 |
|
 08-02-2018, 01:36 PM
|
#221
|
|
Bus Geek
Join Date: Sep 2014
Location: Eustis FLORIDA
Posts: 23,764
Year: 1999
Coachwork: Thomas
Chassis: Freighliner FS65
Engine: Cat 3126
Rated Cap: 15
|
Quote:
Originally Posted by Brewerbob

When I mentioned the heat gun to EK I was thinking of the weather striping stuff I had along the walls and wheel wells at the floor. It was 1/2" maybe 3/4" weather striping of some sort or another. It did NOT like coming up just scrapping it and pulling. Heat gun worked great.
The rubber mat stuff glued to the top of the wheel wells left behind what looked like rubber cement. The xylene poured on paper towels and left to soak for 2 or 3 minutes worked wonders. Went back with a rag and the rubber cement wiped off easy peezy.
Decals and the like on the outside of the bus would be good wire wheel candidates.
|
Nah, I used to do that but it just makes for more sanding later.
Only reason I own a heat gun is bus decals!!!!!!!!!!!
|

|

|
|
08-02-2018, 03:53 PM
|
#222
|
|
Bus Geek
Join Date: May 2016
Location: Eastern WA
Posts: 6,401
Year: 2002
Coachwork: Bluebird
Chassis: All American RE (A3RE)
Engine: Cummins ISC (8.3)
Rated Cap: 72
|
Quote:
Originally Posted by EastCoastCB
I've not found anything gooey on a bus that aircraft stripper or a wire wheel on a drill won't remove!
|
I have been trying to remove the reflective stripe that runs the length of my bus. The paint tends to come off along with the sticker. I am making a mess.
Will aircraft stripper work on this?
|
|
|
|
|
08-02-2018, 04:48 PM
|
#223
|
|
Bus Geek
Join Date: Sep 2014
Location: Eustis FLORIDA
Posts: 23,764
Year: 1999
Coachwork: Thomas
Chassis: Freighliner FS65
Engine: Cat 3126
Rated Cap: 15
|
Quote:
Originally Posted by PNW_Steve
I have been trying to remove the reflective stripe that runs the length of my bus. The paint tends to come off along with the sticker. I am making a mess.
Will aircraft stripper work on this?
|
Nah, it will make a big mess.
Heat gun and a good scraper are the best way.
Or a whizzy wheel.

|
|
|
|
|
08-02-2018, 05:01 PM
|
#224
|
|
Bus Crazy
Join Date: Feb 2012
Location: Salt Lake City Utah
Posts: 1,635
Year: 2000
Chassis: Blue Bird
Engine: ISC 8.3
|
I'd definitely expect the hot air gun would be the right tool for peeling off the reflective strip. Usually anything that is gooey, or used to be gooey before it baked in the sun and dried out, can be softened with hot air. It might soften so much that the sticker substrate isn't strong enough to be pulled, and then you'd have to use a scraper tool to peel it up instead.
After the sticker substrate is gone and only adhesive residue remains, go through the usual assortment of solvents to find the least aggressive one which removes the residue (alcohol, naphtha, xylene, MEK, goo-gone, citrus-whatever, etc).
|
|
|
|
|
08-03-2018, 06:55 AM
|
#225
|
|
Bus Geek
Join Date: Oct 2016
Location: Essex, MD
Posts: 3,738
Year: 1999
Coachwork: Blue Bird
Chassis: Blue Bird TC RE 3904, Flat Nose, 40', 277" wh base
Engine: 8.3L Cummins ISC 260hp, MT643, 4.44 rear
Rated Cap: 84 pax or 1 RV; 33,000lbs
|
Quote:
Originally Posted by family wagon
goo-gone
|
Found a bottle of this stuff under my sink. I think the ex bought it. Anywho, I used it on my stove and holy $hit it works on that!! Iran out and need to buy more of it.
|
|
|
|
|
08-14-2018, 09:50 PM
|
#226
|
|
Almost There
Join Date: Jun 2018
Location: Florida
Posts: 73
Year: 1999
Coachwork: Thomas Build
Chassis: International
Engine: 466E
Rated Cap: 66
|
Alright another newby question.
So we are finishing up the clean up on the floors. The pain that was on it before has been a pain in the butt to get off but we are getting there.
We are pretty sure the floors are galvanized. We found a primer at Lowe's that's suppose to prevent rust and such. I don't know if we are treating it with Ospho or anything just because we don't have rust issues.
Is it necessary to paint after the primer? Just wondering why people paint before putting the floors down. I know rust is an issue and rustoleum helps that but if we grind out any surface rust (we have very little and it's only by wheel wells and on windows), seal the holes, primer it with the stuff me for rust...(We will also have a vapor barrier when floors are put in) do we need to paint it?
Before anyone jumps down my throat, I'm learning as I go and I can only learn by research and the help of others who have experience. I'll have many questions ahead too. I appreciate any advice.
|
|
|
|
|
08-15-2018, 08:56 AM
|
#227
|
|
Bus Geek
Join Date: Mar 2011
Location: Houston, Texas
Posts: 8,462
Year: 1946
Coachwork: Chevrolet/Wayne
Chassis: 1- 1/2 ton
Engine: Cummins 4BT
Rated Cap: 15
|
Nearly all rust "converters" require a coat of paint in order to get the benefits. At least, that is what is on most of their labels.
|
|
|
|
|
08-15-2018, 11:51 AM
|
#228
|
|
Almost There
Join Date: Jun 2018
Location: Florida
Posts: 73
Year: 1999
Coachwork: Thomas Build
Chassis: International
Engine: 466E
Rated Cap: 66
|
Quote:
Originally Posted by Tango
Nearly all rust "converters" require a coat of paint in order to get the benefits. At least, that is what is on most of their labels.
|
Thank you. I'll have to see if the one we found says that. I just wasn't sure if there was any reason behind it so I appreciate the info.
|
|
|
|
|
08-15-2018, 12:00 PM
|
#229
|
|
Bus Nut
Join Date: Feb 2018
Location: Tahoe
Posts: 513
Year: 1997
Coachwork: International
Chassis: 3000RE
Engine: T444E w/ MT643
Rated Cap: 84 pass, 40'
|
Quote:
Originally Posted by WanderlustExistence
Thank you. I'll have to see if the one we found says that. I just wasn't sure if there was any reason behind it so I appreciate the info.
|
Primer is designed to be covered with paint to get full, lasting protection. What happens if you don't, I can't say. We rolled a coat of some ugly ass enamel that we had no other use for anyway over the primer to be on the safe side. Now I'm debating painting my subfloor to be on the safe side. It's so hard to get it in and out once you have cut it!! But we should probably glue it down some anyway. Sigh.
__________________
middle aged mom on a learning adventure
|
|
|
|
|
08-15-2018, 12:55 PM
|
#230
|
|
Almost There
Join Date: Jun 2018
Location: Florida
Posts: 73
Year: 1999
Coachwork: Thomas Build
Chassis: International
Engine: 466E
Rated Cap: 66
|
Quote:
Originally Posted by 2martins
Primer is designed to be covered with paint to get full, lasting protection. What happens if you don't, I can't say. We rolled a coat of some ugly ass enamel that we had no other use for anyway over the primer to be on the safe side. Now I'm debating painting my subfloor to be on the safe side. It's so hard to get it in and out once you have cut it!! But we should probably glue it down some anyway. Sigh.
|
Thank you  It makes sense. I want to prevent future rust issues for sure. Just one a budget and want to save money if something isn't necessary.
|
|
|
|
|
08-15-2018, 02:25 PM
|
#231
|
|
Mini-Skoolie
Join Date: Jun 2018
Location: NW Florida
Posts: 68
Year: 2001
Coachwork: International
Engine: DT-466
|
order of patching holes in floor
Hi,
Been reading through this thread and taking some notes, but figured I'd ask for clarity...
What's the order of patching the holes?
1. Remove rust from the surface
2. Clean up dust
3. Treat the rust with some kind of rust converter
But then do I paint before I patch the holes, or do I patch the holes before I paint? If I paint before i patch, do I paint again after I patch?
And do I need to do anything to the underside to make sure it doesn't start rusting where the holes were? I don't have access to every hole...
I just really really don't want rust.
EDIT: by "rust converter", I mean an ospho or something like it. By paint, I mean rustoleum.
|
|
|
|
|
08-15-2018, 03:26 PM
|
#232
|
|
Skoolie
Join Date: Jun 2018
Location: Las Vegas, NV
Posts: 169
|
Quote:
Originally Posted by Beeb
Hi,
Been reading through this thread and taking some notes, but figured I'd ask for clarity...
What's the order of patching the holes?
1. Remove rust from the surface
2. Clean up dust
3. Treat the rust with some kind of rust converter
But then do I paint before I patch the holes, or do I patch the holes before I paint? If I paint before i patch, do I paint again after I patch?
And do I need to do anything to the underside to make sure it doesn't start rusting where the holes were? I don't have access to every hole...
I just really really don't want rust.
EDIT: by "rust converter", I mean an ospho or something like it. By paint, I mean rustoleum.
|
I painted before I patched the holes because I was worried about the paint sticking to the product I used. Painting before had the advantage of the paint sealing some of the nail holes and dripping through the others and seat holes.
You can do it the way I did or patch before. The only thing to influence this would be if the patch product was paintable.
I dont see any reason you would paint a second time after sealing the holes unless you have concerns about the patch product reacting with your insulation. Check if there is any negative interaction with the foam you will use for floor insulation.
Not sure what you can do about the underside if you cant get to the holes. Painting before you patch might have the advantage of sealing the underside as the paint leaks through the holes. Get a can of undercoating and hit all the patches that you can get to from the underside to ease your mind and dont worry about the ones you cant get too. The most important part is to not let the water get in through the holes.
Hope that helps.
Heres a link to my build thread showing what I did (and what you shouldnt use) to seal the holes.
http://www.skoolie.net/forums/f11/em...n-23234-9.html
|
|
|
|
|
08-15-2018, 04:11 PM
|
#233
|
|
Bus Geek
Join Date: Dec 2017
Location: Dawsonville, Ga.
Posts: 10,482
Year: 1999
Coachwork: Genesis
Chassis: International
Engine: DT466/3060
Rated Cap: 77
|
I'm going to prime, seal the holes with aluminum tape, I have a roll of 1" squares, and the lay a coat of primer over the tape just to seal it all in.
I would Convert the rust, prime, patch an reprime over the patch. Preprime the back side of the patch.
|
|
|
|
|
08-15-2018, 08:19 PM
|
#234
|
|
Skoolie
Join Date: Jun 2018
Location: Las Vegas, NV
Posts: 169
|
Quote:
Originally Posted by o1marc
I'm going to prime, seal the holes with aluminum tape, I have a roll of 1" squares, and the lay a coat of primer over the tape just to seal it all in.
I would Convert the rust, prime, patch an reprime over the patch. Preprime the back side of the patch.
|
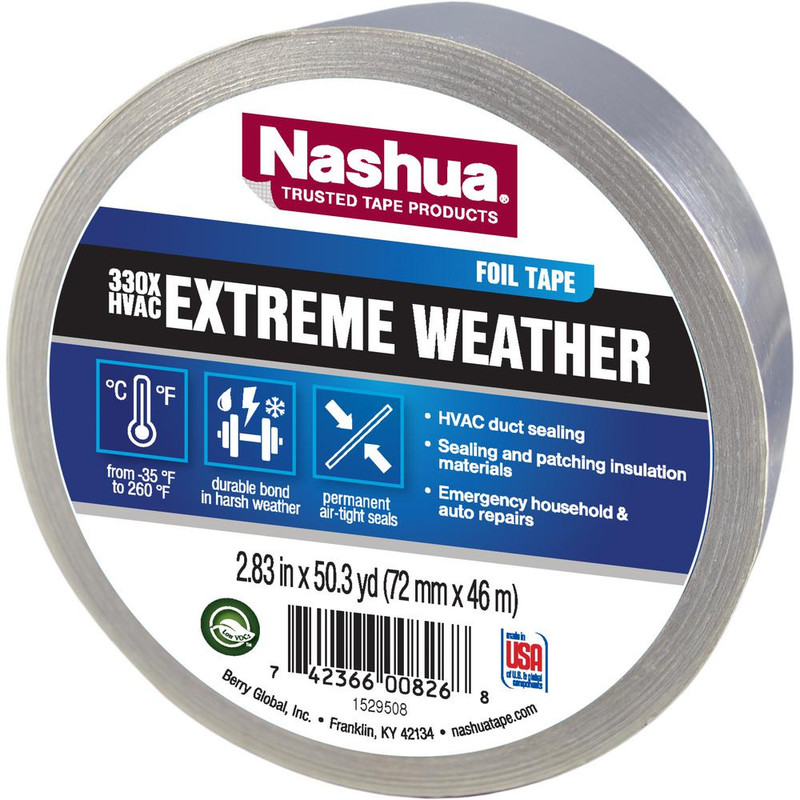
Which aluminum tape are you thinking of using? I used this extreme weather one from Home Depot to cover the sealant I put in the seat holes on the school bus floor. I got this one for the metal floor because it had an ultra wide temperature range so I figured it was most appropriate for that environment.
The reason I ask is because the tape I used seemed a little fragile to just put over the hole. The stuff I used I could easily stick my pinky through if over an open hole. I also thought about using some kind of tape like aluminum or that eternabond RV tape to cover the holes. I started to think that tapes are meant to seal in the opposite direction. So are sealers like caulk and 550. But, sealants do have an ooze factor and sink into the hole. They also are the same material throughout so they dry like glue into a homogeneous mass. Tapes are a glue on a given substrate and seem to rely on both to do their job. One gives stick and the other gives strength/protection. The problem I saw with tape is that the water coming up from below would potentially degrade the the glue without the tape part providing the protection from the elements. The more I thought about it, the more I was sure the water would find a way up under the tape (if taped from the top).
I have no long term experience with what I did. I am sharing only what I know from working with the materials and thinking about the problem. Only time will tell what works. But, with all that said, I now think the way I would do it is to prime, then fill holes with either the dynatron 550 or Tropicool Caulk, then cover with Aluminum Tape. Maybe even trying to put the tape on at the same time as the sealant to "feather" it out and make a cohesive patch. If you want to paint over again you could pant over the patch, or skip the foil tape and paint over the 550 (as mentioned by eastcoastCB).
I thought the eternabond would be the ultimate choice but seeing this video on solar install with eternabond made me doubt the idea of taping from the top. In the video he shows how water got under his tape and how it moved under there.
This is the Extreme Weather aluminum tape I used to cover the sealant.
|
|
|
|
|
08-15-2018, 08:44 PM
|
#235
|
|
Bus Geek
Join Date: Sep 2014
Location: Eustis FLORIDA
Posts: 23,764
Year: 1999
Coachwork: Thomas
Chassis: Freighliner FS65
Engine: Cat 3126
Rated Cap: 15
|
Go to any steel shop that has a punch and ask if they have a bucket of punched out steel rounds in any thin gauge.
Stick em down over the holes with some good adhesive and forget them.
|
|
|
|
|
08-15-2018, 08:46 PM
|
#236
|
|
Bus Geek
Join Date: Dec 2017
Location: Dawsonville, Ga.
Posts: 10,482
Year: 1999
Coachwork: Genesis
Chassis: International
Engine: DT466/3060
Rated Cap: 77
|
I just checked my rolls of tape and they are continues and not 1" squares. Doesn't say anything other than 1" Alum Foil Tape. It is considerably thicker than kitchen AF. The way I see it, my bus has very little rust for a floor that was "untreated" for 18 years. We take that floor and prep with rust converter and seal it in primer and paint and a layer of water proof covering. The tape will be sealed under the primer and then layered in rigid foam. I'm not worried about water ingress from the seat holes in the next 18 years that would be a concern. I'm a firm believer in quality, but that doesn't have to be expensive. When building one of these I don't need to spend the extra money to have widgets or whatever that will last 100 years when I only have about 20 left, the 50 year widgets will exceed requirements. 
|
|
|
|
|
08-15-2018, 08:52 PM
|
#237
|
|
Bus Nut
Join Date: Jan 2018
Location: Brevard County, FL
Posts: 911
Year: 1990
Coachwork: Bluebird
Chassis: Ford
Engine: 6.6 New Holland Diesel
Rated Cap: 60 kids, 10 window
|
I used this on the bolt and nail holes. Painted right over it.
It held up fine for months before I laid subflooring. 
__________________
Nick
|
|
|
|
|
08-15-2018, 11:20 PM
|
#238
|
|
Bus Geek
Join Date: Mar 2011
Location: Houston, Texas
Posts: 8,462
Year: 1946
Coachwork: Chevrolet/Wayne
Chassis: 1- 1/2 ton
Engine: Cummins 4BT
Rated Cap: 15
|
Weld'em!!!
|
|
|
|
|
08-15-2018, 11:24 PM
|
#239
|
|
Bus Geek
Join Date: Dec 2017
Location: Dawsonville, Ga.
Posts: 10,482
Year: 1999
Coachwork: Genesis
Chassis: International
Engine: DT466/3060
Rated Cap: 77
|
Quote:
Originally Posted by Tango
Weld'em!!!
|
That seems like an awful lot of work. But I do have a new Lincoln WeldPak that I need some sheet metal practice on.
|
|
|
|
|
08-19-2018, 02:46 PM
|
#240
|
|
Skoolie
Join Date: Jun 2018
Location: Las Vegas, NV
Posts: 169
|
Dynatron 550 seam sealer and aluminum tape nail holes
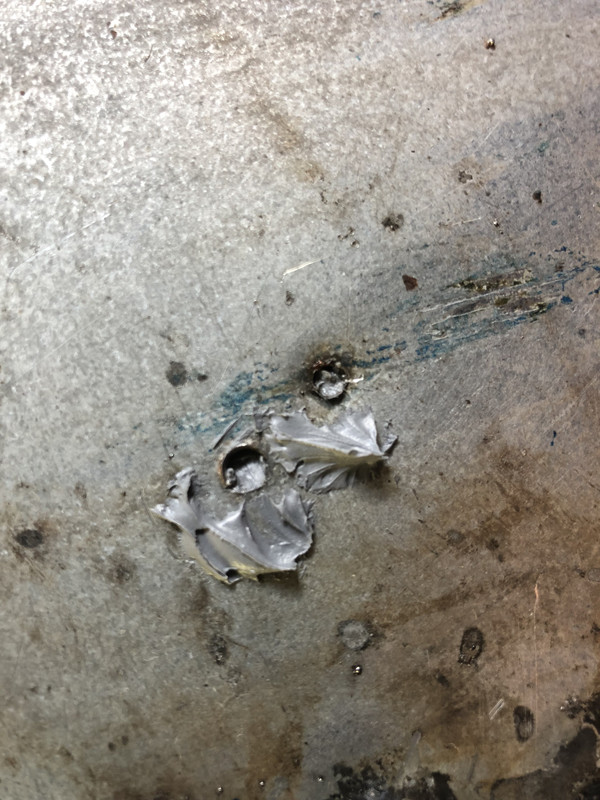
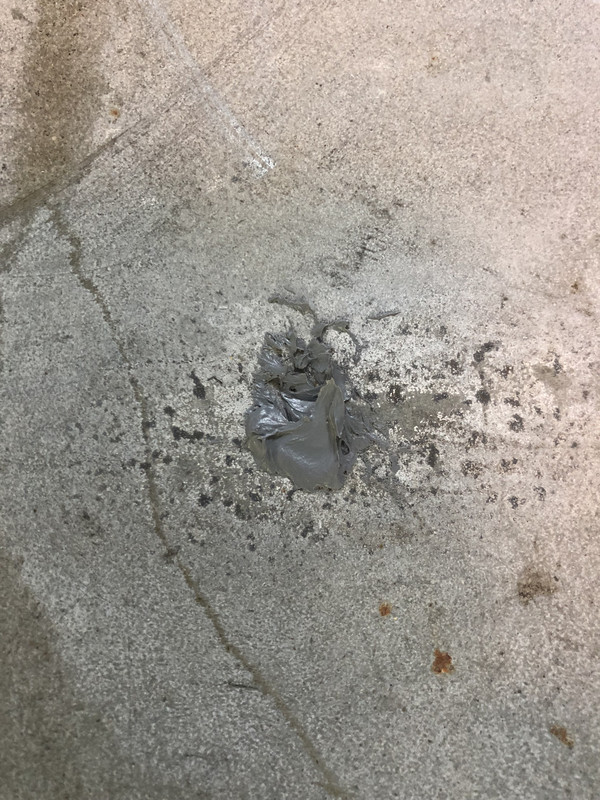
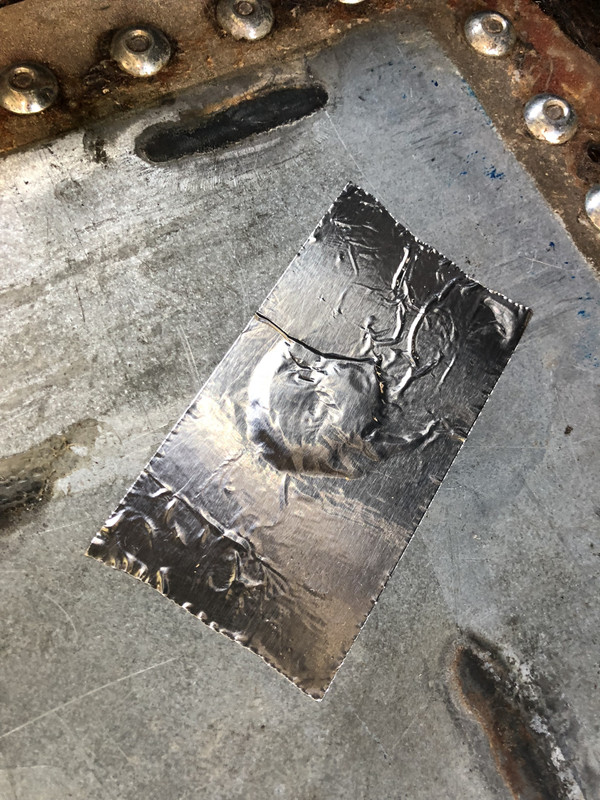
Update: I took out the old top step and had some more holes to fill so I thought I would try the Dynatron 550 and aluminum tape method to see how it works.
I put the 550 in the hole and clumped on top. Then I put aluminum tape over and spread it out with my fingers. Looks like a good seal. Took some pics of the top and bottom. What do you think?
BTW: the wet patch worked better than I thought from below but I still prefer the caulk or seam sealer. I put some pics up on my build thread
http://www.skoolie.net/forums/f11/em...tml#post287045
550 seam sealer showing how it goes in hole
 550 seam sealer clump on top
 Aluminum tape on top of dynatron 550 seam sealer to seal nail hole.
|
|
|
|
|
|
 Posting Rules
|
You may not post new threads
You may not post replies
You may not post attachments
You may not edit your posts
HTML code is Off
|
|
|
|
 » Recent Threads
 |
|
|
|
|
|
|
|
|
|
|
|
|
|
|
|
|
|
|
|
|
|
|
|
|
|
|
|
|
|
|
|
|
|
|
|
|
|


 Linear Mode

