 |
|
 11-20-2017, 08:27 PM
|
#21
|
|
Bus Geek
Join Date: Mar 2011
Location: Houston, Texas
Posts: 8,462
Year: 1946
Coachwork: Chevrolet/Wayne
Chassis: 1- 1/2 ton
Engine: Cummins 4BT
Rated Cap: 15
|
With all that solar, you could sub an electric motor go totally green!
|

|

|
|
11-20-2017, 10:19 PM
|
#22
|
|
Skoolie
Join Date: Aug 2017
Location: Phoenix, AZ
Posts: 228
Year: 1997
Coachwork: Blue Bird
Chassis: AARE 3903
Engine: Cummins 8.3L 12v
Rated Cap: 78
|
Ive got an 80kW Nissan Leaf motor in the garage, Ive definitely thought about it ;) Not enough torque to go all electric, but would make mean hybrid...
Sent from my iPhone using Tapatalk
|
|
|
|
|
11-27-2017, 01:50 PM
|
#23
|
|
Skoolie
Join Date: Aug 2017
Location: Phoenix, AZ
Posts: 228
Year: 1997
Coachwork: Blue Bird
Chassis: AARE 3903
Engine: Cummins 8.3L 12v
Rated Cap: 78
|
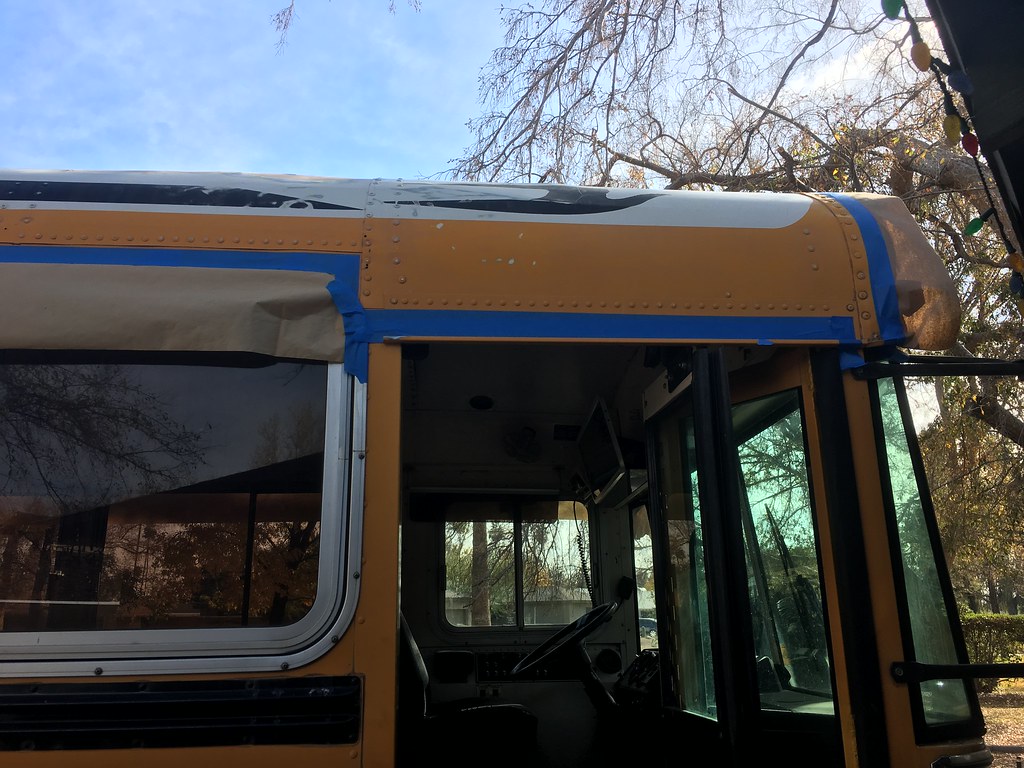
We are planning to keep the metal interior, but there is some body damage on the roof that I wanted to repair before painting. Figured this would also be a good chance to have a look inside to make sure the original insulation was in decent condition.

Not a very clear shot, but you can see previous damage across two panels. The rear one was more severe, penetrating the panel, and there is some surface rust around the old repair.
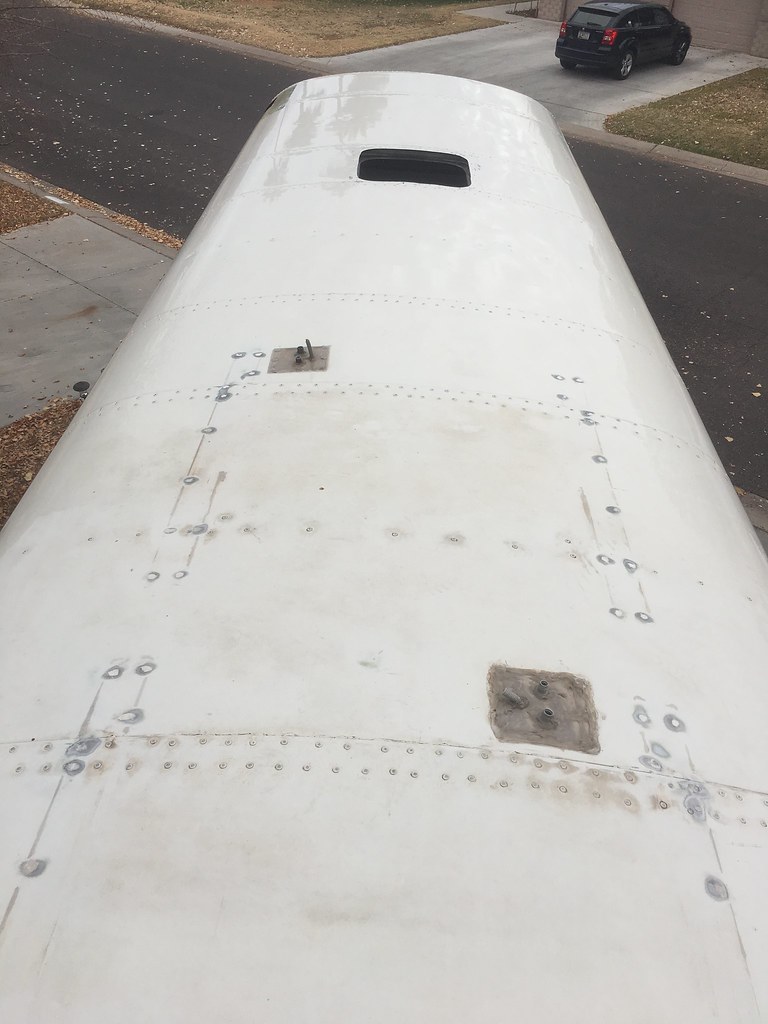
I took off about 2 rows of interior ceiling rivets, which was quite a pain. Used a cheap harbor freight air hammer. Generally had better luck using a pointed chisel to drive up through the center, then crow foot type chisel to get in under the head. But on some it just couldnt get under the head and had to cut all the way through it.
Good news is it all looks pretty good inside.

Bad news is I ended up creasing some of the panels in trying to get them free. In particular the panel between the ceiling and the wall was folded back under the edge of the ceiling panels, and runs almost half the length of the bus. Well have to see how well it goes back together.

Hammering out the damaged areas went pretty well. Planning to weld the penetration area now that the deformation is largely closed up. Then probably bondo over it to smooth it out.
Before:

After:


Sent from my iPhone using Tapatalk
|
|
|
|
|
11-28-2017, 05:27 PM
|
#24
|
|
Skoolie
Join Date: Aug 2017
Location: Phoenix, AZ
Posts: 228
Year: 1997
Coachwork: Blue Bird
Chassis: AARE 3903
Engine: Cummins 8.3L 12v
Rated Cap: 78
|
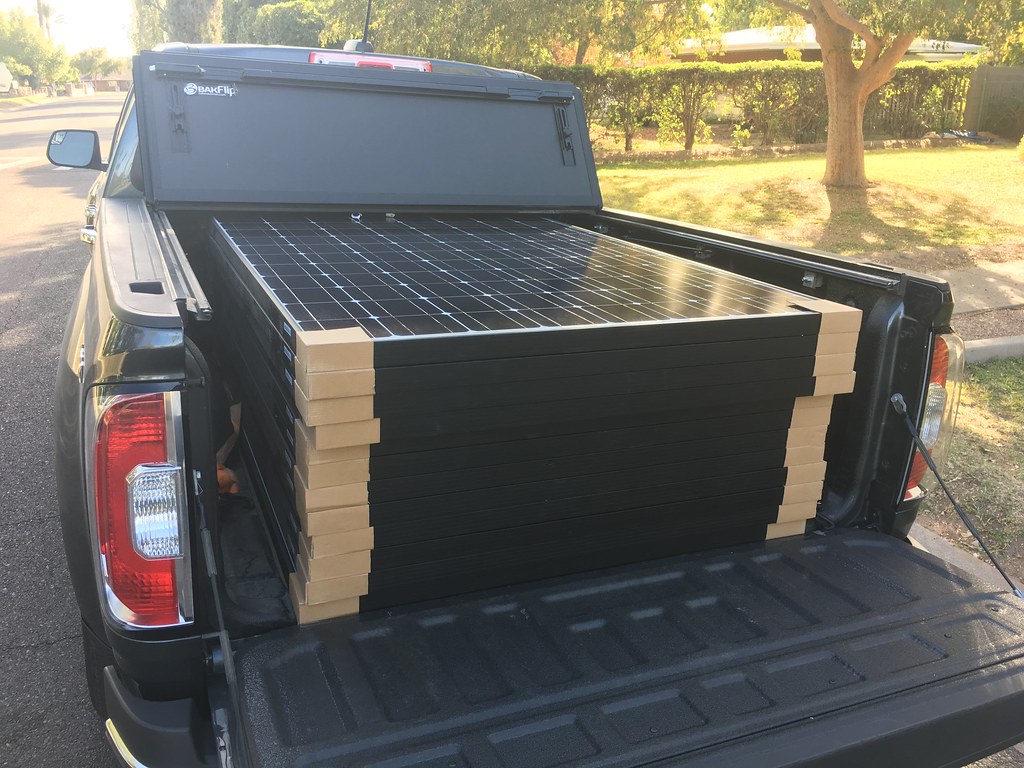
Picked up our panels today, 3600W of Skoolie power!
|
|
|
|
|
11-28-2017, 05:54 PM
|
#25
|
|
Traveling
Join Date: Nov 2015
Location: Midwest
Posts: 2,573
Year: 2003
Coachwork: BlueBird
Chassis: TC2000
Engine: 5.9L Cummins
Rated Cap: '00
|
Quote:
Originally Posted by miscrms

Picked up our panels today, 3600W of Skoolie power!
|
Wow, you don't play. That's a lot of juice. You doing some welding i that bus??? 
|
|
|
|
|
11-28-2017, 08:19 PM
|
#26
|
|
Skoolie
Join Date: Aug 2017
Location: Phoenix, AZ
Posts: 228
Year: 1997
Coachwork: Blue Bird
Chassis: AARE 3903
Engine: Cummins 8.3L 12v
Rated Cap: 78
|
|
|
|
|
|
03-19-2018, 05:51 PM
|
#27
|
|
Skoolie
Join Date: Aug 2017
Location: Phoenix, AZ
Posts: 228
Year: 1997
Coachwork: Blue Bird
Chassis: AARE 3903
Engine: Cummins 8.3L 12v
Rated Cap: 78
|
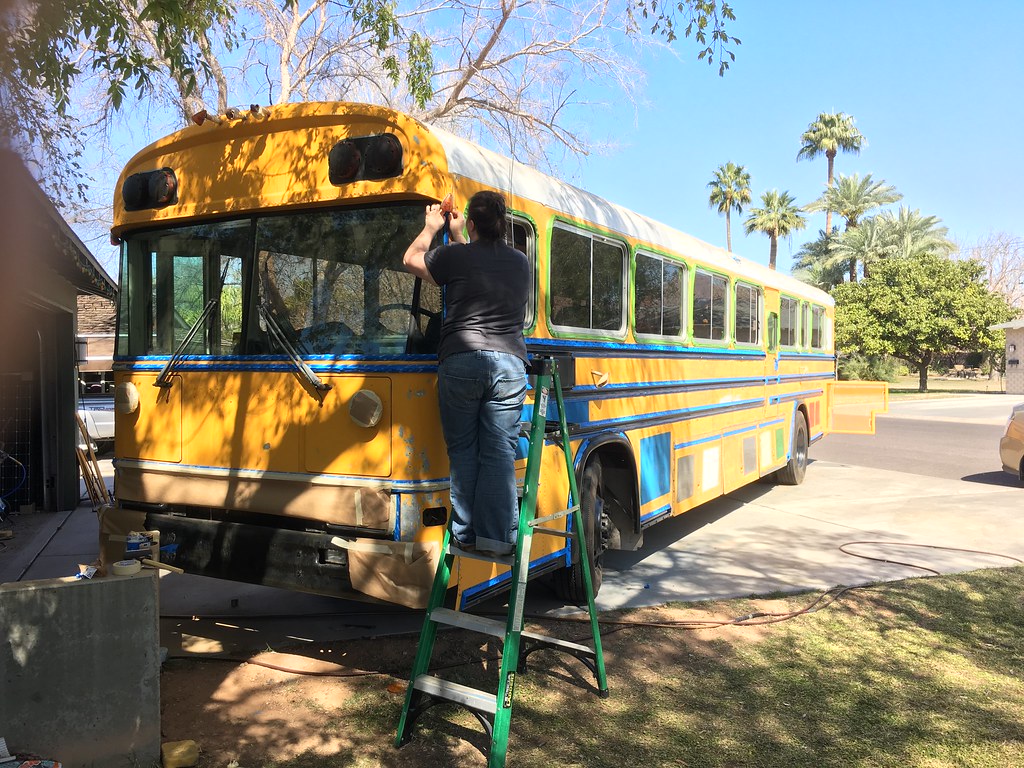
I was starting to think we would never get through the process of painting, but we're finally getting there. Crazy how much sanding and grinding and patching and masking there is to do on a 40' bus.
Now that we're starting to see the light at the end of the tunnel and have started to regain the will to live, here's some catch up on every thing.
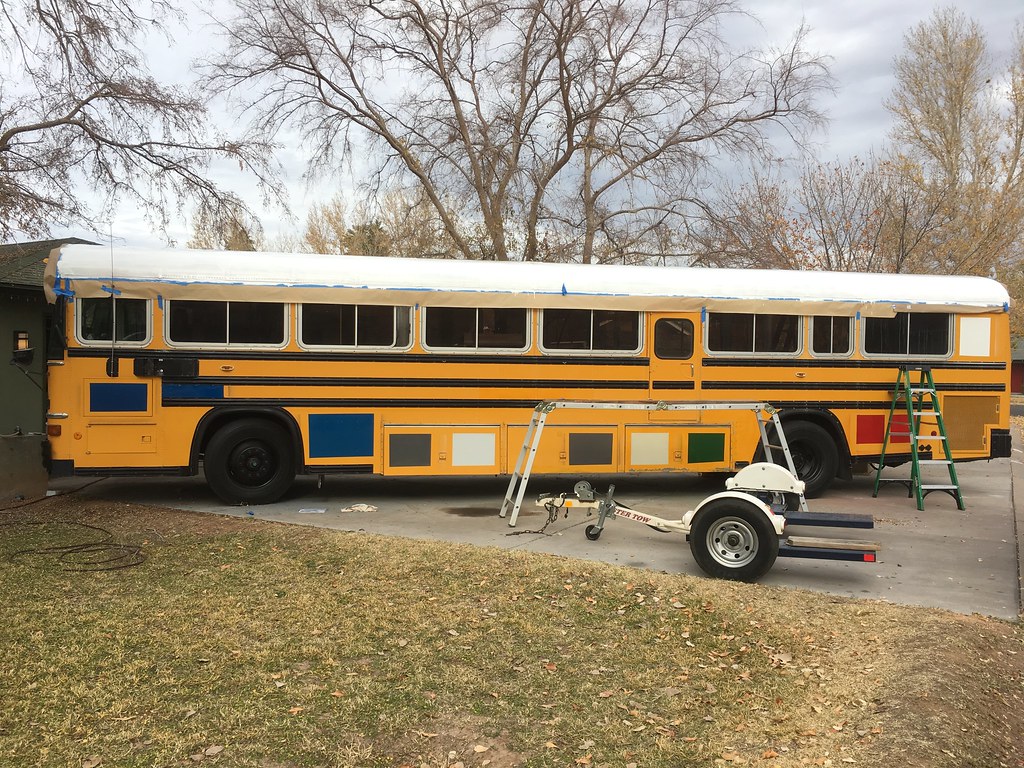
Decided to go with the 100% Silicone version of the Henry's Tropicool for the roof coat. Took most of a 5 gallon bucket, and didn't end up as smooth as I would have liked, but turned out ok. Took 2 coats on the roof, and 3 down the sides to really get what felt like good coverage and hid the yellow.
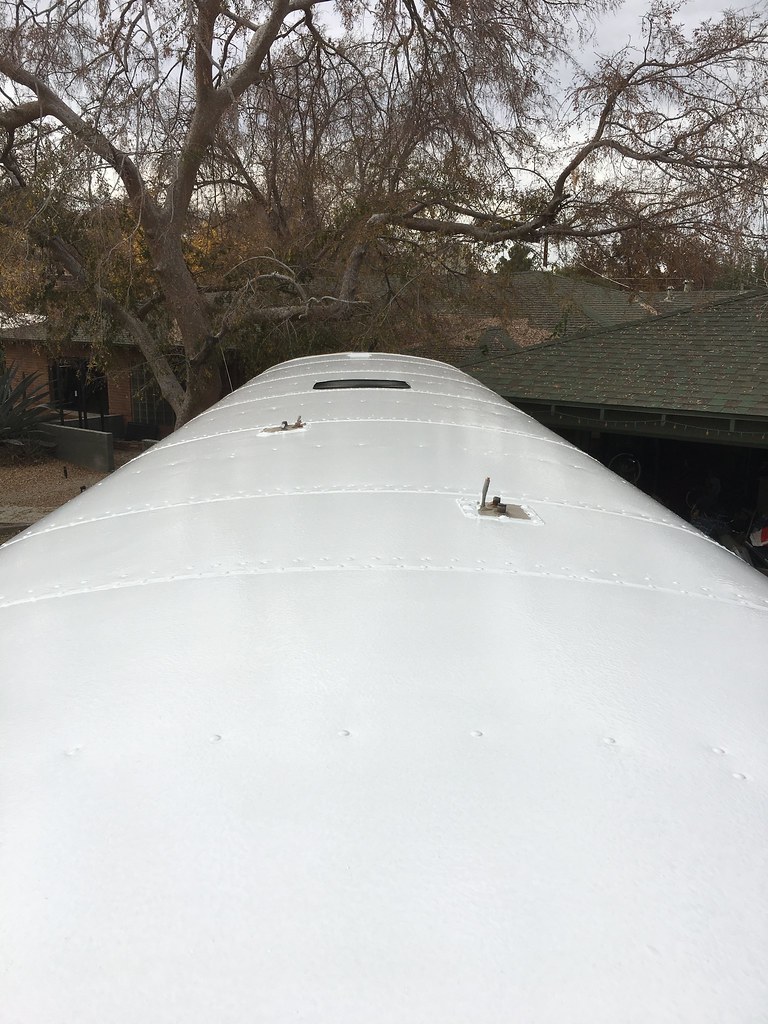
We left the penetrations for the old roof ACs alone for the time being, just sealed around the edges. We'll figure out what to do with them when we get back to mounting the solar.
Then on to painting. We did a lot of testing, and dealt with a lot of frustration due to difficulty getting what we wanted. Above you can see the test panels we did with spray cans of Valspar and Rustoleum tractor paint. The Valspar seemed to go on a lot better, with the Rustoleum seeming pretty thin and runny by comparison. Unfortunately we had a really tough time finding the Valspar now that tractor supply co no longer carries it. We ended up ordering from Amazon only to have them fail to deliver as the package was damaged in shipment.
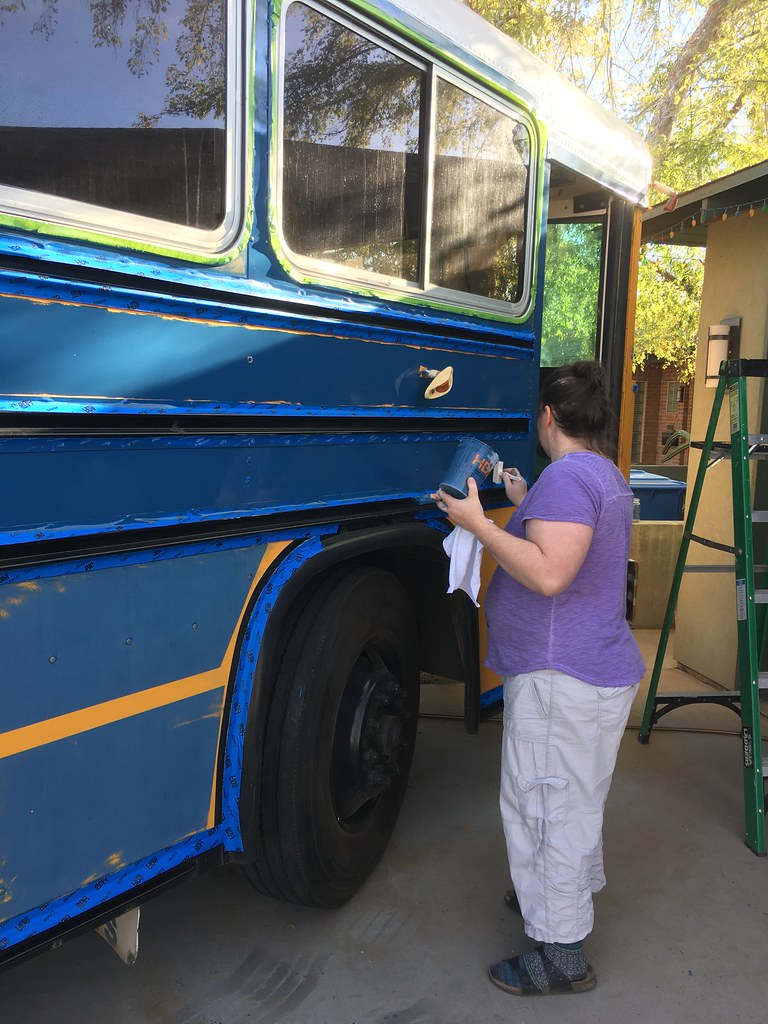
We finally ended up deciding to go with the Valspar Rust Armor which is available at Lowes, seems very similar to the Valspar tractor and implement, and as a bonus is custom tintable. The color we went with is called "Deep Sea Diving." We generally tried to use the "roll and tip" method, applying paint with a foam roller with a second person following directly behind to knock down the texture left by the roller with a foam brush. This turned out to be a lot harder than we'd hoped ;) We did add the Valspar hardener, and thinned slightly with acetone as needed to keep the paint flowing. But it would take us 6 hours or so to get down one side of the bus with one coat, so between only being able to paint on weekends, and weather problems, and temperature/humidity variation, etc it was a bit of an ordeal. Probably the most challenging part was the top half of the sides around the windows which are way too narrow to do with a roller, so had to be painted with a narrow sash brush. We seemed to have the best results following over the brushed area with a foam just as we did with the roller.
All in all there are still a lot more brush marks and sags and drips, etc than we would have liked but it looks decent. From a distance. in the dark ;)
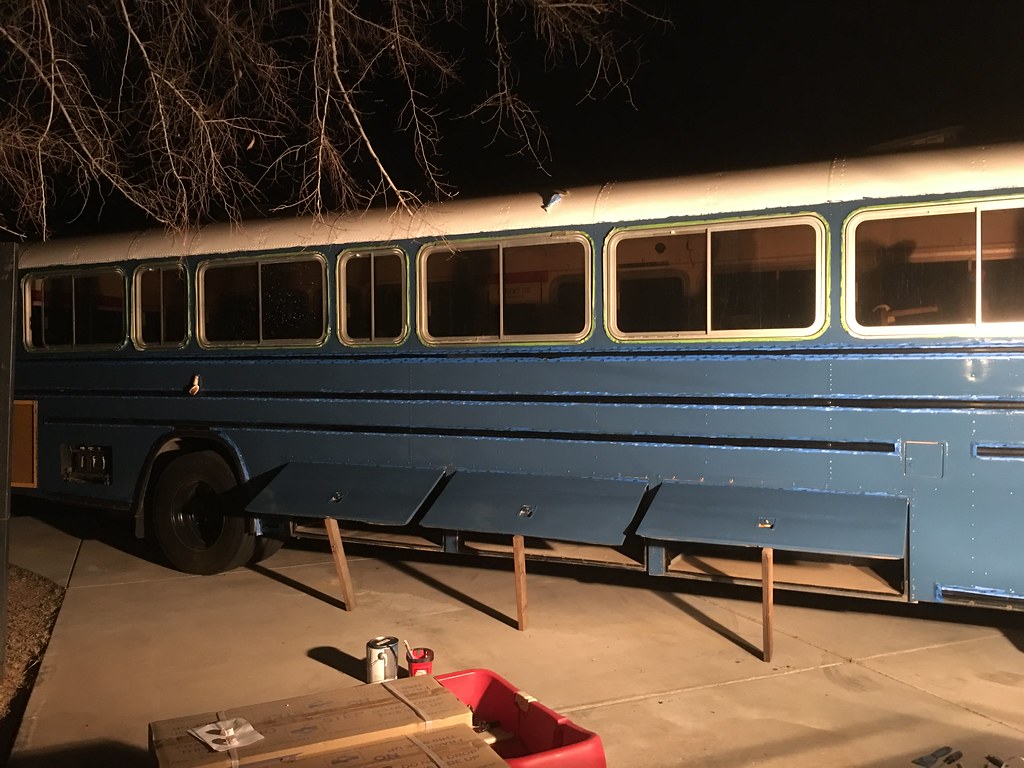
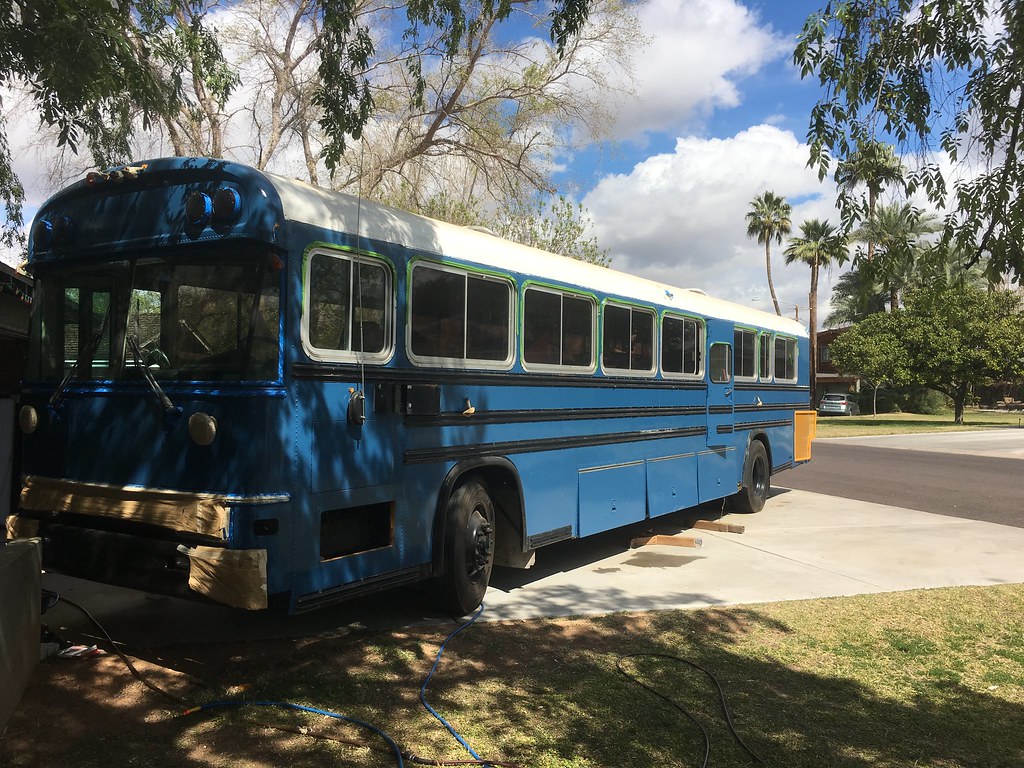
Still have a few areas to go back and spray black, but the bulk of it is finally done! Luckily the raggedy seam between the roof coat and the paint will largely be covered by the aluminum gutter once that goes back up.
|
|
|
|
|
03-19-2018, 06:07 PM
|
#28
|
|
Skoolie
Join Date: Aug 2017
Location: Phoenix, AZ
Posts: 228
Year: 1997
Coachwork: Blue Bird
Chassis: AARE 3903
Engine: Cummins 8.3L 12v
Rated Cap: 78
|
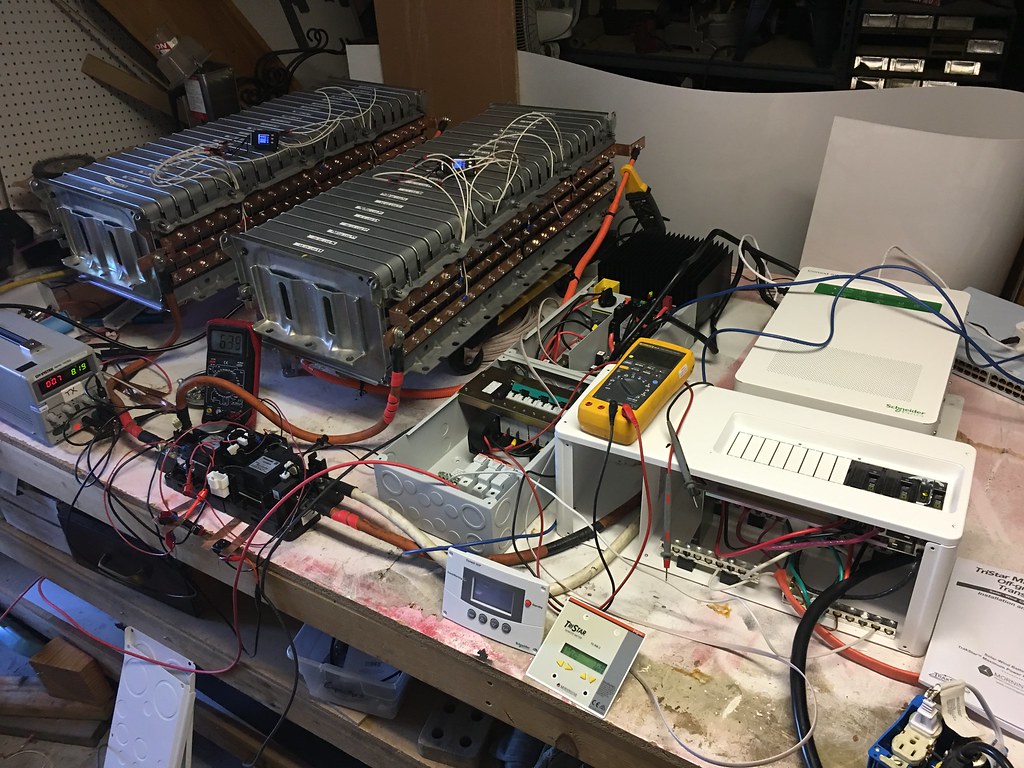
While all that was going on we tried to keep everything else moving ahead as well.
Been doing bench testing on the electrical components.
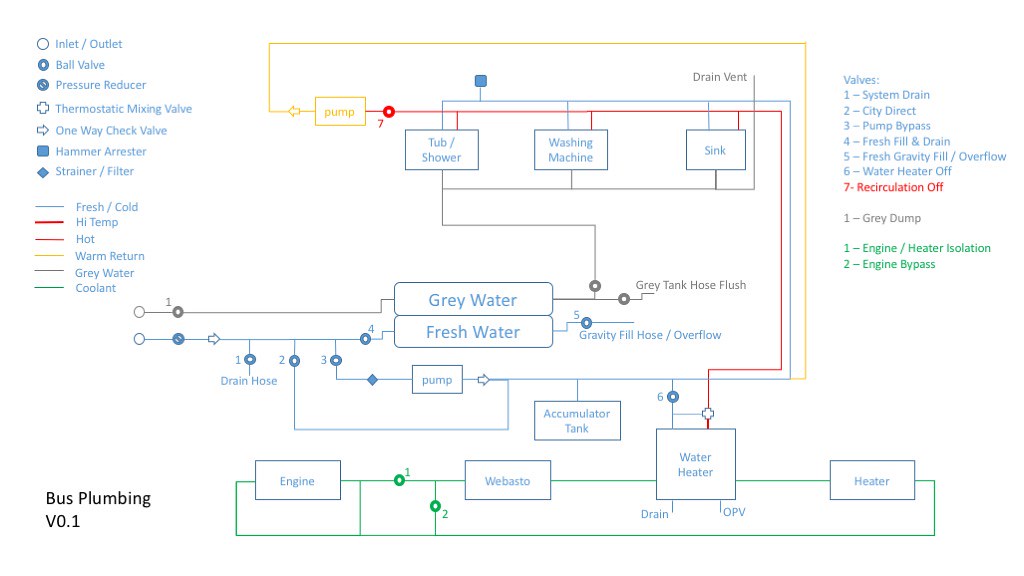
Came up with a general plumbing plan and ordered all the parts.
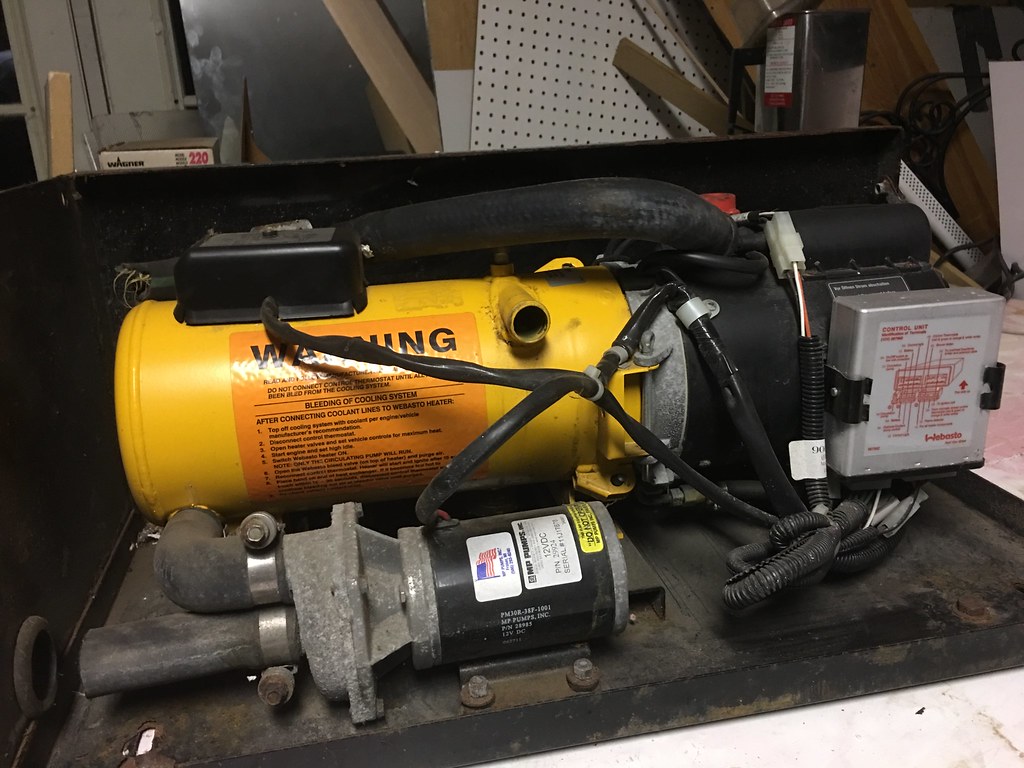
Picked up a Webasto diesel coolant heater off eBay.
Finished our kitchen design and ordered from Ikea.
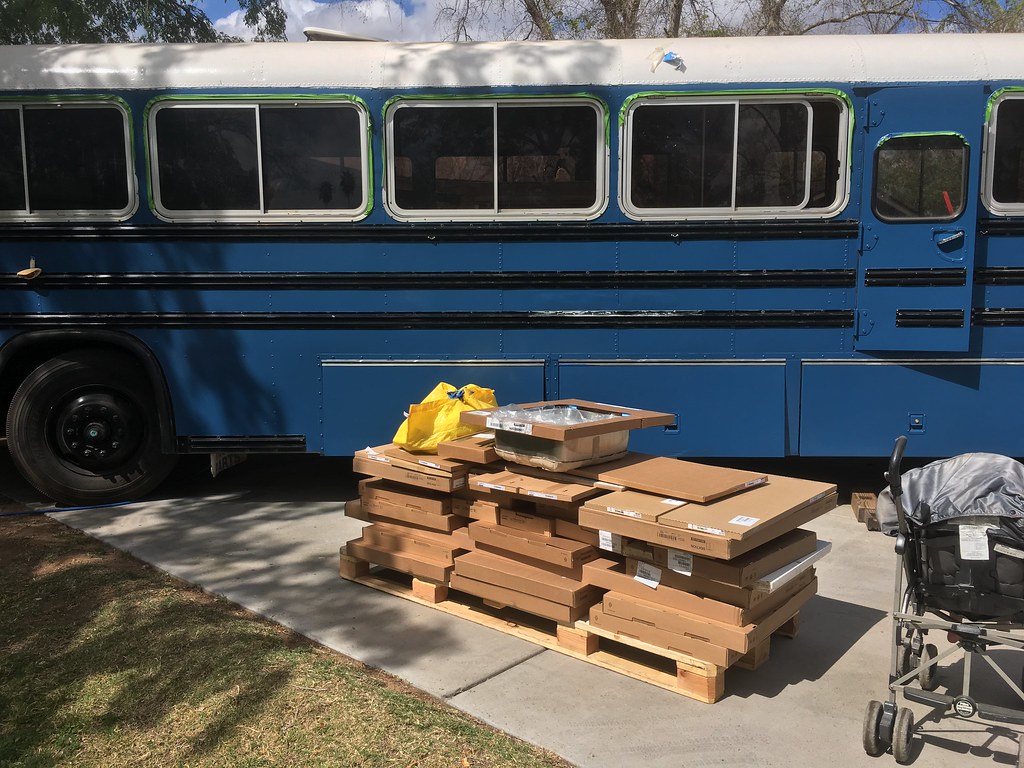
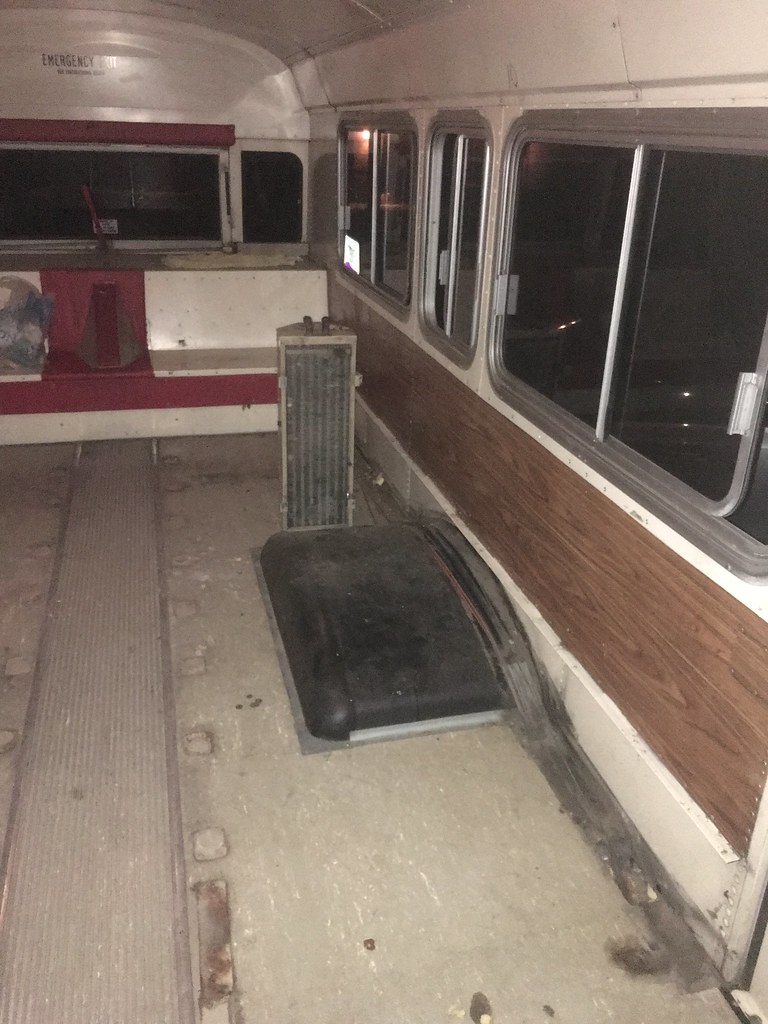
Drained the interior coolant lines and removed the heaters, most likely will be rerunning them under the floor.

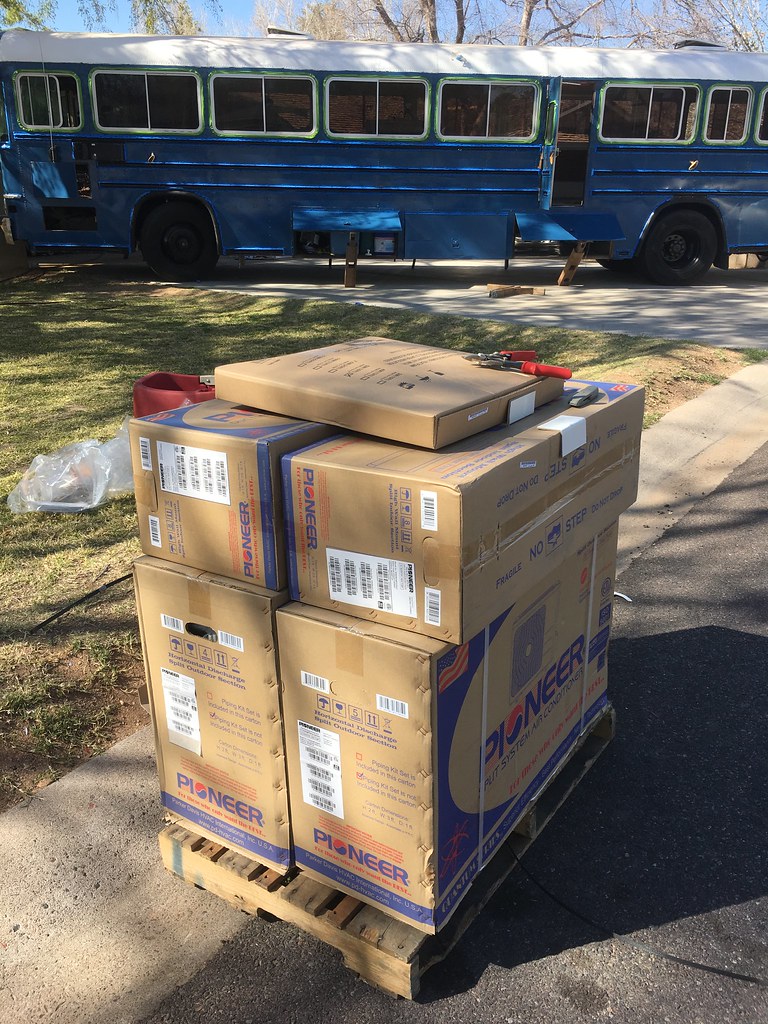
Ordered our Mini Splits, Pioneer 22 SEER 230v, one 9k and one 12k.
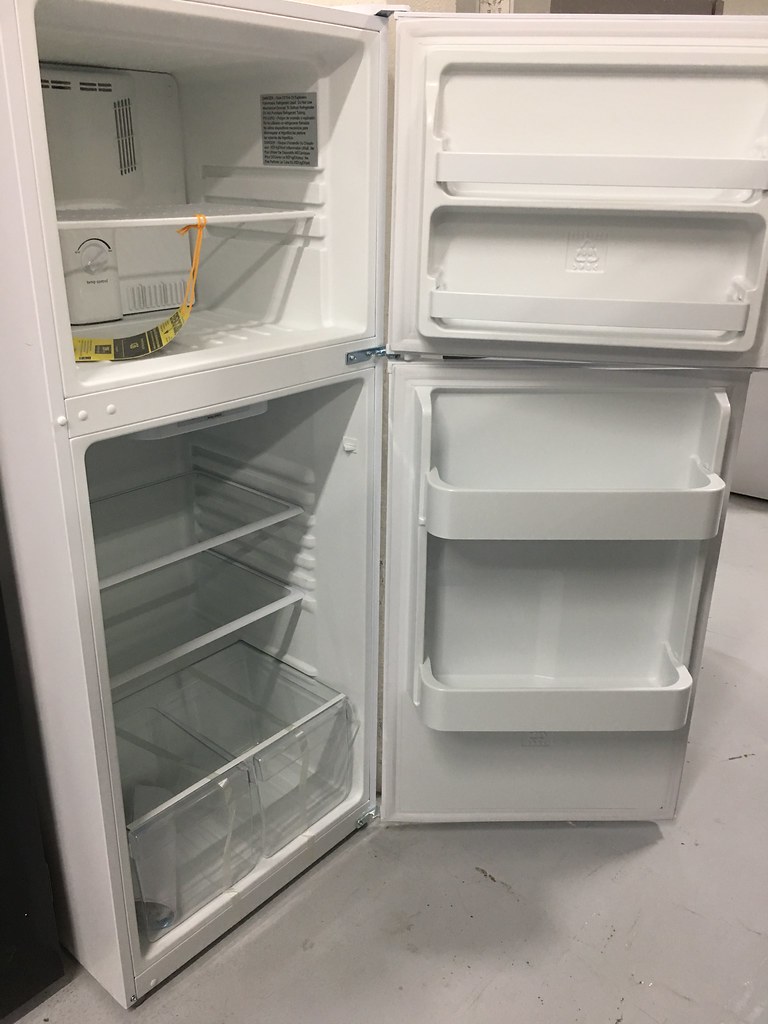
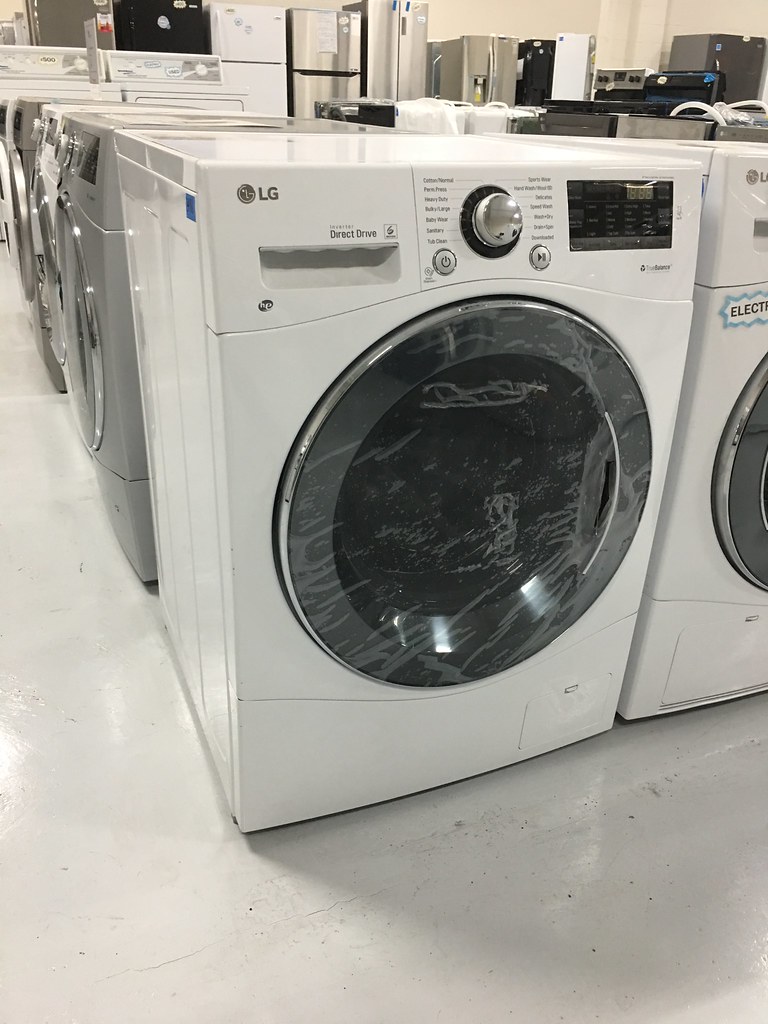
Went to the local scratch and dent appliance place and found our refrigerator (10 cuft Frigidaire <300kWh per year) and an LG 24" combo washer / dryer.
|
|
|
|
|
03-19-2018, 06:22 PM
|
#29
|
|
Skoolie
Join Date: Aug 2017
Location: Phoenix, AZ
Posts: 228
Year: 1997
Coachwork: Blue Bird
Chassis: AARE 3903
Engine: Cummins 8.3L 12v
Rated Cap: 78
|
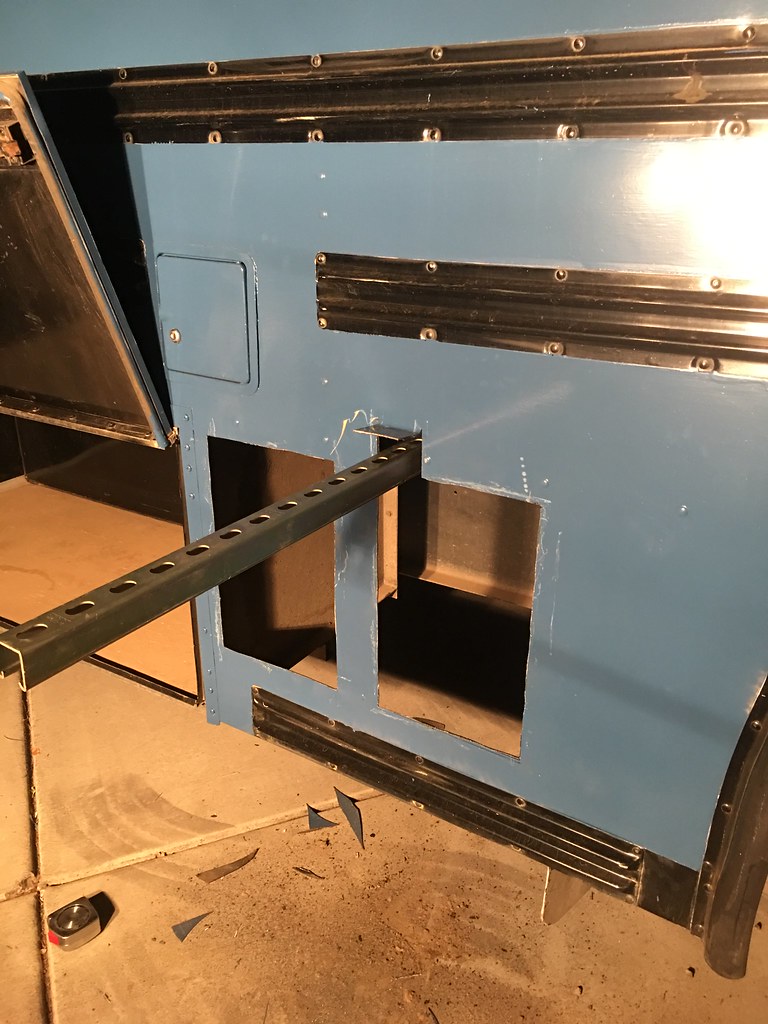
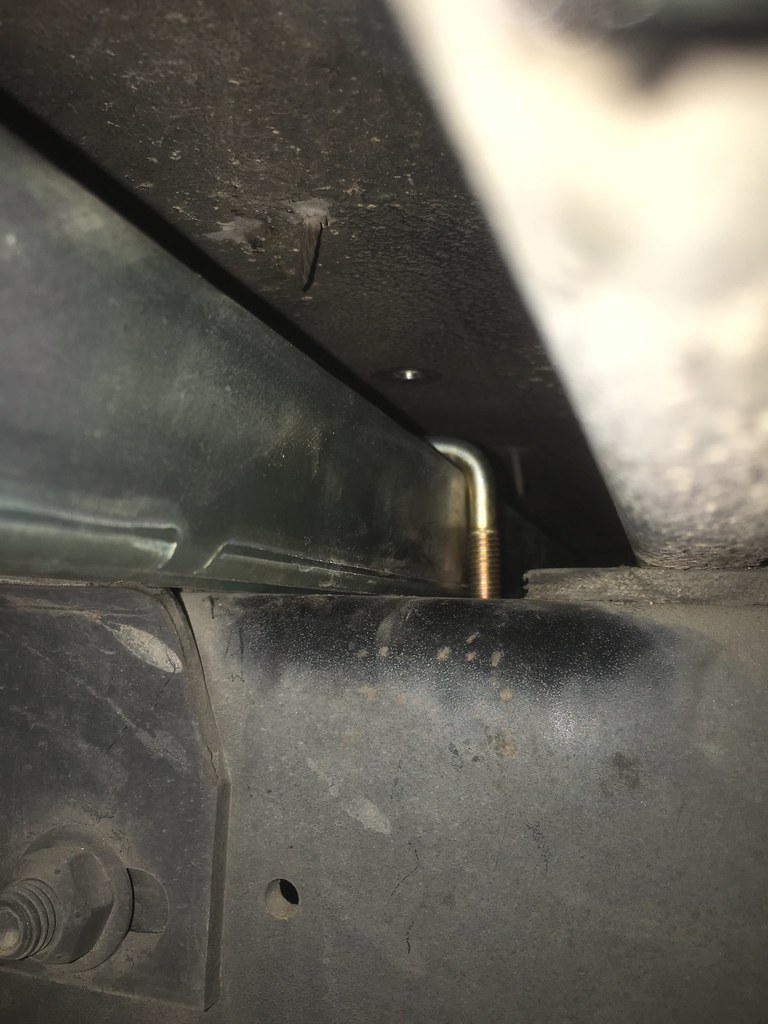
And now I've started working on the mounts for the outside units. One unit will mount behind the front tire on each side with the hookup end being inside the front storage boxes and the other hanging from a unistrut mount behind the front wheel / mud flap.
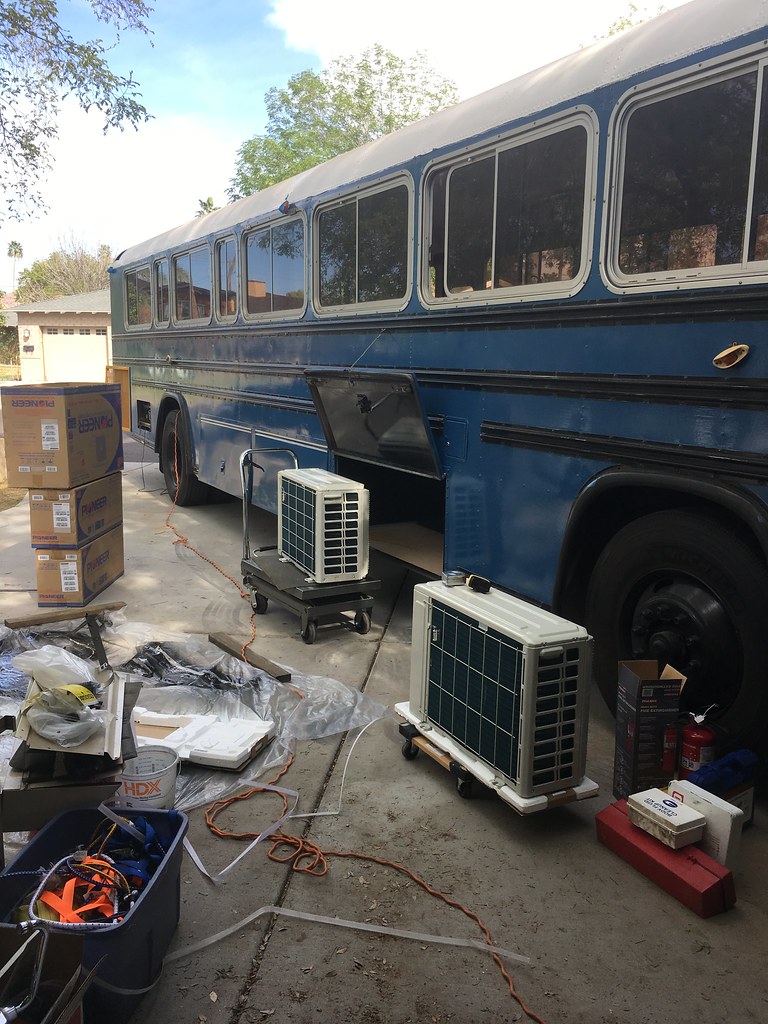
Each side will have two vent panels to hopefully improve air flow.
Covered with these after spray painting black:
https://www.amazon.com/gp/product/B0...?ie=UTF8&psc=1
I had to cut a small opening in order to fed the top support rail in over the top of the frame. It runs all the way across the bus, will be bolted to the body at each end, and is clamped to the frame rails.

I'm also planning to shield the coil side of each unit with some perforated sheet metal to try and protect them from any flying debris that gets past the mudflaps without giving up to much air flow.
Will post more as we progress, think I'm finally caught up now ;)
|
|
|
|
|
04-04-2018, 04:59 PM
|
#30
|
|
Skoolie
Join Date: Sep 2017
Location: Charleston SC
Posts: 105
Year: 1987
|
Enjoyed the update, thank you.
Question: could you use the open storage box in the above photo for your outside unit, cutting a grate into the door, and on the back-wall parallel to it to provide for airflow? Do you think that would be enough airflow, would you have a problem mounting it straight to the floor of the compartment, and would your main reason for not doing that be to retain the storage space?
I like the idea of mounting mine in my pass through storage bay. It'd be easy, and the splits would be protected. Downside being that rain could get into the storage bay, but then again I could install a vent that could open and close like in a house.
Sorry, just picking your brain here. Thanks.
__________________
Gilligan Phantom:
1987 40 FT Gillig Phantom School Bus, Detroit Diesel Mechanical 6V92TA
|
|
|
|
|
04-05-2018, 07:52 PM
|
#31
|
|
Skoolie
Join Date: Aug 2017
Location: Phoenix, AZ
Posts: 228
Year: 1997
Coachwork: Blue Bird
Chassis: AARE 3903
Engine: Cummins 8.3L 12v
Rated Cap: 78
|
Quote:
Originally Posted by Juicifer
Enjoyed the update, thank you.
Question: could you use the open storage box in the above photo for your outside unit, cutting a grate into the door, and on the back-wall parallel to it to provide for airflow? Do you think that would be enough airflow, would you have a problem mounting it straight to the floor of the compartment, and would your main reason for not doing that be to retain the storage space?
I like the idea of mounting mine in my pass through storage bay. It'd be easy, and the splits would be protected. Downside being that rain could get into the storage bay, but then again I could install a vent that could open and close like in a house.
Sorry, just picking your brain here. Thanks.
|
That was my original plan. We decided to only use part of the box in order to retain some storage. The box would have to be partially open either way as you say, so that was pretty much a wash. The extra hassle of adding the front support seemed worth it to make as much use of the under floor space available as possible.
Sent from my iPhone using Tapatalk
|
|
|
|
|
04-05-2018, 07:58 PM
|
#32
|
|
Skoolie
Join Date: Aug 2017
Location: Phoenix, AZ
Posts: 228
Year: 1997
Coachwork: Blue Bird
Chassis: AARE 3903
Engine: Cummins 8.3L 12v
Rated Cap: 78
|
Big 'Bird
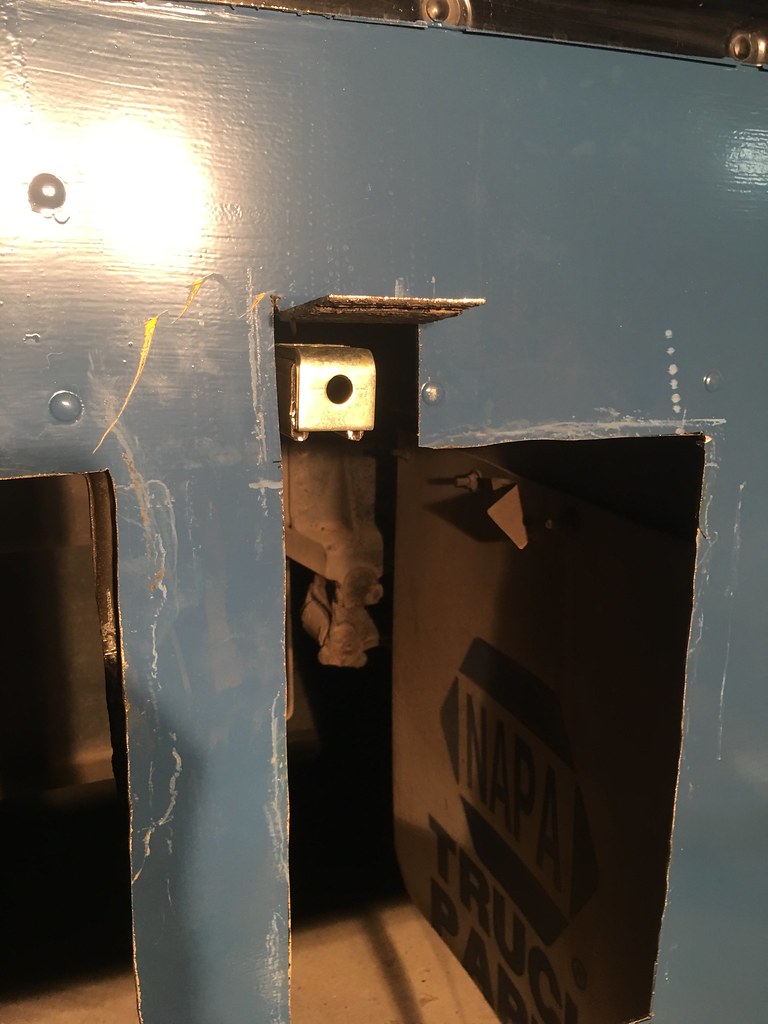
Heres a few more pics of the progress on the AC install. Only thing left to do is fashion a sheet metal guard around the ends of the unit where it passes through the box and try to come up with some weather stripping or something to seal it up as much as possible, and then some touch up paint.
Heres the view through from the inside of the box. Since these are heat pump units I later had to go back and add drain holes in the bottom sheet for when its running in heating mode.

Both units mounted and secured.


Perforated sheet added over the coils to protect, end of top support rail bolted to the body panels. Originally I was going to weld the flap back down, but now Im thinking of just caulking it and painting in case we ever need to get it out again. It seems plenty strong/rigid even with the slits. Toward the top where its bolted through is double thick as there are two body panels overlapping on that area.

Vent covers added to outside:

Sent from my iPhone using Tapatalk
|
|
|
|
|
04-06-2018, 08:12 AM
|
#33
|
|
Bus Crazy
Join Date: May 2017
Location: Chattanooga, TN
Posts: 1,413
Year: 2001
Coachwork: Thomas
Chassis: Thomas
Engine: CAT 3126
|
Quote:
Originally Posted by miscrms
Heres a few more pics of the progress on the AC install. Only thing left to do is fashion a sheet metal guard around the ends of the unit where it passes through the box and try to come up with some weather stripping or something to seal it up as much as possible, and then some touch up paint.
Heres the view through from the inside of the box. Since these are heat pump units I later had to go back and add drain holes in the bottom sheet for when its running in heating mode.
Both units mounted and secured.
Perforated sheet added over the coils to protect, end of top support rail bolted to the body panels. Originally I was going to weld the flap back down, but now Im thinking of just caulking it and painting in case we ever need to get it out again. It seems plenty strong/rigid even with the slits. Toward the top where its bolted through is double thick as there are two body panels overlapping on that area.
Vent covers added to outside:
Sent from my iPhone using Tapatalk |
Pretty cool! I went a bit different direction with my outdoor splits, but I think you have a pretty good plan here!
|
|
|
|
|
04-06-2018, 09:11 AM
|
#34
|
|
New Member
Join Date: Mar 2018
Location: Route 66, Springfield, Mo.
Posts: 8
|
Nice Bus!
Can't wait to see the finished product.
|
|
|
|
|
04-06-2018, 06:00 PM
|
#35
|
|
Skoolie
Join Date: Aug 2017
Location: Phoenix, AZ
Posts: 228
Year: 1997
Coachwork: Blue Bird
Chassis: AARE 3903
Engine: Cummins 8.3L 12v
Rated Cap: 78
|
Thanks. We're lucky to have so much storage underneath but it also creates some unique challenges as there is so little open area left over.
In front of the front axle the Aux air tank sits under the drivers seat, the spare tire in the middle, and the stair well of course on the passenger side. Just behind the axle in the middle there are two more air tanks (wet and secondary?) and then the 100 gallon fuel tank. The two areas just behind the front wheels on the sides are where we are mounting the AC outside units, then the front storage boxes continue down the sides outside the fuel tank. The next 2 doors open into one big ~10' long pass through cargo area. That will get reinforced to carry our water tanks in the back middle (2x 150 gallon ~40"x72") leaving about 4' of remaining pass through and then 6'x~28" down each side. Drivers side toward the rear will be taken up with the water pump, accumulator tank, plumbing and water heater. Between the back of the cargo area and the rear axle in the center is the primary? air tank. There's an emptyish area behind the rear wheel on the drivers side that in addition to the transmission cooler and air dryer seems to be where the Webasto coolant heater seems to have been, and which we're adding back in. I might be able to squeeze the water heater in there also but it looks tight due to the other components already there. In the center is of course the driveshaft / transmission and on the passenger side the battery box. Which brings us back to the engine bay. Since it's rear engine we can't do much off the back, and due to the amount of solar we're putting on the roof we can't really put anything up there either.
So it's been a bit of a struggle to try and keep stuff out of the bus interior, preserve under storage, and still find a place for everything. The batteries and electrical equipment are looking like they'll have to go inside, but since we're going Lithium they are not _too_ big and probably better off in a temperature controlled environment anyway.
|
|
|
|
|
04-06-2018, 08:51 PM
|
#37
|
|
Skoolie
Join Date: Aug 2017
Location: Phoenix, AZ
Posts: 228
Year: 1997
Coachwork: Blue Bird
Chassis: AARE 3903
Engine: Cummins 8.3L 12v
Rated Cap: 78
|
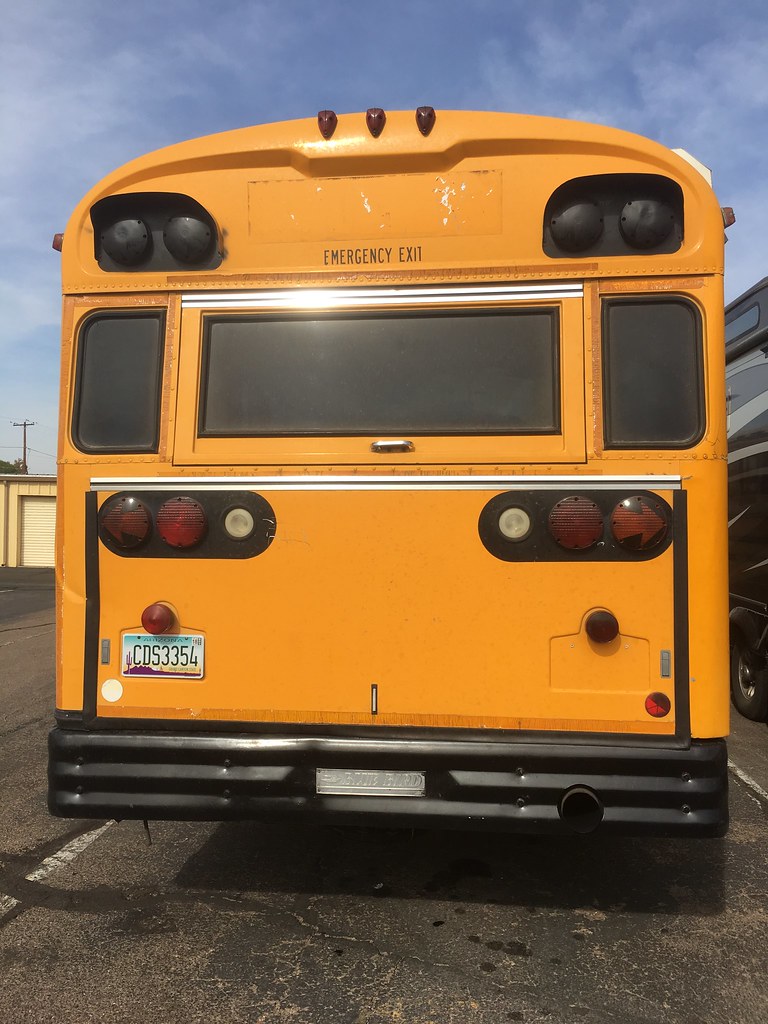
AZ is great for no rust, but tends be pretty hard on plastics and rubbers. In pulling off most of our lights for painting we noticed that most of the gaskets and some of the lenses were pretty shot. I'd like to go LED, but also wanted to keep the "classic" look of some of the old style lights. And we found that surprisingly it's often cheaper (or similar) to just buy the whole light as it is to get new lenses / gaskets if you can find them.
So after going back and forth about 20 times in my mind, we finally pulled the trigger and bought replacement lights that match the originals, plus LED bulb replacements. Only exception is head lights and backup lights which I've just gone with straight LED replacements for max brightness. Generally we ordered the lights from Unity School Bus Parts, LEDs from Amazon. It may take a few tries to get LEDs that fit well and look good, we'll see how it goes. Links are to what I'm trying first. For amber / red lights I'm generally using warm white so they hopefully don't look too weird, and shooting for brightness similar or a little higher than stock bulb but not so much that it washes out the lenses color or looks out of place. Lumens / wattage and ratings are all over the place on some of these, so I took my best shot.
Here's the info I put together in case it's useful to anyone else. Bus is a 1997 Blue Bird All American RE 40' activity bus.
Back:
Clearance Lights: Weldon 5050 1-wire
Red: Tear drop red marker light**.
Amber: Amber Tear Drop Marker Lght**
Bulb: 168 (4.8W / 3CP / 38 lumens)
https://www.amazon.com/gp/product/B0...?ie=UTF8&psc=1
Turn Signal: Weldon 1000 1-wire
Amber w/arrow: Turn signal w/arrow (amber)**
Bulb: 1156 (26.8W / 32CP / 400 (160 target?) lumens
https://www.amazon.com/gp/product/B0...?ie=UTF8&psc=1
https://www.amazon.com/gp/product/B0...?ie=UTF8&psc=1
https://www.amazon.com/gp/product/B0...?ie=UTF8&psc=1
Tail / Brake: Weldon 1010 2-wire (hi/low wired, body ground)
Red Stop & Tail 2 Wire**
Bulb: 1157 (hi 26.8W / 32 CP / 400 lumens, low 8.3W / 3 CP / 38 lumens)
https://www.amazon.com/gp/product/B0...?ie=UTF8&psc=1
https://www.amazon.com/gp/product/B0...?ie=UTF8&psc=1
Tail / License Plate: Grote 50852 (these have tail and brake, not sure if brake is wired in, have to look)
Stop-and-Tail(Snap on Lens)**
Bulb: 1157
1157 (hi 26.8W / 32 CP / 400 lumens, low 8.3W / 3 CP / 38 lumens)
https://www.amazon.com/gp/product/B0...?ie=UTF8&psc=1
https://www.amazon.com/gp/product/B0...?ie=UTF8&psc=1
Reverse: Truck Lite Super 40 w/40700 gasket mount
LED replacement (we'll see if they are bright enough, the name brand are $50+ each as I recall): https://www.amazon.com/gp/product/B0...?ie=UTF8&psc=1
Front:

Turn Signals: Same as back, Weldon 1000 2-wire
Clearance Lights: Same as back, sides, Weldon 5050 1 wire
Corner Parking Lights: Blue Bird #1341700, made by Dietz I believe. These are apparently rather rare and expensive. Replacements are ~$100 ea, and I can't find a part number for gaskets, so I'm just planning to live with what I've got. Can't remember now if they are an 1156 or 1157? Have to check.
Headlamps: 4x6" sealed beam separate high and low. Most LEDs seem to have both high and low in one, so I'll either wire them separate or rig it for 2 low, 2 high on each side.
https://www.amazon.com/gp/product/B0...?ie=UTF8&psc=1
Side:

Clearance Lamps: Same as Back/Front Weldon 5050 1-wire
Side blinkers: Arrow 059-99000 Amber 1-wire
AMBER MARKER WHITE HOUSING
Bulb: 168 (4.8W / 3CP / 38 lumens)
https://www.amazon.com/gp/product/B0...?ie=UTF8&psc=1
Interior:
Dome lights look to be Weldon 1005. Mine are in decent shape, with a few cracked lenses, so just bought generic replacements for a few of those.
Interior Dome Light
Bulbs look to be GE 98, which seem to be a low 2-3 CP output with the same base as the 1156. I'm planing to try some of the 1156 LEDs above in there as I'd like them to be brighter than they are now.
Reflectors:
Also bought some yellow and red 3M stick on reflectors to replace those we removed while painting and those that were already missing. I believe these are a legal requirement, particularly as I believe our lights do not have built in reflectors like most car lamps do.
3M 3" Stick on Reflector
3M 3" Stick on Reflector (Amber)
Not strictly related, but also bought some of these Southco Latches that I'm hoping will be the right size to replace my seized up ones on the rear side engine bay doors. The ones on the rear engine door itself seem heavier duty and still in good condition.
Southco Latch
Also haven't purchased yet, but believe these may be the correct gas struts for the rear engine hatch, as ours are verging on saggy:
1685EX 150 lb: Stabilus Lift-o-Mat 1685EX | 26.3 in. 150 lbs. gas charged lift support|
Someone on the Wanderlodge forum said these were also a workable replacement: https://truck-hardware.orrorr.com/it...nds/h-9515-180
My luggage and engine door hinge rubber is getting pretty split, so I also need to try and find some of the replacement. I believe the BB part number is #01200807, need to check with the local BB parts dealer and see if they can get it.
Rob
|
|
|
|
|
04-06-2018, 10:37 PM
|
#38
|
|
Bus Nut
Join Date: Jul 2016
Location: Central Florida
Posts: 938
Chassis: GMC or Chevrolet, I hope
Engine: gasser probably
|
Enjoyed the pictures. Thank you for sharing.
__________________
the more i learn, the less I know what to buy . . .
|
|
|
|
|
04-10-2018, 12:20 AM
|
#39
|
|
Mini-Skoolie
Join Date: Feb 2018
Posts: 67
|
Ok, I'm officially jealous! Did you get that bus at AAA? I've been watching their inventory, they have a few Tucson buses I'm watching, but those windows make that bus a must buy!
|
|
|
|
|
04-11-2018, 03:36 PM
|
#40
|
|
Skoolie
Join Date: Aug 2017
Location: Phoenix, AZ
Posts: 228
Year: 1997
Coachwork: Blue Bird
Chassis: AARE 3903
Engine: Cummins 8.3L 12v
Rated Cap: 78
|
Quote:
Originally Posted by Dave in Tucson
Ok, I'm officially jealous! Did you get that bus at AAA? I've been watching their inventory, they have a few Tucson buses I'm watching, but those windows make that bus a must buy!
|
Thanks, we felt pretty lucky to find it. Yes it was from AAA Bus, we paid a bit more to get it from a dealer but felt they were fair and knowledgeable. Both Joe and Tony over there are working on their own Skoolies, so they get what we are doing and have been helpful since the sale as well.
|
|
|
|
|
|
| Thread Tools |
|
|
| Display Modes |
 Linear Mode Linear Mode
|
 Posting Rules
|
You may not post new threads
You may not post replies
You may not post attachments
You may not edit your posts
HTML code is Off
|
|
|
|
 » Recent Threads
 |
|
|
|
|
|
|
|
|
|
|
|
|
|
|
|
|
|
|
|
|
|
|
|
|
|
|
|
|
|
|
|
|
|
|
|
|
|


