UPDATE- PLASTIC FANTASTIC CEILING BUMBLING IT UP RIGHT.
Its been a minute and thought I should update the progress for those that care. A lot has been happening between building a bus and streaming it live. Today Im going to talk about the ceiling of my bus. I have dubbed it the "Plastic Fantastic". I had this vision of a plastic translucent ceiling gently illuminated from behind so that the whole bus roof kind of glows giving it a nice open airy feeling. Of course with acrylic, some theromoforming machines, talent at plastic fab (I have none) and a hefty budget, I could do this the "right way". But, at about $200+ a sheet of acrylic (need 13) on budget alone its a no go. So, I activated full bumble life powers and bumbled my way into a system that I think will work.
CROSS SECTION OF PLASTIC FANTASTIC CEILING
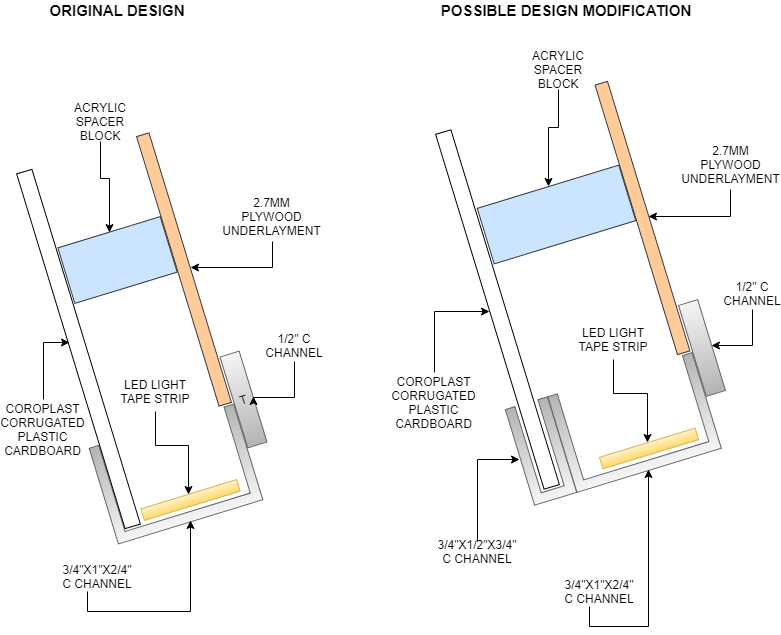 This is the basic sandwich.
1. Roof metal skin
2. 1/4" furring strips (concrete form bender board) glued to metal skin for air gap. Glued with PL power grab.
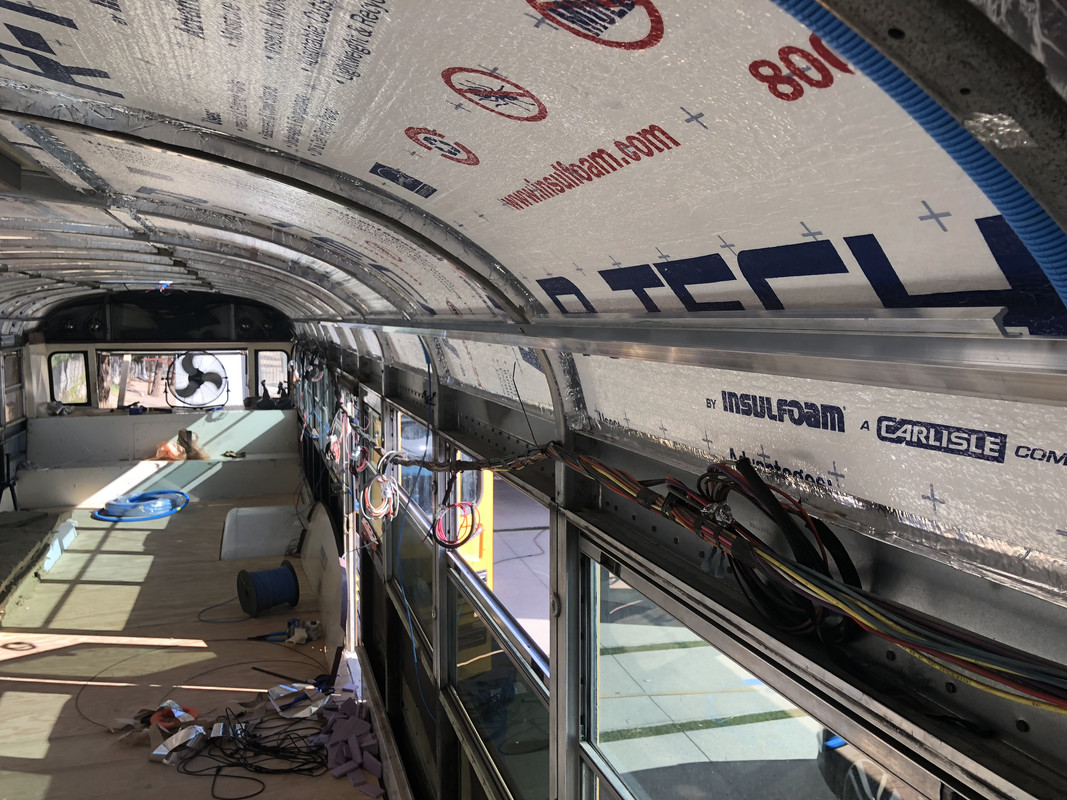
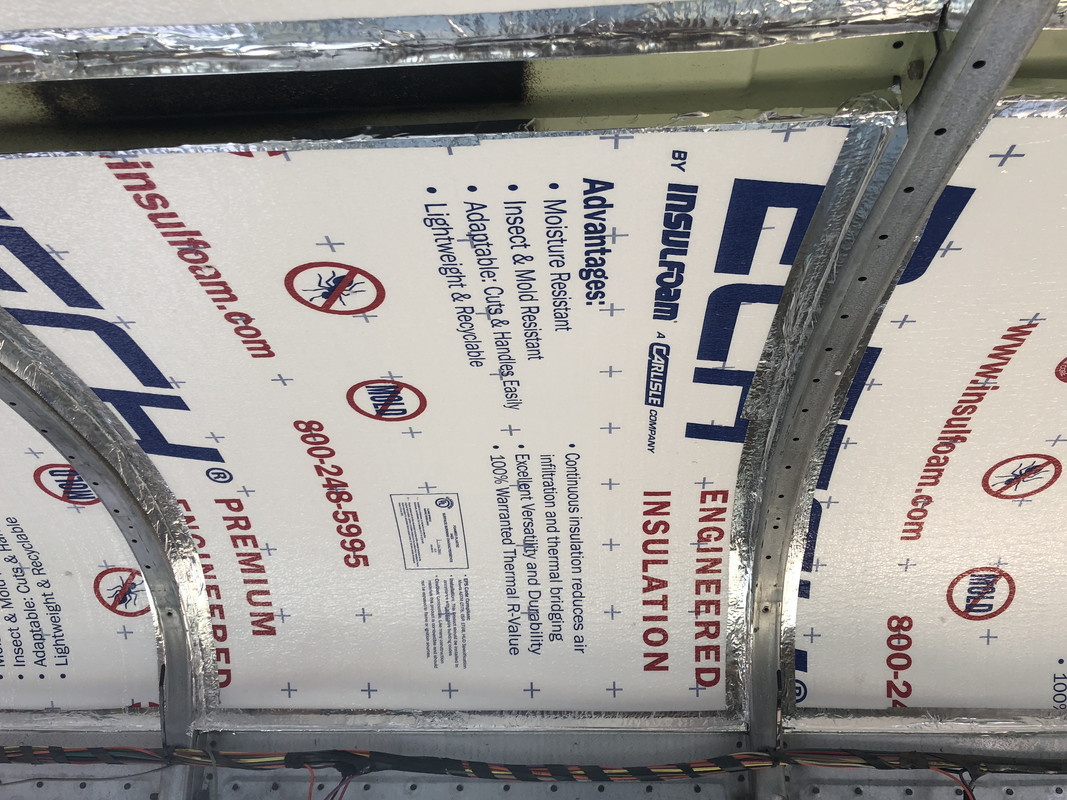
3. RTECH 1/2" foam glued up to boards with radiant barrier side toward metal 1/4" strips providing radiant barrier air gap.
4. Aluminum tape covering every seam between foam boars and ribs.
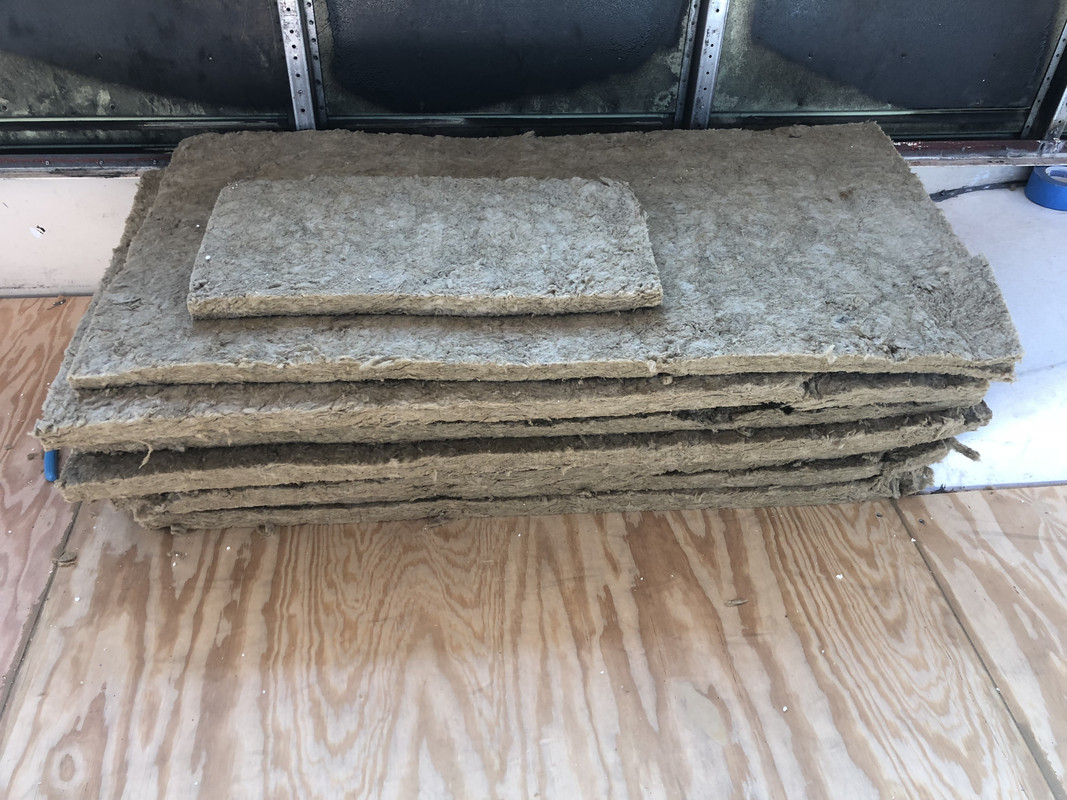
5. Rockwool thermal, fire and sound insulation bats. 2" bats split in half with my custom modified reciprocating saw. I cut a bandsaw blad in half, used a recip blade as a template and made it fit my saw. Laid it flat on a 4x8 sheet and spaced it with 2x4 with a spring on the other end of the blade for tension.
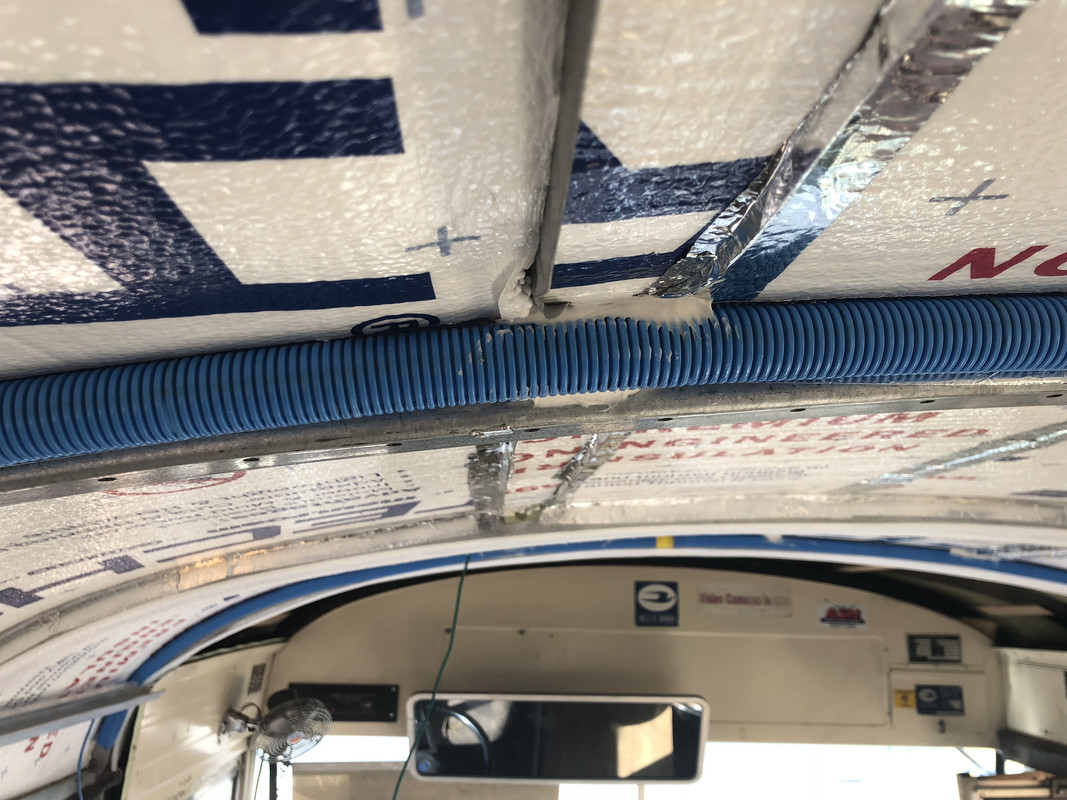
6. Smurf Tube blue 3/4" electrical conduit glued to every other rib with Power Grab and fitted with pull string for future install
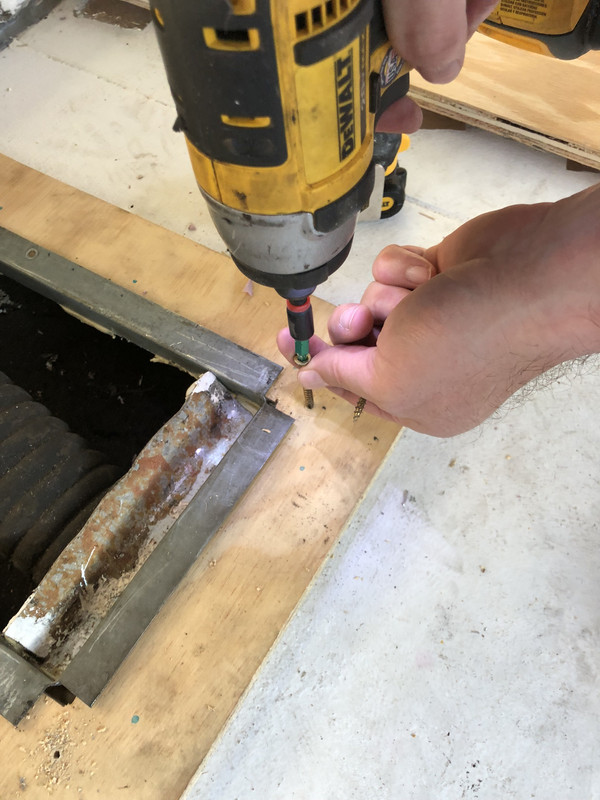
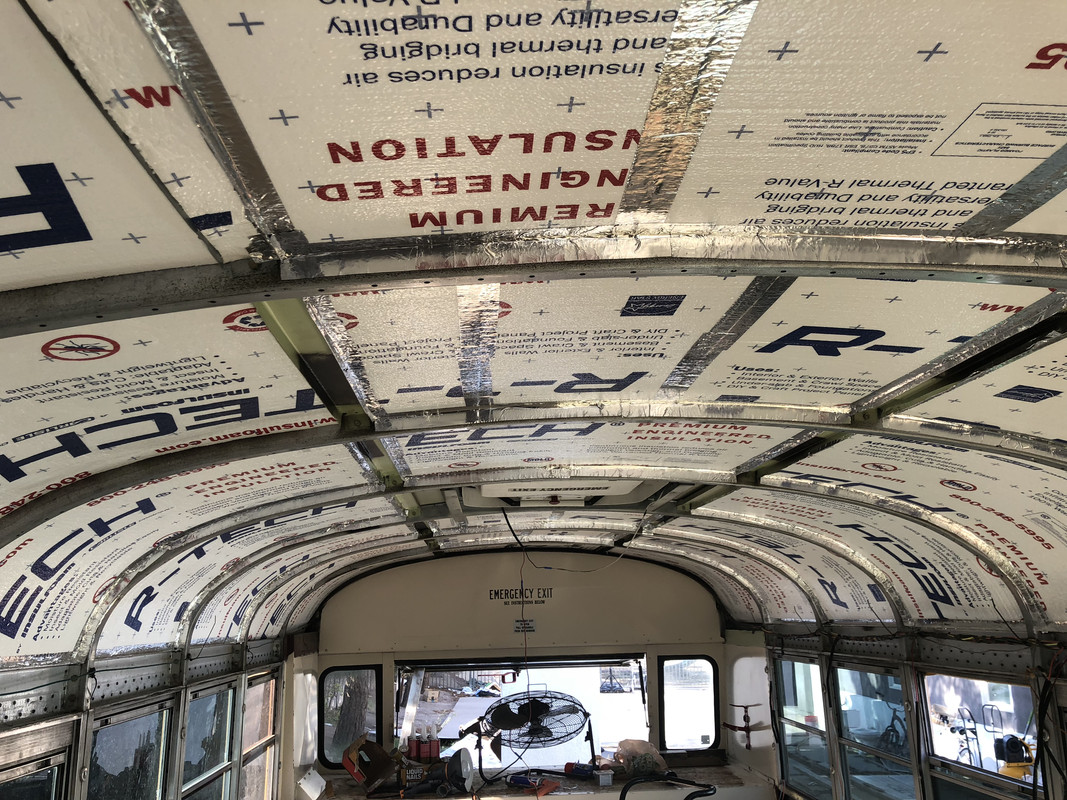
7. Aluminum 3/4"x1"x3/4" C channel screwed into the ribs at the top point where the metal side trim used to attach and hold the old metal ceiling. A 1/2" C channel is glued to the back of the main channel to support the 2.7mm plywood from puckering into the open bay.
8. 2.7mm wood is cut to size to provide a tension fit that is finished with screws into the metal ribs. I know condensation but I didnt want to put any wood in the ceiling. I put strips of foam along the ribs under the plywood. The 2.7mm plywood rests on the back edge of the 3/4x1 C channel and is supported by the 1/2" glued to the back with E6000 (amazing glue). Wood will be painted reflective white.
9. LED 16' RGB+W tape lights go in the 3/4"x1"x3/4" C channel pointing up at wood.
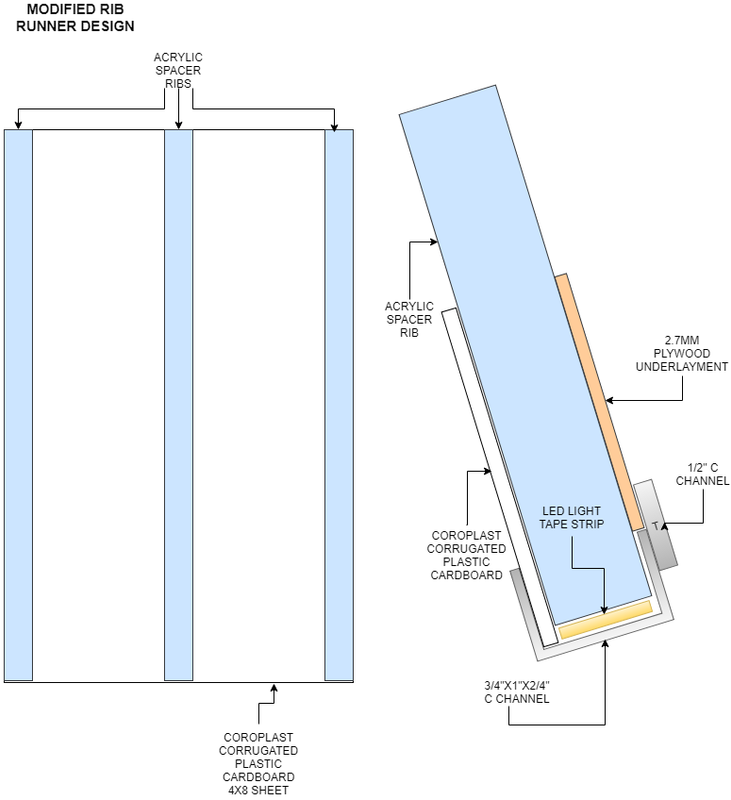
10. Acrylic spacers cut and glued to wood at key intervals along the ribs to support the final ceiling material and maintain an equal air gap between wood and plastic.
11. Coroplast plastic cardboard mounted in channel in front of LED's (possibly second channel in front) and then affixed to spacers to create a solid diffuse lens for the lights.
DOES ANYONE KNOW ANOTHER CHEAP MATERIAL I COULD USE INSTEAD OF COROPLAST? SOMETHING WHITE TRANSLUCENT THAT MIGHT HAVE MORE STRUCTURAL RIGIDITY? IM ALL EARS.
Well thats the plan. So far we have gotten to putting the wood up phase and all is going outstanding. Had a slight mishap.
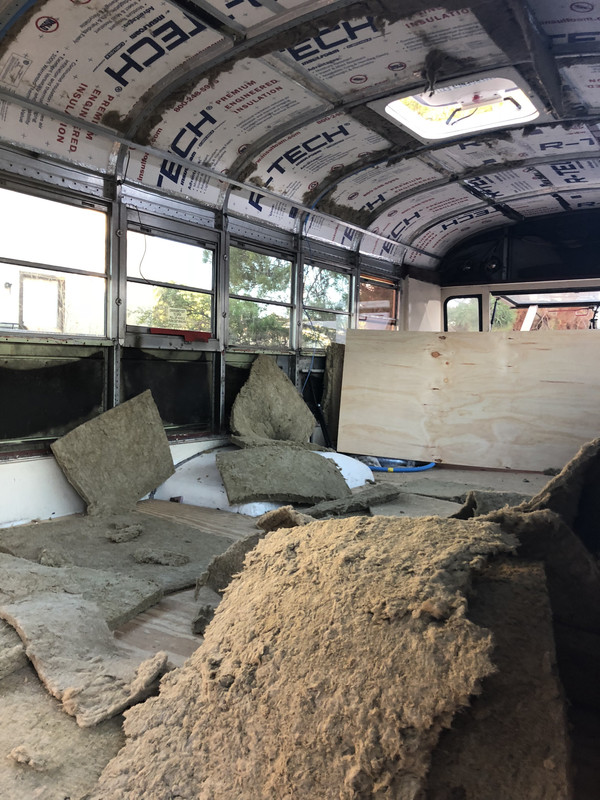
I needed a way to hold the rockwool in the ceiling while putting up the wood. POwer grab / liquid nails didnt work. Tape across the ribs didnt work. But wow 3m spray adhesive worked very well. The original thought was to do one bay insulation then immediately put up the wood. But, the 3m worked so well I just powered through and insulated the whole ceiling. Tired and full of glue and hairy rock filaments, I called it a day to do the wood the next. Well, in the morning wouldnt you know 80% of the rockwool came down! Oh well live a learn.
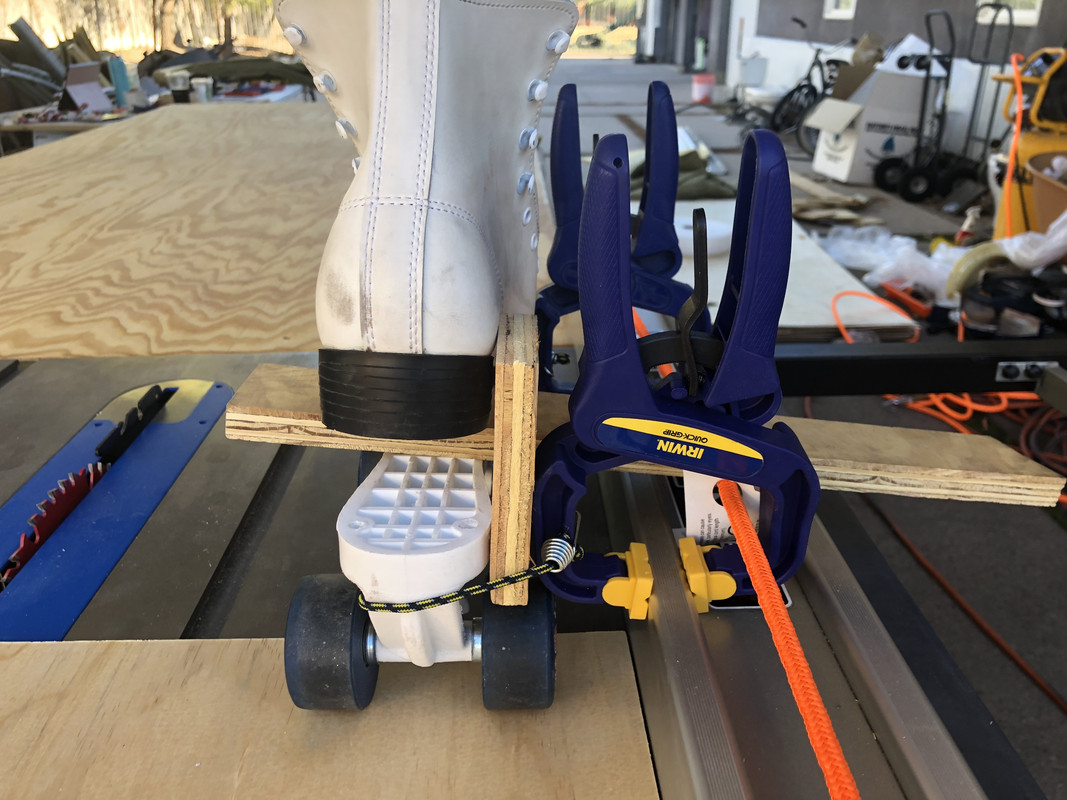
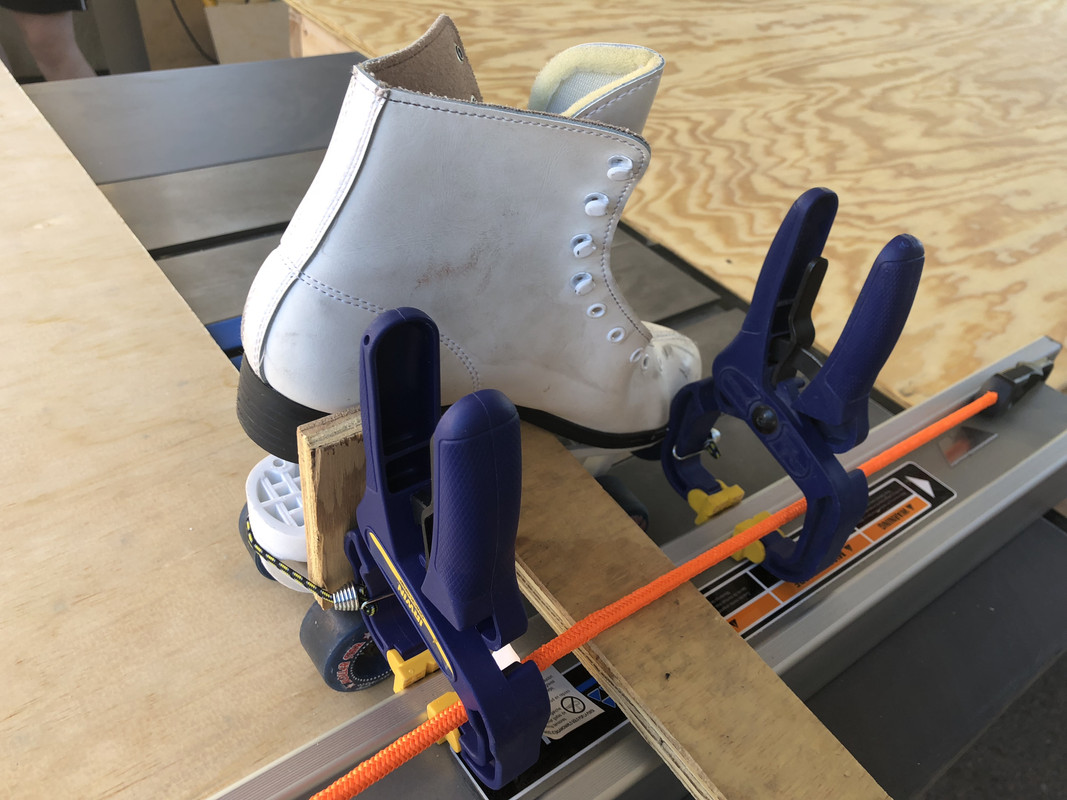
The plywood sheets are from Home Depot and they call it 2.7mm plywood underlayment. It bends real easy and is nice enough to be a finished sealing if stained or even painted. Its also only about $10 a sheet. It is hard to rip on a table saw because of how thin it is. It really likes to bend and warp so that it is hard to keep it flat while feeding into the saw. I overcame this with a roller skate, bungie cords and some clamps. Again, DONT TRY ANY OF THIS AT HOME. THIS IS WHAT I DO AT MY HOUSE, YOU DO WHAT YOU WANT AT YOUR HOME.
Now, I gotta figure a way to put a junction box on the roof and a conduit for solar and any other roof mount electronics so I can finish the inside ceiling.
PICTURES YAY.
SMURF TUBE 3/4" CONDUIT ON RIBS
 ELECTRICAL CONDUIT BEHIND CUSTOM ALUMINUM CEILING RAIL. I HAVE SINCE PUT FOAM BETWEEN RAIL AND RIB
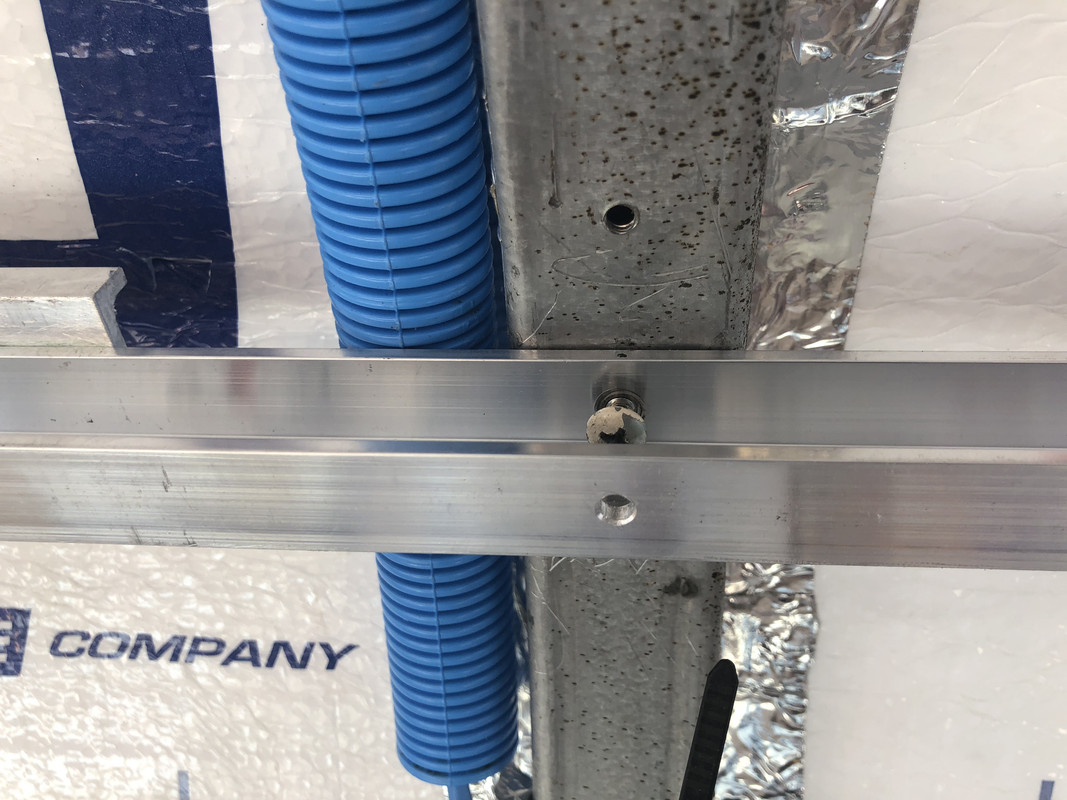 CUSTOM ALUMINUM RAIL DETAIL. YOU CAN SEE THE EDGE THAT THE WOOD SITS ON CREATED BY THE C CHANNEL AND THE PIECE GLUED TO THE BACK IN BETWEEN RIBS. LIGHTS GO DOWN IN THE CHANNEL
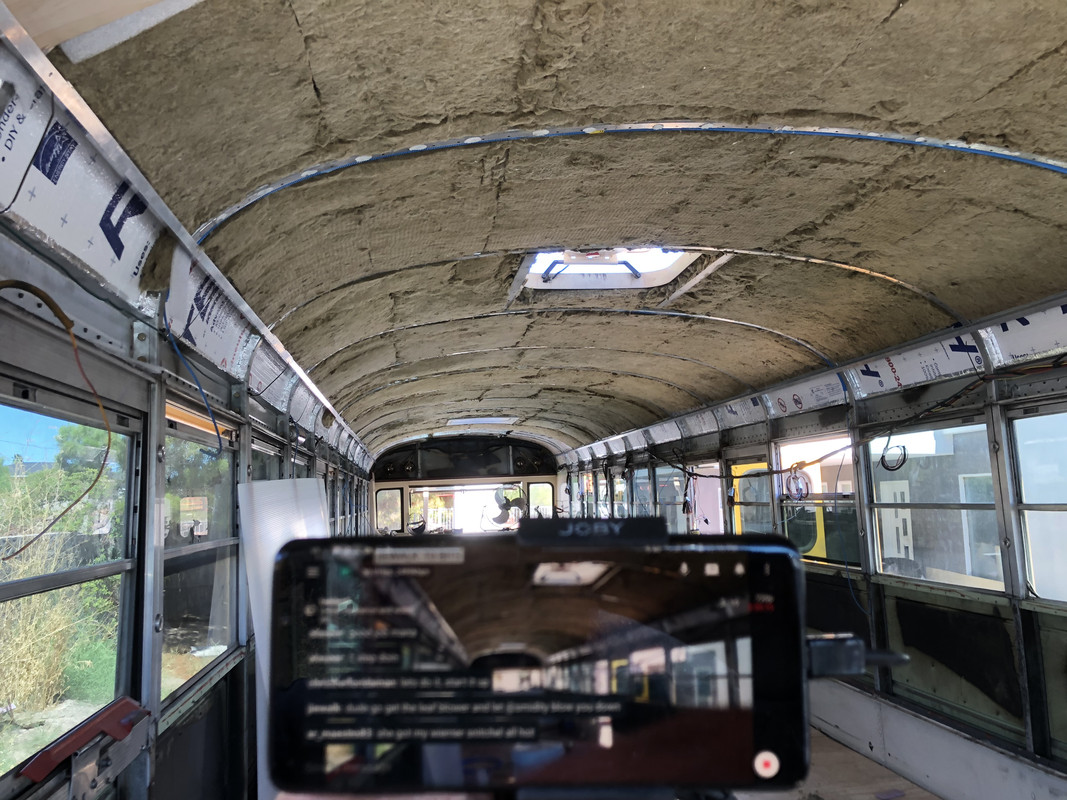
 ROCKWOOL INSULATION BLANKET NICE AND SNUG. IN TOP LEFT CORNER YOU CAN SEE THE FOAM THAT COVERS THE RIBS PEEKING OUT UNDER THE PLYWOOD
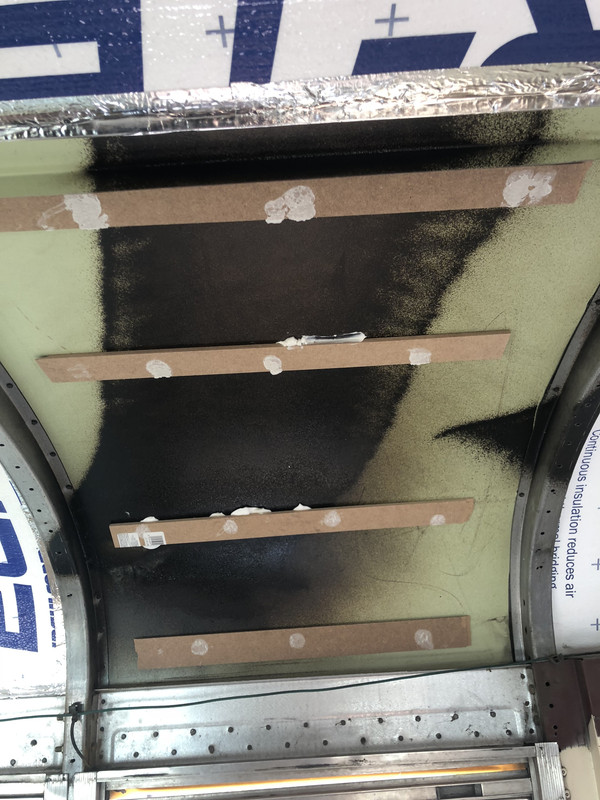
 THE MORNING AFTER COMPLETE DISASTER
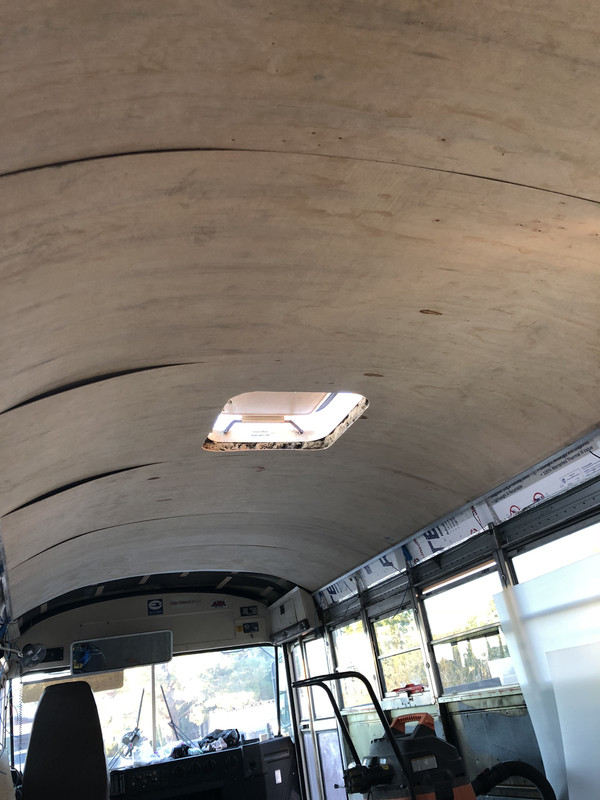
 PERSEVERANCE PAYS OFF. WOOD UP BY COMPRESSION ONLY. THE GAPS WILL GO AWAY ONCE SCREWED UP TO RIBS. THE ACTUAL SPACING BETWEEN BOARDS IS PERFECT ABOUT 1/8" FOR EXPANSION.
 CUT EACH SHEET TO RIB SPACING. ROLLER SKATE TABLE SAW INFEED WHEEL


 Linear Mode


