 |
|
 05-04-2014, 09:49 PM
|
#1
|
|
Skoolie
Join Date: Apr 2014
Location: St Louis Metro
Posts: 110
Year: 1978
Coachwork: Wayne
Chassis: Lifeguard
Engine: 366 Chevy
|
ET - ELWOOD Transport
I got to look inside my first skoolie about a year ago (probably saw a lot before that, but never noticed) and thought "that's pretty cool." Six months ago I got a glimpse of a skoolie hauler and decided I had to have one. If for no other reason than I don't have a garage for my racecar.
Hi all, I'm Marvin. Everybody calls me Gizmo 
(long story, I'll tell you in person over a 6-pack of beer). This is my first post, but I've been reading about other conversions on here for months. I finally took the plunge yesterday and bought a previously partially converted 1978 Wayne Lifeguard.


I got it cheap cause its a mess, but the garage is solid.
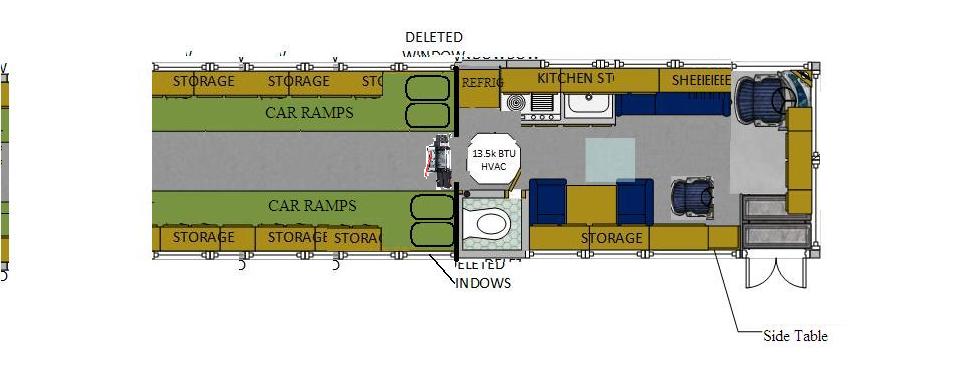
My plan is to retrofit the garage area with aluminum ramps, build a wall/door after window 6 so the garage area is separate, And do a short-bus conversion to the front half. Something like this:
I would really like to do an interior swap from a salvage sticks and staples camper. That way I could reuse all its electrical, water (except black tank), and propane as opposed to sourcing everything separately and then having to figure out how it all goes together. There are a couple salvage RV places near me that I think I can pickup a 2001 or newer 20-28ft "residential 5th wheel/travel trailor" whole for less than $1000. I did a little research and between the front door, fridge/freezer, stove, microwave, rooftop AC, waterheater, couch, dinette, etc. I'll spend way more than that buying individual items. Even if it doesn't all work, it worth it to tear one apart and see how its all setup.
Demolition has begun and there's rust and holes everywhere. My goal is to have the floor in the living area all stripped, figure out how much "cut and replace" is needed, grind and sand the recoverable areas, inspect the walls and windows and start on the window removal.
I know if the garage is the most important aspect, I should start there, but I have so many ideas about how I want to do it, I figured I ought to wait till I get som bids in on some of the different options.
More later...
|

|

|
|
05-06-2014, 08:07 PM
|
#2
|
|
Mini-Skoolie
Join Date: Mar 2014
Posts: 41
Year: 1960
Coachwork: Wayne
Chassis: Chevy
Engine: 283 cid
|
Re: ET - ELWOOD Transport
Hi Gizmo - Welcome to you and your bus. The 1970's chevy have a very bold look. That front bumper is some crash bumper. Is it a counter weight for the rear? Well I will let you get started. The best of luck with your build. Again welcome to the form.
the old man Richard
|
|
|
|
|
05-06-2014, 10:46 PM
|
#3
|
|
Bus Crazy
Join Date: Oct 2009
Location: Moodus, Ct.
Posts: 1,062
Year: 1996
Coachwork: Champion
Chassis: Ford e-450
Engine: 7.3 Powerstroke
Rated Cap: 14
|
Re: ET - ELWOOD Transport
Welcome! I like the "Vista cruiser"garage area. 
As someone who had a dwarf car living in the back of a cube van at dirt tracks for years, you'll love having your own toilet + somewheres to change. If you're racing dirt, make sure you can seal off the living area. And your choice of flooring should be thought out. (I ran at a very dusty track-everything got covered.)
Craigslist is a good place to find an old camper-there's alway some on there.
|
|
|
|
|
05-06-2014, 10:52 PM
|
#4
|
|
Almost There
Join Date: Sep 2009
Location: NE Oregon, SW Idaho
Posts: 98
Year: 1995
Coachwork: Thomas
Chassis: IH
Engine: 466
Rated Cap: 64
|
Re: ET - ELWOOD Transport
Love the 'Vista Cruiser' look- that bus is beggin' for an old style 'hippy home' theme! No chance you could just pull the car on a trailer? I can just see your bus with an old VW van top grafted onto the rear Vista Cruiser section for a two story effect, with some love beads hangin' from the rafters- wow, the thought turns me pure nostalgic! 
|
|
|
|
|
05-06-2014, 11:26 PM
|
#5
|
|
Skoolie
Join Date: Apr 2014
Location: St Louis Metro
Posts: 110
Year: 1978
Coachwork: Wayne
Chassis: Lifeguard
Engine: 366 Chevy
|
Re: ET - ELWOOD Transport
Today was frustrating.
Evidently the previous owner used the bus to learn how to weld. There are welds everywhere, many, as far as I can tell , to fix striped screws and bolts. What a mess.
Looking under the bus for the last two days is also depressing.Both rear wheel wells are showing rust through the body. There are a few other areas of bad rust, too, but structural integrity seems intact. The number of holes through the floor is massive. Everything leaks and half the windows are cracked/fractured.
This is going to be fun!
Tomorrow is grinder day. I'm going to empty this sucker one way or another this week!
|
|
|
|
|
05-07-2014, 09:35 PM
|
#6
|
|
New Member
Join Date: May 2014
Posts: 9
|
Re: ET - ELWOOD Transport
hey there! I'm new as well, and about to buy a bus to convert to load a car in the back! If you have time to take some pictures, I'd love to see how yours was done! whole bus looks really cool!
|
|
|
|
|
05-09-2014, 08:09 PM
|
#7
|
|
Skoolie
Join Date: Apr 2014
Location: St Louis Metro
Posts: 110
Year: 1978
Coachwork: Wayne
Chassis: Lifeguard
Engine: 366 Chevy
|
Re: ET - ELWOOD Transport
Quote:
|
Originally Posted by RoadBoss
hey there! I'm new as well, and about to buy a bus to convert to load a car in the back! If you have time to take some pictures, I'd love to see how yours was done! whole bus looks really cool!
|
I underestimated my resolve. Been spending a lot of time on design and parts researching. If I'm gonna do this right, I really want it right the first time. Got some crazy ideas I'm working on so the research also includes doing the engineering calculations and drawing. I said all that to say, I bought the bus cause the garage was already done, but I don't like it this way so I'll be stripping everything out and refinishing a little more upscale.
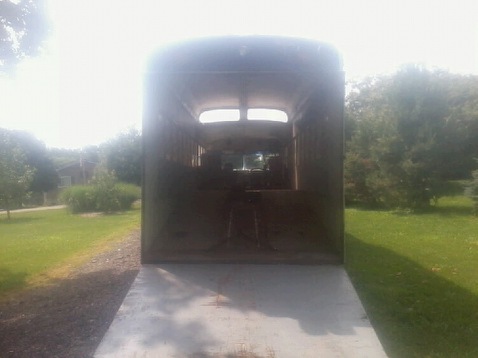
The back end is currently all done with one or two sheets of 5/8" plywood. The door is two sheets 7'x7 1/2'. The dovetail is 7'2" basically the bus was cut, stretched 2', angled 20*, and rewelded behind the rear wheels. Given that drop, the back door is 15* when opened on the ground. Among other things that wont work for me is that door has a 2" lip on the ground. My car's ground clearance is 2 1/2" with over two feet from the lip to the wheels. That 2' lip on the bus will never work!!!!
The previous owner also just extended the dovetail with plywood for a total length of 11'4" at that 20* angle(probably to clear the rear wheelwells) and then added 4'8" of flat plywood on steel platforms 10" high. If the angle of the dovetail wasn't bad enough, that flat section just ruined it for me. By my calculations, I can only use the first 8" before my car bottoms out.
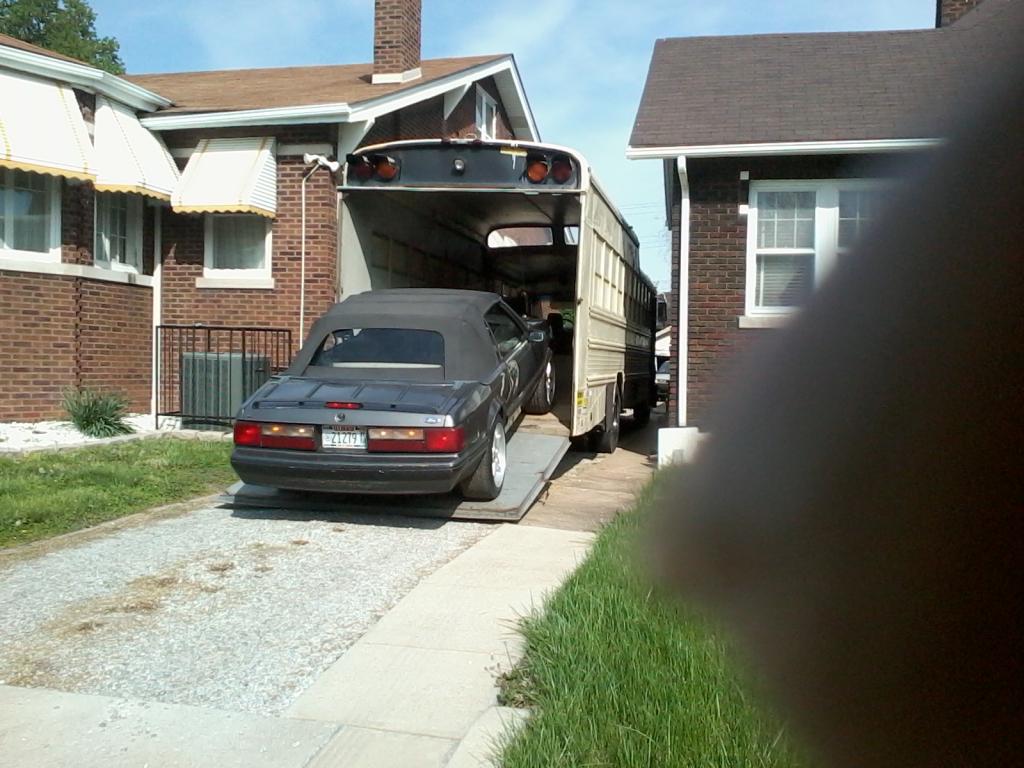
I had been up to see the bus previously, so I knew there were clearance issues. So I took my fox-body Mustang as the guinea pig for the return home after buying the bus.
This is what the previous owner hauled in the bus.

This is the car I plan to haul to and from racing and show events....
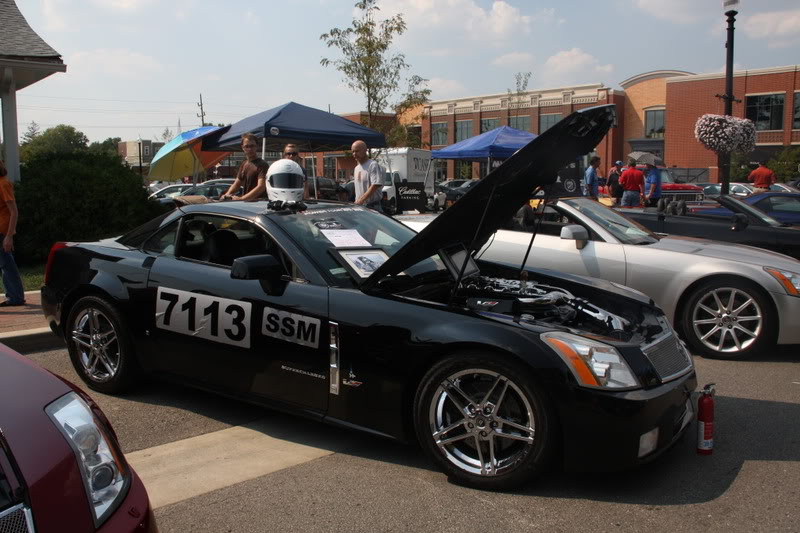
cause I'm tired of driving the racecar 1100 miles to events and then have to worry what I'm going to do if I broke it racing. I also would like to detail it for shows at home where I have all the tools and equipment, pack it onto the bus, cover it, and drive the bus to the shows without having to bring half my gear to clean it up after the long drive to the show.
|
|
|
|
|
05-10-2014, 10:35 AM
|
#8
|
|
Bus Crazy
Join Date: Oct 2009
Location: Moodus, Ct.
Posts: 1,062
Year: 1996
Coachwork: Champion
Chassis: Ford e-450
Engine: 7.3 Powerstroke
Rated Cap: 14
|
Re: ET - ELWOOD Transport
Ummmm-yea. That bus might be a little "low rent" compared to whats being hauled....
|
|
|
|
|
05-10-2014, 11:23 AM
|
#9
|
|
Skoolie
Join Date: Apr 2014
Location: St Louis Metro
Posts: 110
Year: 1978
Coachwork: Wayne
Chassis: Lifeguard
Engine: 366 Chevy
|
Re: ET - ELWOOD Transport
Quote:
|
Originally Posted by sdwarf36
Ummmm-yea. That bus might be a little "low rent" compared to whats being hauled....
|
That's the whole point! No one would ever expect a beat up, run down,"vista cruiser-style bus" to be hauling such precious cargo. The ultimate sleeper (pun intended). I'll leave it rusted and tattered on the outside, while living in luxury on the inside.
|
|
|
|
|
05-10-2014, 12:48 PM
|
#10
|
|
New Member
Join Date: May 2014
Posts: 9
|
Re: ET - ELWOOD Transport
thats pretty cool. do you run into any ground clearance issues with the back being so much lower?
|
|
|
|
|
05-10-2014, 12:58 PM
|
#11
|
|
Bus Crazy
Join Date: Oct 2009
Location: Moodus, Ct.
Posts: 1,062
Year: 1996
Coachwork: Champion
Chassis: Ford e-450
Engine: 7.3 Powerstroke
Rated Cap: 14
|
Re: ET - ELWOOD Transport
Quote:
|
Originally Posted by gizmoq
Quote:
|
Originally Posted by sdwarf36
Ummmm-yea. That bus might be a little "low rent" compared to whats being hauled....
|
That's the whole point! No one would ever expect a beat up, run down,"vista cruiser-style bus" to be hauling such precious cargo. The ultimate sleeper (pun intended). I'll leave it rusted and tattered on the outside, while living in luxury on the inside. |
|
|
|
|
|
05-10-2014, 02:15 PM
|
#12
|
|
Skoolie
Join Date: Apr 2014
Location: St Louis Metro
Posts: 110
Year: 1978
Coachwork: Wayne
Chassis: Lifeguard
Engine: 366 Chevy
|
Re: ET - ELWOOD Transport
Quote:
|
Originally Posted by RoadBoss
thats pretty cool. do you run into any ground clearance issues with the back being so much lower?
|
The hinge and lever for the back door is the lowest part at 22" off the ground. The lever does touch the ground when I drop the ramp when a car is loaded in the garage and the airbags on the rear suspension are low. So I just have to remember to pump up the airbags before loading ELWOOD.
|
|
|
|
|
05-24-2014, 03:08 PM
|
#13
|
|
Skoolie
Join Date: Apr 2014
Location: St Louis Metro
Posts: 110
Year: 1978
Coachwork: Wayne
Chassis: Lifeguard
Engine: 366 Chevy
|
Re: ET - ELWOOD Transport
Slow progress to date. I had to decide whether to leave the plywood ramps in or replace them. Been thinking of the end-game - what do I want as a finished product? So basically been doing more thinking and planning than doing.
while I stripped everything off the floors in the living quarters except the hydraulic wench, my little brother tackled the engine and drivetrain.


I think his job is easier. Too bad I have no mechanical skills.
By the time the interior pieces and the rubber floor was all extricated, I realized there was way too much rust on the bus to leave the garage section untreated. Problem was the previous owner was welding in section as he went along so there was no rhyme or reason to how to remove any section whole. In my frustration, I finally decided to just start from the front and use my angle grinder to cut it all up .


While up under the drivetrain my little brother noticed the steer tires were riddled with 6-8" cracks (dry rot). I can't believe he didn't see that when we inspected the bus before we bought it. So I has to replace the front tires immediately. MY SECOND BUS ADVENTURE. I found the tires 30 miles from home, but they wouldn't install them. I found a guy to do the install within a mile of home so I drove the bus to get the tires and back sweating the whole way - damn bus never got over 50 MPH.
On the way back from getting the tires I had my first incident. Self inflicted, I might add. I evidently didnt completely release the parking brake so 10 miles down the road, I thought the tires were on fire. After pulling off the interstate and a quick inspection I soon realized what I had done. A few pumps and releases on the parking brake and I was back on the road again a little more wiser. I actually hit 55MPH on the way back.

New steer tires installed. Poor guy who worked on them definitely earned every cent. The old tires are probably 10 years old.
Out of curiosity, I crawled under the bus last week to see how the tailgate worked. Boy was that a disaster! The previous owner used a 1/2 " axle with lawnmower tires in the frame rails to steady the two hydraulic cylinders that push the door closed. That poor axle was bent in three locations, both cylinders were leaking and the guide wires were saddled backwards. Time to rip it all out and start over. A week and $400 later, his is out and my new cylinders and 1" axle with steel wheels is in.


Glad I did that when I did. The old system looked like it had already exceeded its lifespan. And I needed the tailgate 100% reliable for hauling. First trip next week will be to scrap all the metals I cut out and junkyard for the rest.

Finished stripping the garage floor couple days ago. Took out all the interior side walls and insulation.


Now to get motivated to remove the glue and rust. Then the fun stuff can begin. My latest iteration of the layout takes some room out of the garage so I can install full walls between the garage and the bathroom and another between the bath and the living quarters.

I also moved the sink next to the shower to cut down on plumbing. The more measurements I take the less confident I am that it all will fit. I figure worse case scenario, I can get away with shortening the couch and dinette (I'm OK with having my feet dangling off the edge of the beds).
I also found a compact kitchen that was interesting.
 Anybody on here ever heard of an Avanti CK302 compact kitchen http://www.appliancesconnection.com/...2-i289726.html?
 I like the concept, but it's expensive and looks cheap. Hmmm.... I also don't know how I feel about the tiny fridge and it being all electric.
I really don't feel like I've accomplished much (knowing how much more needs to be done). But, I'll keep plugging away. I was hoping for it to be liveable and road ready by August - I just don't see that happening now. Shooting for being ready by the October Texas Mile event where I have to defend my record. I really need to find somebody local to me with electrical experience. I have no clue how all that should be setup.
Enough for now. Today I'm taking the day off for a Bar-B-Q and rest my weary bones.
|
|
|
|
|
05-24-2014, 03:39 PM
|
#14
|
|
Skoolie
Join Date: Apr 2014
Posts: 151
|
Re: ET - ELWOOD Transport
I am thinking about getting one of these too.
http://www.appliancesconnection.com/ava ... review_tab
This one has reviews on it, and most people seem happy. It does look kind of cheap though, and the price is a little high.
|
|
|
|
|
05-25-2014, 09:26 AM
|
#15
|
|
Bus Nut
Join Date: Jun 2013
Location: Southern Maine
Posts: 337
|
Re: ET - ELWOOD Transport
I noticed in your build you don't have any dedicated sleeping quarters. Have you checked out the Camel/Goat bus? http://www.skoolie.net/forum/viewtopic.php?f=9&t=11053
He is doing a similar set up for his jeep and he managed to fit a bed above his hood, I am sure with the raised roof you could do the same.
As far as the compact kitchen, I was searching CL for a stove an fridge for the house we are buying and ran across quite a few of those. People here seem to have used them in their lake and or hunting camps. Maybe you can find 1 local to you used and see it in person. Just a thought....looks like your going to have a great rig when done..... Good luck!
|
|
|
|
|
05-26-2014, 01:53 AM
|
#16
|
|
Skoolie
Join Date: Apr 2014
Location: St Louis Metro
Posts: 110
Year: 1978
Coachwork: Wayne
Chassis: Lifeguard
Engine: 366 Chevy
|
Re: ET - ELWOOD Transport
Quote:
|
Originally Posted by Malkieri
I noticed in your build you don't have any dedicated sleeping quarters. Have you checked out the Camel/Goat bus? http://www.skoolie.net/forum/viewtopic.php?f=9&t=11053
He is doing a similar set up for his jeep and he managed to fit a bed above his hood, I am sure with the raised roof you could do the same.
As far as the compact kitchen, I was searching CL for a stove an fridge for the house we are buying and ran across quite a few of those. People here seem to have used them in their lake and or hunting camps. Maybe you can find 1 local to you used and see it in person. Just a thought....looks like your going to have a great rig when done..... Good luck! |
The couch converts to a full bed and the dinette drops down into a twin bed. If need be, the nav chair also fully reclines. I don't anticipate having more than four people sleeping in the bus at any given time. More than likely, it'll be my gal and I or my crew chief and I ... and that's only for a weekend (four days at most). For the GF, I have an air mattress to go on the couch. My crew chief gets a sleeping bag for the dinette, he he ;)
The more I think about the compact kitchen, the less I like it. Too many compromises, although I did find some with gas range and oven as well as some with small freezers. But the refrigerators are electric only and the water is unheated with nowhere to install a separate heater in the cabinet. I'll keep an open mind till I can actually get my hands on one.
|
|
|
|
|
05-26-2014, 08:17 AM
|
#17
|
|
Bus Crazy
Join Date: Oct 2009
Location: Moodus, Ct.
Posts: 1,062
Year: 1996
Coachwork: Champion
Chassis: Ford e-450
Engine: 7.3 Powerstroke
Rated Cap: 14
|
Re: ET - ELWOOD Transport
As someone else who's bus exsists as a race car hauler/weekender, you don't spend much time IN the bus all weekend. We do have the mama required heater (salvaged from a pop up) + camp toilet, we use a portable gas grill http://www.amazon.com/Weber-50060001-Li ... eber+grill (great grill-highly recommended) and have a small microwave powered off an inverter. A couple of Coleman coolers (I've emptied ice out of them on Weds-after filling it the prior Friday!) keep things cold. I would also suggest an awning.
|
|
|
|
|
11-18-2014, 02:07 PM
|
#18
|
|
Skoolie
Join Date: Apr 2014
Location: St Louis Metro
Posts: 110
Year: 1978
Coachwork: Wayne
Chassis: Lifeguard
Engine: 366 Chevy
|
Re: ET - ELWOOD Transport
Quote:
|
Originally Posted by sdwarf36
As someone else who's bus exsists as a race car hauler/weekender, you don't spend much time IN the bus all weekend. We do have the mama required heater (salvaged from a pop up) + camp toilet, we use a portable gas grill http://www.amazon.com/Weber-50060001-Li ... eber+grill (great grill-highly recommended) and have a small microwave powered off an inverter. A couple of Coleman coolers (I've emptied ice out of them on Weds-after filling it the prior Friday!) keep things cold. I would also suggest an awning. |
You're right about the time in the bus at events. The heater - I NEED! I'll go with a composting toilet - that eliminates the need for a black water tank. I will have a generator to power electricals such as microwave, TV, AC, tools, etc. I'm leaning toward all electrical if I can get a big enough generator - install and plumbing propane seems like a waste. Love the outdoor grille idea, I'll look into it. The awning is a must. One came with the bus, but I haven't played with it yet.
Had an event last month, but the bus wasn't ready and realized I really, really, really want a roof deck.
|
|
|
|
|
11-18-2014, 06:50 PM
|
#19
|
|
Skoolie
Join Date: Apr 2014
Location: St Louis Metro
Posts: 110
Year: 1978
Coachwork: Wayne
Chassis: Lifeguard
Engine: 366 Chevy
|
Re: ET - ELWOOD Transport
So it's been a while and not much progress has been made -life keeps getting in the way.
As usual, I'm building things backwards, i.e., I want the garage finished first so I gutted the bus.
 

Took the excess to the dump/metal recycler.
Went out and bought new tires.

Somewhere along the way, the rear brakes seized and I had to invest in a full set of brakes, rotors, calipers, and lines. OUCH! That really hurt the budget and killed my enthusiasm. My little brother was working on the engine and drivetrain for a bit. He got the bus doing 60MPH on flat ground,ut I kept telling him I needed more cause that was empty and it'll be 7ooolbs heavier with the car and RV stuff.   He swears there's a governor, but can't figure it out. I have to remind him every couple weeks that I need more power.
After the gutting was complete, I painted the garage ceiling and floor, then started on the insulation. 
  
Since the material cam in early I also test-fit the flooring - a grey (to match the ceiling) diamond plate style anti-fatigue vinyl floor.
  
The flooring is going to look great, but I realized later that not much of it will be seen. I needed it for when I store stuff under the car and it'll keep the area tidy in case the car leaks any fluids, etc and dust an dirt will clean up easily.
Next step was the window deletes for the back two windows and then the walls went up.
 
But, of course, another issue arises. I sealed and painted the garage half of the bus. Seals are good and there's only two coats of buskote knowing it'll need at least 4. Yet, no matter what I do, I can't get the damn skylights to seal.  I've got one really bad drip and two more that are insidiously slow and hard to track down. Everytime it rains, I go out and spend an hour or two trying to track then down, but no luck so far.
Last month, in an attempt to motivate myself I got with a graphics designer and started working on the exterior graphics.  And to think when I originally to that pic, I snickered at the guy in the right of the pic with his U-Haul and open trailer for his car. I thought, "Wait till I finish this, it'll put traveling like that to shame." Little did I know how much that would take.
Well, that didn't do much for me so just before my last race I test fit the car in the back.

Then I drove the car 1100miles, set a new Land Speed Record for the car and drove it another 1100 miles home.
 I never want to do that again. So the bus must get done!
This month I picked up the seesaw trailer from Sikeston, 180 miles away.

It fit perfectly and once I build its foundation the car will go all the way in and I can figure out where I want my wall sepating the garage from the RV sections. 

Got it home and tested the tilt.
 
It only takes 180lbs forward of the axle which is perfect: car drives on with trailer flat on the dovetail and a foot after rear wheels come onboard the front pass the pivot, and the whole thing pivots flat.
Still plenty to do, but always moving forward. I'll be tying the pivot to the frame of the bus this month and hopefully by Christmas have the wall up and starting on the front section.
|
|
|
|
|
11-18-2014, 08:25 PM
|
#20
|
|
Bus Geek
Join Date: Apr 2012
Location: So Cal
Posts: 3,231
Year: 1935
Coachwork: Superior
Chassis: Chevy
Engine: 317 ci/tid / Isuzu
|
Re: ET - ELWOOD Transport
Way cool The tilt gizmo is a great idea.You probably have all this figured out on paper etc. but being old skool like I am I couldn't resist taking the bus and the Caddy to a truck scale and finding out what the actual weight distribution is with the car loaded. Once you know this you will never have to worry about brakes and weight and whether you can pull a trailer etc. Jack
|
|
|
|
|
|
 Posting Rules
|
You may not post new threads
You may not post replies
You may not post attachments
You may not edit your posts
HTML code is Off
|
|
|
|
 » Recent Threads
 |
|
|
|
|
|
|
|
|
|
|
|
|
|
|
|
|
|
|
|
|
|
|
|
|
|
|
|
|
|
|
|
|
|
|
|
|
|


 Linear Mode

