Journey with Confidence RV GPS App RV Trip Planner RV LIFE Campground Reviews RV Maintenance Take a Speed Test Free 7 Day Trial ×


Reply
 
Thread Tools Display Modes
 
Old 01-12-2015, 04:20 AM   #1
Mini-Skoolie
 
Join Date: Jan 2015
Location: Anchorage, Alaska
Posts: 15
Year: 1999
Coachwork: Thomas
Chassis: International 3800
Engine: T444E
Rated Cap: 75
Last Frontier Adventure Club Bus

In February of 2014 my wife and I bought our bus.

view the video:
http://youtu.be/fjO-AaeRxlg


The bus was pretty much a blank slate. The former owner had purchased it to move their belongings from Pennsylvania to Alaska with, so they had even removed all but three rows of the seats.


Unfortunately though, he'd removed them by pulling the bolts out on the wall side and then just snapping off the legs where they went in to their rusty brackets on the aisle side. He did this of course because to remove the bolt you need one person underneath the bus and one inside it. Combine that with the rust proofing coating on the bottom of the bus, and it just ends up being easier to just grind them off.


Next we built a bed platform at the very back of the bus

view the video:
http://youtu.be/88o3NvdhSJg


We had to kind of rush along for a while once the snow melted, to get the bus ready for a trip in May, by which we needed it to legally be an RV so we could insure it.

video: http://youtu.be/lBsKgzPYNBY


Our trip was actually to take a group of people (including Christopher McCandless' sister Carine McCandless) to hike out twenty miles to see another famous bus.


Bus 142 has seen a lot more wear than mine. Fun fact though, bus 142 was originally a school bus as well (judging by the yellow paint showing through the green) It then became a fairbanks city bus, and then in the 1960s Jess Mariner turned it into a bus house and towed it out into the wilderness.

I'll post some more photos up to flickr so I can share them here soon. We've actually made a lot of progress on our build: bedroom, bathroom, dining booth, couch, running water, etc... In the meantime here's the links to our other YouTube video updates:

JUNE 2014 UPDATE
http://youtu.be/z-u63SzGynU
JULY 2014 UPDATE
http://youtu.be/Y4y1zfBXEbA
AUGUST 2014 UPDATE
http://youtu.be/spy8gQqSWBA
SEPTEMBER 2014 UPDATE
http://youtu.be/TQl6--Mhy-E
OCTOBER 2014 UPDATE
http://youtu.be/8Ln4ydvshO4
DECEMBER 2014
http://youtu.be/ePvsJGDM-k8

LFadventureCLUB is offline   Reply With Quote
Old 01-12-2015, 08:47 AM   #2
Bus Geek
 
bansil's Avatar
 
Join Date: Nov 2011
Location: MNT CITY TN
Posts: 5,158
Welcome
And great pictures
__________________
Our build La Tortuga
Accept the challenges so that you can feel the exhilaration of victory.
George S. Patton
bansil is offline   Reply With Quote
Old 01-12-2015, 09:03 AM   #3
Bus Geek
 
EastCoastCB's Avatar
 
Join Date: Sep 2014
Location: Eustis FLORIDA
Posts: 23,764
Year: 1999
Coachwork: Thomas
Chassis: Freighliner FS65
Engine: Cat 3126
Rated Cap: 15
Welcome, from the Sunshine State!
Seen you folks on youtube for a while now.
EastCoastCB is offline   Reply With Quote
Old 01-12-2015, 09:42 AM   #4
Bus Nut
 
Join Date: Sep 2014
Posts: 546
Welcome, nice build!
dond is offline   Reply With Quote
Old 01-15-2015, 08:40 AM   #5
New Member
 
Join Date: Jan 2015
Posts: 3
Wait a second....you hiked with Chris McCandless' sister to the place where his story ended?!? What was that like?
jadam318 is offline   Reply With Quote
Old 01-23-2015, 03:57 AM   #6
Mini-Skoolie
 
Join Date: Jan 2015
Location: Anchorage, Alaska
Posts: 15
Year: 1999
Coachwork: Thomas
Chassis: International 3800
Engine: T444E
Rated Cap: 75
Quote:
Originally Posted by jadam318 View Post
Wait a second....you hiked with Chris McCandless' sister to the place where his story ended?!? What was that like?
We did! That was a pretty intense experience. That was the third trip I made to bus 142 and it will probably be my last. Carine was, expectedly, pretty emotional when we got to the Teklanika River. Luckily for us it was very low both directions, thanks to some planning and keeping an eye on the weather. We did a video of that trip as well: http://youtu.be/jMN52iJV3qY
LFadventureCLUB is offline   Reply With Quote
Old 01-23-2015, 04:00 AM   #7
Mini-Skoolie
 
Join Date: Jan 2015
Location: Anchorage, Alaska
Posts: 15
Year: 1999
Coachwork: Thomas
Chassis: International 3800
Engine: T444E
Rated Cap: 75
I'm still working on getting together some photos of the build between when we just started and now, but for now here's a link to this month's update video: http://youtu.be/VjH3xFn_Y48


Getting the roof rack going was a challenge. I was worried that big sheet metal screws directly into the cross members, and silicone, wouldn't be enough to hold the floor flanges down tightly, but it is totally rock solid.
LFadventureCLUB is offline   Reply With Quote
Old 01-23-2015, 05:36 AM   #8
Bus Geek
 
EastCoastCB's Avatar
 
Join Date: Sep 2014
Location: Eustis FLORIDA
Posts: 23,764
Year: 1999
Coachwork: Thomas
Chassis: Freighliner FS65
Engine: Cat 3126
Rated Cap: 15
Very cool, yall.
EastCoastCB is offline   Reply With Quote
Old 01-23-2015, 07:42 AM   #9
New Member
 
Join Date: Jan 2015
Posts: 3
Quote:
Originally Posted by LFadventureCLUB View Post
We did! That was a pretty intense experience. That was the third trip I made to bus 142 and it will probably be my last. Carine was, expectedly, pretty emotional when we got to the Teklanika River. Luckily for us it was very low both directions, thanks to some planning and keeping an eye on the weather. We did a video of that trip as well: http://youtu.be/jMN52iJV3qY
I just watched that video. Thanks for the link, by the way. What a cool experience! I'm really glad you documented that.
jadam318 is offline   Reply With Quote
Old 01-25-2015, 07:22 PM   #10
Mini-Skoolie
 
Join Date: Jan 2015
Location: Anchorage, Alaska
Posts: 15
Year: 1999
Coachwork: Thomas
Chassis: International 3800
Engine: T444E
Rated Cap: 75
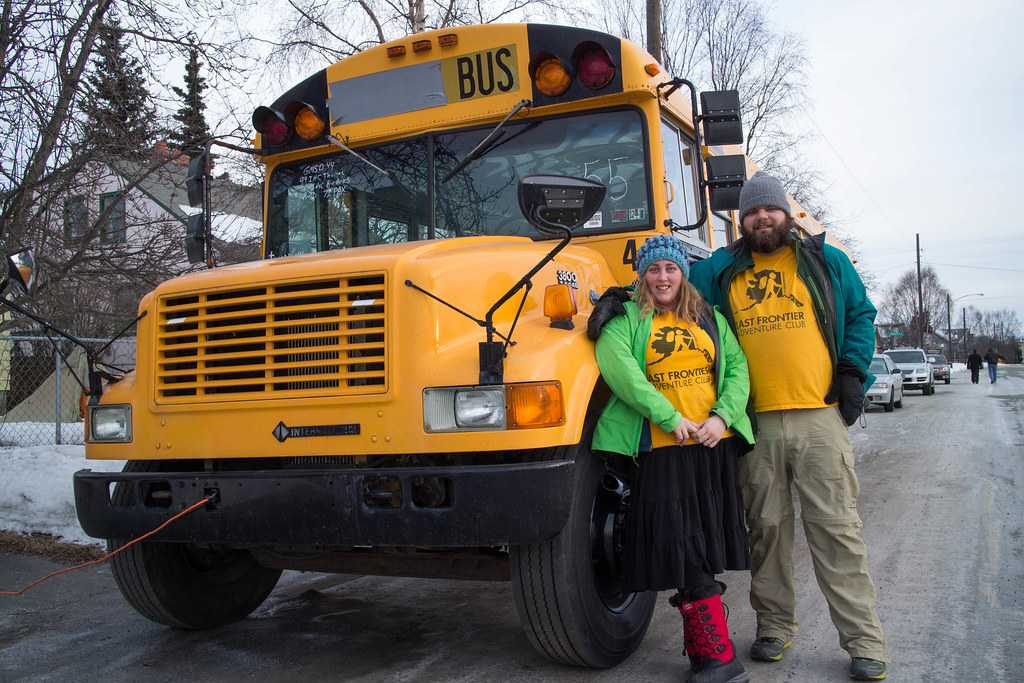
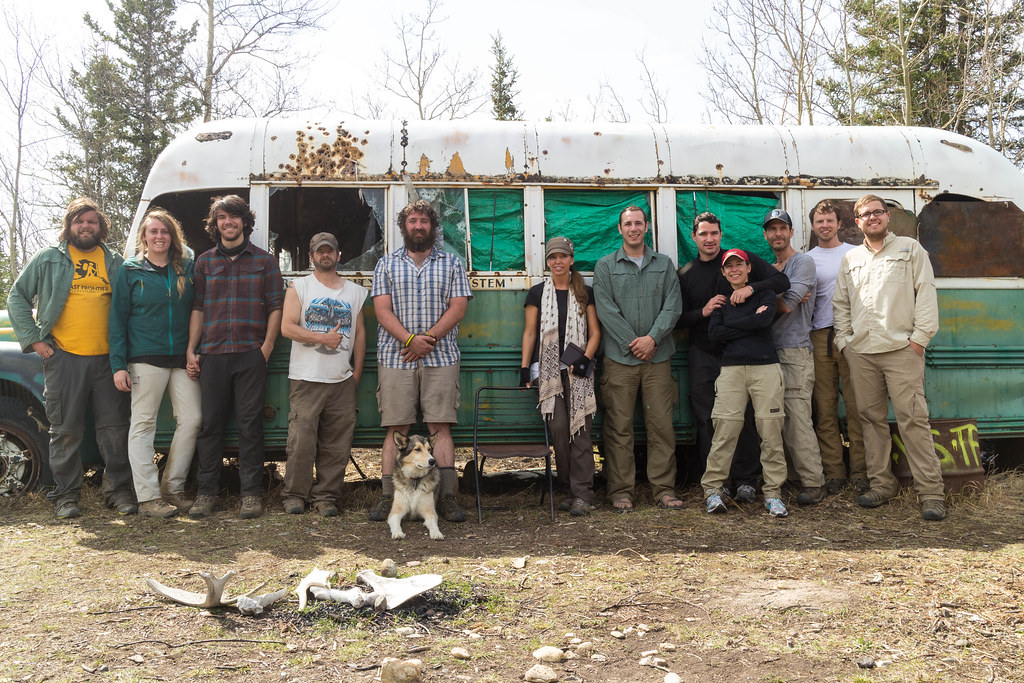
Build pictures so far:


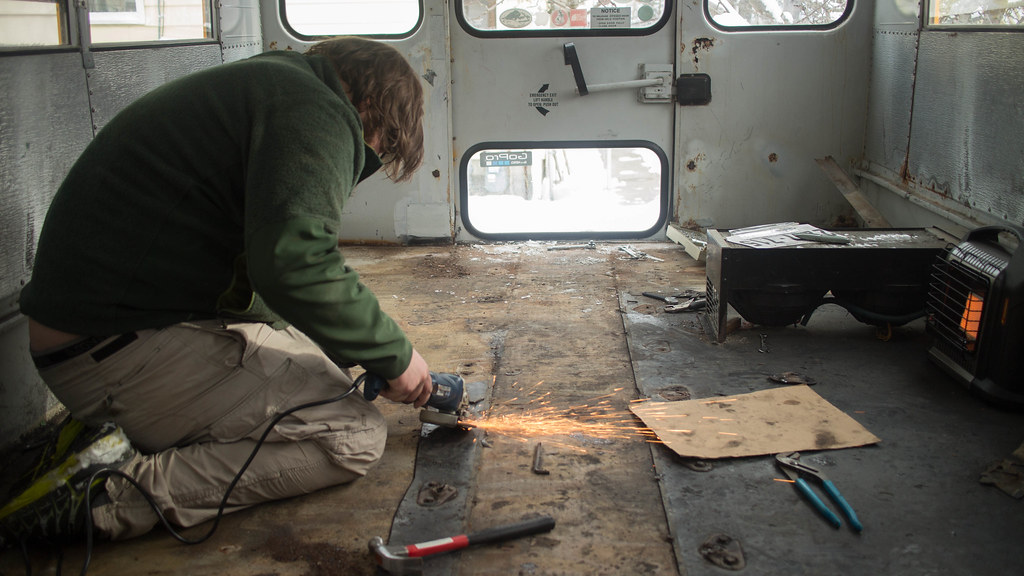
A huge amount of time was spent removing the bolts that held the brackets for the seats to the floor. I started this project not knowing very much about a lot of things, and made the mistake of trying to grind them off instead of using a thinner disc and cutting them off.


The beginnings of the bed platform

Removing windows was kind of a scary prospect until I actually did it. Popping the four clips off surrounding each window and cutting the caulking was all that was needed.


We decided we didn't need the flashers. We had ideas about making sweet flashing party lights or something using different colors, but we decided for the sake of simplicity, and to reduce the risk of getting pulled over as often, we'd just remove them.


We covered the window holes with thing sheet steel, attaching the sheets with sheet metal screws and sealing with silicone.


The hole for the flappy stop sign and the flasher holes got the same treatment.


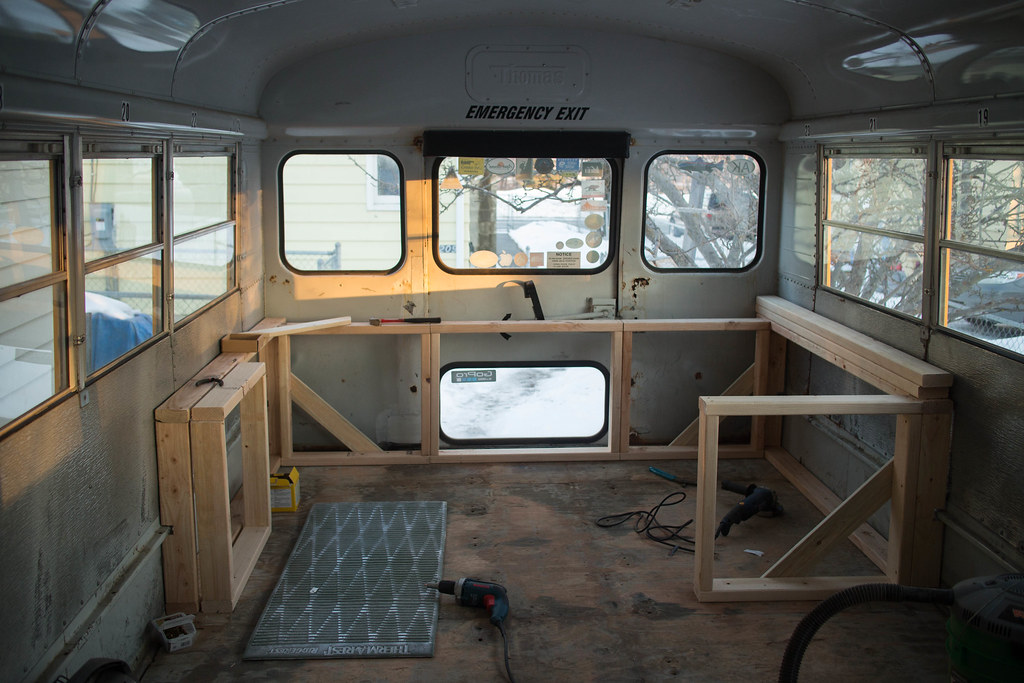
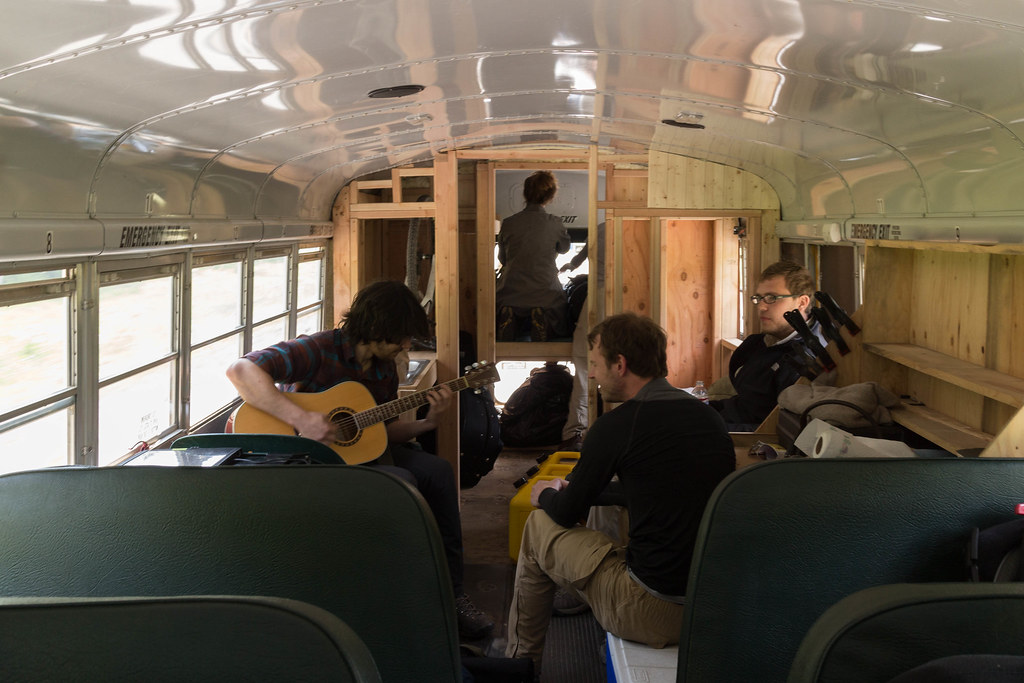
We began to frame out the bathroom. The wall that would house the plumbing for the shower and the one that would house electric outlet boxes are framed with 2x4s, and the rest are framed with 2x3s to shave weight.


The previous owner had covered the SCHOOL BUS decals with duct tape before driving the bus up to Alaska. Between the duct tape and the decals themselves, I had a hell of a time getting them off. In the end it took a blow torch, a scraper, a wire brush, and a lot of acetone to get them removed.


A surprising percentage of the lumber used in the bus was hauled this way.


Ryan's bunk over the foot of our bed.


Some creative framing to accommodate the wheel well.


We ended up using a lot of tongue and groove because it was the easiest way to follow the contours of the ceiling, it's light and it looks good.


Painting has begun! We went with flat black for the hood to keep glare down. We went with black for the front and back of the roof section so that eventually we could put some white vinyl decals up there.


So much time went into sanding every inch of the bus before painting.
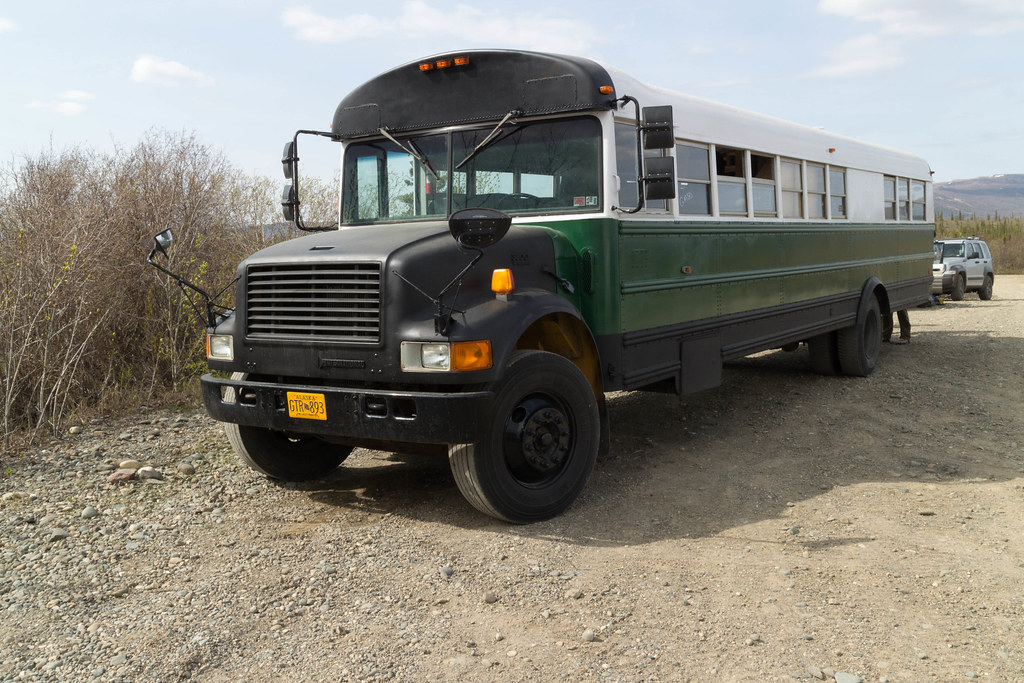

Complete Paint Job


The sink installed in it's temporary location, so we could meet the requirements to get our RV title/registration from the state of Alaska.


The urine-separating/solid-composting toilet.


A robin I caught trying to make a nest inside of the bus. He was released after the photo.


The license plate we received after passing our RV conversion inspection


Finally, a way to lock the bus.


Installing the bluetooth stereo deck made working in the bus much more enjoyable.


Cubbies above the toilet


Bedside table/drawer in the bedroom


Installing some flooring in the bathroom and bedroom


privacy film over the bathroom window


Building hollow core doors for the bedroom and bathroom


Vent system for the composting toilet, built with a small PC case fan.


Our couch. It opens up for storage underneath, and the left arm opens up to house the inverter. Cup holders and small storage spaces are also built into the top of both arms.


I built a four-spot USB charger into the bedside table in the bedroom. No need for separate chargers for the cell phones. I can just plug straight into the table.


Jenna made curtains for the bedroom.


a 110v plug in the bedroom
LFadventureCLUB is offline   Reply With Quote
Old 01-25-2015, 07:27 PM   #11
Mini-Skoolie
 
Join Date: Jan 2015
Location: Anchorage, Alaska
Posts: 15
Year: 1999
Coachwork: Thomas
Chassis: International 3800
Engine: T444E
Rated Cap: 75

The bathroom coming together. Note the box sticking out of the wall in the upper right. That was a fan system to pull hot air from above a wood stove to a toe-kick register in the bedroom. Now that we've abandoned the idea of a wood stove in favor of a small propane furnace, we've removed that box and come up with another idea for that wall.


We got a bunch of very old skis for free from REI and decided to use them as trim, since our 'theme' for the bus was "mountaineering-hut on wheels."


Installing some seat-belts for the couch. Safety first.


Building the dinette benches and table. The table can be lowered to become a bed by placing the back cushions in the center.


Medicine cabinet in the bathroom.


A small closet built where the sink used to be.


Installing a roof rack.


I built this cubby/shelf to replace the flappy door to the 'emergency equipment access.'


The cabinets and counters I built last week.

So that about does it. I think I'm caught up now. I'll continue to post updates as the project progresses.
LFadventureCLUB is offline   Reply With Quote
Old 01-26-2015, 03:17 AM   #12
Bus Crazy
 
Join Date: Jul 2011
Location: Winlcok, WA
Posts: 2,233
You may find that using silicone was a bad idea for a sealer.

Using butyl rubber tape caulk would have worked better--it won't dry up nearly as fast and UV won't break it down.
cowlitzcoach is offline   Reply With Quote
Old 01-26-2015, 09:10 AM   #13
New Member
 
Join Date: Oct 2014
Posts: 1
Year: 92
Coachwork: Ford
Chassis: B700
Engine: 5.9 Cummins
Hello,
We love the design of your skoolie. Especially your dinette area that turns into a bed. We would like to make the same thing. Do you have any plans that you would be willing to share? Happy adventures!
Thank you,
Jonas
powderzog is offline   Reply With Quote
Old 01-26-2015, 05:05 PM   #14
Bus Nut
 
Hank's P-O-S's Avatar
 
Join Date: Jun 2014
Location: MB
Posts: 279
Year: 1997
Coachwork: Tomas
Chassis: International
Engine: T444e
Rated Cap: 54
How did you attach your roof rack? In your YouTube video you said you screwed in on? Like as in self taping metal screwed or did ya mean bolts? I've been thinking about something like that myself...
Hank's P-O-S is offline   Reply With Quote
Old 01-27-2015, 09:10 PM   #15
Bus Geek
 
Tango's Avatar
 
Join Date: Mar 2011
Location: Houston, Texas
Posts: 8,462
Year: 1946
Coachwork: Chevrolet/Wayne
Chassis: 1- 1/2 ton
Engine: Cummins 4BT
Rated Cap: 15
WOW! --- lookin' great guys! Keep up the good work and the pix.
Tango is offline   Reply With Quote
Old 01-28-2015, 01:00 AM   #16
Mini-Skoolie
 
Join Date: Jan 2015
Location: Anchorage, Alaska
Posts: 15
Year: 1999
Coachwork: Thomas
Chassis: International 3800
Engine: T444E
Rated Cap: 75
Quote:
Originally Posted by powderzog View Post
Do you have any plans that you would be willing to share?

I don't yet, but I will draw up a floor plan.


Sent from my iPhone using Tapatalk
LFadventureCLUB is offline   Reply With Quote
Old 01-28-2015, 01:03 AM   #17
Mini-Skoolie
 
Join Date: Jan 2015
Location: Anchorage, Alaska
Posts: 15
Year: 1999
Coachwork: Thomas
Chassis: International 3800
Engine: T444E
Rated Cap: 75
Quote:
Originally Posted by Hank's P-O-S View Post
How did you attach your roof rack? In your YouTube video you said you screwed in on? Like as in self taping metal screwed or did ya mean bolts? I've been thinking about something like that myself...

I screwed the floor flanges directly to the cross-members of the roof using #14 self tapping sheet metal screws. It's super solid as far as I can tell. Those #14s are really big screws.


Sent from my iPhone using Tapatalk
LFadventureCLUB is offline   Reply With Quote
Old 01-28-2015, 08:33 AM   #18
Bus Nut
 
Join Date: Dec 2014
Location: Florida
Posts: 584
Year: 1988
Coachwork: Blue Bird
Chassis: I.H.
Engine: DT360
Wow, that is great progress! Looks real good. I was starting to think about the space I have and if it is enough but you made it look roomy. I can't wait to dive in and add an armoire I found at the Restore to fit over the wheel well.
HolyBus is offline   Reply With Quote
Old 01-28-2015, 09:18 AM   #19
Bus Geek
 
EastCoastCB's Avatar
 
Join Date: Sep 2014
Location: Eustis FLORIDA
Posts: 23,764
Year: 1999
Coachwork: Thomas
Chassis: Freighliner FS65
Engine: Cat 3126
Rated Cap: 15
Quote:
Originally Posted by HolyBus View Post
Wow, that is great progress! Looks real good. I was starting to think about the space I have and if it is enough but you made it look roomy. I can't wait to dive in and add an armoire I found at the Restore to fit over the wheel well.
Well to be fair they are showing what they've already done.
This bus is built. Although, buses are always "under construction".
EastCoastCB is offline   Reply With Quote
Old 01-28-2015, 12:41 PM   #20
Bus Nut
 
Join Date: Jul 2014
Posts: 722
Year: 1998
Coachwork: Bluebird
Chassis: TC2000 RE
Engine: 8.3l Cummins
Rated Cap: 78
I like your build! You might consider using sikaflex 295 (it's uv stable) instead of silicone caulk for sealing your gaps. I think you can get that stuff at many marine boating places.

Do you have any more details related to the composting toilet? I'm trying to decide between buying a one ready made (like the nature's head) or just building my own (like yours!)
aaronsb is offline   Reply With Quote
Reply

Tags
3800, alaska, family, green

Thread Tools
Display Modes

Posting Rules
You may not post new threads
You may not post replies
You may not post attachments
You may not edit your posts

BB code is On
Smilies are On
[IMG] code is On
HTML code is Off
Trackbacks are Off
Pingbacks are Off
Refbacks are Off


» Featured Campgrounds

Reviews provided by

Powered by vBadvanced CMPS v3.2.3

All times are GMT -5. The time now is 08:16 PM.


Powered by vBulletin® Version 3.8.8 Beta 4
Copyright ©2000 - 2024, vBulletin Solutions, Inc.