 |
|
 04-05-2018, 01:18 PM
|
#161
|
|
Bus Geek
Join Date: Dec 2016
Location: Weeki Wachee, FL
Posts: 3,056
Year: 1997
Coachwork: Bluebird
Chassis: TC2000 FE
Engine: Cummins 5.9
Rated Cap: 72
|
My bus has a spare tire compartment, so storage isn't an issue! Plenty of room to also keep the bottle jack and wheel chocks in there too. All the tires on this bus are "all position" as well.
If you followed my short bus thread, you already know I blew out both rear tires on the passenger side of that bus on our first highway trip, and were stuck on the inside shoulder of a very busy highway waiting for a roadside tire service to rescue us. THat sucked and I intend to avoid it if possible!
Plus having this equipment allows me to service my own brakes and steering components!
|

|

|
|
04-11-2018, 06:52 PM
|
#162
|
|
Bus Geek
Join Date: Dec 2016
Location: Weeki Wachee, FL
Posts: 3,056
Year: 1997
Coachwork: Bluebird
Chassis: TC2000 FE
Engine: Cummins 5.9
Rated Cap: 72
|
Spent some time on the roof today! There were some rusty spots I discovered underneath the vinyl wrap, Cleaned them up and applied Ospho. Hoping to paint the center of the roof tomorrow, between the rub rails. The edges of those rails were a little orange so I put Ospho in a squirt bottle and sprayed a bunch of it into the seam. Hopefully that does the trick, I don't plan on pulling those up!
My marker lights in the front and back seem to have holes in the top on the lenses. They kind of look like they melted through. Weird stuff, but it's an excuse to replace them all with LED units.
Bus is still running great! My brakes actually got better in the last month or so. Really weird, they felt awful and wooden and there was no real travel on the pedal, just more pressure meant more brake. Now the pedal moves and the brakes are pretty linear. Still don't feel as good as the Sport BUs but much improved for sure. Maybe my excessive use or air blew some dirt out or something.
Most of the wrap is removed, but what's left will take time. That really is a big job, and i can see why people would just paint over it! We've probably spent as much time on wrap removal as everything else we've done combined. We have our paint scheme and colors chosen so I'll be painting as I get areas ready for it. The roof must be done first so I can start attaching things to it!
We also took down some more ceiling panels. I think there are 3 remaining.
So our plan was to delete 16 of the 22 side windows, but the level of effort involved i doing that is a lot higher than I anticipated. i have 2 of them deleted and am on the fence about doing 2 more... Mostly because if I do I can swap them around so that all the emergency side windows are removed, and I can have window screens on every window. But as easy as the inside rivets are, the outside ones are a different animal entirely.
Once the roof is done and rails mounted, I'll do a leak test.. Any issues there will be fixed, and then we officially switch from removing bus parts to adding skoolie parts! Insulation!!!!
Some pics in the next post.
|
|
|
|
|
04-11-2018, 06:54 PM
|
#163
|
|
Bus Geek
Join Date: Dec 2016
Location: Weeki Wachee, FL
Posts: 3,056
Year: 1997
Coachwork: Bluebird
Chassis: TC2000 FE
Engine: Cummins 5.9
Rated Cap: 72
|
|
|
|
|
|
04-11-2018, 06:58 PM
|
#164
|
|
Bus Geek
Join Date: Sep 2017
Location: Owasso, OK
Posts: 2,627
Year: 1999
Coachwork: Thomas
Chassis: Saf-T-Liner MVP ER
Engine: Cummins 6CTA8.3 Mechanical MD3060
Rated Cap: 46 Coach Seats, 40 foot
|
You bought the "Boeing" bus, right?
What is its overall condition?
|
|
|
|
|
04-11-2018, 07:26 PM
|
#165
|
|
Bus Geek
Join Date: Dec 2016
Location: Weeki Wachee, FL
Posts: 3,056
Year: 1997
Coachwork: Bluebird
Chassis: TC2000 FE
Engine: Cummins 5.9
Rated Cap: 72
|
Yep that's the one.
Overall I'm very happy with it. Everything works, the level of rust is well below the point I would call interesting, and my list of actual repairs that weren't upgrades or part of the conversion is pretty darn short. Off the top of my head, just the one tire.
|
|
|
|
|
04-12-2018, 08:05 AM
|
#166
|
|
Bus Geek
Join Date: May 2009
Location: Columbus Ohio
Posts: 18,848
Year: 1991
Coachwork: Carpenter
Chassis: International 3800
Engine: DTA360 / MT643
Rated Cap: 7 Row Handicap
|
how do you re-torque the lugs and know they are at the correct amount?
-Christopher
|
|
|
|
|
04-12-2018, 08:57 AM
|
#167
|
|
Bus Geek
Join Date: Dec 2016
Location: Weeki Wachee, FL
Posts: 3,056
Year: 1997
Coachwork: Bluebird
Chassis: TC2000 FE
Engine: Cummins 5.9
Rated Cap: 72
|
Quote:
Originally Posted by cadillackid

how do you re-torque the lugs and know they are at the correct amount?
-Christopher
|
Given the circumstances in which you'd be changing a tire, use the impact and estimate it and have it corrected when you get to the tire shop. The tool box still needs a few more things to be complete!
|
|
|
|
|
04-12-2018, 09:19 AM
|
#168
|
|
Skoolie
Join Date: Oct 2015
Location: League City, Texas
Posts: 221
|
Quote:
Originally Posted by brokedown
Given the circumstances in which you'd be changing a tire, use the impact and estimate it and have it corrected when you get to the tire shop. The tool box still needs a few more things to be complete!
|
What size are the lug nuts? Take a look at Harbor Freight Tools for a torque wrench, extension and deep well impact sockets for the lug nuts... You'll probably want a breaker bar as well...
I know HF isn't top tier stuff, but the Pittsburgh tools have proven pretty reliable for me over the years, and I know a few guys at least doing automotive work, where they are hanging in there right along side Snap On with no real issues...
|
|
|
|
|
04-12-2018, 09:24 AM
|
#169
|
|
Bus Geek
Join Date: Sep 2017
Location: Owasso, OK
Posts: 2,627
Year: 1999
Coachwork: Thomas
Chassis: Saf-T-Liner MVP ER
Engine: Cummins 6CTA8.3 Mechanical MD3060
Rated Cap: 46 Coach Seats, 40 foot
|
Quote:
Originally Posted by dbhost
What size are the lug nuts? Take a look at Harbor Freight Tools for a torque wrench, extension and deep well impact sockets for the lug nuts... You'll probably want a breaker bar as well...
I know HF isn't top tier stuff, but the Pittsburgh tools have proven pretty reliable for me over the years, and I know a few guys at least doing automotive work, where they are hanging in there right along side Snap On with no real issues...
|
The problem is the 450 to 500 ft lb.
Getting it accurate requires a torque multiplier or accurate air-impact wrench.
Getting it close enough to drive to a tire shop can be done by marking all the nut positions, and the wheel orientation before you remove them.
One of the cheaper nut-lug removal tools can be use with a regular torque wrench if you know the multiplication factor of the tool.
|
|
|
|
|
04-12-2018, 09:44 AM
|
#170
|
|
Bus Geek
Join Date: Dec 2016
Location: Weeki Wachee, FL
Posts: 3,056
Year: 1997
Coachwork: Bluebird
Chassis: TC2000 FE
Engine: Cummins 5.9
Rated Cap: 72
|
Short bus lug nut is 1 5/16, big bus is 1 1/2 inch.
I use an adapter from 1/2 drive wrench to 3/4 drive socket.
I got a Pittsburgh set of 3/4 drive SAE sockets, but they're not quite deep enough for the big bus. Two of my lugs per wheel are a couple inches longer for purposes of holding the hubcaps on. I do not yet have a working setup for those but I'll report back when I do.
|
|
|
|
|
04-12-2018, 12:47 PM
|
#171
|
|
Skoolie
Join Date: Oct 2015
Location: League City, Texas
Posts: 221
|
Quote:
Originally Posted by brokedown
Short bus lug nut is 1 5/16, big bus is 1 1/2 inch.
I use an adapter from 1/2 drive wrench to 3/4 drive socket.
I got a Pittsburgh set of 3/4 drive SAE sockets, but they're not quite deep enough for the big bus. Two of my lugs per wheel are a couple inches longer for purposes of holding the hubcaps on. I do not yet have a working setup for those but I'll report back when I do.
|
Okay THAT might require a specialty socket. Plenty of regular deep well sockets in 1-1/2" all over the place, but extra deep can be problematic...
|
|
|
|
|
04-14-2018, 05:24 PM
|
#172
|
|
Bus Geek
Join Date: Dec 2016
Location: Weeki Wachee, FL
Posts: 3,056
Year: 1997
Coachwork: Bluebird
Chassis: TC2000 FE
Engine: Cummins 5.9
Rated Cap: 72
|
The roof is now painted, and one side is ready for the upper corners to be painted. The wrap is SO MUCH WORK I spent all day on this side above the windows and several hours before today... I think I need s third gallon of white paint too.
We will be white from the bottom of the windows up, except the front which will be a solid color.
 
|
|
|
|
|
04-14-2018, 07:15 PM
|
#173
|
|
Bus Geek
Join Date: Mar 2011
Location: Houston, Texas
Posts: 8,462
Year: 1946
Coachwork: Chevrolet/Wayne
Chassis: 1- 1/2 ton
Engine: Cummins 4BT
Rated Cap: 15
|
Need an really deep socket? Make one!
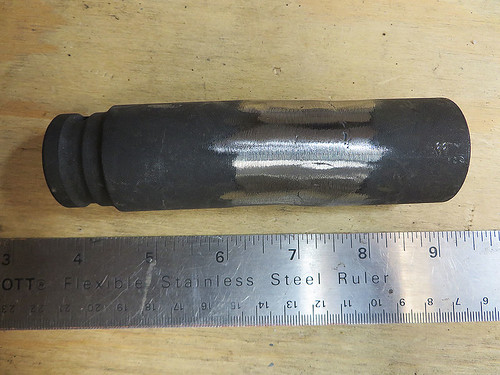
Had a similar issue with my U-Bolt nuts on the rear and had to cut and weld two sockets together. WaaLaa...extra deep.
|
|
|
|
|
04-14-2018, 07:18 PM
|
#174
|
|
Bus Geek
Join Date: Dec 2016
Location: Weeki Wachee, FL
Posts: 3,056
Year: 1997
Coachwork: Bluebird
Chassis: TC2000 FE
Engine: Cummins 5.9
Rated Cap: 72
|
I tried welding the other day and even though it's been like five years since the last time I tried it I haven't gotten any better at it!

|
|
|
|
|
04-14-2018, 07:46 PM
|
#175
|
|
Bus Geek
Join Date: Mar 2011
Location: Houston, Texas
Posts: 8,462
Year: 1946
Coachwork: Chevrolet/Wayne
Chassis: 1- 1/2 ton
Engine: Cummins 4BT
Rated Cap: 15
|
Too funny!  I have only recently gotten beyond my "mud dauber" beads with practice. But hey...I doubt that sucker will ever let loose!
"How do you get to Carnegie Hall?
Practice, practice, practice."
|
|
|
|
|
04-14-2018, 07:49 PM
|
#176
|
|
Bus Geek
Join Date: Dec 2016
Location: Weeki Wachee, FL
Posts: 3,056
Year: 1997
Coachwork: Bluebird
Chassis: TC2000 FE
Engine: Cummins 5.9
Rated Cap: 72
|
I broke it loose pretty easily unfortunately. But then I watched some YouTube videos so next time I think I will be a pro. I am planning to develop basic ability and weeks a few things for the bus... Lots of practice steel that came out!
|
|
|
|
|
04-14-2018, 09:26 PM
|
#177
|
|
Bus Geek
Join Date: Sep 2017
Location: Owasso, OK
Posts: 2,627
Year: 1999
Coachwork: Thomas
Chassis: Saf-T-Liner MVP ER
Engine: Cummins 6CTA8.3 Mechanical MD3060
Rated Cap: 46 Coach Seats, 40 foot
|
Quote:
Originally Posted by brokedown
I tried welding the other day and even though it's been like five years since the last time I tried it I haven't gotten any better at it!
Attachment 20800 |
Well you did keep the arc going long enough to make a bead.
Now all you need to do is move it side-to-side as you weld.
It'll come easily with practise.
|
|
|
|
|
05-07-2018, 02:57 PM
|
#178
|
|
Bus Geek
Join Date: Dec 2016
Location: Weeki Wachee, FL
Posts: 3,056
Year: 1997
Coachwork: Bluebird
Chassis: TC2000 FE
Engine: Cummins 5.9
Rated Cap: 72
|
Big update today!
I reached the point of diminishing returns with the vinyl wrap. It was evident that I could take spent the rest of my life removing it and still have some left. We used stripper, heat, razor scrapers, rubber eraser wheels, wire wheels, and lots of curse words. I got to the point where I needed to move to the next stage and instead of removing paint I started adding it. I did a thick and rough layer of white all over for now.
Then I got back to removing ceiling and wall panels. Air tools ftw. You really need ear protection when you do the walls.
I pulled out the wiring for lights and speakers and interlocks, so now the only wires running back are for the tail and market lights.
I mounted the nice rails from inside the bus to the roof, and have a nice looking rack to mount my solar panels and whatever else I put up there.
I finished the back window deletes and the rear most side windows, riveted and sealed them up nice.
Finally, today I got closed bell spray foam insulation in the ceiling and walls. It cost a little more than I hoped but you can tell a difference right away.
Next steps: put the windows back in and seal them, and start on the sub floor!
         
|
|
|
|
|
05-07-2018, 03:33 PM
|
#179
|
|
Bus Geek
Join Date: May 2016
Location: Eastern WA
Posts: 6,401
Year: 2002
Coachwork: Bluebird
Chassis: All American RE (A3RE)
Engine: Cummins ISC (8.3)
Rated Cap: 72
|
Looking awesome!
|
|
|
|
|
05-07-2018, 04:12 PM
|
#180
|
|
Bus Geek
Join Date: Sep 2014
Location: Eustis FLORIDA
Posts: 23,764
Year: 1999
Coachwork: Thomas
Chassis: Freighliner FS65
Engine: Cat 3126
Rated Cap: 15
|
Man- you shoulda let me help yall strip it!
Looking good, you're doubling your living space!!!
|
|
|
|
|
|
 Posting Rules
|
You may not post new threads
You may not post replies
You may not post attachments
You may not edit your posts
HTML code is Off
|
|
|
|
 » Recent Threads
 |
|
|
|
|
|
|
|
|
|
|
|
|
|
|
|
|
|
|
|
|
|
|
|
|
|
|
|
|
|
|
|
|
|
|
|
|
|


 Linear Mode

