"CRUEL BUS" UPDATE:
My plan is to have the bus moving under its own power by the time the snow melts in the spring. That doesn't mean DOT legal, just moveable. That means A LOT of electrical work since the whole wiring harness has been removed. These are just some of the bundles I've been going through:
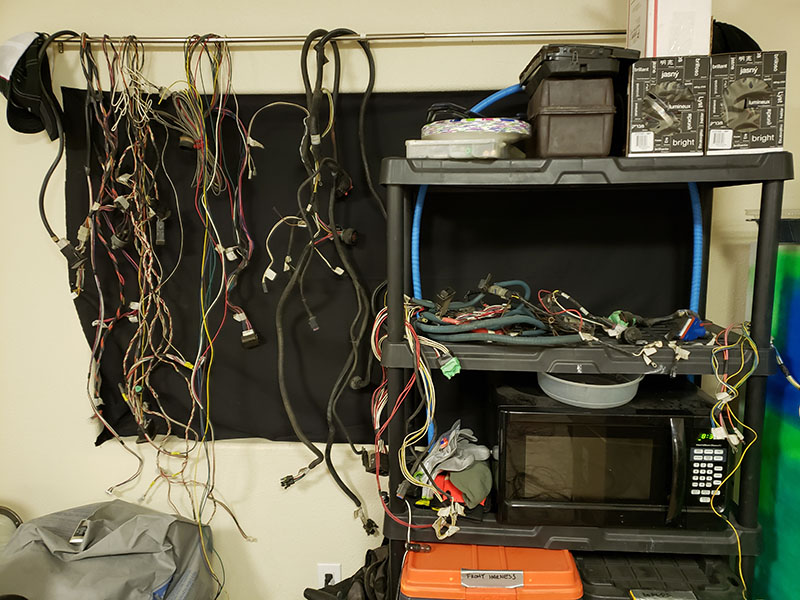
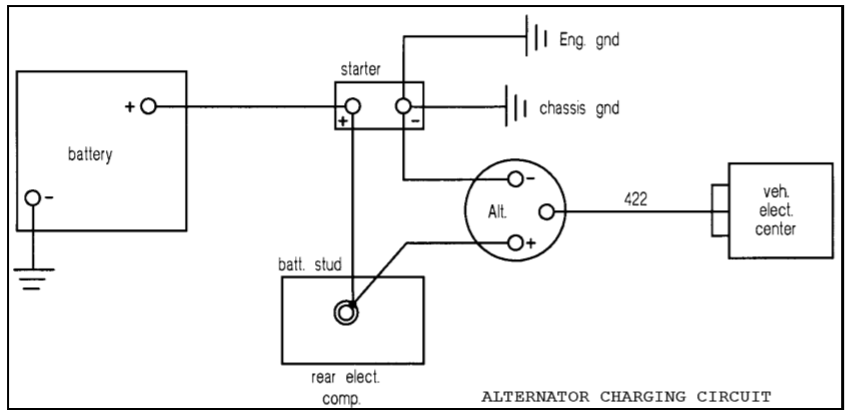
I have been going through each circuit board and mapping the internal connections, then making diagrams on the computer which will eventually become a shop manual for the bus, because in 20 years, I'm not going to remember what the heck I did. I'm working front-to-back and am pleased to say that I am comfortable enough with the wiring harness mods I've done to actually put the fascia on the bus.
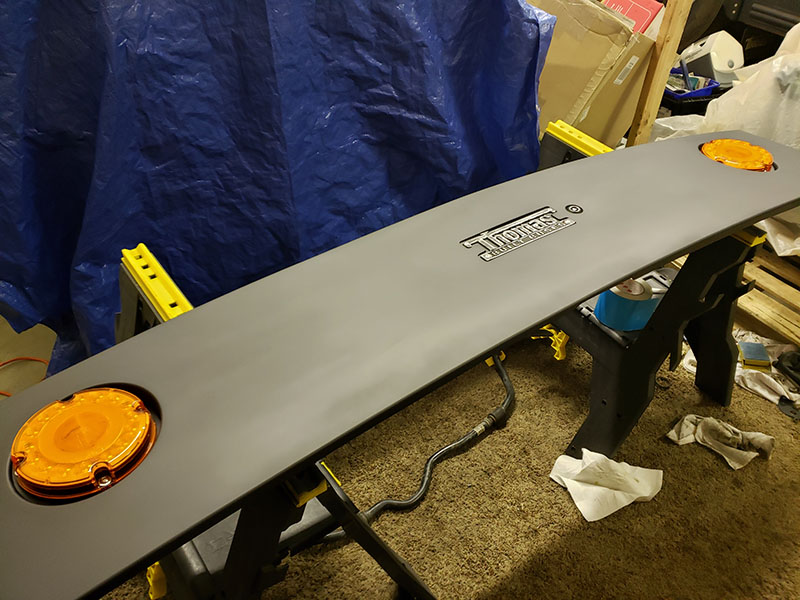
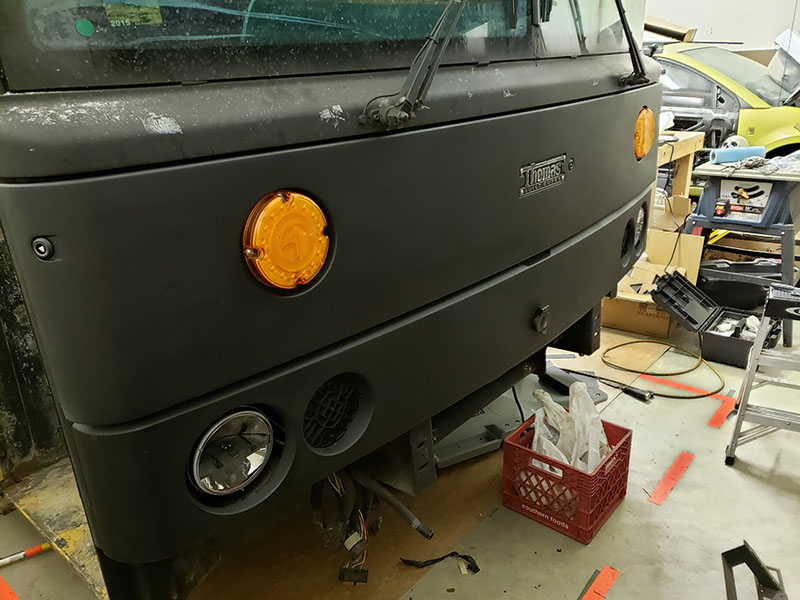
This is the lower fascia with TruckLite LED headlights, DRL system deleted and replaced with LED work lights that will be switch activated instead of tied into the headlight system. I used landscape drain grates, turned over, to make the covers, and made some "L" brackets to mount them. The drain grates are there for appearance, to offset any legal concerns (too many forward facing white lights), and to actually block some of the light for "very low presence" driving should such things ever become necessary.
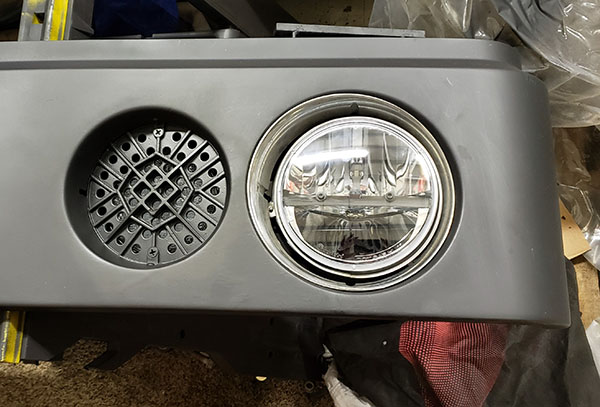
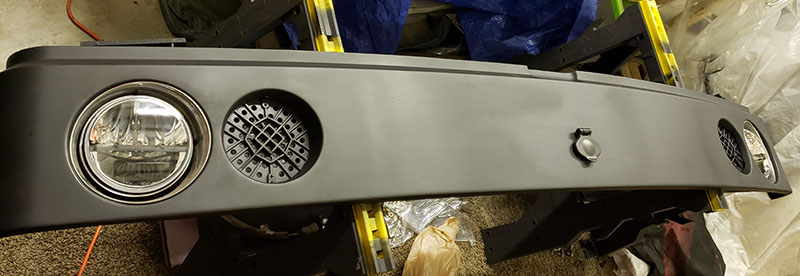
The rear mounting brackets were cleared of all rust, treated, and painted. The headlight buckets were cold galvanized painted and all hardware replaced with stainless steel.

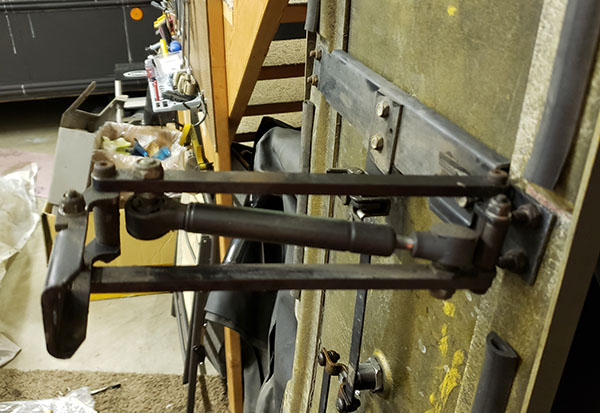
The upper fascia on my bus is a full-width single piece that swings down when unlocked. The mini hydraulic lifts on the back had rusted mount points and were binding as well as being loose. The result was a lot of slop when raising and lowering the upper fascia. All rusted hardware was replaced with stainless steel, and a few washers were added to tighten up the slop.
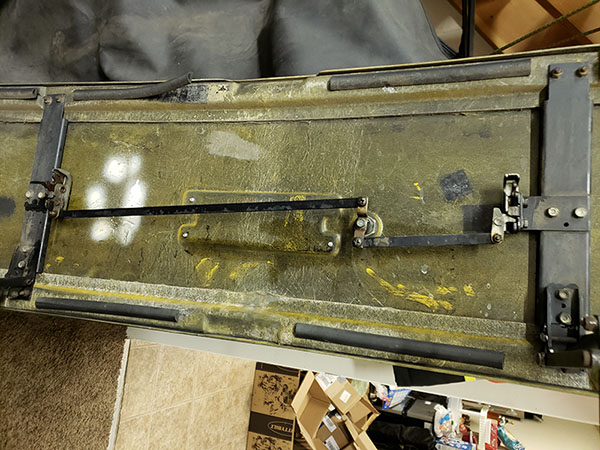
Weather stripping pieces were reattached where they had come lose.
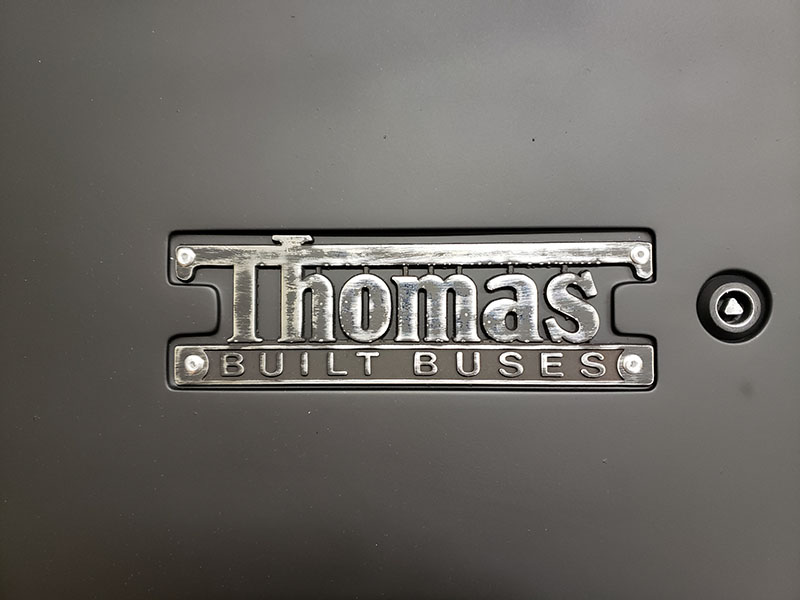
The front logo was removed, painted then directionally hand sanded to give a weathered windblown look.
And finally, Optronics STL190 series LED lights were added.
After cleaning up the front portion of the bus, it's was time to mount the pieces.


 Linear Mode


