 |
|
 10-24-2015, 04:01 PM
|
#61
|
|
Bus Geek
Join Date: Aug 2011
Location: Stony Plain Alberta Canada
Posts: 2,937
Year: 1992
Coachwork: Bluebird
Chassis: TC2000 FE
Engine: 190hp 5.9 Cummins
Rated Cap: 72
|
I see that $hit almost everyday at the bus shop.
Look at how pathetic that was built. How small the intercooler is.
A Subaru car has a bigger intercooler than that bus.
I feel that the intercooler should be mounted on the roof like a wing. It would perform much better.
With all that heat from the rad, the intercooler is not helping one bit. You would be better off bypassing it.
My bus will be relocating the inter cooler to the opposite side as the rad. Both sides will pull air into the engine bay. I will have vents cut into the rear hatch. All air will flow out the rear, helping break the dust suction that currently happens.
That's how they should have been built from the start.
Nat
__________________
"Don't argue with stupid people. They will just drag you down to their level, and beat you up with experience."
Patently waiting for the apocalypses to level the playing field in this physiological game of life commonly known as Civilization
|

|

|
|
10-24-2015, 04:27 PM
|
#62
|
|
Skoolie
Join Date: Feb 2015
Location: South Dakota
Posts: 217
Year: 2002
Coachwork: Thomas
Chassis: Freightliner HDX
Engine: CAT 3126B250
Rated Cap: 84
|
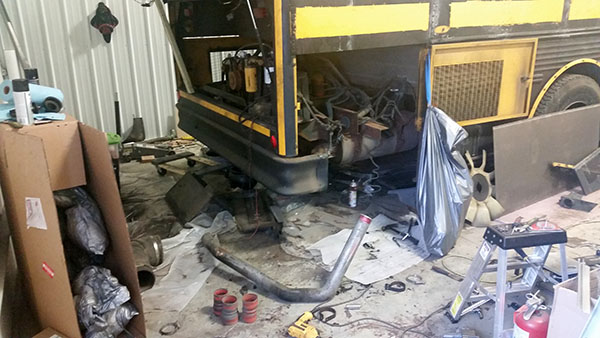
Hey, Nat, by "the other side," do you mean the passenger side? I don't like the route the air has to take to get into the engine right now:
Intake, passenger side
Over the engine to the turbo
Across to the top of the intercooler
Down through and underneath the bus, right by the exhaust and transmission
Then finally back to the start on the passenger side for the intake
through the engine to the driver's side, back under the bus and engine to exit on the passenger side.
I'd love to reroute all of that but don't really know where everything would go.
I thought the intercooler was pretty big, but I know nothing about turbos.
How would you draw air through the intercooler? I'm having a hard time visualizing it.
|
|
|
|
|
10-26-2015, 11:21 AM
|
#63
|
|
Skoolie
Join Date: Feb 2015
Location: South Dakota
Posts: 217
Year: 2002
Coachwork: Thomas
Chassis: Freightliner HDX
Engine: CAT 3126B250
Rated Cap: 84
|
Radiator and intercooler at the shop. The guy said he could add a few more rows to the radiator core for a couple hundred bucks, so that sounds good to me. I was hoping the intercooler would be just fine, but when he submerged it into the test tank, it looked like a spa, so yeah. It will have to get shipped out unless he can find one elsewhere. I thought the bus had decent power for all I know, and the fuel mileage was about 7-8mpg coming back from Chicago, so with an actual sealed intercooler, it should be mo'better.
I'll be focussing on cleaning the parts of the engine compartment I can get to and all of the brackets from this micro-adventure. That should keep me busy until it's all ready to be put back in.
I might actually get some sleep today!
|
|
|
|
|
10-29-2015, 12:23 PM
|
#64
|
|
Bus Geek
Join Date: Aug 2011
Location: Stony Plain Alberta Canada
Posts: 2,937
Year: 1992
Coachwork: Bluebird
Chassis: TC2000 FE
Engine: 190hp 5.9 Cummins
Rated Cap: 72
|
By the other side, yes I mean mounting the intercooler on the passenger side of the engine bay.
On my bus I will be using electric fans on the intercooler. At idle they will shut down. The fans will only pull air threw the intercooler when diving down the road with the turbo at full spool.
This may be to much work for most to do. It requires changing all the 3 inch intake plumbing, making mounts for the intercooler on the other side, and wiring in the new fans. Also cutting / stamping louvers in the rear hatch is expensive and time consuming.
Looking good. I look forward to more pics.
Nat
__________________
"Don't argue with stupid people. They will just drag you down to their level, and beat you up with experience."
Patently waiting for the apocalypses to level the playing field in this physiological game of life commonly known as Civilization
|
|
|
|
|
10-29-2015, 12:53 PM
|
#65
|
|
Skoolie
Join Date: Feb 2015
Location: South Dakota
Posts: 217
Year: 2002
Coachwork: Thomas
Chassis: Freightliner HDX
Engine: CAT 3126B250
Rated Cap: 84
|
Well, since I discovered I need a new intercooler intake tube anyway, maybe I can find a way to reroute everything now while the radiator and such is in the shop.
|
|
|
|
|
11-11-2015, 02:16 PM
|
#66
|
|
Skoolie
Join Date: Feb 2015
Location: South Dakota
Posts: 217
Year: 2002
Coachwork: Thomas
Chassis: Freightliner HDX
Engine: CAT 3126B250
Rated Cap: 84
|
Got the radiator and intercooler back. Here's the radiator before:
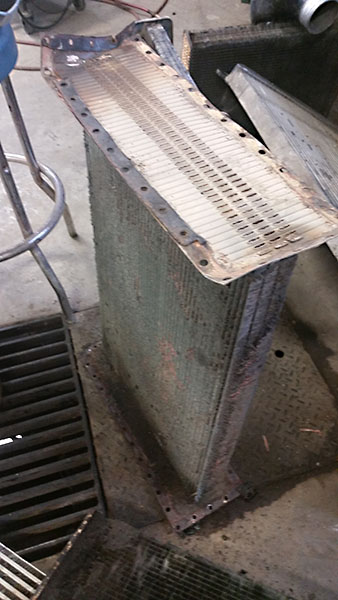
3 cores and lots of decay. Just a total mess.
Here it is now back at my shop:
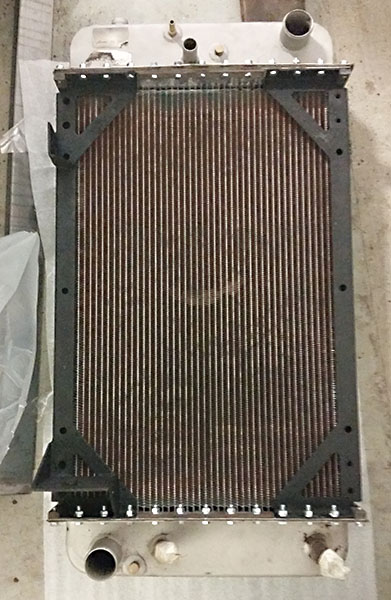
4 cores and ready to be painted. The intercooler is already painted because it was shipped out to be rebuilt. No pics of that right now since I'm leaving it in the box until I'm ready to put it in. I've been scraping and treating rust in the engine compartment where all of this will go, then priming and undercoating. I may as well do what I can while I have access to the area. I might also cut out the existing battery box and put in a new one. I'm not sure I like the current location: right behind the rear tire. There just feels like there's so much weight there already, not to mention the chance for future corrosion. I might turn that space into some kind of storage. Not really sure right now.
I got several long pieces of 14ga sheet steel bent into an L so I could cut my own brackets to further secure the window covers top and bottom. I have cut 56 so far and it's just slow going.
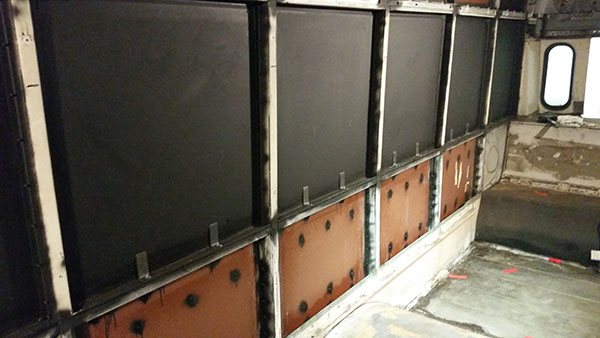
They are screwed into the old window sill in 2 places, somewhat for extra strength, but mostly because if I use just one screw, the bracket rotates and I can't stop it.
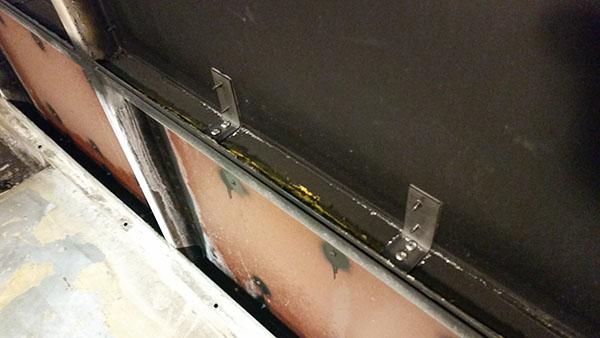
Those screws are stainless steel and I have to hit them hard and fast so the heads don't shear off. The back of each bracket is primed, painted, and has a layer of thick 2 sided automotive tape. The tape serves as a vibration barrier, and helps seal the screws from the outside when the window plate squishes against the bracket. Of course, the whole thing will be sealed with primer, paint, and plastidip.
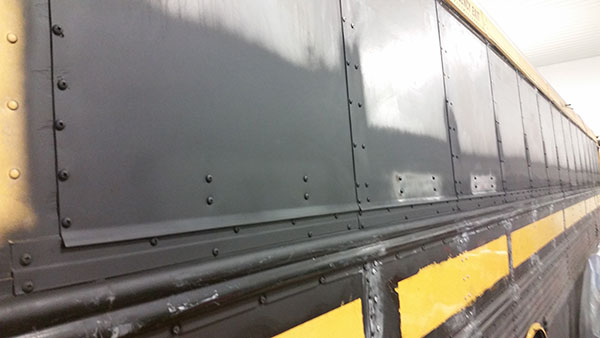
I also like the effect of the extra screws.
I went through a few ideas to "industrialize" my new refrigerator that's been sitting here, not plugged in, for probably 2 months. One involved drilling 8892 holes through some adhesive rubber material to attach to the faces of the doors. I didn't like the effect so I decided to just use the plain material. I am also fabricating custom handles out of braided steel water line, battery post connectors, and mounting plates for screw-in legs used on small tables. I will trim the edges in 1" aluminum angle.
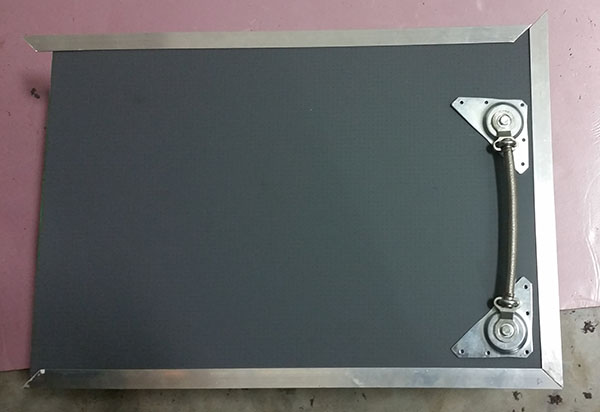
As always, it won't win any awards for "perfect execution," but I've accepted that I am not creating a showroom quality bus.
So, the fridge. I'm thinking about removing the 120v fan from the back and replacing it with the 12v squirrel cage fan that was used on the old defroster. I'd just need a relay to kick it on in place of the 120v fan when needed. The idea is to use less electricity overall, though I don't know either of the fans' ratings right now. I originally wanted to duct the exhaust from the fridge to the outside when it's hot out, and to the inside when it's cold out, but have decided that the heat difference is not worth figuring it all out. Also, I'd have to drill through the heavy plate where the wall meets the floor, and I'd rather leave that piece alone.
After the radiator and all is installed, it will be time for windows and the roof rack. Oh and a trailer hitch. I guess I should do the hitch before reinstalling the radiator.
I definitely need to log some overtime to pay for all of this. I'm trying to keep the final budget under $45,000. I'm already over 25% there. 
|
|
|
|
|
11-12-2015, 12:59 PM
|
#67
|
|
Bus Geek
Join Date: Aug 2011
Location: Stony Plain Alberta Canada
Posts: 2,937
Year: 1992
Coachwork: Bluebird
Chassis: TC2000 FE
Engine: 190hp 5.9 Cummins
Rated Cap: 72
|
Like I always tell the newbies, stuff adds up fast.
Looking good as always.
Nat
__________________
"Don't argue with stupid people. They will just drag you down to their level, and beat you up with experience."
Patently waiting for the apocalypses to level the playing field in this physiological game of life commonly known as Civilization
|
|
|
|
|
11-12-2015, 09:21 PM
|
#68
|
|
Bus Nut
Join Date: Jul 2013
Location: Maryland / Boulder
Posts: 347
Year: 1999
Coachwork: Thomas Built
Chassis: Saf-T-Liner MVP ER
Engine: CAT 3126b Rotella-Chugger
Rated Cap: 72
|
Man the radiator on my bus (1999 Thomas) was not in good shape. My intercooler is a hell of a lot bigger than yours for some reason, but is in front of the rad which is already too small. Do you have any overheating issues?
|
|
|
|
|
11-13-2015, 08:18 AM
|
#69
|
|
Skoolie
Join Date: Feb 2015
Location: South Dakota
Posts: 217
Year: 2002
Coachwork: Thomas
Chassis: Freightliner HDX
Engine: CAT 3126B250
Rated Cap: 84
|
Porkchop, do you have a front-engine bus? When I was getting my radiator redone, I saw several intercoolers that were the size of radiators in the shop. No, no issues with overheating, BUT my only driving experience with my bus has been from -20F to 30F on the highway. I guess I won't know until I hit the road next summer or fall.
|
|
|
|
|
11-13-2015, 12:34 PM
|
#70
|
|
Bus Geek
Join Date: Aug 2011
Location: Stony Plain Alberta Canada
Posts: 2,937
Year: 1992
Coachwork: Bluebird
Chassis: TC2000 FE
Engine: 190hp 5.9 Cummins
Rated Cap: 72
|
No his bus is a rear engine Cat powered.
Nat
__________________
"Don't argue with stupid people. They will just drag you down to their level, and beat you up with experience."
Patently waiting for the apocalypses to level the playing field in this physiological game of life commonly known as Civilization
|
|
|
|
|
12-07-2015, 02:50 PM
|
#71
|
|
Skoolie
Join Date: Feb 2015
Location: South Dakota
Posts: 217
Year: 2002
Coachwork: Thomas
Chassis: Freightliner HDX
Engine: CAT 3126B250
Rated Cap: 84
|
I've been procrastinating. So, the custom design I came up with for the intercooler tube was priced at $500 to manufacture. FORGET THAT. I'll just buy pieces and cut them myself. I'm still mucking about in the engine compartment, scraping, rust treating, underbody coating, etc.
I was hoping to swap the Cyclopack system out for a K&N (and save 45 pounds in the process) but many threads and comments from people with decades more experience than I advised against it. The short version is that K&N systems ultimately allow more foreign matter to pass into the engine. The Cyclopack design encourages a centrifugal force to move heavier dirt particles from the filter medium. There seems to be WAY more emphasis on keeping even the tiniest dust particle away from these motors, so much so that some designs are not user serviceable to prevent dust intrusion.
So I guess I'll clean it up, paint it and put it back in. At least I have access to other parts of the engine compartment to clean wire connetions and rust. Once again, this is all a HUGE procrastination effort in avoiding messing with the floor and wheel wells.
I also discovered a shop nearby that does laser cutting of aluminum and steel. MUAHAHAHAAAA. I have wanted to put some kind of logo or symbol on the back of the bus, but didn't want to use a sticker. Here's my plan now:
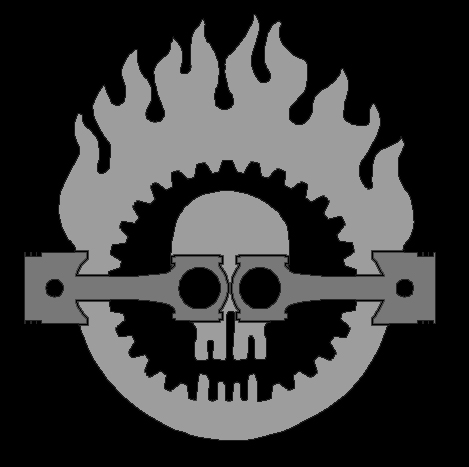
Inspired by the "Wars Boys" logo from Mad Max: Fury Road
The light grey will be a piece of sheet steel and the dark grey will be aluminum. the overall height will be almost 24 inches and the whole thing will be affixed to the window panel.
I am also working up an idea for the exhaust - no pictures yet.
I keep getting asked, "so when will the bus be done?" Done? HAHAHAHAHAAA.
|
|
|
|
|
12-14-2015, 10:28 PM
|
#72
|
|
Skoolie
Join Date: Feb 2015
Location: South Dakota
Posts: 217
Year: 2002
Coachwork: Thomas
Chassis: Freightliner HDX
Engine: CAT 3126B250
Rated Cap: 84
|

Just personal project notes since I'm away from my home terminal:
Transmission:
Disconnect transmission lines from transmission
Have transmission lines fabricated
Trace, test, clean and protect all wiring to front connectors
Reattach lines when radiator is installed
Air intake system:
Clean, prep and paint Cyclopack
Size lower pipe from IC to intake
Order aluminum pieces and connectors for upper and lower pipes
Measure and cut pieces, send to shop to weld and fabricate lips
Clean, treat and paint "air box" located before Cyclopack
Select, order and install air temp and boost psi gauge feeds:
- intake air temp
- pre IC temp and psi
- post IC temp and psi
Reassemble all parts when IC is installed
Engine Compartment:
Treat all rust on frame and supports
Create and seal necessary wiring channels to inside of bus
Treat and paint firewall
Trace, test, clean and protect all wiring to front connectors including switch panel
Rebuild body bushing assemblies
Install wire protection as necessary
Spec bolts, redesign attachment points and install radiator and intercooler assembly
Select and install towbar
Select and install muffler and exhaust system
Fabricate muffler shield plate
|
|
|
|
|
12-16-2015, 09:57 PM
|
#73
|
|
Mini-Skoolie
Join Date: Aug 2015
Location: Bozeman Montana
Posts: 28
Year: 1978
Coachwork: Superior
Chassis: International
Engine: International 392 V-8 gas
Rated Cap: 72 passengers
|
I recently came across a couple of thomas mid engine busses at the local scrap yard, they all run but have some sort of problem with the transmissions. The first thing that came to mind was the complexity of the wiring. maybe I figure out how to put a diesel in my 78 international.
I wish I had a place indoors to work in the winter. I live on mine so not much happens during the winter.Keep up the good posts and work
|
|
|
|
|
12-17-2015, 05:26 PM
|
#74
|
|
Bus Crazy
Join Date: Nov 2015
Location: Billings, MT
Posts: 1,269
Year: 2003
Coachwork: Thomas
Chassis: HDX
Engine: Cat C7
Rated Cap: 84 passenger
|
Could be like me. I'm living in that refrigerated igloo and trying my best to work on it without freezing parts of my anatomy that aren't meant to be frozen.
|
|
|
|
|
12-19-2015, 01:19 AM
|
#75
|
|
Skoolie
Join Date: Apr 2014
Location: St Louis Metro
Posts: 110
Year: 1978
Coachwork: Wayne
Chassis: Lifeguard
Engine: 366 Chevy
|
Quote:
Originally Posted by RHOMBUS

I also discovered a shop nearby that does laser cutting of aluminum and steel. MUAHAHAHAAAA. I have wanted to put some kind of logo or symbol on the back of the bus, but didn't want to use a sticker.
Inspired by the "Wars Boys" logo from Mad Max: Fury Road
The light grey will be a piece of sheet steel and the dark grey will be aluminum. the overall height will be almost 24 inches and the whole thing will be affixed to the window panel.
I am also working up an idea for the exhaust - no pictures yet.
I keep getting asked, "so when will the bus be done?" Done? HAHAHAHAHAAA.
|
What's wrong with vinyl stickers? I had a buddy cut me three. 24" for the sides and 42" around for the back of the bus. It's the same adhesive and material that's on my racecar and held up well at 170MPH. I don't see it peeling off the bus anytime soon.
I'm putting this:

Right here:

|
|
|
|
|
12-19-2015, 04:08 AM
|
#76
|
|
Skoolie
Join Date: Feb 2015
Location: South Dakota
Posts: 217
Year: 2002
Coachwork: Thomas
Chassis: Freightliner HDX
Engine: CAT 3126B250
Rated Cap: 84
|
I thought about a sticker, Gizmo, but my concern would be that it would slowly degrade due to sun exposure. I am considering doing both layers in aluminum to offset rust issues, but even if it rusts, that would add to the look of the bus. Of course, then it wouldn't be all "shiny and chrome" as it were.
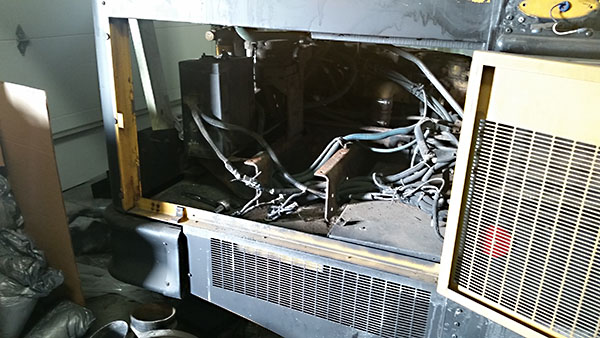
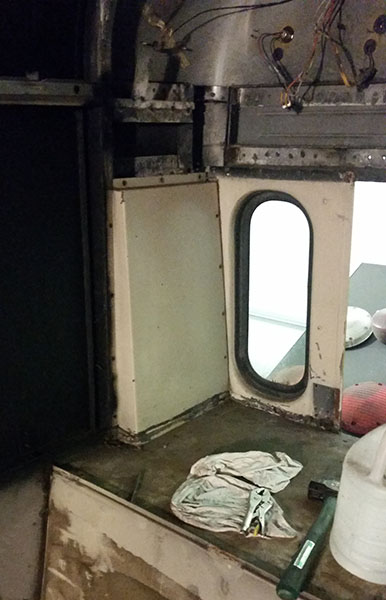
It's 3am and I'm at the end of another 2 cutting wheels, covered in metal fragments and microburns. The short version is, I had a brainstorm and went with it. It's about the air intake system. Yes, the Cyclopac again. I took the whole thing apart to thoroughly clean and treat it for rust, then repaint and reinstall. After a few hours of grinding rust off and finding holes everywhere, I became discouraged and returned to thinking about a replacement. I did a lot more research and came across some products by Donaldson. I determined that the CAT 3126B250 requires an airflow of a little less then 650cfm. I will be getting a Donaldson PowerCore PSD12, either the D120036 or the D120038. Of course, I'll need to do a little reconfiguring of the stock airbox (that metal box that's between the body exterior wall and the air filter system.)
It turns out that the airbox is a single piece that goes all of the way into the passenger compartment.
Inside @ rear passenger:
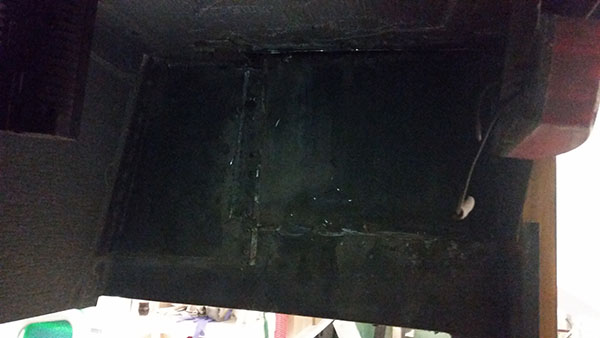
Engine compartment passenger side:
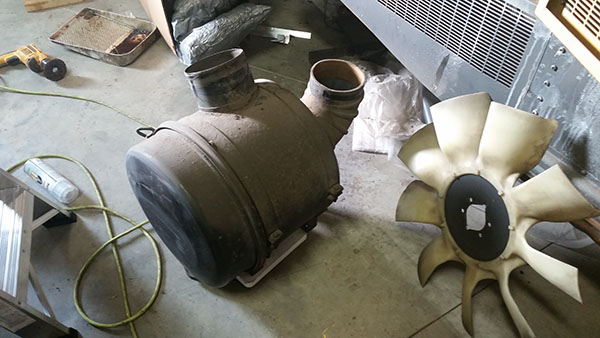
The piece the used to be in the engine comparment looks more or less like this:
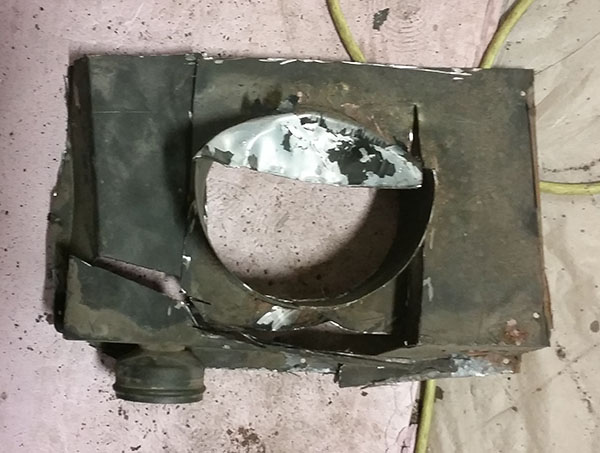
The inside of a Cyclopac:

I plan on making a new box on the inside to replace the old one since the Davidson has an oval mouth and is a lot wider. It also weighs less: 15.5 or 17.4 pounds depending which one I get. That beats the 45 pounds for the Cyclopac, it's made of plastic so no rust, super filtration for heavy dust environments, and easy to service. Also, now I don't have to spend hours and hours trying to fix my rusted stock air cleaner and I will get the space I wanted, since it will be mounted up high.
|
|
|
|
|
12-19-2015, 09:37 AM
|
#77
|
|
Bus Nut
Join Date: Jan 2015
Location: ...little north of Toronto Ontario
Posts: 606
Year: 2000
Coachwork: Thomsass
Chassis: FreightShaker
Engine: 5.9 Cummins 5 speed
Rated Cap: 2 ATV's and friends
|
[QUOTE=gizmoq;131417]What's wrong with vinyl stickers? I had a buddy cut me three. 24" for the sides and 42" around for the back of the bus. It's the same adhesive and material that's on my racecar and held up well at 170MPH. I don't see it peeling off the bus anytime soon.
I'm putting this:

Personally nothing, there's all kinds of MFG's that have products that "stick like s#!T to a blanket" 3M, TCT, Avery, Mac Tac etc... there's also off shore crap as well. Some vinyl's last for 15 years plus, how old is your bus that you removed "SCHOOL BUS" from? How bad of shape were the decals/stickers in? Pressure washers do the most damage. Every year they seem to come out with a new pressure that has another 1000 psi behind it. UV's don't help either...
|
|
|
|
|
12-24-2015, 02:14 PM
|
#78
|
|
Skoolie
Join Date: Feb 2015
Location: South Dakota
Posts: 217
Year: 2002
Coachwork: Thomas
Chassis: Freightliner HDX
Engine: CAT 3126B250
Rated Cap: 84
|
Almost done taking stuff apart back here:
I ordered just about everything I need to rebuild the whole air intake system. I'll be redoing all of the piping with 3" 6061 aluminum and fiberglass reinforced silicone connectors. The intake airbox will be rebuilt to mate with the Donaldson PSD12 intake. New trans lines, belts, and I'm hacking the exhaust out right now to prep for a little custom surprise. I guess I shouldn't hype it up too much. It won't look stock, but that's about it.
I've been looking at air and water heating products, as well as diesel cooking products. I've decided to forget the oven and go with a diesel cooktop. There are a few products out there that work with cooktops to make a small convection oven. I *almost* decided to get a marine diesel oven and cooktop with integrated water heating system, but either I have to cut a huge hole in the roof to vent, or pay over $4,000 to get a system that gets rid of the combustion byproducts in a neater fashion. The cooktop I can vent out the side or underneath the bus. I'm still debating which diesel air and water heater system(s) to use. None of this will be purchased anytime soon.
Back to taking off the exhaust so I can treat all of the rust. Then it's reassembly time! The goal is to have the bus move under its own power by the end of January. I won't take it anywhere since it won't have a seat or main door, along with other large issues. I just want to start putting things back together.
|
|
|
|
|
01-31-2016, 03:33 PM
|
#79
|
|
Skoolie
Join Date: Feb 2015
Location: South Dakota
Posts: 217
Year: 2002
Coachwork: Thomas
Chassis: Freightliner HDX
Engine: CAT 3126B250
Rated Cap: 84
|
It's the end of January, annnnddddd...... yeah. Maybe I will have it running by the end of February. In the meantime, here are some of my recent antics.
I've slowly been tidying up the engine compartment. I fabricated some replacement body bushings at the rear.

I say franricated, but really just got new parts. The orginal bolt is a grade 5 so I went with that, but added thicker and wider washers. One of the springs was broken, and after searching all across town I finally decided to isolate the two pieces with a washer. Oh the compromises I make.
I painted the fan because... I can. UV reactive orange, you know, in case I uh... install a blacklight in the engine compartment. Which I won't.

New grade 5s here as well.
The radiator, intercooler and related brackets are assembled and awaiting new mounting bushings that should be here next week.


New grade 8 hardware everywhen for the radiator.
I'll put in a pic of the engine compartment in my next post so you can see where all the time has gone.
So, how in the world are these next two pictures related?


Stay tuned and find out!
|
|
|
|
|
02-20-2016, 08:26 PM
|
#80
|
|
Skoolie
Join Date: Feb 2015
Location: South Dakota
Posts: 217
Year: 2002
Coachwork: Thomas
Chassis: Freightliner HDX
Engine: CAT 3126B250
Rated Cap: 84
|
A pretty big milestone for me: the radiator and intercooler are installed - finally!
Finsihing the rubberized coating on the last piece of the shroud:

This is the piece that channels air into the intercooler. You can tell by looking at the installed location (further down) that the intercooler barely gets any decent airflow, so I cut two 4" holes that will receive ducted air to help things out some. I also plated over the nasty holes where the old heater lines went through.

Okay, so first the fan... (notice the nice clean engine compartment)


No, first the shroud, THEN the fan.

Moving the assembly into position:

I had to take off the piece by the intercooler to make things easier to fit back in,
and then - TADA:

I still need to rebuild the lower trim piece on the radiator that helps channel the air. The old one is just a bunch of rust crumbles.

A look from the hole in the side to where ducts will take air to the intercooler:

Before I installed all of this, I made sure the alternator connections were perfect. Bare metal to bare metal with dielectric grease.

I'm waiting to get the duct plate back from a laser cutting shop. I tried to make my own but the hole saw died and I'm not paying $50 for another one. I have a few tiny odds and ends to really finish the install, but the hard part is done.
Next will be the other side of the engine to include:
- mounting the new air cleaner
- cutting and fabricating the line to the turbo
- cutting all of the aluminum intercooler tubing
- getting new transmission lines
- looking for an alternative to the solid metal coolant lines
- installing ports for air temp, boost and exhaust temp
- lots of electrical connection cleaning
- lots of rust treatment and underbody coating
- install the backup alarm and new engine bay lights
(might consider some colored lights for show)
At some point, I'll finish up the ducted air and can then move on to the floor. YES - the floor. Procrastination time is OVER. I bought myself a welder for Valentine's day and am going to learn to do it myself.
|
|
|
|
|
|
 Posting Rules
|
You may not post new threads
You may not post replies
You may not post attachments
You may not edit your posts
HTML code is Off
|
|
|
|
 » Recent Threads
 |
|
|
|
|
|
|
|
|
|
|
|
|
|
|
|
|
|
|
|
|
|
|
|
|
|
|
|
|
|
|
|
|
|
|
|
|
|


 Linear Mode

