 |
|
 11-05-2015, 11:54 AM
|
#821
|
|
Bus Geek
Join Date: Aug 2011
Location: Stony Plain Alberta Canada
Posts: 2,937
Year: 1992
Coachwork: Bluebird
Chassis: TC2000 FE
Engine: 190hp 5.9 Cummins
Rated Cap: 72
|
Quote:
Originally Posted by wmkbailey

Hey Nat,
It is good to be back and working on the bus. Even better to be living in it too.
|
I hear you.
I lived in my bus shed for the winter of 2014 / 2015.
It sure did teach me a ton about what to change in my bus, and what to do different.
Feel free to drop in with pics anytime.
Too many of our members from the passed have slid away from posting.
Nat
__________________
"Don't argue with stupid people. They will just drag you down to their level, and beat you up with experience."
Patently waiting for the apocalypses to level the playing field in this physiological game of life commonly known as Civilization
|

|

|
|
11-05-2015, 02:12 PM
|
#822
|
|
Bus Nut
Join Date: Jul 2014
Posts: 722
Year: 1998
Coachwork: Bluebird
Chassis: TC2000 RE
Engine: 8.3l Cummins
Rated Cap: 78
|
I think actually living in the bus for a period of time will teach you a lot about what to expect, and what works/doesn't work for your particular situation and tastes.
Admittedly, RV manufacturers probably do this all the time as a part of usability testing, but it's geared towards a generic idea use that fits as large of a market segment as possible.
We lived in ours for the last couple months while moving/selling house and I learned a lot about what will work and what will not.
Quote:
Originally Posted by nat_ster
I hear you.
I lived in my bus shed for the winter of 2014 / 2015.
It sure did teach me a ton about what to change in my bus, and what to do different.
Feel free to drop in with pics anytime.
Too many of our members from the passed have slid away from posting.
Nat
|
|
|
|
|
|
11-06-2015, 08:53 AM
|
#823
|
|
Bus Crazy
Join Date: Aug 2014
Location: SW New Hampshire
Posts: 1,334
|
Wmk -
I'm in your area and I'd be happy to give you a hand with anything that takes 3 or more hands in return for the opportunity to see one of these beasts up close and personal. Your build is one of the more interesting. I'll PM you contact details. Thanks in advance - Dan Fox
|
|
|
|
|
11-10-2015, 04:59 PM
|
#824
|
|
Bus Nut
Join Date: Jun 2013
Location: West Lafayette, IN
Posts: 832
Year: 1999
Coachwork: Thomas
Engine: 3126
Rated Cap: 72
|
Halloween Weekend
Oct 31 2015
My granddaughter asked me if I would come up and go trick or treating with her. My daughter lives about forty minutes away since it would be late when we finished, and cold. I decided to take the bus up. Since I was in the bus I asked my granddaughter if she wanted to stay overnight in it. She was like Oh yes. When I got up there they pointed me to a parking area near the train tracks just behind their house. It is a nice quite dark place to park and they allow you to stay there for three days before you have to move.

She dressed up as Lady Robin Hood. There was lots of candy to take from the rich and give to the poor.  She was very excited to stay in the bus. The next morning she did not want to leave, said my couch was very comfortable. I told her if she wanted to stay, she had to come back with me and help build a computer desk for me to work from.
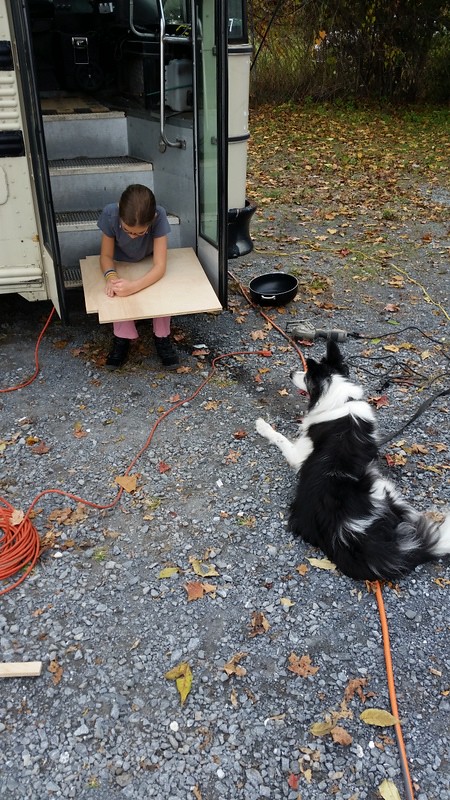
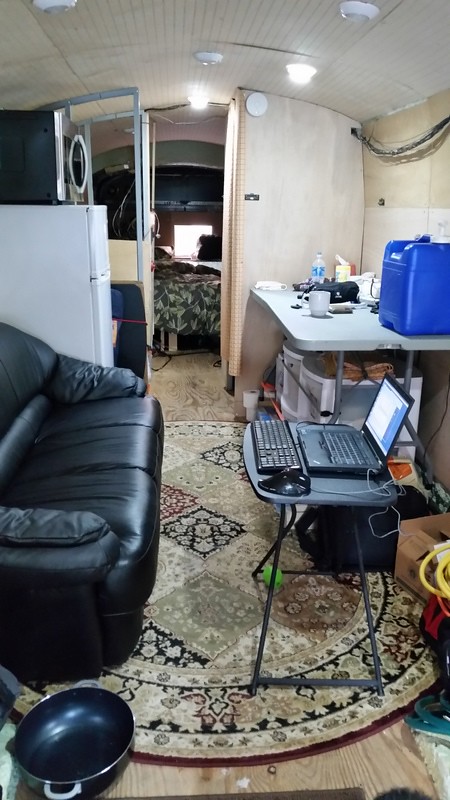
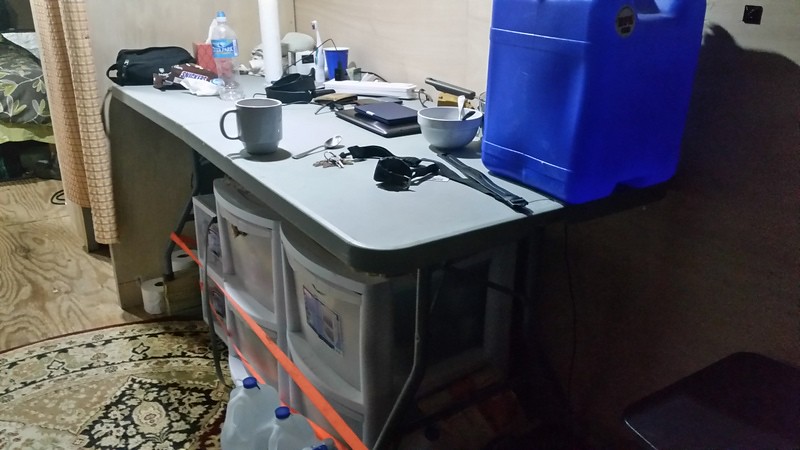
So now I have volunteer help to build a temporary computer desk. This desk I will use and adjust until I figure out what will work the best.
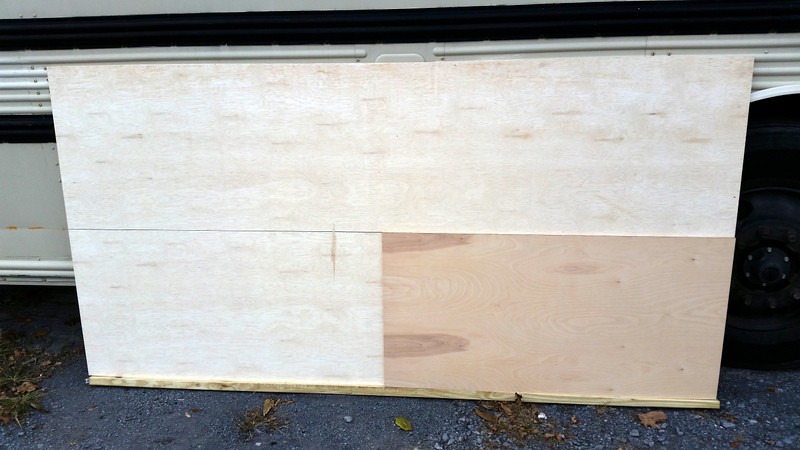
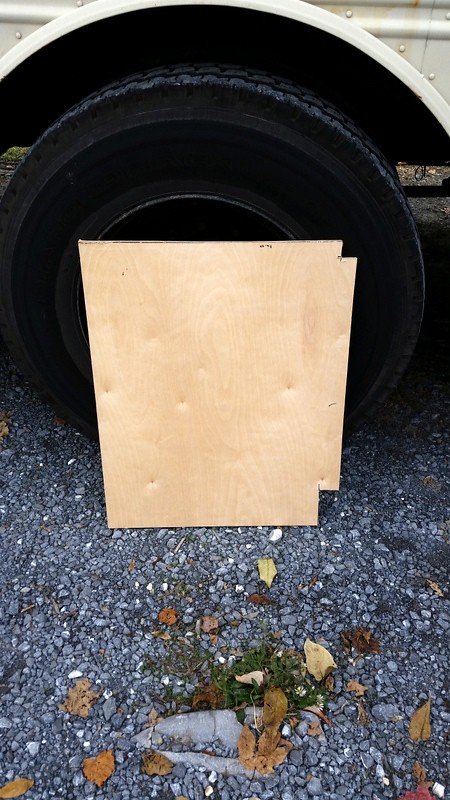
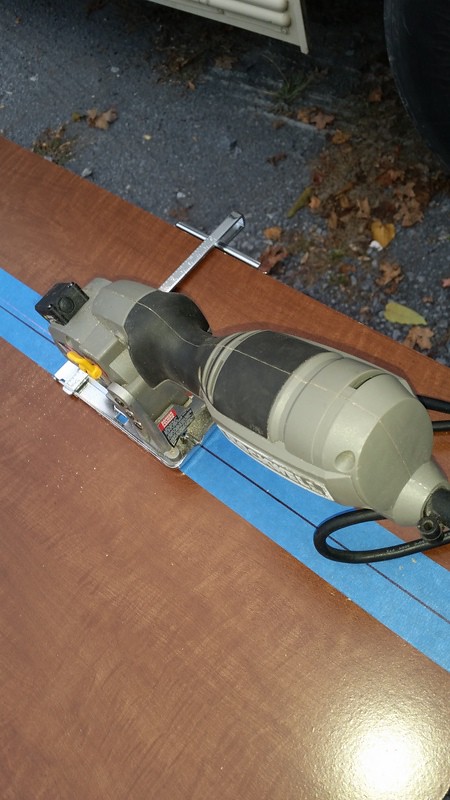
I want the desk to be two feet deep, so I have a 4′ x 8′ and a 2′ x 4′. What is 4 2
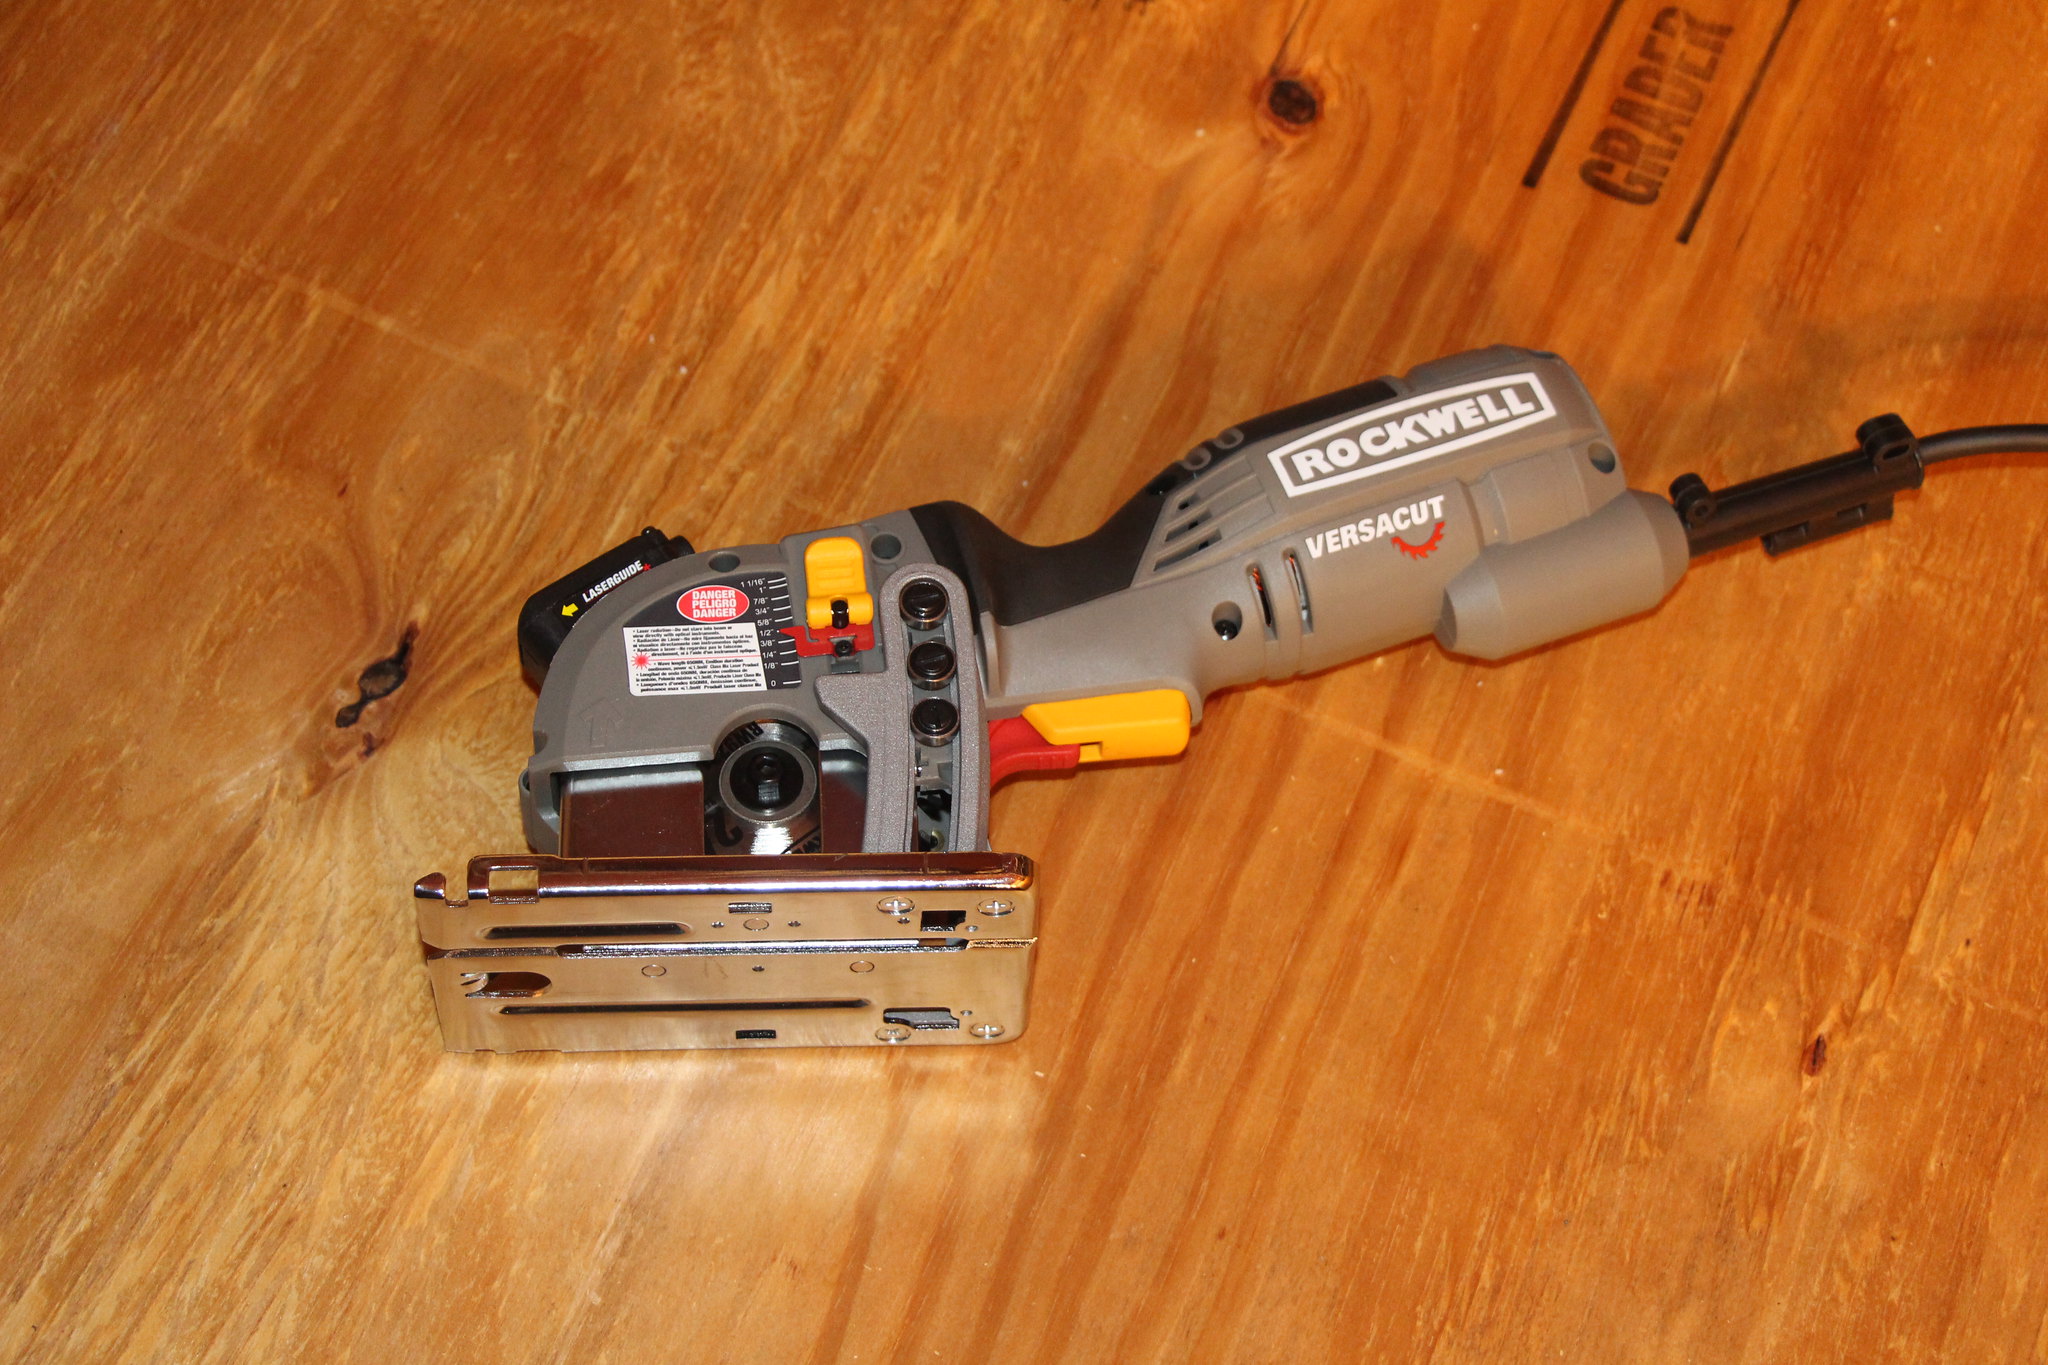
=2. An easy way to cut it down with out measuring. I used my trusty old Rockwell Veracut saw. It has a laser line and I can just cut the plywood right there leaning against the bus. I forgot to go to storage and pick up my saw horses.
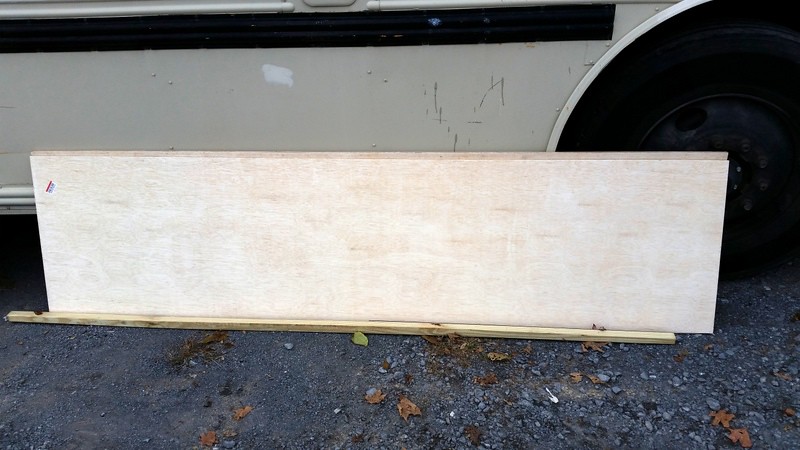
I found 1 1/4 x 1 1/4 pressure treated wood at home depot. I decided this would be perfect to build the desk and to use when I rebuild my walls. This is the perfect size and all I have to do is cut to length.
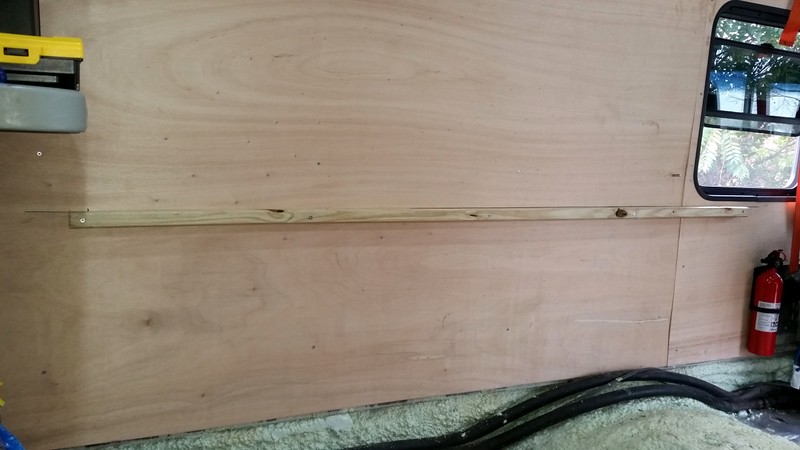
I measured and screwed on into the wall to support the back of the desk. Then I measured from there to get the design of the desk legs.
I drilled at an angle to screw into the floor and the wall.
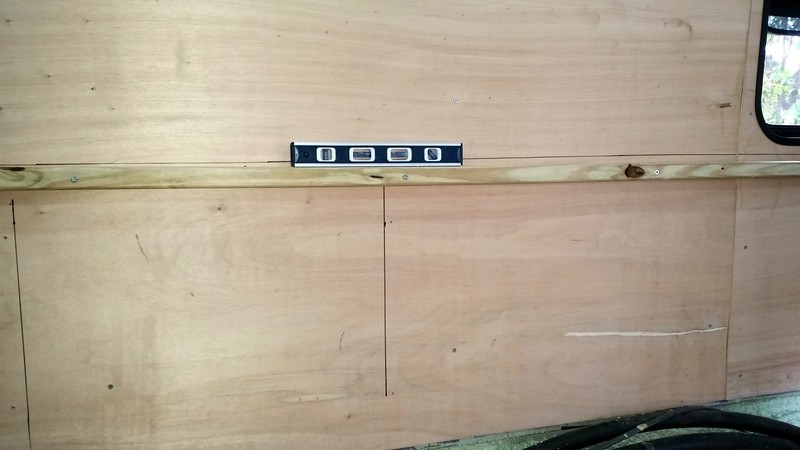
I noticed when I test fitted the desk legs they did not fit as I hoped. When I rechecked the wall support, I was off. First one installed two more to go. They will frame in the wheel hump.
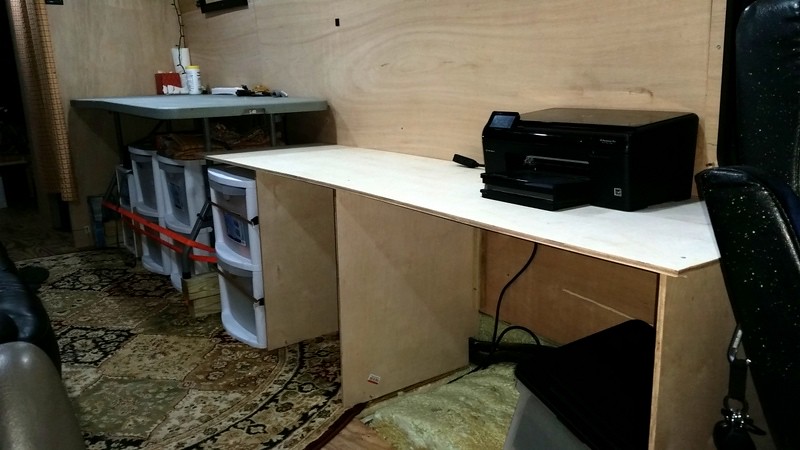
First thing the storage unit on the left will get removed and that leg will move to the end when I get my kitchen cabinets installed. That will give me more leg space. The area that frames the wheel hump will have drawers and a filing drawer installed on the left. The right side is where Im thinking of putting the hot water heater. My hydronic lines run right there. The heater is 12 x 12 x 18.
After using it for a week the first thing Im going to do is cut the area where I sit down to about one foot. This will help keep the computer chair out of the way. It will be cut in a curve and I will face a little to the right at my monitor. It is also nice to have the added work space when cooking, cleaning and general work in the bus.
|
|
|
|
|
11-10-2015, 05:27 PM
|
#825
|
|
Bus Geek
Join Date: Sep 2014
Location: Eustis FLORIDA
Posts: 23,764
Year: 1999
Coachwork: Thomas
Chassis: Freighliner FS65
Engine: Cat 3126
Rated Cap: 15
|
Cool to see yall enjoying the bus!
I'll have to try out one of those saws, looks handy.
|
|
|
|
|
11-12-2015, 04:41 PM
|
#826
|
|
Bus Nut
Join Date: Jun 2013
Location: West Lafayette, IN
Posts: 832
Year: 1999
Coachwork: Thomas
Engine: 3126
Rated Cap: 72
|
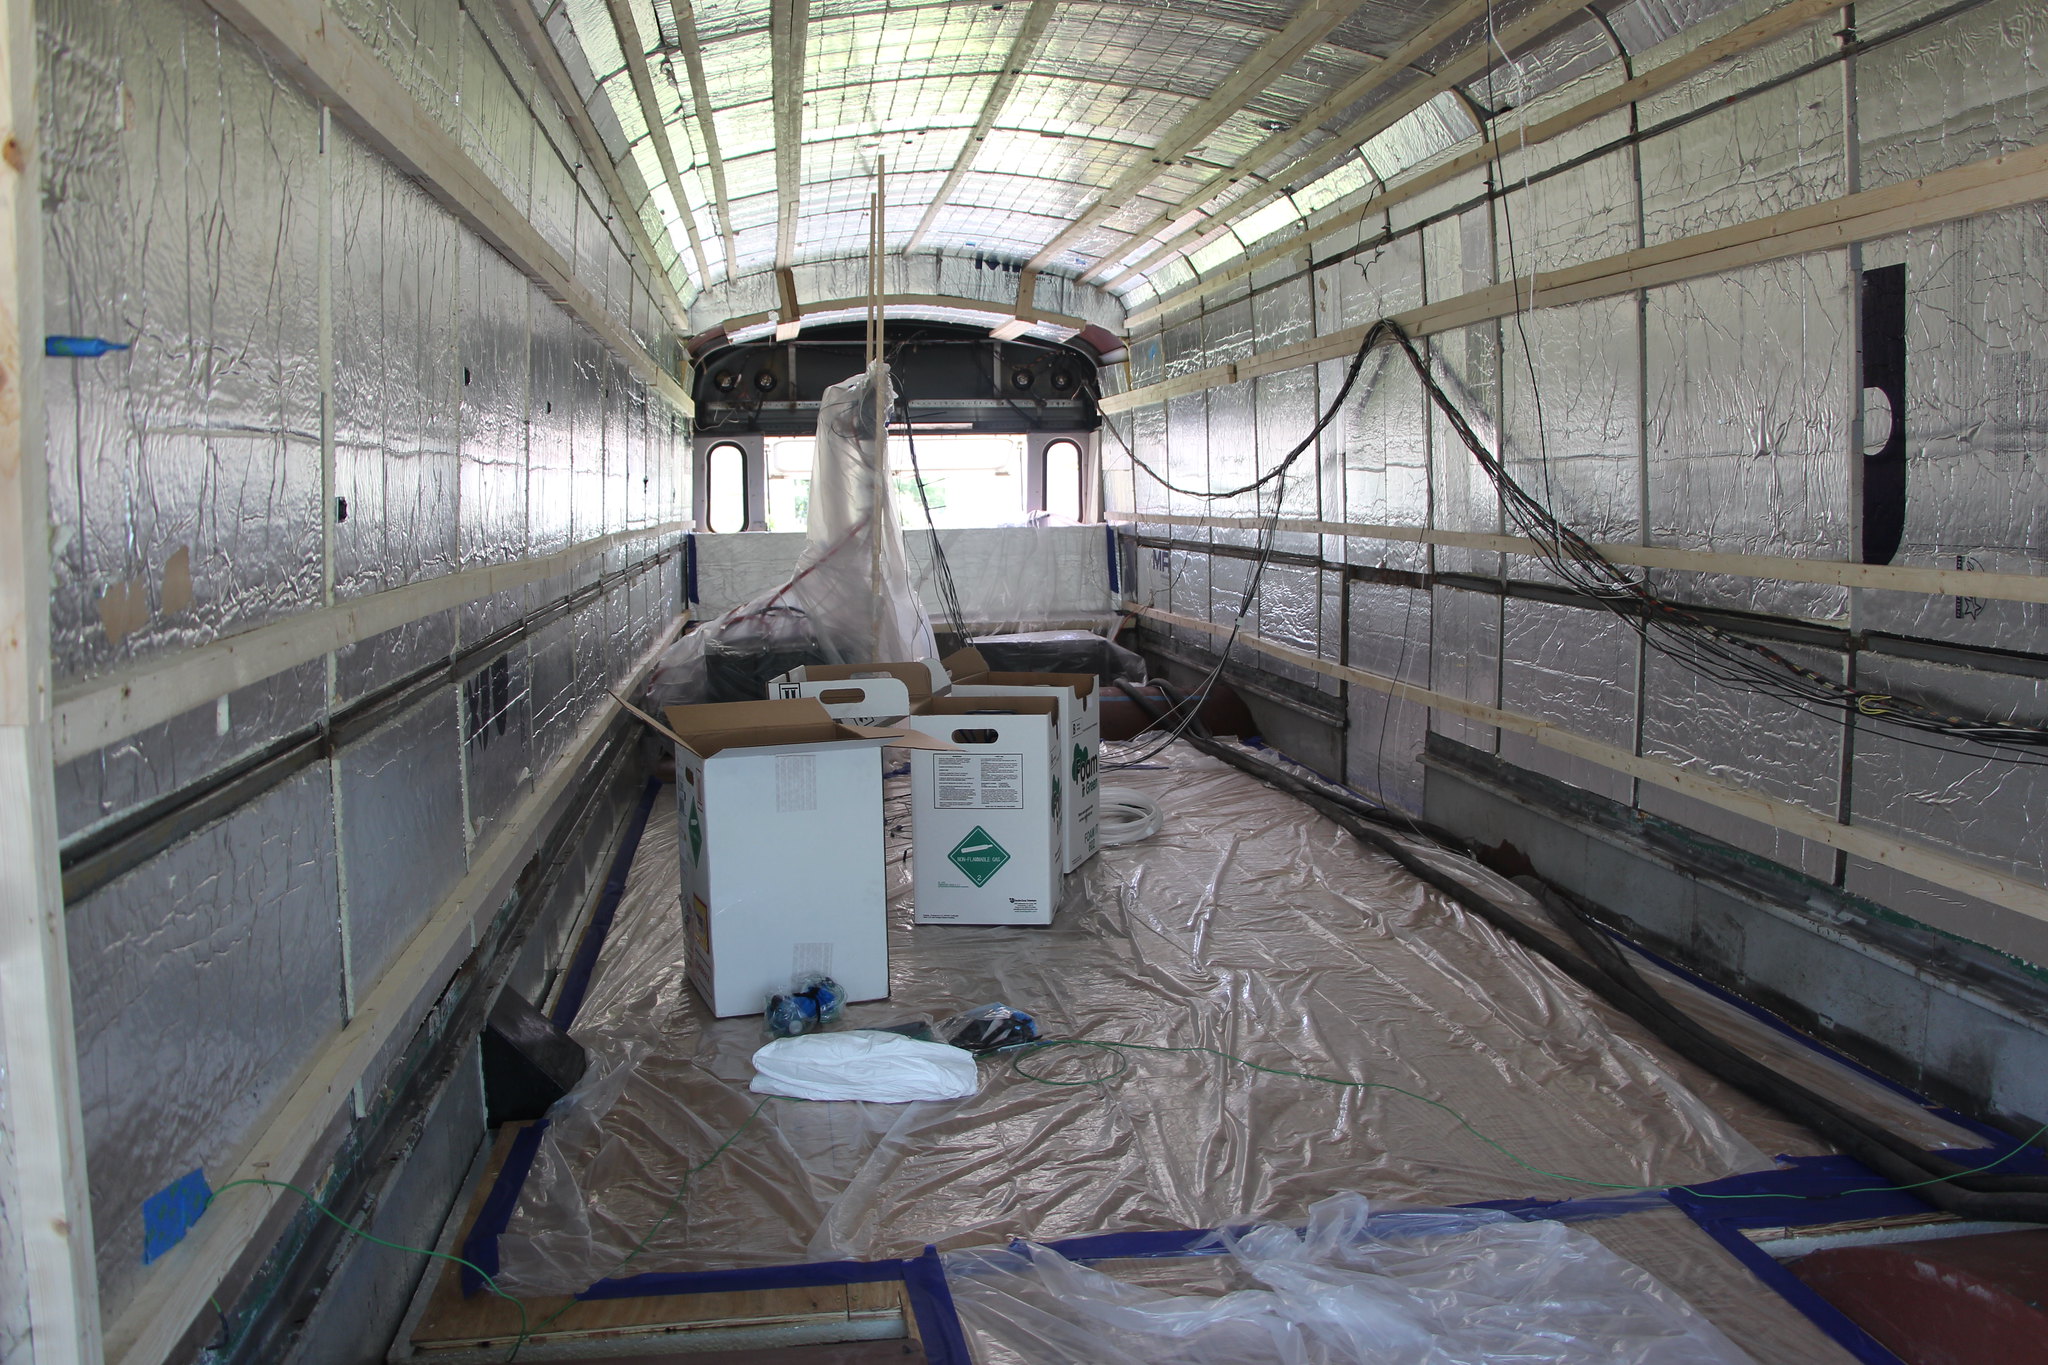
The Construction Starts Again.
It is good to be back working on the bus. All these things I want to get done, but where to start. After the Halloween weekend with my granddaughter that was an easy choice, the bathroom.
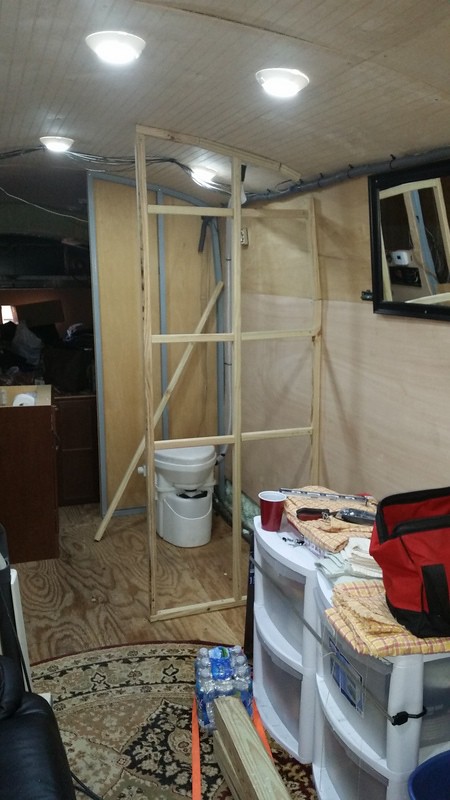
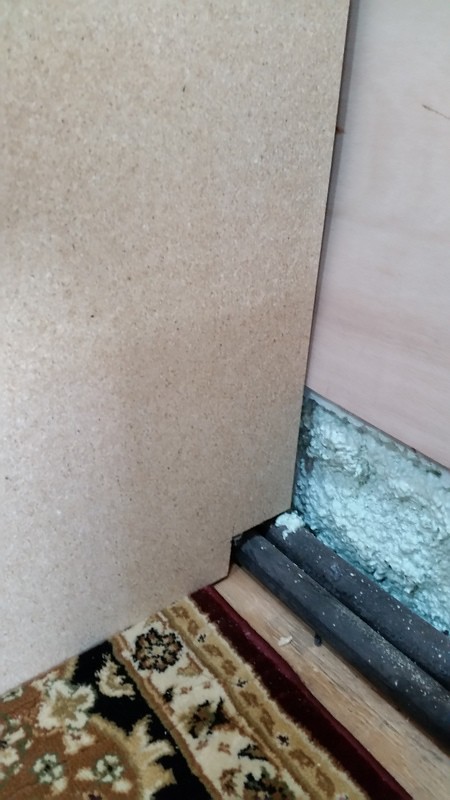
That wall in the back on the right with the fabric hanging down is my bathroom. I have one of my LED light on the ceiling with no wall switch to turn it on. She had issues with not having a door and not being able to reach the light to turn it on. As you can see in the old closet area on the back left, I used steel to build my walls. It was easy to put up but very flimsy and noisy while driving. The screws needed to be re-tightened all the time.
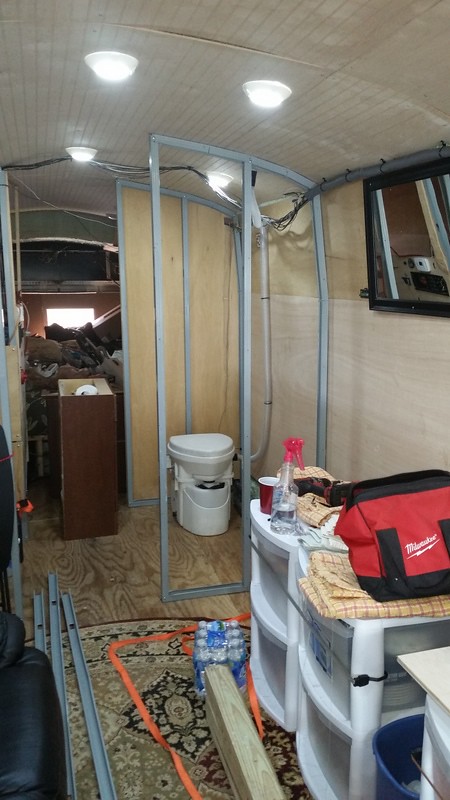
Everything is screwed down so it was easy to take it all out.
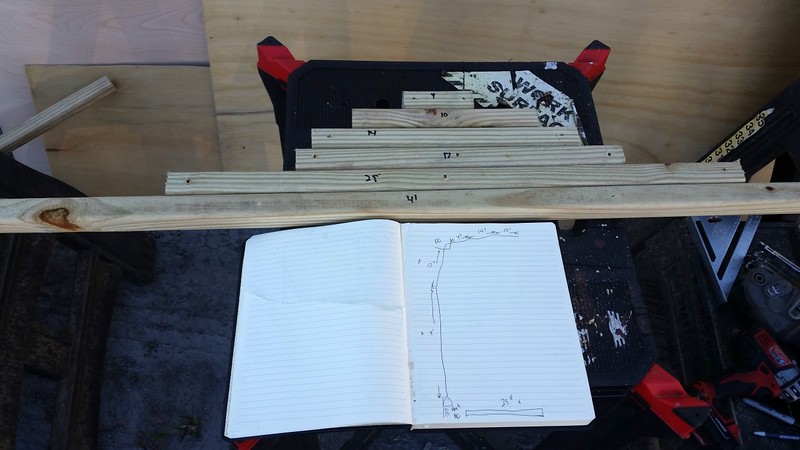
Since wood will not bend to conform to the curves in the bus, I used the steel to take measurements so I could pre-cut the wood. Once I get the first one figured out all the rest will be the same.
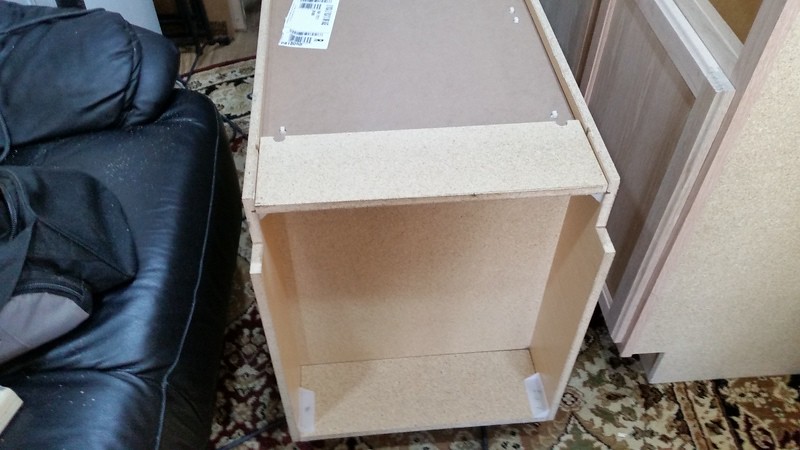
I bought a damaged Medicine cabinet and sink cabinet from Home Depot. they were marked way down, I got both for less than one new. The cross pieces you see in the wall are where the cabinets will be mounted.
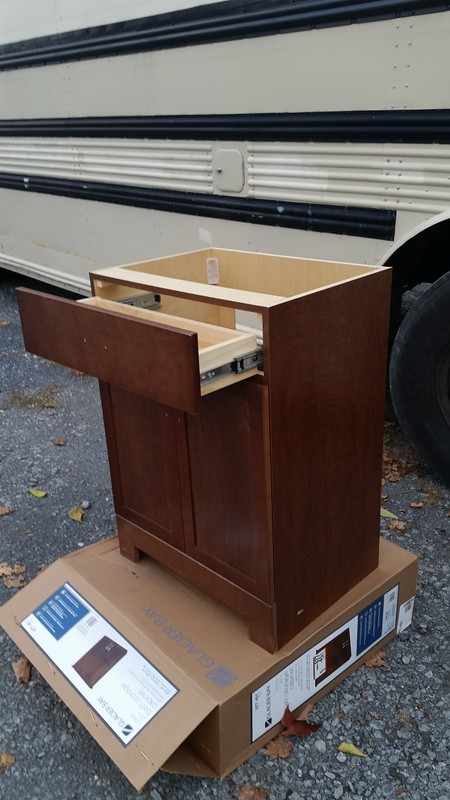
All the damage is in places that will be hidden in the bus. This cabinet is too deep for my use, I will not be putting a sink in it, when right around the wall is the kitchen sink. This cabinet is 18″ deep and I will cut it down to 12″. I wanted one with a drawer and this one has a half drawer, makes it easy to cut down.
I removed the back which was just stapled on, taped, marked and cut it down. Then re-stapled the back on and you have a shallow cabinet that fits perfect in my bathroom.
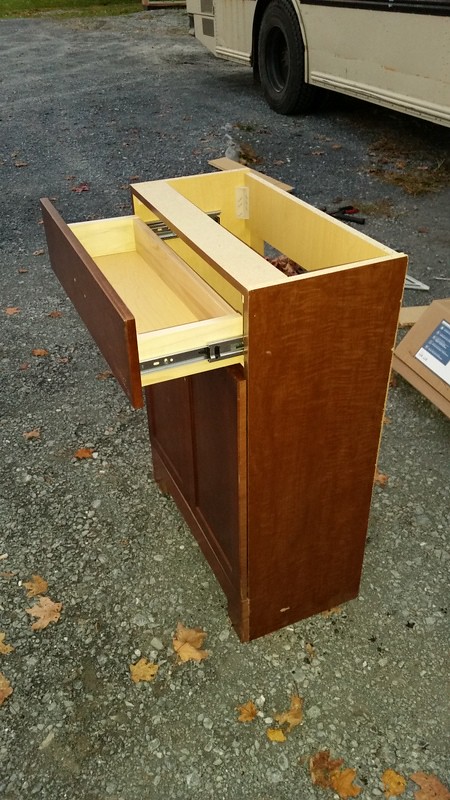
I was able to use the old 1/4 plywood and just re-attach them. Then install the cabinets.
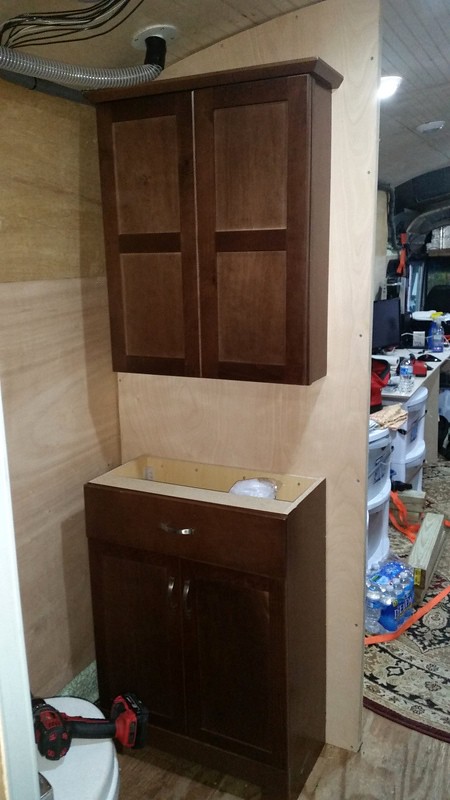
Repeat the steps for the rear wall.
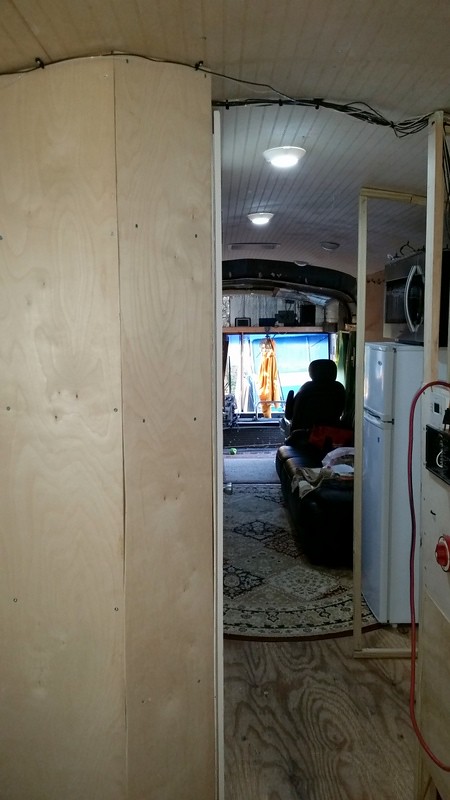
At the last minute I decided to take out the corner I was hitting every time I went into my bedroom and make it a 45 degree angle. It has worked out very well, even makes the entrance seem bigger when you go into the bedroom.
I used a pre-hung 2′ bathroom door, I just had to cut it down 2″ and it fit just fine. I even ran wires in the side wall and put in a switch for the light. When we used it for the Assateague Island trip my granddaughter gave it a thumbs up.
|
|
|
|
|
11-12-2015, 06:27 PM
|
#827
|
|
Bus Crazy
Join Date: Apr 2008
Location: Bakersfield, California
Posts: 1,013
Year: 1976
Coachwork: Crown
Chassis: Supercoach
Engine: Detroit 6-71 Mid-Ship Mounted
Rated Cap: 79 at Birth
|
Beautiful work!
|
|
|
|
|
11-13-2015, 12:02 PM
|
#828
|
|
Bus Nut
Join Date: Jun 2013
Location: West Lafayette, IN
Posts: 832
Year: 1999
Coachwork: Thomas
Engine: 3126
Rated Cap: 72
|
Road Trip
I was sitting in the bus this morning, it is a day off. I was thinking I would like to go over to the Waffle House for breakfast, but it is cold and windy and I'm too lazy to walk the block to get there. So I guess it will be cereal for breakfast.
I also wanted to stop by Home Depot to check out cabinets and sinks for tomorrow's install. But too lazy to unhook the electric for a 1 mile drive.
I'm also getting tired of the same old view where I'm parked.
Then it hit me, I'm in a mobile home, the Waffle House should have room for me to park, then I could swing by Home Depot then head up to Little Bennett Park and hang out for the day.

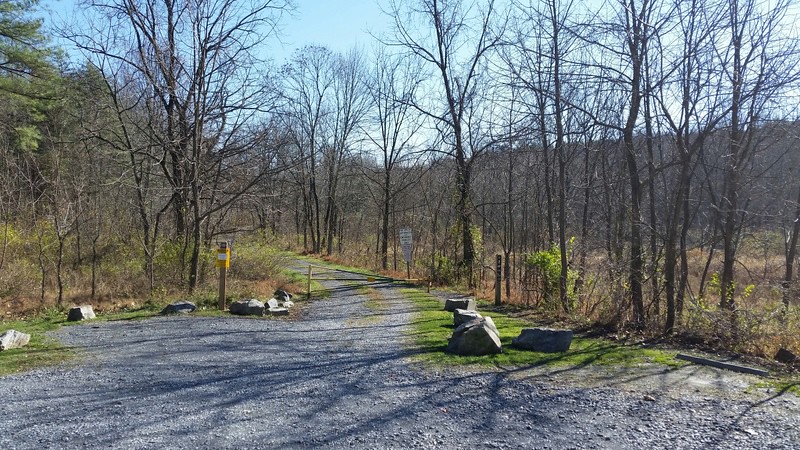
So here is where I'm parked for the day, what a ruff life, right Durango.
|
|
|
|
|
11-14-2015, 08:02 AM
|
#829
|
|
Bus Nut
Join Date: Jun 2013
Location: West Lafayette, IN
Posts: 832
Year: 1999
Coachwork: Thomas
Engine: 3126
Rated Cap: 72
|
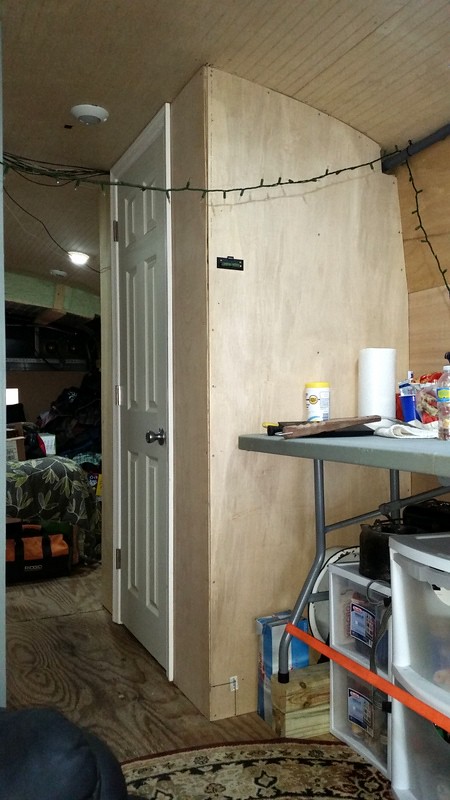
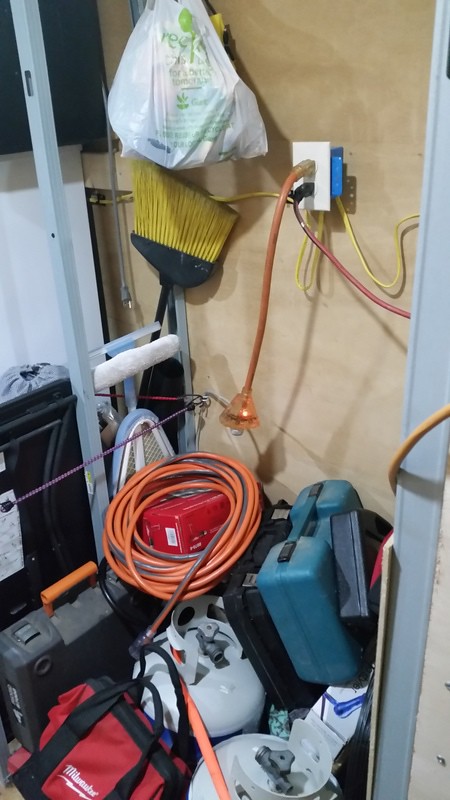
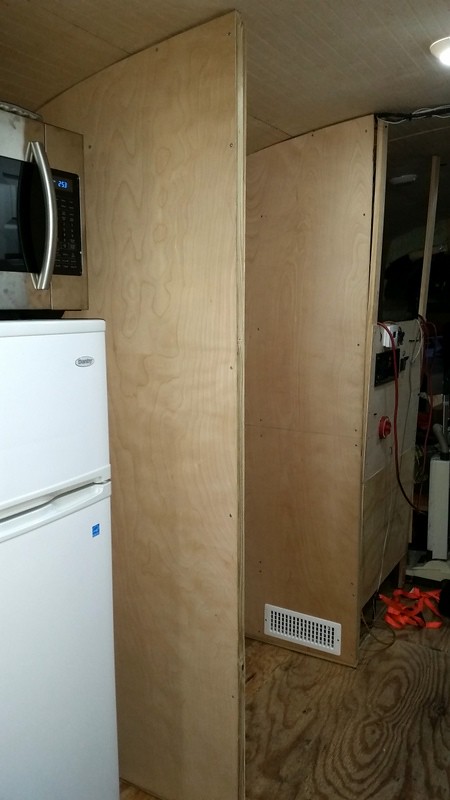
Storage, Closet and Dresser
Storage is one of the biggest problems with an RV, there is never enough. Ive created a 30″ x 36″ space across from my bathroom to be used as a shower.
I had the door for the bathroom setup so that when it opened it would close off the hall and make both the bathroom and shower one room. Great idea, I had it all planed out
After talking to many people with RVs, Class A, Class B and travel trailers. They all dont use their shower, except for storage. There are many reasons, shower is to small to use, need to fill fresh water and dump grey water often, creates a lot of humidity in the RV and it is a pain to clean among many.
I figured this would make a great closet. By using the same method I used to create the walls for the bathroom I re-did the walls for the new closet.

I used the same layout as before, the only difference was the depth was 1.5″ shorter. The top and bottom end pieces I made 1.5″ shorter. I used one of the bathroom walls before I re-attached it to make a template for the closet walls. I just cut that down 1.5″ too.
I put in a vent at the bottom for air flow to my power inverter and battery charger. The back wall is cut into three sections, the bottom section lines up with the bottom of the battery bay so I can get to the power inverter and battery charger. The middle section to give me access to my battery bank and electrical panel.
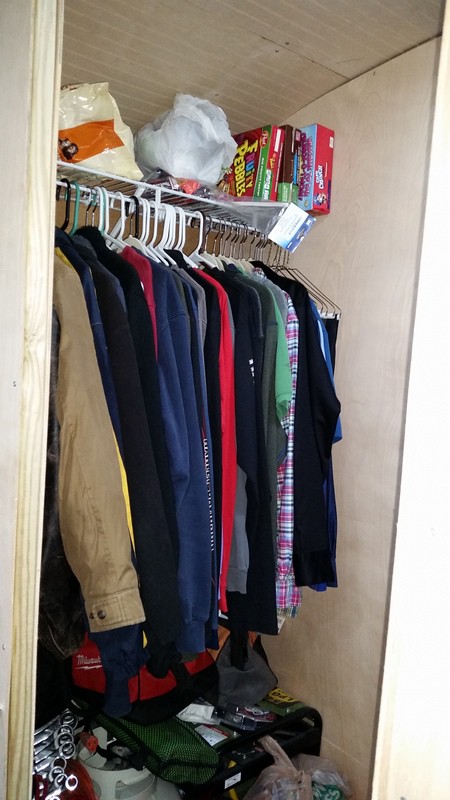
I was smart enough to put cross pieces in the wall to line up with the clothes hanging system I planned to use. I didnt want it all to come crashing down while I was driving down the road. I used the simple wire style to give me a shelf at the top for more storage. I have room at the bottom for my generator and all my tools. Someday I plan to mount the generator under the bus.
While living in the bus, I was laying in my bed looking at the battery bay and thought I wonder if a dresser would fit in there.
It was 1:00 am in the morning and I got up and measured the area. The next day I went to Walmart and found one of those build yourself dressers that would fit nicely.
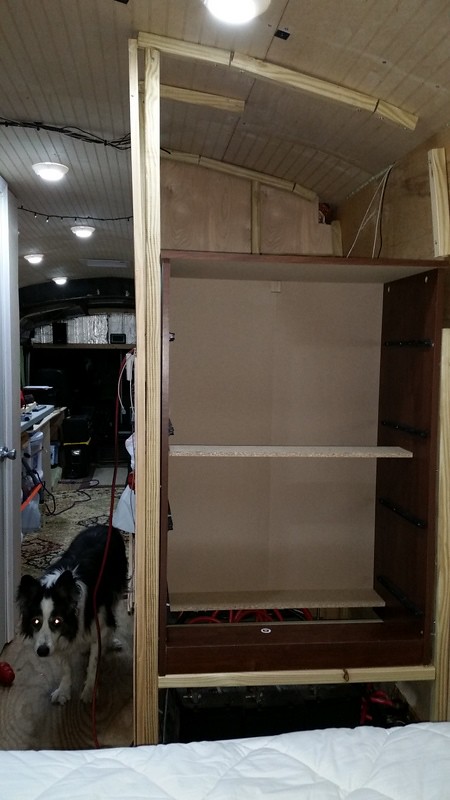
Using the same technique as I did with both the closet and bathroom. I made a wall platform front and back to place the dresser on. Then I screwed the sides of the dresser to the vertical supports. It is in there solid.
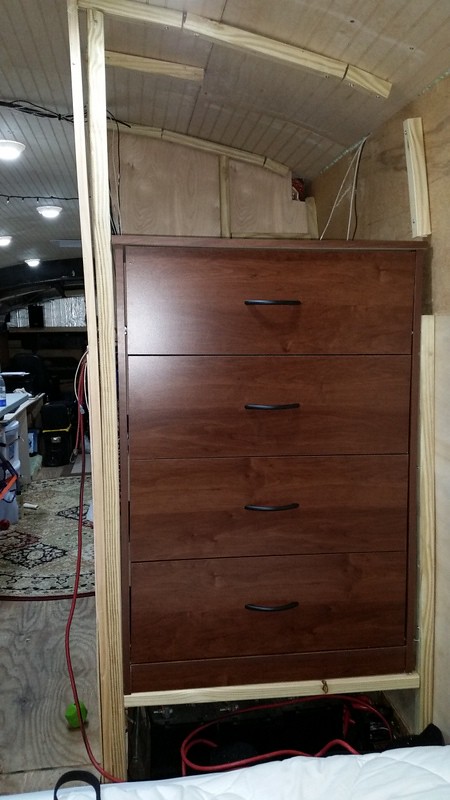
If I need to get to this side off the battery bank, I just pull out the drawers and remove the four side screws and it comes right out. I will eventually close in the top and make more storage. The bottom will be closed in and a vent added just like in the closet. It is nice have a dresser flush with the wall not taking up space in the bed room.
Between the closet and dresser, it is nice to have a place to put all my clothes.
|
|
|
|
|
11-14-2015, 09:07 AM
|
#830
|
|
Moderator
Join Date: Feb 2007
Location: NUNYA
Posts: 4,236
Year: 1995
Coachwork: Thomas
Chassis: 3800
Engine: DT408, AT545
Rated Cap: 23 500 gvw
|
Looking good. Now I know where you secret cereal stash is.
|
|
|
|
|
11-15-2015, 06:03 PM
|
#831
|
|
Bus Crazy
Join Date: Apr 2008
Location: Bakersfield, California
Posts: 1,013
Year: 1976
Coachwork: Crown
Chassis: Supercoach
Engine: Detroit 6-71 Mid-Ship Mounted
Rated Cap: 79 at Birth
|
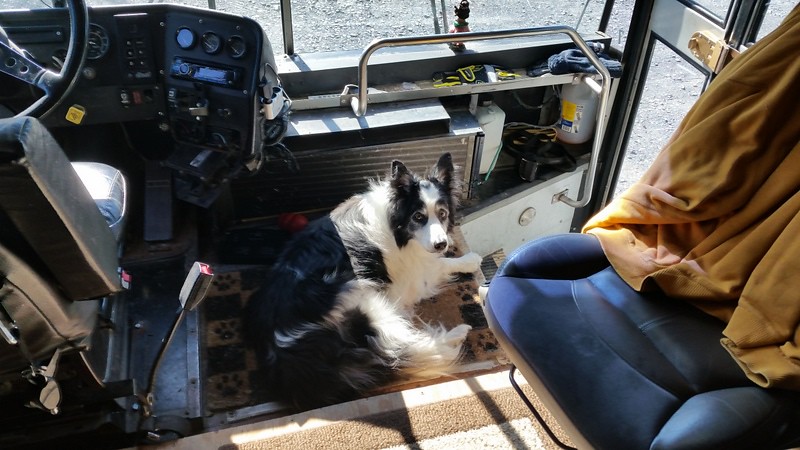
Durango looks like he is enjoying all your hard work!
|
|
|
|
|
11-17-2015, 11:29 AM
|
#832
|
|
Bus Crazy
Join Date: Aug 2014
Location: SW New Hampshire
Posts: 1,334
|
I want to give wmkbailey a shout-out and a Thanks! He invited me up to "help" him install some cabinetry. I spent the day walking all over his project and asking dumb newbie questions and learning a whole lot. And, I gave him 10 or 15 minutes of help wrangling cabinets and a countertop in. I'll let him put up the pics. A really fun day for me.
|
|
|
|
|
11-17-2015, 08:02 PM
|
#833
|
|
Bus Nut
Join Date: Jun 2013
Location: West Lafayette, IN
Posts: 832
Year: 1999
Coachwork: Thomas
Engine: 3126
Rated Cap: 72
|
Yes Durango is enjoying the Bus Life.
|
|
|
|
|
11-17-2015, 08:11 PM
|
#834
|
|
Bus Nut
Join Date: Jun 2013
Location: West Lafayette, IN
Posts: 832
Year: 1999
Coachwork: Thomas
Engine: 3126
Rated Cap: 72
|
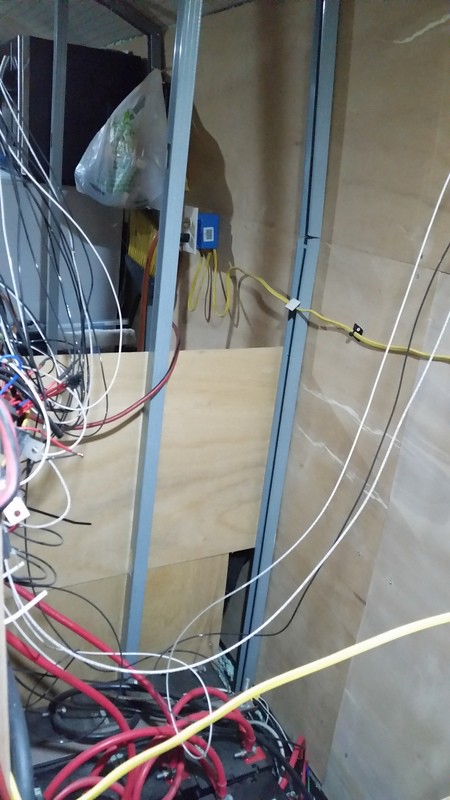
Update to Power Panel & Installing Kitchen Cabinets
My power panel is, or was a rats nest.
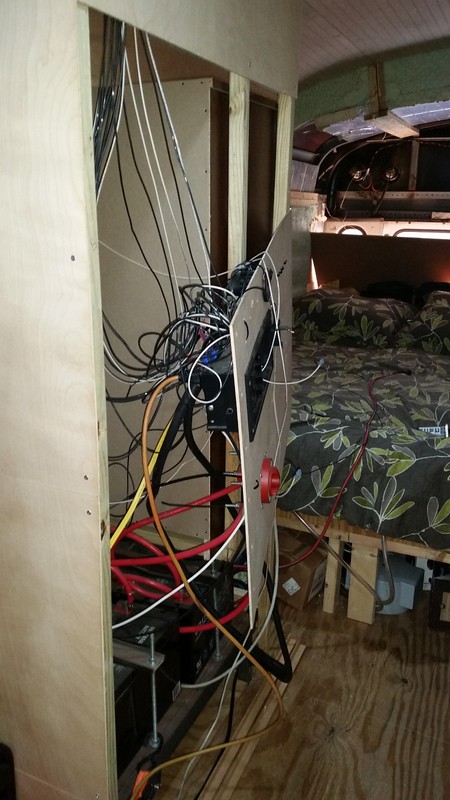
When I got my bus back in July of 2013, I knew I wanted to take it to Indiana for Christmas. I needed to get it insulated, batteries mounted and the electrical hooked up in under five months. I remember I finished the day before I left. That was cutting it close, so to save time I didnt try to make it look pretty.
Since I have both sides walled in with the closet and dresser, I figured it was time to do something about it.
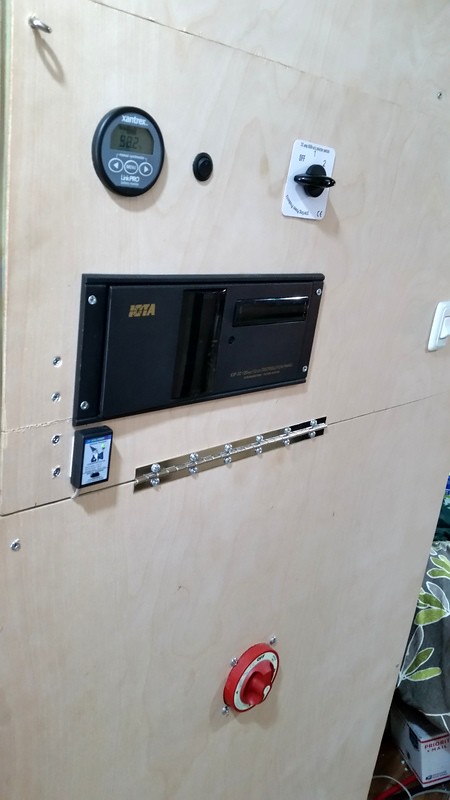

It is still not as clean as it could be, but I need to reroute my 12 DC side anyway and then I will be able to clean it up as I redo it.
On Saturday A fellow skoolie Dan Fox ask to come by and check out my bus and offered to help while he was there. It was nice to have an extra set of hands. So I put him to work helping me install my kitchen cabinets.
I had a 6′ table strapped to the floor with storage container so I could use the area as a kitchen. I knew I would put in 6′ of cabinetry. I bough one 36″ base cabinet for the sink and two 18″ cabinets to make up the 6′ area. I bought the cheapest non-finished cabinets Home Depot had. I plan to paint them not stain them.
They could not have gone in any easier. All I needed to do was cut a 1 3/4″ x 3″ notch for the hydronic water hoses.
I know Im installing them right on top of the carpet. I did things backwards to get the bus usable faster. I have not put in my flooring yet. Most of this will get redone when I get around to that.
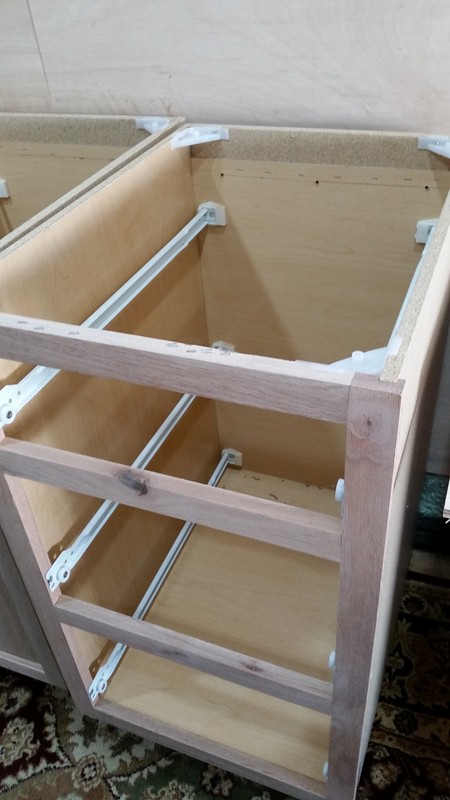
If any of you remember I ran 1″ x 2″ bolted to the steel supports that run every 22″ in the bus. There is one that runs just a little under 3′ to line up with the solid piece on the back of the cabinet. With the cabinets screwed to that, they are very secure.
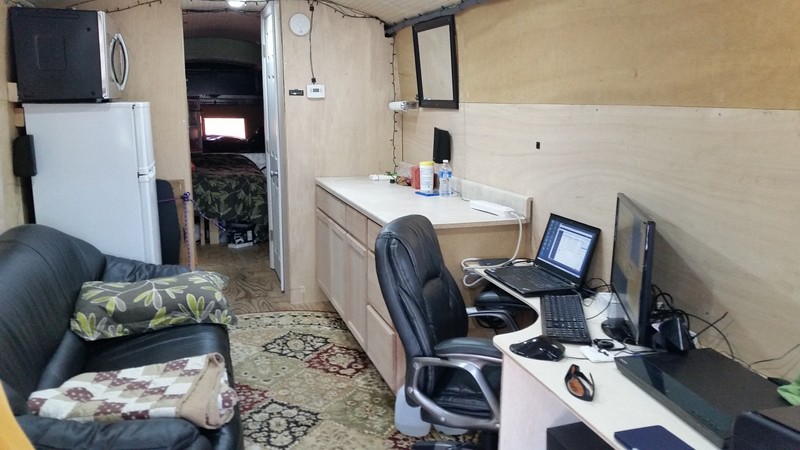
As you can see I also did the cutout in the computer desk. This arrangement works much better. Soon I will start putting in running water and at that time I will mount the sink. For now the drawers are secured with the child proof magnetic locks. There will be a post on the actual locks I plan to use, when I figure out how to mount them
|
|
|
|
|
11-18-2015, 05:35 PM
|
#835
|
|
Bus Nut
Join Date: Jun 2013
Location: West Lafayette, IN
Posts: 832
Year: 1999
Coachwork: Thomas
Engine: 3126
Rated Cap: 72
|
Wicked ride
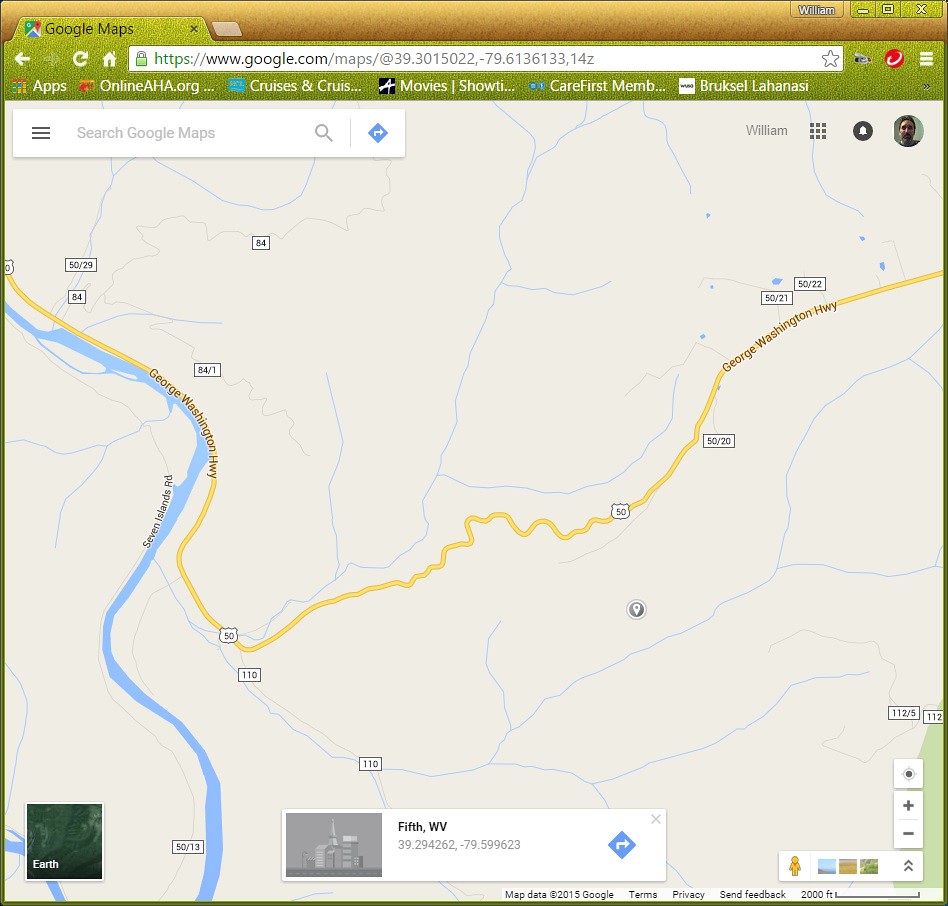
What a wicked ride this morning. I got up to drive two hours before I had to login for work. I took 219 south to pick up US 50. Then I came to this 9 degree down hill, max speed 30 mph with 25 - 15 mph curves.
All I can say is I'm glad I have a Allison MD 3060 push button transmission with a lockup clutch. I know that in 3rd the max I can go is 35. I selected 3rd and let the bus do most of the work, just a little breaking for the 25 - 15 mph curves
The only issue I had was my refrigerator kept coming open. I had to make an emergency stop here to get everything back in.


Not a bad place to take a break. Where I'm stopping for the day is at a Home Depot, sure I can figure something out to keep that door shut.
The uphill side of the valley was just as bad.
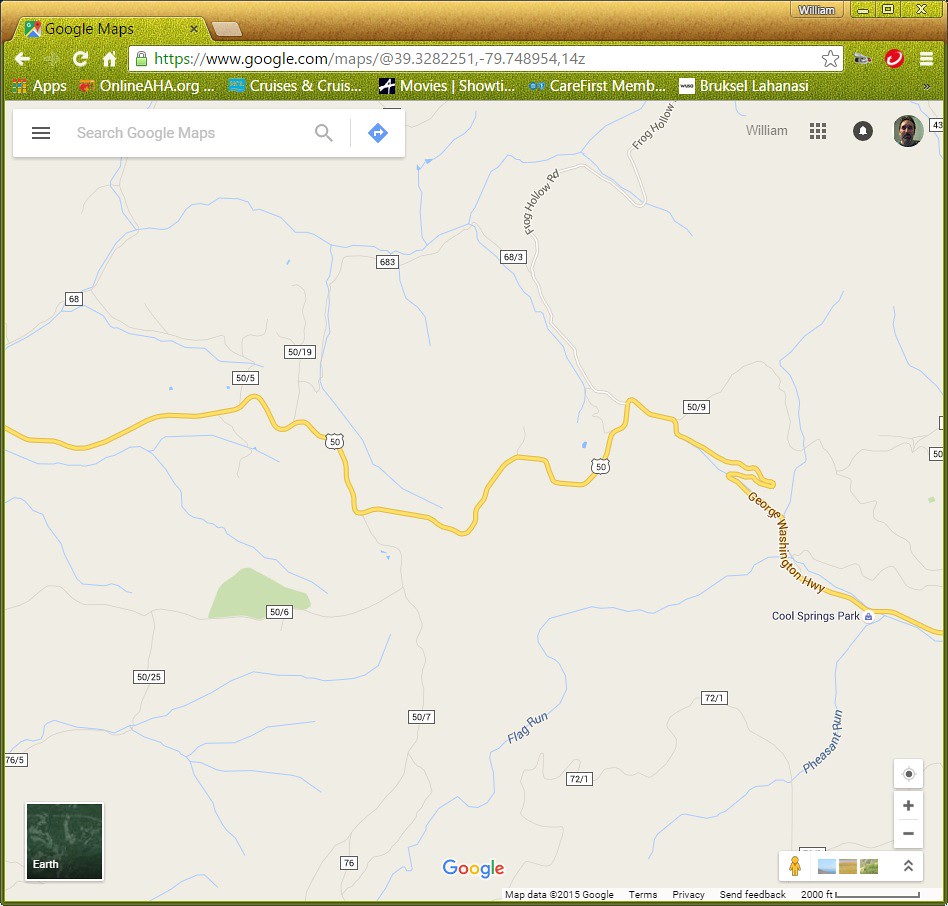
The bus is geared perfect for the climb. It had no problem getting back up to 35 after the 25 - 15 mph curves.
|
|
|
|
|
11-18-2015, 07:09 PM
|
#836
|
|
Bus Crazy
Join Date: Apr 2008
Location: Bakersfield, California
Posts: 1,013
Year: 1976
Coachwork: Crown
Chassis: Supercoach
Engine: Detroit 6-71 Mid-Ship Mounted
Rated Cap: 79 at Birth
|
Really nice computer table! For my refrig, I bought some one inch wide heavy duty velcro strips and the work great at keeping it closed and easy to open when you need to
|
|
|
|
|
11-19-2015, 02:59 PM
|
#837
|
|
Mini-Skoolie
Join Date: Aug 2015
Posts: 11
|
Hi William,
Have just read your thread from front to back. Amazing work you are doing.
I figured I would use my first post to suggest something like this for your fridge opener problem: http://www.amazon.co.uk/Safety-Fridg...cks+for+fridge Cheap and cheerful.
Keep up the fantastic work.
|
|
|
|
|
11-21-2015, 06:56 AM
|
#838
|
|
Bus Nut
Join Date: Jun 2013
Location: West Lafayette, IN
Posts: 832
Year: 1999
Coachwork: Thomas
Engine: 3126
Rated Cap: 72
|
Thanks Auwyn,
I found something very similar at Walmart. I put one on the frig and one on the microwave. I use the microwave to store all the stuff I usualy have sitting on the counter when I'm traveling.
Safety 1st Multi-Purpose Appliance Locks, 2 count - Walmart.com
|
|
|
|
|
11-23-2015, 06:54 PM
|
#839
|
|
Bus Nut
Join Date: Jun 2013
Location: West Lafayette, IN
Posts: 832
Year: 1999
Coachwork: Thomas
Engine: 3126
Rated Cap: 72
|
Re-doing the Bedroom
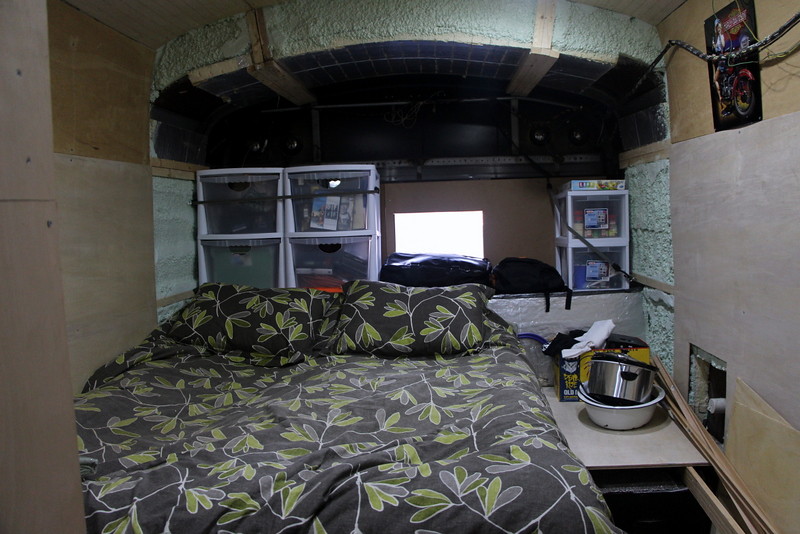
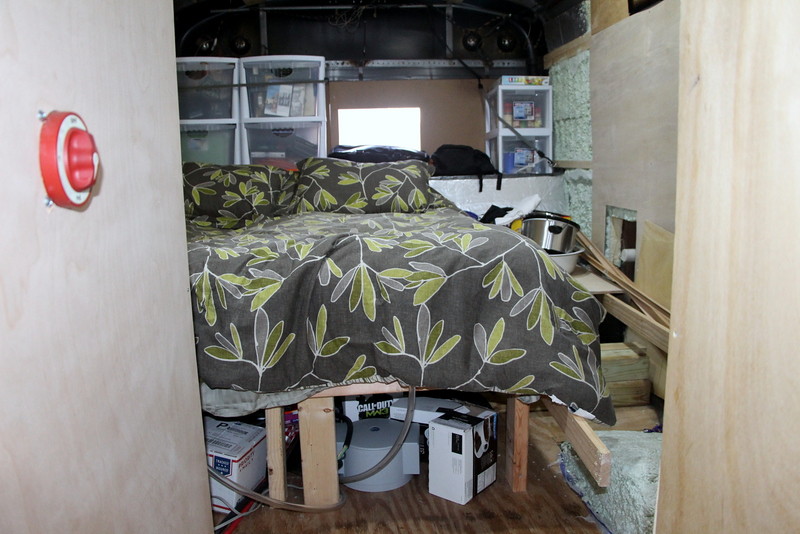
The first bed platform was just temporary. It was put in so I could start using the bus. I always planned to re-do it. For one thing it is difficult to get things in and out from underneath it. The platform will be hinged so that you can raised the bed and get to stuff below easier.
But first I need to finish insulating and covering the back before I can start building in the new platform. I guess for the next few days I will see how comfortable the sofa is.

There is 2″ of insulation and I need to cover areas that the insulation has come down. Im using the 1 1/4 that I built the walls, screwed to the steel engine ledge to give me places to screw the 1/4 plywood I will use to cover it.
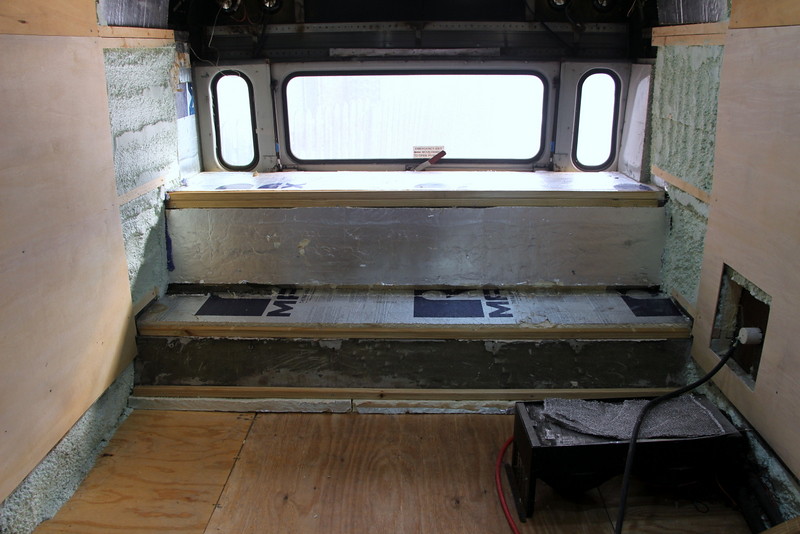
Dont worry I did not forget to insulate that 8″ section at the bottom. Now all that is left is to measure and cut the plywood.

I will do the ceiling later, this is all I need done to build the bed platform. My dad and I are working together on this. We will spend tomorrow figuring it all out. Everything in the bus has to be cut to fit, so it takes a little planning.
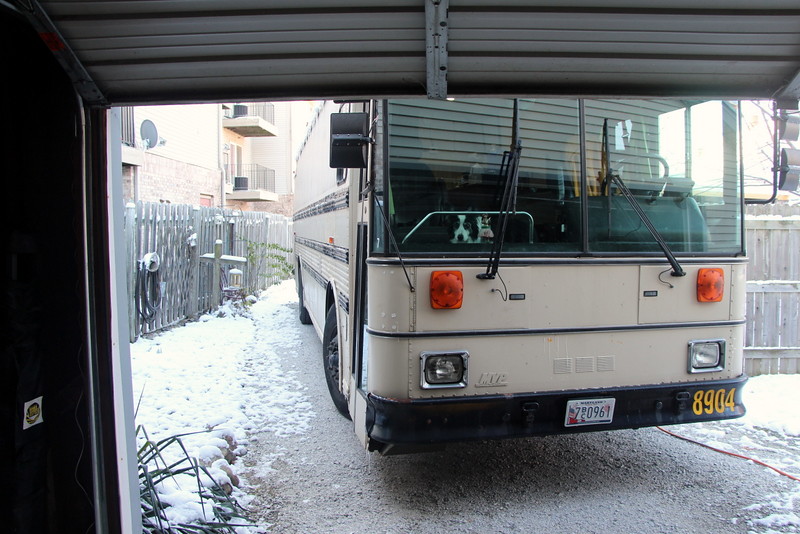
The last two day have been cold. we reached a low of 10 on the 21st. yesterday was not much warmer. We even got three inches of snow.
|
|
|
|
|
11-23-2015, 07:40 PM
|
#840
|
|
Bus Geek
Join Date: Sep 2014
Location: Eustis FLORIDA
Posts: 23,764
Year: 1999
Coachwork: Thomas
Chassis: Freighliner FS65
Engine: Cat 3126
Rated Cap: 15
|
Excellent update, and again I LOVE that roofline.
Check your PM's...
|
|
|
|
|
|
| Thread Tools |
|
|
| Display Modes |
 Linear Mode Linear Mode
|
 Posting Rules
|
You may not post new threads
You may not post replies
You may not post attachments
You may not edit your posts
HTML code is Off
|
|
|
|
 » Recent Threads
 |
|
|
|
|
|
|
|
|
|
|
|
|
|
|
|
|
|
|
|
|
|
|
|
|
|
|
|
|
|
|
|
|
|
|
|
|
|


