 |
|
 05-13-2016, 09:21 PM
|
#181
|
|
Skoolie
Join Date: Sep 2015
Posts: 193
|
Are you sure that wasn't meant for another thread?
|

|

|
|
05-13-2016, 09:30 PM
|
#182
|
|
Bus Geek
Join Date: May 2009
Location: Columbus Ohio
Posts: 18,830
Year: 1991
Coachwork: Carpenter
Chassis: International 3800
Engine: DTA360 / MT643
Rated Cap: 7 Row Handicap
|
Quote:
Originally Posted by Jman6631

Right, and that makes sense. For me, tearing into the harness is pretty daunting, but granted, if those systems aren't being used then I'm all for taking them out, provided I could figure it out of course!  |
the best way is to start at the switch and follow the wire from there.. you know what the switches do since they are labelled.. if you are extremely lucky your bus will having wiring diagram on the inside of the electrical console.. but thats really lucky.. its definitely something to take nice and slow thats for sure and take Lots of pictures AND notes...
so if you end up nuking something you want to keep then you have a fighting chance at getting it back...
when I built the custom A/C for my last bus I removed all the old school wiring and accidentilly yanked some wires for the cab lights on top of the bus.. luckily I had lots of pictures and notes so I didnt lose a crazy amount of time on it..
-Christopher
|
|
|
|
|
05-13-2016, 10:43 PM
|
#183
|
|
Skoolie
Join Date: Feb 2016
Location: Bemidji MN
Posts: 209
Year: 1998
Coachwork: Carpenter Body
Chassis: International 3800
Engine: DT466
Rated Cap: 65 to Zero. Folding Chair
|
Decal remove:
I used pure citrus air freshener and a 1" puddy knife to get my stickers and decals off without scratching or chipping paint.
The air freshener was $4.70 and had the some of the same active agents as paint thinners. It was a wonderful suggestion from the Auto Zone lady.
__________________
D.L. Jones III
"The Independence"
98 International
|
|
|
|
|
05-13-2016, 11:09 PM
|
#184
|
|
Bus Geek
Join Date: Feb 2016
Location: Willamina, Oregon
Posts: 6,409
Coachwork: 97 Bluebird TC1000 5.9
|
And now your bus is citrusy fresh too.
|
|
|
|
|
05-14-2016, 01:44 AM
|
#185
|
|
Bus Nut
Join Date: Jan 2016
Location: Greater Boston
Posts: 504
|
Try Goo Gone for decal removal. Its an orange/citrus-based cleaner, but it works pretty well.
|
|
|
|
|
05-14-2016, 06:14 AM
|
#186
|
|
Bus Geek
Join Date: Sep 2014
Location: Eustis FLORIDA
Posts: 23,764
Year: 1999
Coachwork: Thomas
Chassis: Freighliner FS65
Engine: Cat 3126
Rated Cap: 15
|
Quote:
Originally Posted by New2Skool
Decal remove:
I used pure citrus air freshener and a 1" puddy knife to get my stickers and decals off without scratching or chipping paint.
The air freshener was $4.70 and had the some of the same active agents as paint thinners. It was a wonderful suggestion from the Auto Zone lady.
|
I'm sanding my whole bus, so I just sanded the decals right off. Quick and easy.
|
|
|
|
|
05-14-2016, 10:21 AM
|
#187
|
|
Skoolie
Join Date: Sep 2015
Posts: 193
|
Goo Gone, which I use all the time, didn't do anything on these decals. When I say they were stubborn I mean they were realllllly stubborn. I sanded for a while too but that actually didn't work well at all. The paper just removed the paint around the decals and left the decals pretty much alone.
They're pretty cool though, as far as decal materials go anyway. Maybe this is common but during the day they are black, but when hit with headlights at night they reflect yellow back just like regular safety reflector material. It's almost a shame to have to remove them!
|
|
|
|
|
05-14-2016, 10:23 AM
|
#188
|
|
Skoolie
Join Date: Sep 2015
Posts: 193
|
Thanks cadillackid, a thorough methodology is very important. I have already cut into the harness by removing the inside dome lights during the tear down and the running lights for paint prep. I'd still have to cut them with the roof raise coming but I am a little concerned since I didn't label them. Need to get on that!
|
|
|
|
|
05-14-2016, 10:34 AM
|
#189
|
|
Skoolie
Join Date: Sep 2015
Posts: 193
|
The main question I have right now to anybody who will listen is if I should replace the batteries.
Even after a full night of charging, which did get the volts up to where they should be, the CCA of each is about half of the rated 700CCAs (700CCA seems low to me anyway).
Should I just replace them already or do they have more life? I "think" they are about 5 years old.
|
|
|
|
|
05-14-2016, 10:53 AM
|
#190
|
|
Bus Nut
Join Date: Mar 2016
Location: near Christiansburg VA
Posts: 692
Coachwork: Thomas
Chassis: Freightliner
Engine: Cummins 5.9
Rated Cap: 44 or 66? 11 rows
|
Quote:
Originally Posted by Jman6631
The main question I have right now to anybody who will listen is if I should replace the batteries.
Even after a full night of charging, which did get the volts up to where they should be, the CCA of each is about half of the rated 700CCAs (700CCA seems low to me anyway).
Should I just replace them already or do they have more life? I "think" they are about 5 years old.
|
Maybe buy new starter batteries but add them to your inverter bank? Or wire it so you can substitute them when your deep cycle batteries are low?
|
|
|
|
|
05-14-2016, 11:00 AM
|
#191
|
|
Skoolie
Join Date: Sep 2015
Posts: 193
|
Thanks Dapplecreek, for sure, I'm all for reducing/reusing/recycling!
|
|
|
|
|
05-14-2016, 01:01 PM
|
#192
|
|
Bus Geek
Join Date: Feb 2016
Location: Willamina, Oregon
Posts: 6,409
Coachwork: 97 Bluebird TC1000 5.9
|
If they're not performing well now, they will continue to get worse. True it wouldn't hurt to use them as your house batteries, but don't add them to an existing bank of house batteries. For batteries to be tied together, like house batteries or even when you're using dual batteries for you starter, they need to be matched batteries. That means they started their work life together and have been used together, as one battery. You can't put different batteries together to use as house batteries. Your current batteries were used together previously so they would transfer easily into a two battery house system, but with pretty poor potential. Are you willing to pay the core charges when you get new starter batteries so you can keep the old batteries? It could help you set up your house system to have a small bank of batteries to practice on. I'm not sure I'd pay core charges to keep batteries that I know are going bad.
Sorry if I'm preaching to the quire.
|
|
|
|
|
05-14-2016, 02:46 PM
|
#193
|
|
Bus Nut
Join Date: Feb 2015
Location: North carolina
Posts: 651
Year: 1986
Coachwork: Thomas
Chassis: Ford
Engine: Detroit 8.2
Rated Cap: 60 bodies
|
Correct robin
Don't add weaker batteries into a good bank because they are going to draw power from the good batteries making them weak.
I bought new starting batteries and debated using the old ones as exchange or house that were expected to fail at any moment and I was still dependent on my battery charger to maintain both I used them for cores? One because I didn't know what my new charger could do(haven't put it thrue it's paces) and I either way I wanted to be able to start and go home.
I am keeping my starting batteries completely seperate from the house batteries because I know if I have a house problem? I can always go home and figure it out and if I have a starting problem then it is between the starting batteries and anything associated but not anything I have created in the house system?
But my charger is capable to run the entire house without batteries and can jump the bus starting batteries in a few minutes. As hands on installed at this point.
|
|
|
|
|
05-14-2016, 07:15 PM
|
#194
|
|
Skoolie
Join Date: Sep 2015
Posts: 193
|
Great input guys, thanks a million.
I neglected to mention the newly charged batteries started her right up, and I mean instantly. I'll keep an eye on them and when the time is right and the budget allows I'll replace them and move them over to house power.
|
|
|
|
|
05-14-2016, 09:35 PM
|
#195
|
|
Bus Geek
Join Date: Sep 2014
Location: Eustis FLORIDA
Posts: 23,764
Year: 1999
Coachwork: Thomas
Chassis: Freighliner FS65
Engine: Cat 3126
Rated Cap: 15
|
Quote:
Originally Posted by Jman6631
Goo Gone, which I use all the time, didn't do anything on these decals. When I say they were stubborn I mean they were realllllly stubborn. I sanded for a while too but that actually didn't work well at all. The paper just removed the paint around the decals and left the decals pretty much alone.
They're pretty cool though, as far as decal materials go anyway. Maybe this is common but during the day they are black, but when hit with headlights at night they reflect yellow back just like regular safety reflector material. It's almost a shame to have to remove them!
|
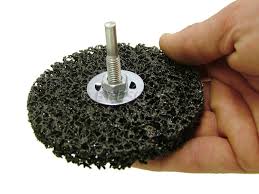
When I say I sanded the decals, I meant I used an abrasive disc. Like this one but bigger. On a drill and an angle grinder.
|
|
|
|
|
05-14-2016, 10:15 PM
|
#196
|
|
Mini-Skoolie
Join Date: Apr 2016
Posts: 17
|
Easy remove decals
I took my decals off with a heat gun. Warm them up, get a corner up, and they peel right off. Just keep heating where you are peeling.
|
|
|
|
|
05-14-2016, 10:18 PM
|
#197
|
|
Bus Nut
Join Date: Mar 2016
Location: near Christiansburg VA
Posts: 692
Coachwork: Thomas
Chassis: Freightliner
Engine: Cummins 5.9
Rated Cap: 44 or 66? 11 rows
|
Welcome, SilverSchooler! Glad you're here!
Thanks for the tip.
|
|
|
|
|
05-14-2016, 11:38 PM
|
#198
|
|
Bus Geek
Join Date: Feb 2016
Location: Willamina, Oregon
Posts: 6,409
Coachwork: 97 Bluebird TC1000 5.9
|
Do you know why your old batteries went bad? You did say they were 5 or 6 years old, but they often last longer. I was wondering if they were low on water or anything obvious? I understand the right kind of float charger will maintain them best during periods of non-use which in turn extends the life of the battery.
You scared me with this so I went out and bought some distilled water and examined my battery but it was just fine. It's amazing how we all share these stories about how we throw money at these buses. It's an expensive hobby.
|
|
|
|
|
05-15-2016, 07:12 AM
|
#199
|
|
Skoolie
Join Date: Sep 2015
Posts: 193
|
The heat gun only made things worse on mine. It made them curl up and readhere, and then they were realllllly hard/next to impossible to remove.
The batteries don't have a manufactured date on them that I can find, but the "01" (out of 10) is pinched out, along with "Oct," which I took to mean either Oct 2011 or Oct 2001, with the former being most likely.
They are sealed so I can't check inside. I will get a charger though for sure, to maintain them and the new batteries I'll eventually get.
I do agree it's expensive, but compared to what? I think it's a bargain for what you end up with and besides, who can put a price on seeing all those unicorns and rainbows?
|
|
|
|
|
05-15-2016, 07:22 AM
|
#200
|
|
Bus Geek
Join Date: Sep 2014
Location: Eustis FLORIDA
Posts: 23,764
Year: 1999
Coachwork: Thomas
Chassis: Freighliner FS65
Engine: Cat 3126
Rated Cap: 15
|
Quote:
Originally Posted by Jman6631
The heat gun only made things worse on mine. It made them curl up and readhere, and then they were realllllly hard/next to impossible to remove.
The batteries don't have a manufactured date on them that I can find, but the "01" (out of 10) is pinched out, along with "Oct," which I took to mean either Oct 2011 or Oct 2001, with the former being most likely.
They are sealed so I can't check inside. I will get a charger though for sure, to maintain them and the new batteries I'll eventually get.
I do agree it's expensive, but compared to what? I think it's a bargain for what you end up with and besides, who can put a price on seeing all those unicorns and rainbows?
|
If you have a Rural King nearby they have batteries CHEAP.
Mine have been stone reliable for like 2 years now. I start it every month or two. G31's were $75 when I bought mine.
|
|
|
|
|
|
| Thread Tools |
|
|
| Display Modes |
 Linear Mode Linear Mode
|
 Posting Rules
|
You may not post new threads
You may not post replies
You may not post attachments
You may not edit your posts
HTML code is Off
|
|
|
|
 » Recent Threads
 |
|
|
|
|
|
|
|
|
|
|
|
|
|
|
|
|
|
|
|
|
|
|
|
|
|
|
|
|
|
|
|
|
|
|
|
|
|


