 |
|
 02-15-2017, 08:50 AM
|
#2081
|
|
Bus Geek
Join Date: Mar 2011
Location: Houston, Texas
Posts: 8,462
Year: 1946
Coachwork: Chevrolet/Wayne
Chassis: 1- 1/2 ton
Engine: Cummins 4BT
Rated Cap: 15
|
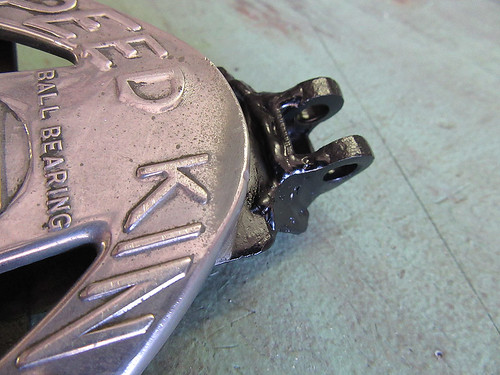
Thanks. I came across it a couple of years ago and had to have it. If you look closely, it reads..."Speed King". Hardly what I expect from this rig, but a fun touch anyway.
|

|
|
|
02-15-2017, 09:08 AM
|
#2082
|
|
Bus Nut
Join Date: Jan 2015
Location: Brazoria County, Texas
Posts: 819
Year: 1997
Coachwork: Carpenter
Chassis: International
Engine: T444E
Rated Cap: 32 Passenger
|
Tango, you have the same thing going for yourself that I have. We are somewhat on the short side of "NOSE BLEED" If you catch my drift.
|
|
|
|
|
02-18-2017, 09:02 AM
|
#2083
|
|
Bus Geek
Join Date: Mar 2011
Location: Houston, Texas
Posts: 8,462
Year: 1946
Coachwork: Chevrolet/Wayne
Chassis: 1- 1/2 ton
Engine: Cummins 4BT
Rated Cap: 15
|
More bits & pieces --- Still bouncing around on thirteen dozen different projects, but I did manage to finish up the steel frame for my sofa/bed. Also got some more insulation in.
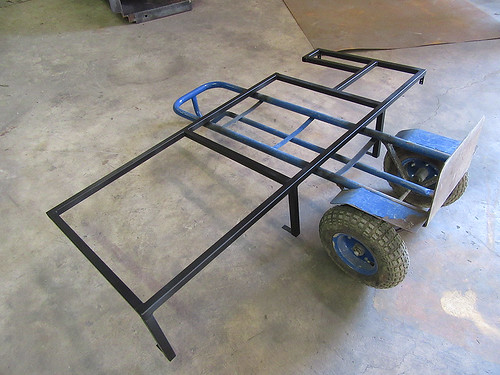
Ready to go. It will be a while before I actually install it, but needed it to help with the placement of things around it.
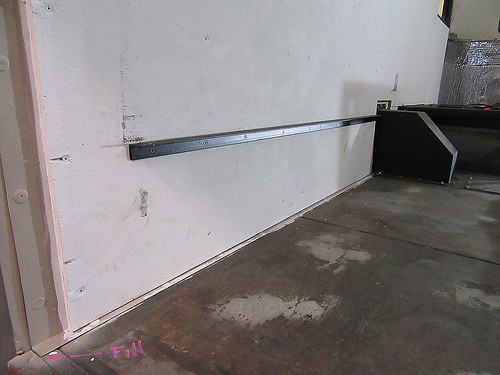
It will attach to the wall via this rail.
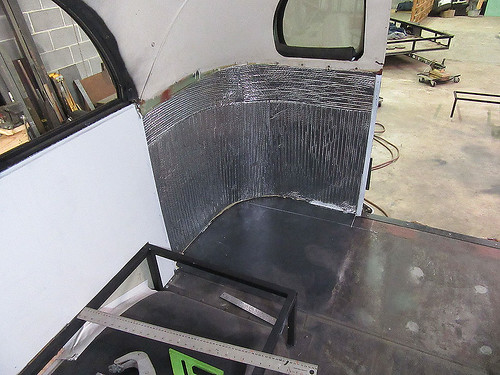
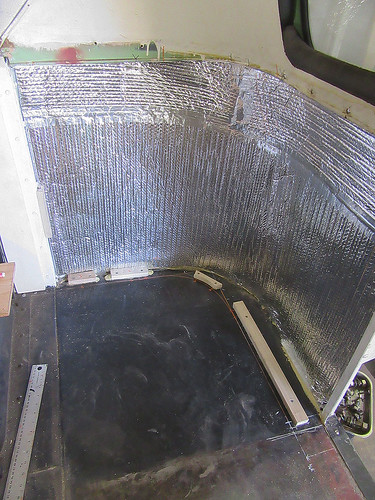
Not as fancy or effective as a foam job, but a couple of layers of Reflectix does a pretty good job of limiting heat transfer.
Still battling the whole dash/steering/brake arrangement but just needed a break from it all doing other stuff.
ONWARD!
|
|
|
|
|
02-18-2017, 10:49 AM
|
#2084
|
|
Bus Nut
Join Date: Jan 2015
Location: Brazoria County, Texas
Posts: 819
Year: 1997
Coachwork: Carpenter
Chassis: International
Engine: T444E
Rated Cap: 32 Passenger
|
That Reflectix does a really good job on vw beetles. Not bad sound deadener either. That is the only way I can work on a large project. I have to have different things at one time. Back in my day "they" just called it hyperactivity. Give the kid a lawnmower and let him go out and earn a dollar or two. Keep up the good work Tango. CARRY ON
|
|
|
|
|
02-18-2017, 07:14 PM
|
#2085
|
|
Bus Geek
Join Date: Mar 2011
Location: Houston, Texas
Posts: 8,462
Year: 1946
Coachwork: Chevrolet/Wayne
Chassis: 1- 1/2 ton
Engine: Cummins 4BT
Rated Cap: 15
|
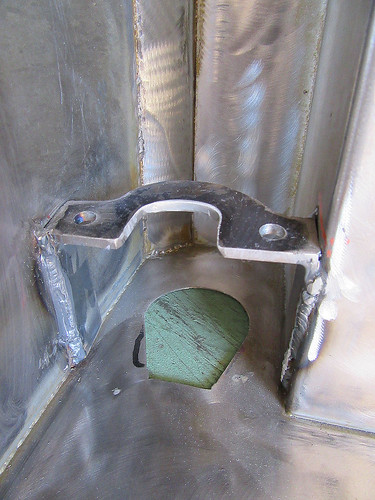
Thanks Phatman --- Spent most of the day today "revising" some steel work. After many in and outs and measurements and cusswords...I came to the conclusion I needed to modify what I am calling my "footwell". This is where the steering goes through the floor and the pedals will hang...someday.
It fit, but was so snug against the outer body that I decided to trim one corner off at 45*. Easier said than done. The cut out and patch had to be pretty precise and all I have to work with is a big hand held 7" cutoff. It was a bit of a nail biter as those things like to dig in and take off on their on, but it worked out just fine by going verrrry slooowwly. Only real problem was when I set one of my favorite shirts on fire, but hey, it's not like it was the first time.
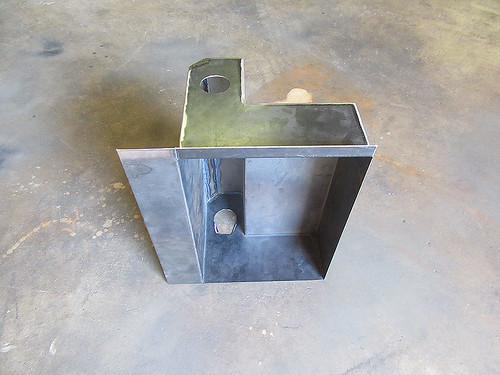
It is the left rear corner that was trimmed. Also opened up the hole for the steering shaft to give it a better angle (DO NOT EXCEED 30 DEGREES!)
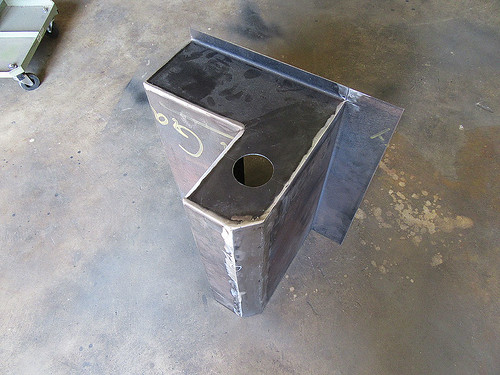
From the back you can see where one corner is now beveled. Before it was just about touching the outer body. Probably just close enough to rattle at every bump and make me nuts.
Now...about all that homemade steering stuff...
ONWARD!
|
|
|
|
|
02-19-2017, 09:30 AM
|
#2086
|
|
Bus Nut
Join Date: Jan 2015
Location: ...little north of Toronto Ontario
Posts: 606
Year: 2000
Coachwork: Thomsass
Chassis: FreightShaker
Engine: 5.9 Cummins 5 speed
Rated Cap: 2 ATV's and friends
|
Making some decent progress Tango, lookin' good!
|
|
|
|
|
02-19-2017, 07:51 PM
|
#2087
|
|
Bus Geek
Join Date: Mar 2011
Location: Houston, Texas
Posts: 8,462
Year: 1946
Coachwork: Chevrolet/Wayne
Chassis: 1- 1/2 ton
Engine: Cummins 4BT
Rated Cap: 15
|
Thanks Redd...just gotta' keep chippin' away at it --- Today was wash day. Acid wash, that is. Best cure I have found so far for removing mill scale. After chopping up amd welding the footwell portion of my dash/firewall arrangement, it was time to clean up the nasty hot rolled steel. A mix of Muriatic acid and water plus a little dish washing soap took it off much better than grinding or sanding. It does the job in areas you just can't reach with a disk. You will get a little flash rust on the surface but that is easy to deal with.
Seems a lot of folks just weld or paint over mill scale, but that is a really bad idea. Mill scale is nothing more than a layer of concentrated oxidation...rust. Not what you want as a base for much of anything. If you don't believe me...read up on it.
And...Just for Jack (aka; Ol' Trunt)...
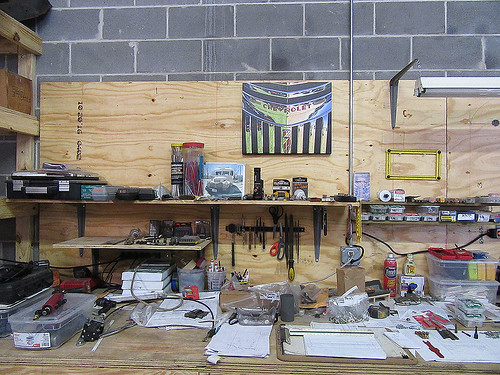
Many thanks for the "Not BBQ" grill! It has a place of glory in my shop to keep me motivated. Thanks again pardner!
ONWARD!
|
|
|
|
|
02-21-2017, 09:36 AM
|
#2088
|
|
Bus Geek
Join Date: Mar 2011
Location: Houston, Texas
Posts: 8,462
Year: 1946
Coachwork: Chevrolet/Wayne
Chassis: 1- 1/2 ton
Engine: Cummins 4BT
Rated Cap: 15
|
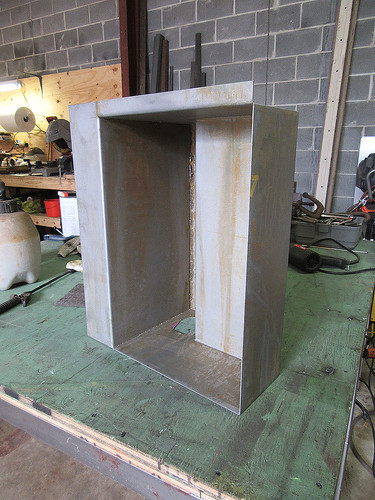
Howdy All --- Didn't get a lot done yesterday but did make some progress.
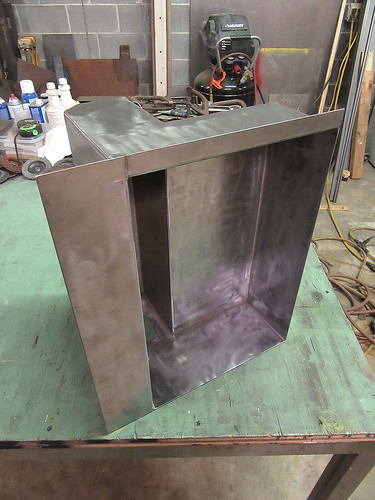
Here is my "footwell" after acid washing all the mill scale off and hitting it with a stripping pad. Much easier, cleaner than trying to grind all that nastiness off.
Once that was done I could re-fit it into the new firewall and locate the positions for the throttle return spring attachments. Still have to cut/drill for the throttle cable and mount the steering bearing brackets but at least some work got done.
ONWARD!
.
|
|
|
|
|
02-21-2017, 12:04 PM
|
#2089
|
|
Bus Crazy
Join Date: Feb 2012
Location: Salt Lake City Utah
Posts: 1,635
Year: 2000
Chassis: Blue Bird
Engine: ISC 8.3
|
Thanks for the repetitive mentions of acid washing the scale off the metal.... I have yet to try it, but the result looks fantastic and I definitely need lots of reminders to keep it fresh in the memory!
|
|
|
|
|
02-21-2017, 12:41 PM
|
#2090
|
|
Bus Nut
Join Date: Jan 2015
Location: Brazoria County, Texas
Posts: 819
Year: 1997
Coachwork: Carpenter
Chassis: International
Engine: T444E
Rated Cap: 32 Passenger
|
Quote:
Originally Posted by Tango

Thanks Redd...just gotta' keep chippin' away at it --- Today was wash day. Acid wash, that is. Best cure I have found so far for removing mill scale. After chopping up amd welding the footwell portion of my dash/firewall arrangement, it was time to clean up the nasty hot rolled steel. A mix of Muriatic acid and water plus a little dish washing soap took it off much better than grinding or sanding. It does the job in areas you just can't reach with a disk. You will get a little flash rust on the surface but that is easy to deal with.
Seems a lot of folks just weld or paint over mill scale, but that is a really bad idea. Mill scale is nothing more than a layer of concentrated oxidation...rust. Not what you want as a base for much of anything. If you don't believe me...read up on it.
And...Just for Jack (aka; Ol' Trunt)...
Many thanks for the "Not BBQ" grill! It has a place of glory in my shop to keep me motivated. Thanks again pardner!
ONWARD!
|
Love the NON BBQ GRILL !!!
|
|
|
|
|
02-21-2017, 07:31 PM
|
#2091
|
|
Bus Crazy
Join Date: Apr 2008
Location: Bakersfield, California
Posts: 1,013
Year: 1976
Coachwork: Crown
Chassis: Supercoach
Engine: Detroit 6-71 Mid-Ship Mounted
Rated Cap: 79 at Birth
|
Nice work on the sofa bed frame...I envy your welding skills
|
|
|
|
|
02-22-2017, 09:03 AM
|
#2092
|
|
Bus Geek
Join Date: Mar 2011
Location: Houston, Texas
Posts: 8,462
Year: 1946
Coachwork: Chevrolet/Wayne
Chassis: 1- 1/2 ton
Engine: Cummins 4BT
Rated Cap: 15
|
Thanks BC...It's amazing how much better you can make welds look with the right grinder  .
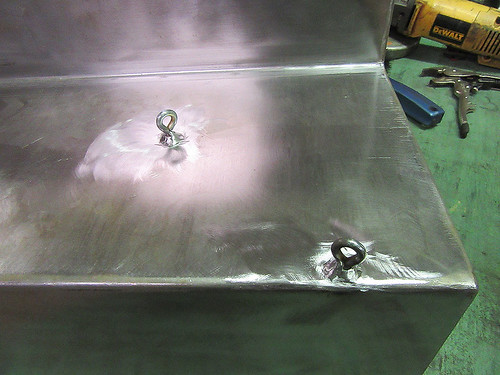
After another dozen or so in & outs, I now have the gas pedal and steering pretty much worked out.
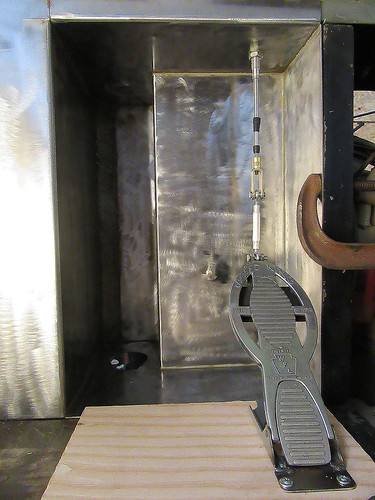
Wound up "revising" the way the linkage attaches to the pedal. You can't see it, but I spent way too long making a teeny, tiny little welded eye that connects the cable to the pedal. But at least it is now in and functioning.
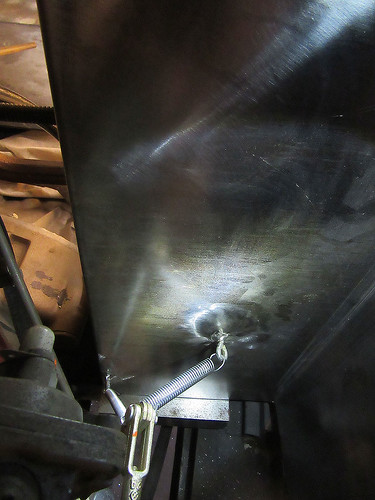
On the backside of the box is where the return springs attach to the throttle arm on the engine. I like having two in case one fails.
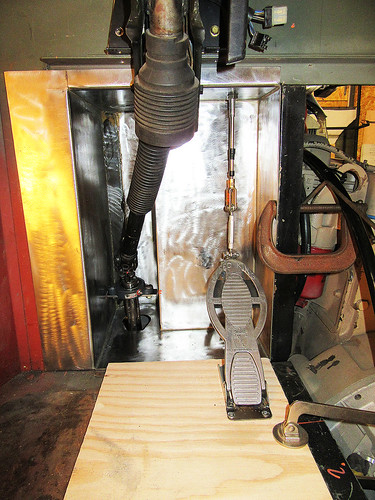
And here it is with the steering linkage in place. Still working on a small bracket that will stabilize the column where the bearing is located then on to the really BIG task...the brakes that have to go in there somewhere.
Advice to anyone thinking about converting an antique school bus into an updated, highway capable RV...
START YOUNG!!!
ONWARD!
|
|
|
|
|
02-22-2017, 10:49 AM
|
#2093
|
|
Bus Geek
Join Date: Apr 2012
Location: So Cal
Posts: 3,231
Year: 1935
Coachwork: Superior
Chassis: Chevy
Engine: 317 ci/tid / Isuzu
|
Amen to that Tango!
|
|
|
|
|
02-22-2017, 02:31 PM
|
#2094
|
|
Bus Geek
Join Date: May 2009
Location: Columbus Ohio
Posts: 18,848
Year: 1991
Coachwork: Carpenter
Chassis: International 3800
Engine: DTA360 / MT643
Rated Cap: 7 Row Handicap
|
yeppers you are doin a skoolie conversion PLUS building a Street rod!!!!
ive done the hotrod thing.. though never built a complete modern streetrod out of a 40s car.. I have helped on a few such projects.. and they looked and felt very much like you are doing.. lots of custom fab and custom Re-Fab when you discover the first time around wouldnt work
-Christopher
|

|
|
|
02-22-2017, 03:12 PM
|
#2095
|
|
Bus Nut
Join Date: Jan 2015
Location: Brazoria County, Texas
Posts: 819
Year: 1997
Coachwork: Carpenter
Chassis: International
Engine: T444E
Rated Cap: 32 Passenger
|
Quote:
Originally Posted by Tango
Thanks BC...It's amazing how much better you can make welds look with the right grinder .
After another dozen or so in & outs, I now have the gas pedal and steering pretty much worked out.
Wound up "revising" the way the linkage attaches to the pedal. You can't see it, but I spent way too long making a teeny, tiny little welded eye that connects the cable to the pedal. But at least it is now in and functioning.
On the backside of the box is where the return springs attach to the throttle arm on the engine. I like having two in case one fails.
And here it is with the steering linkage in place. Still working on a small bracket that will stabilize the column where the bearing is located then on to the really BIG task...the brakes that have to go in there somewhere.
Advice to anyone thinking about converting an antique school bus into an updated, highway capable RV...
START YOUNG!!!
ONWARD!
|
You left out the second part Tango.......... And have lots of money or be willing to take some constructive criticism !!
|
|
|
|
|
02-23-2017, 02:03 AM
|
#2096
|
|
Bus Geek
Join Date: Mar 2011
Location: Houston, Texas
Posts: 8,462
Year: 1946
Coachwork: Chevrolet/Wayne
Chassis: 1- 1/2 ton
Engine: Cummins 4BT
Rated Cap: 15
|
Just a couple of detail shots...
This was a nail-biter. It is the bracket I had to make and install that holds the steering shaft bearing in place. Everything had to line up just right.
And this tiny bit of metal was a bear as well. It is the new clevis attachment for the throttle cable. Fabbing & welding stuff this small is royal pain.
Now if I can just figure out where the heck to stuff all the brake parts I have laying around.
ONWARD!
|
|
|
|
|
02-23-2017, 08:37 AM
|
#2097
|
|
Bus Nut
Join Date: Jan 2015
Location: Brazoria County, Texas
Posts: 819
Year: 1997
Coachwork: Carpenter
Chassis: International
Engine: T444E
Rated Cap: 32 Passenger
|
Tango the Fab work looks like it's coming along pretty good. It's a good thing my friend that you are not a big guy....... boy would you be cramped.
|
|
|
|
|
02-23-2017, 08:59 AM
|
#2098
|
|
Bus Geek
Join Date: Mar 2011
Location: Houston, Texas
Posts: 8,462
Year: 1946
Coachwork: Chevrolet/Wayne
Chassis: 1- 1/2 ton
Engine: Cummins 4BT
Rated Cap: 15
|
Roger that. The roof is so low that I need not fear being invaded by giants...or...normal sized people.
Could well be The Hobbit Bus. Hmmm...wonder what kind of insulation growing grass on the roof would provide...
|
|
|
|
|
02-23-2017, 10:44 AM
|
#2099
|
|
Bus Nut
Join Date: Jan 2015
Location: Brazoria County, Texas
Posts: 819
Year: 1997
Coachwork: Carpenter
Chassis: International
Engine: T444E
Rated Cap: 32 Passenger
|
That's the idea Tango. Always thinking !!! Do you have room for a snare ?
|
|
|
|
|
02-27-2017, 08:31 AM
|
#2100
|
|
Bus Geek
Join Date: Mar 2011
Location: Houston, Texas
Posts: 8,462
Year: 1946
Coachwork: Chevrolet/Wayne
Chassis: 1- 1/2 ton
Engine: Cummins 4BT
Rated Cap: 15
|
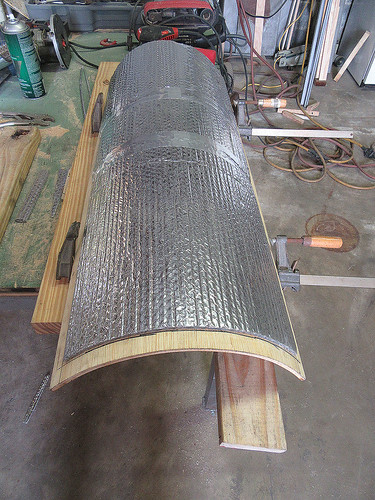
Back to boat building --- At least that's what I call the woodwork necessary to accommodate all this old gals curves. Forget true & square, nothing is either on this puppy so you wind up cutting every piece to fit whatever compound angles she might have.
Putting wall panels into the passenger side rear quarter called for making a number of blocks to attach the new wood onto.
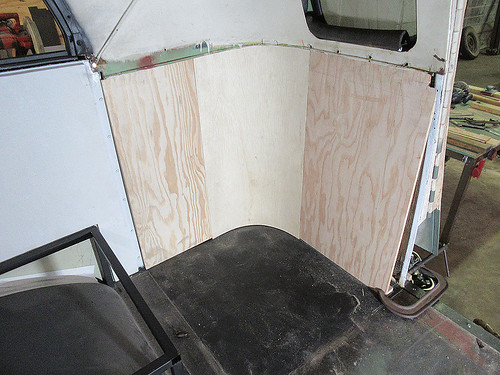
Here is a test fit of the wall panels. The center, lighter segment is formed with "bender board", a very flexible type of specialty plywood. Handy stuff.
After a great deal of careful fitting, cutting & routing, several coats of shellac were applied and some radiant barrier insulation applied to the backside of each panel.
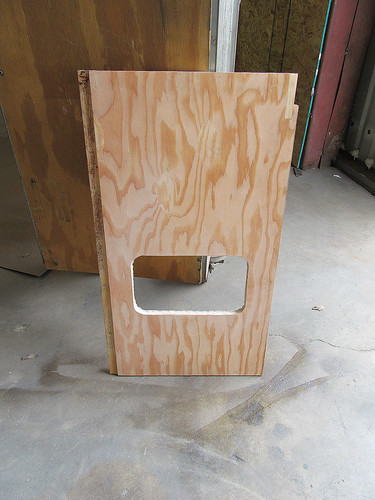
The space between the inner & outer wall is minimal, but I decided to try and use it anyway by cutting an access opening. In a Shorty, you gotta try and use every cubic inch. A hatch cover for this will be forthcoming.
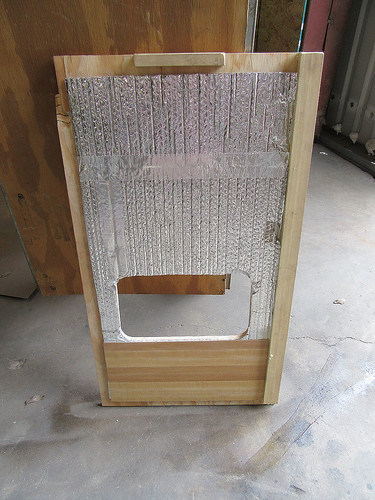
Here's what the back of that panel looks like. As with the others, it required more time than I would have liked, but fitting was a bear.
It will be a while before I actually do the final installation of the panels, but at least most of the done.
ONWARD!
|
|
|
|
|
|
 Posting Rules
|
You may not post new threads
You may not post replies
You may not post attachments
You may not edit your posts
HTML code is Off
|
|
|
|
 » Recent Threads
 |
|
|
|
|
|
|
|
|
|
|
|
|
|
|
|
|
|
|
|
|
|
|
|
|
|
|
|
|
|
|
|
|
|
|
|
|
|


 Linear Mode

