Journey with Confidence RV GPS App RV Trip Planner RV LIFE Campground Reviews RV Maintenance Take a Speed Test Free 7 Day Trial ×


Reply
 
Thread Tools Display Modes
 
Old 05-14-2016, 09:07 PM   #1
Bus Crazy
 
sdwarf36's Avatar
 
Join Date: Oct 2009
Location: Moodus, Ct.
Posts: 1,062
Year: 1996
Coachwork: Champion
Chassis: Ford e-450
Engine: 7.3 Powerstroke
Rated Cap: 14
A bus is never done-wheel arch rebuild

When I first built my bus, I came across rusted out wheelwells. The 2-3" gap between the Ford wheel arches + the Champion box was filled--with spray foam. I'm sure it worked fine for years-but after a while it stays wet-and rusts everything out. I was able to chisel everything out and make a patch from the inside to seal things from the floor up-so I could start on the interior. I had this roll of plastic-pretty sure it was the sides to an above ground pool-nice thick stuff. I made a inner liner for the underside of the well-it worked awsome. I'll get to the underneath when I can...
has it really been 8 years?
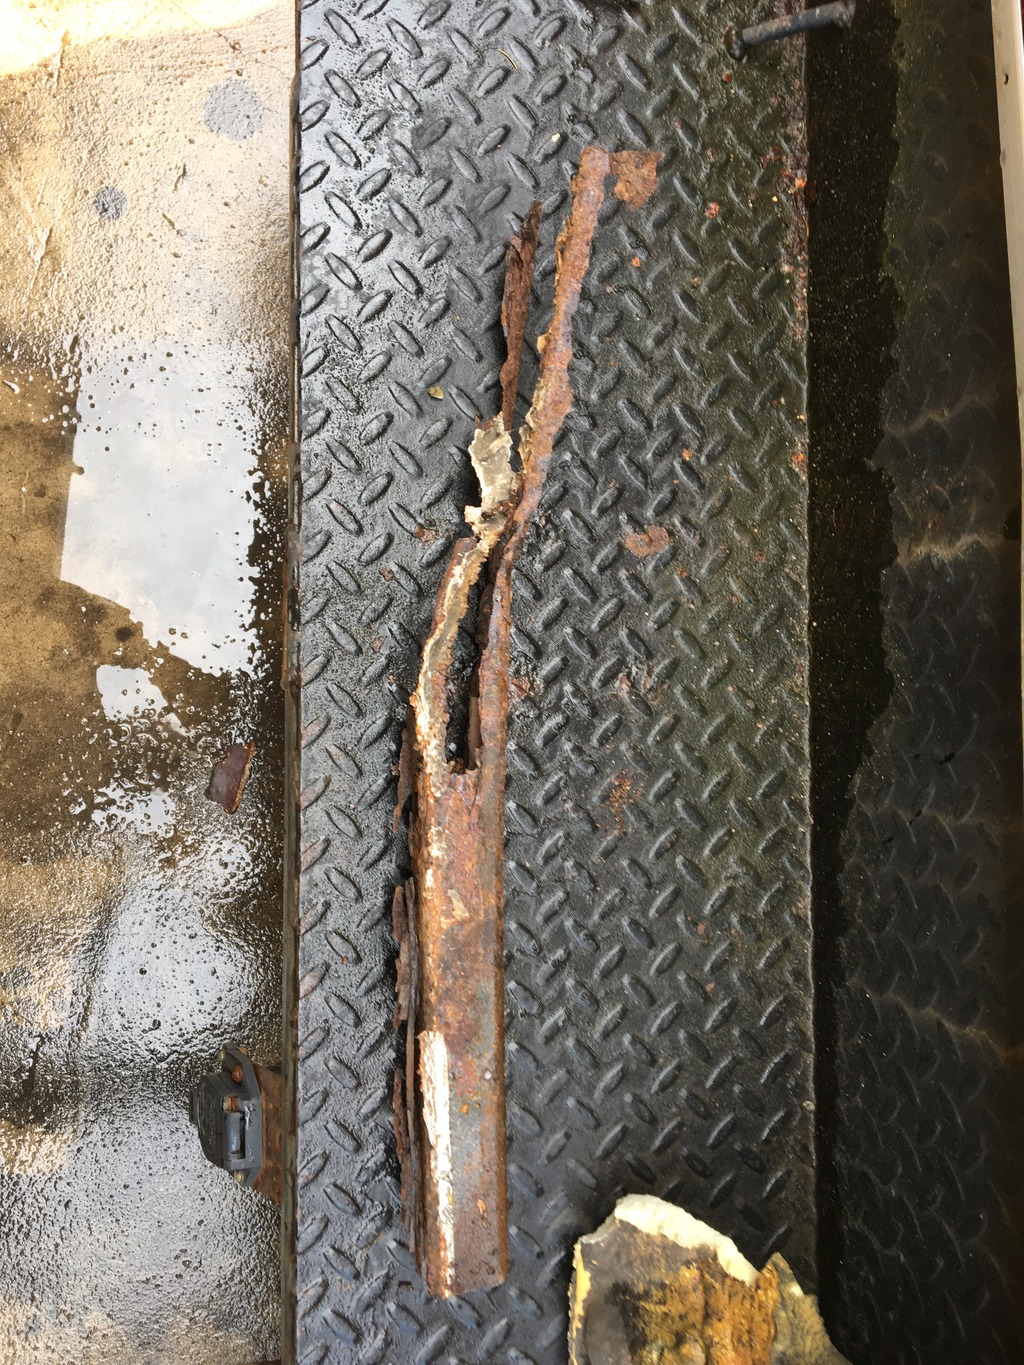
Originally the metal from the floor down was thin-maybe 22 gauge-backed by spray foam. Heres a chunk.
The lower piece slides under one above-with screws in the rub rail holding it all together.

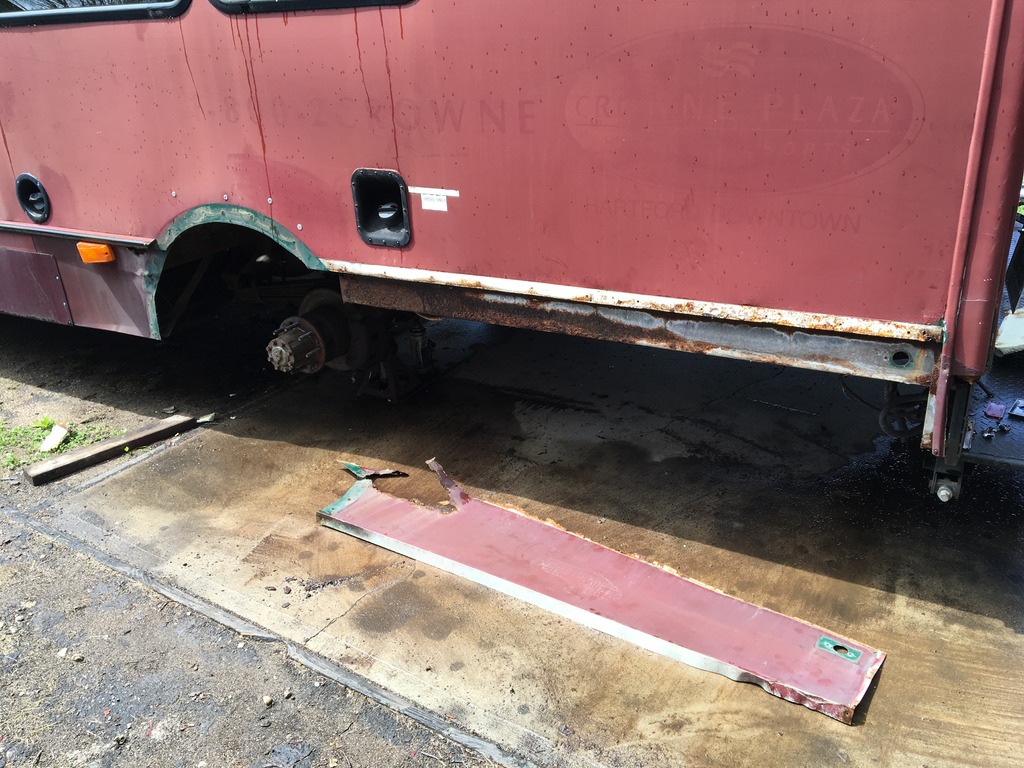
This is what was left to a piece of 1 1/2"x 2" tube that was at the back of the wheelwell-that the mudflap attaches to.
I made the new piece out of 18 gauge.
There is all kinds of open space between the frame + the outer body. I always wanted to make some underbody storage. Now was the time. So I bent up a box.

Its 22"x 28"x8"
I bought a door on ebay from an overstock camper place-for $8.00!

Its got 2 3/8" hangers on the back-and the box as a 1" lip catching the frame on the top-and new side piece all the way around. Its plenty solid.
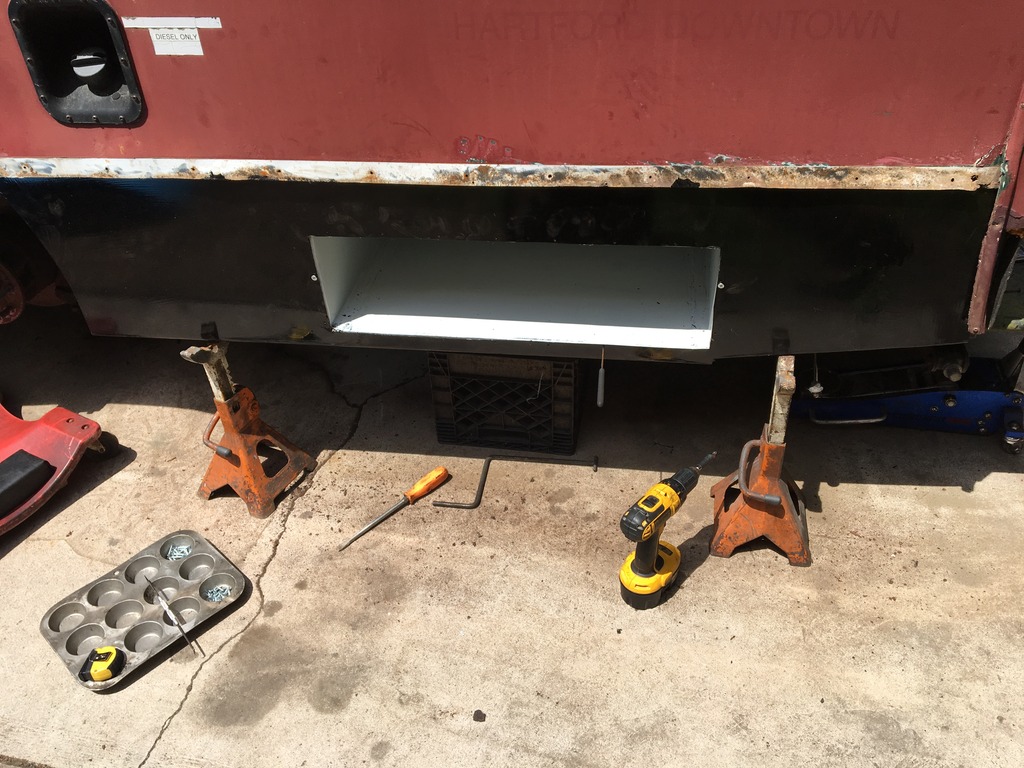
I brushed Ace hardware Rust stop paint on plenty thick. I plan on wrapping the bus so I wasn't worried about looks.
I'll get more pics when I finish up tomorrow.

__________________
Don't make a fuss-just get on the bus!

my bus build https://www.skoolie.net/gallery/Skoolies/Sped
sdwarf36 is offline   Reply With Quote
Old 05-14-2016, 10:53 PM   #2
Bus Geek
 
Robin97396's Avatar
 
Join Date: Feb 2016
Location: Willamina, Oregon
Posts: 6,409
Coachwork: 97 Bluebird TC1000 5.9
Nice job on the box. Now that's the newest looking part.
Robin97396 is offline   Reply With Quote
Old 05-15-2016, 09:53 AM   #3
Skoolie
 
RHOMBUS's Avatar
 
Join Date: Feb 2015
Location: South Dakota
Posts: 217
Year: 2002
Coachwork: Thomas
Chassis: Freightliner HDX
Engine: CAT 3126B250
Rated Cap: 84
Awesome find on the door, and nice assembly for the box! Some day I will get to my storage box fabrication, just not this day.
__________________
My project: The Cruel Bus
RHOMBUS is offline   Reply With Quote
Old 05-15-2016, 09:57 AM   #4
Bus Geek
 
Join Date: May 2009
Location: Columbus Ohio
Posts: 18,830
Year: 1991
Coachwork: Carpenter
Chassis: International 3800
Engine: DTA360 / MT643
Rated Cap: 7 Row Handicap
lookin good!! in the pic with the box mounted to the panel there is a nice trim there. . did you bend that in or is there something you used as trim pieces?

-Christopher
cadillackid is offline   Reply With Quote
Old 05-15-2016, 10:10 AM   #5
Bus Nut
 
Join Date: Feb 2014
Location: The Valley - Arizona
Posts: 644
Year: 1999
Coachwork: Thomas
Chassis: Freight-shaker (Freightliner)
Engine: Cat 3126b 250 HP
Rated Cap: Only 1 seat
Excellent fabrication skills! Even though the box is smaller, it will give much needed space!
Docsgsxr is offline   Reply With Quote
Old 05-15-2016, 09:12 PM   #6
Bus Crazy
 
sdwarf36's Avatar
 
Join Date: Oct 2009
Location: Moodus, Ct.
Posts: 1,062
Year: 1996
Coachwork: Champion
Chassis: Ford e-450
Engine: 7.3 Powerstroke
Rated Cap: 14
Quote:
Originally Posted by cadillackid View Post
lookin good!! in the pic with the box mounted to the panel there is a nice trim there. . did you bend that in or is there something you used as trim pieces?

-Christopher
I bent a 1" lip outwards on the box - and the lid had about the same sized trim around the outside. Confession time-I screwed up making the box. It was supposed to be made out of 2 pieces. We have an old 8 ft brake at work-which no one has really used. I bent the big piece first-and it kind rolled rather than bent. Once I saw the issue, I adjusted the brake-its now good to go. But I didn't want to scrap a 42x22" piece of steel. So a little trimming + it got a cap on one side. I seam sealed all the edges-betting it will be plenty water tight.
I wish I could have made the box larger-but thats all the room vertically-and thinking one step ahead-I wanted to leave access to the rear leaf spring hanger-I know I'm gonna have to change them-someday.
I made a new tighter fitting pool liner wheel arch. Siliconed the edges both sides. I'm sure its gotta keep 99% of any spray from getting in any of the areas that could possibly leak.
Trying to wrap up the job, I ran into a problem. I reused the rub rails, and was going to get new rubber. I couldn't find anything to match-so I went to reuse the old stuff. It was about 6" short! Its 20 years old + pretty stiff. It must have shrunk once unscrewed-and it was cold today. Got to wait for a sunny day + hope I can get it in place.
__________________
Don't make a fuss-just get on the bus!

my bus build https://www.skoolie.net/gallery/Skoolies/Sped
sdwarf36 is offline   Reply With Quote
Reply

Thread Tools
Display Modes

Posting Rules
You may not post new threads
You may not post replies
You may not post attachments
You may not edit your posts

BB code is On
Smilies are On
[IMG] code is On
HTML code is Off
Trackbacks are Off
Pingbacks are Off
Refbacks are Off


» Featured Campgrounds

Reviews provided by

Powered by vBadvanced CMPS v3.2.3

All times are GMT -5. The time now is 06:55 PM.


Powered by vBulletin® Version 3.8.8 Beta 4
Copyright ©2000 - 2024, vBulletin Solutions, Inc.