 |
|
 01-07-2016, 04:43 PM
|
#181
|
|
Bus Geek
Join Date: Mar 2011
Location: Houston, Texas
Posts: 8,462
Year: 1946
Coachwork: Chevrolet/Wayne
Chassis: 1- 1/2 ton
Engine: Cummins 4BT
Rated Cap: 15
|
Mmmm...love those old frontends.
|

|

|
|
01-10-2016, 01:52 PM
|
#182
|
|
Bus Nut
Join Date: Jan 2015
Location: ...little north of Toronto Ontario
Posts: 606
Year: 2000
Coachwork: Thomsass
Chassis: FreightShaker
Engine: 5.9 Cummins 5 speed
Rated Cap: 2 ATV's and friends
|
Nice bridge work (not your teeth), doubled up the "ready rack" on both sides. I'll hafta show my brother this set up. What do you figure it'll hold weight wise?
We've done thousands of feet of corduroy road and have a smaller creek to cross, whatcha ride for an ATV?
|
|
|
|
|
01-13-2016, 08:34 PM
|
#183
|
|
Bus Crazy
Join Date: Nov 2011
Location: Sault Ste. Marie, Ontario
Posts: 1,793
Year: 1997
Coachwork: Thomas
Chassis: B3800 Short bus
Engine: T444E
Rated Cap: 36
|
Quote:
Originally Posted by REDD

Nice bridge work (not your teeth), doubled up the "ready rack" on both sides. I'll hafta show my brother this set up. What do you figure it'll hold weight wise?
|
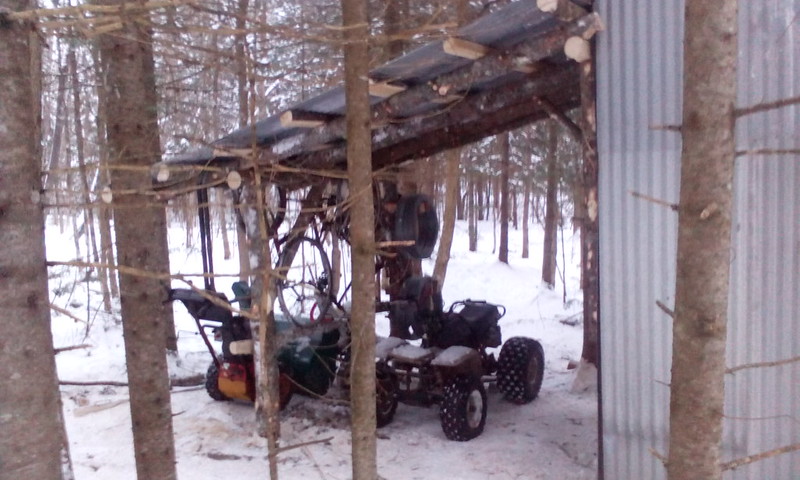
I can't say with much certainty yet. For a static load it is currently holding many hundred pounds of soaking wet ash and balsam fir (the impromptu decking made from green wood) and a foot of snow. I don't notice any vertical deflection while driving over it with the quad or snowmobiles or with a group of people jumping up and down. I can make it sway laterally, though. When I properly secure I-beams to it I will install diagonal, crossing runs of cables with turn-buckles to stiffen it up.
Quote:
Originally Posted by REDD
whatcha ride for an ATV?
|
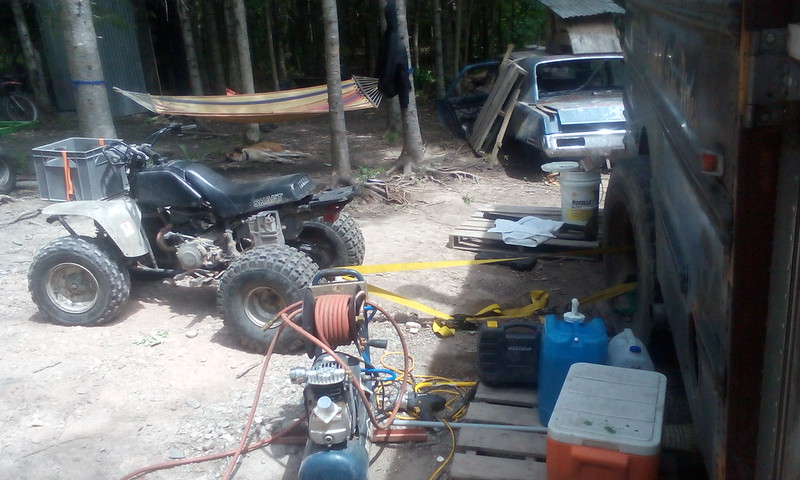
Oh boy.. how embarrassing.. Do I need to answer this? 
The super bush demon I possess is nothing other than a mid-80s Yamaha Moto4 power house! 200cc of displacement. Shaft drive. Two flat front tires (it's cool. the sidewalls keep the rims of the ground... most of the time). 50% braking capactiy. A dangling headlight harness.. And no rear fenders. Fenders are for wussies anyway, right?
Mechanically it runs great. Has electric start and fires right up, even in -20°C. So far I've been using it to haul a trailer around the property and as a skidder. I can easily pull one log around. Two if they aren't too girthy.
I had an unused motorbike that a friend wanted, so we made a trade. I'm definitely getting more use out of this crud bucket, so it was a worthwhile trade.
Mmmm.. what a beauty.
|
|
|
|
|
01-13-2016, 08:43 PM
|
#184
|
|
Bus Crazy
Join Date: Nov 2011
Location: Sault Ste. Marie, Ontario
Posts: 1,793
Year: 1997
Coachwork: Thomas
Chassis: B3800 Short bus
Engine: T444E
Rated Cap: 36
|
ANNNNNDDDDD.... obligatory kitty photo:
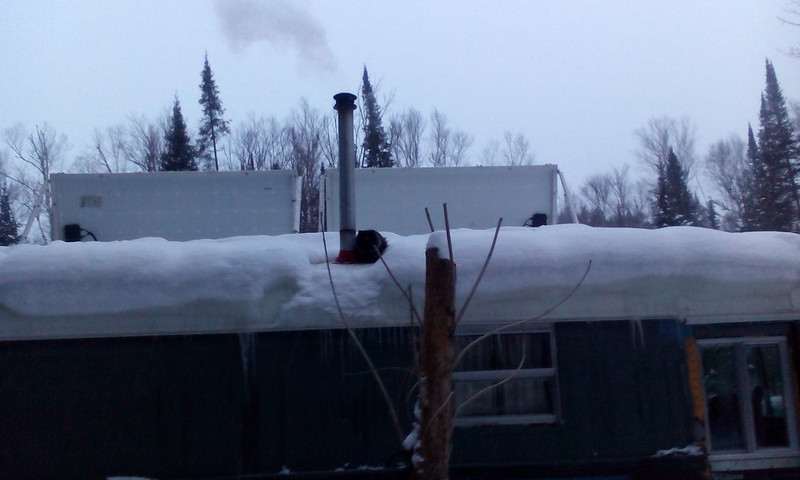
This is Cub snuggling up to the warm chimney.
|
|
|
|
|
01-13-2016, 08:46 PM
|
#185
|
|
Bus Nut
Join Date: Jun 2014
Location: MB
Posts: 279
Year: 1997
Coachwork: Tomas
Chassis: International
Engine: T444e
Rated Cap: 54
|
Quote:
Originally Posted by jazty
Oh boy.. how embarrassing.. Do I need to answer this?
The super bush demon I possess is nothing other than a mid-80s Yamaha Moto4 power house! 200cc of displacement. Shaft drive. Two flat front tires (it's cool. the sidewalls keep the rims of the ground... most of the time). 50% braking capactiy. A dangling headlight harness.. And no rear fenders. Fenders are for wussies anyway, right?
. |
I know the feeling! We had a 1984 Polaris 250. It had the original tires from 1984! It was held together entirely with wire and had eaten through the plastic flywheel cover iirc. I left my snow chains on all year round the tires were so bald.
I actually traded it for a lawn tractor when the tires wouldn't hold any air anymore.
__________________
"...Baler twine tie downs goin' down the road
On two bald tires and an oversize load..."
|
|
|
|
|
01-14-2016, 12:22 AM
|
#186
|
|
Bus Nut
Join Date: Jan 2015
Location: Gonvick MN
Posts: 339
Year: 1975
Chassis: Gillig
Engine: Cat 3208t/10 speed transmission
|
I like the pallet rack bridge. Good idea!
__________________
Remove hence to yonder place....
|
|
|
|
|
06-01-2016, 08:55 AM
|
#187
|
|
Bus Crazy
Join Date: Nov 2011
Location: Sault Ste. Marie, Ontario
Posts: 1,793
Year: 1997
Coachwork: Thomas
Chassis: B3800 Short bus
Engine: T444E
Rated Cap: 36
|
To anyone with an electronically controlled International/Navistar engine and wonky tachometer: the fix may be easier than you think.
CadillacKid posted the DIP switch settings for tachometer settings. The dash I had was set to "International", but it seems that it needed to be set to "Data Link"; I'm assuming this is because it is an electronically controlled engine. This could possibly pertain to the DT466e and any other Navistar/International engine of the same vintage as mine. Anyhow, it all works now for the first time since owning the bus! Thanks CadillacKid!
I'll be doing the rear brakes on the bus sometime in the next week or two. Will post pics...
|
|
|
|
|
06-04-2016, 03:14 PM
|
#188
|
|
New Member
Join Date: May 2016
Posts: 2
|
I am looking at doing a bus very similar to yours. I don't really want to deal with the roof raise primarily due to the front transition. I saw that you flipped a low roof model front transition. I thought that was the only difference from a low to a high roof model. In one of your post you say that this mod made it taller the a high roof model. Can you explain this a little. I had been looking a high roof models. I'm just over 6' tall My worry is once I get floor and ceiling insulation in there will not be enough head space.
|
|
|
|
|
06-07-2016, 11:44 PM
|
#189
|
|
Mini-Skoolie
Join Date: Oct 2011
Posts: 30
|
Jazty,
Love your work and your posts!!!! I was hoping the thread would not end. Looking forward to more of your progress!!
Here is the second of my builds. Keep up the good work!!!
http://www.skoolie.net/forums/f11/ga...fics-7040.html
|
|
|
|
|
06-08-2016, 07:52 AM
|
#190
|
|
Bus Crazy
Join Date: Nov 2011
Location: Sault Ste. Marie, Ontario
Posts: 1,793
Year: 1997
Coachwork: Thomas
Chassis: B3800 Short bus
Engine: T444E
Rated Cap: 36
|
Quote:
Originally Posted by Jdhill
I saw that you flipped a low roof model front transition. I thought that was the only difference from a low to a high roof model. In one of your post you say that this mod made it taller the a high roof model. Can you explain this a little. I had been looking a high roof models.
|
G'day Jdhill! Yes, my roof is a bit taller than the stock high-roof models. Simply flipping the transition cap would bring the roof to the stock high-roof model height, but I pushed even higher than that. This made it difficult to fit the cap, since the roof mating surfaces were no longer parallel, but I was able to make it work with some careful hammering and riveting then a liberal application of Supra Expert caulk to fill the gap between the rear mating surface of the cap and the roof.
Quote:
Originally Posted by Jdhill
I'm just over 6' tall My worry is once I get floor and ceiling insulation in there will not be enough head space.
|
Overall I like where our ceiling landed. I'm 5'11" and can comfortable walk around inside the bus. The lower ends of the ceiling curve are close to my head, but after building out the cabinets and everything I'm never walking there. This is all after putting 2" of rigid foam and 5/8" T&G plywood on the floor and 3/4" strapping and 1/4" plywood on the ceiling.
Going supremely high would be nice for the additional openness and storage (taller cabinets), but accessibility is very important to me. I don't want to have to back away from a route because my roof can't fit under a bridge or an old lane-way has low hanging branches. Also - for the latter reason - I've been very cautious about what I put on top of the roof. Everything has to be strong enough to withstand the occasional tree branch.
That being said, I did shy away from going under the Mackinaw Bridge at it's lowest point last summer. I really wanted to try it, but it was dark out and I couldn't make out whether or not we were going to clip it. Better safe than sorry? Maybe.. I'll conquer it this summer on my next trip!
|
|
|
|
|
06-08-2016, 07:55 AM
|
#191
|
|
Bus Crazy
Join Date: Nov 2011
Location: Sault Ste. Marie, Ontario
Posts: 1,793
Year: 1997
Coachwork: Thomas
Chassis: B3800 Short bus
Engine: T444E
Rated Cap: 36
|
Quote:
Originally Posted by gameseven
|
Very nice, Gameseven! Are there any shorty KWs out there? That'd be rad.. If not, well, it'd be kind of a shame, but also amazing to cut one down to be a short bus. Maybe if you happened to find one that serendipitously had half it's body rusted away, or something...
|
|
|
|
|
06-09-2016, 05:02 AM
|
#192
|
|
Mini-Skoolie
Join Date: Oct 2011
Posts: 30
|
Not sure of any shorty KW's but I really like the Bluebirds and the Thomas' busses. I think 25-28 ft would be ideal! I really like your conversion  !
|
|
|
|
|
06-12-2016, 02:07 PM
|
#193
|
|
New Member
Join Date: Nov 2015
Location: Oakland
Posts: 4
Year: 1998
Coachwork: BlueBird
Engine: Cummins 5.9
Rated Cap: 48
|
Quote:
Originally Posted by jazty
Oh, right.. and to elaborate on the spray foam:
The walls have about 3" spray foam in them. It was a real pain in the *ss to get it evenly sprayed between and under the strapping. There was a lot of waste, which was later trimmed down by a 5amp grinder with a braided wire wheel cup on it. Holy freakin' dang blasted foam dust mess!! But dealing with the clean up was easier than trying to cut it with hack saw blades and the like. Tyvek suit, respirator and eye protection is a must. But really, for anyone who is considering spray foaming anything more than the most trivial wall layouts, heed this advice: PAY SOMEONE ELSE TO DO IT!
It really works wonders, though. My little radiant kerosene heater pulled the bus interior from -3°C to 25°C (26.6°F to 77°F) before I opened more windows (always have one cracked with the kero heater, for those not in the know). |
Hey O,
Bus looks cool... getting ready to strip and potentially take on the spray foam job ourselves.... I wonder if you used the spray foam called Foam it Green. It seems like it could be a potentially easy way at it. Just curious, thanks a bunch 
|
|
|
|
|
06-12-2016, 03:55 PM
|
#194
|
|
Bus Crazy
Join Date: Nov 2011
Location: Sault Ste. Marie, Ontario
Posts: 1,793
Year: 1997
Coachwork: Thomas
Chassis: B3800 Short bus
Engine: T444E
Rated Cap: 36
|
Quote:
Originally Posted by LooNeeBus
Hey O,
Bus looks cool... getting ready to strip and potentially take on the spray foam job ourselves.... I wonder if you used the spray foam called Foam it Green. It seems like it could be a potentially easy way at it. Just curious, thanks a bunch |
Yep, that's the exact stuff I used. It comes in two propane tank sized containers. My advice is to avoid it unless a professional installation costs exorbitantly more than the Foam It Green. Around here you can get a professional contractor to do the job for around the same price as buying 2 kits. That's another good point: you'll likely need 1 more kit than you expect if you go the DIY route. I will avoid the DIY spray foam like ebola in the future
|
|
|
|
|
06-28-2016, 08:53 AM
|
#195
|
|
Bus Crazy
Join Date: Nov 2011
Location: Sault Ste. Marie, Ontario
Posts: 1,793
Year: 1997
Coachwork: Thomas
Chassis: B3800 Short bus
Engine: T444E
Rated Cap: 36
|
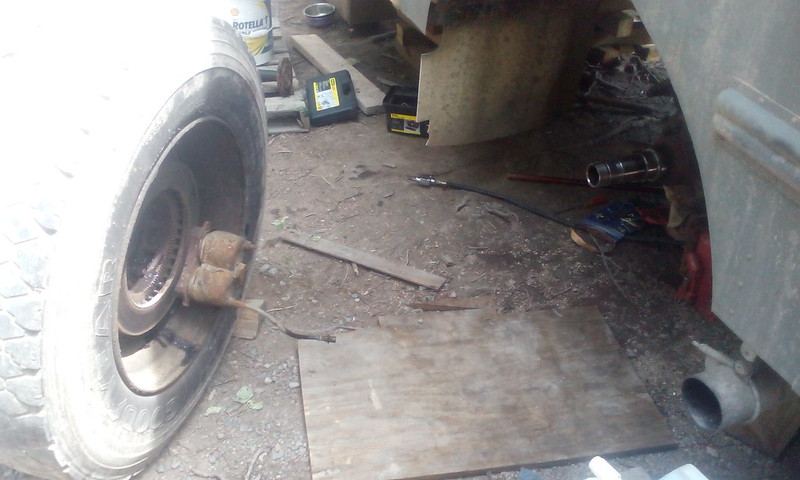
I've been hearing a clunk coming from the rear-right brake for some time and with a trip coming up it is high time to fix it. While I have things apart I'll also use a flap wheel to clean up the springs for a smoother ride. Here's the progress:
Popped the axle shaft out. It's real easy. Just a couple bolts and it slides right out.
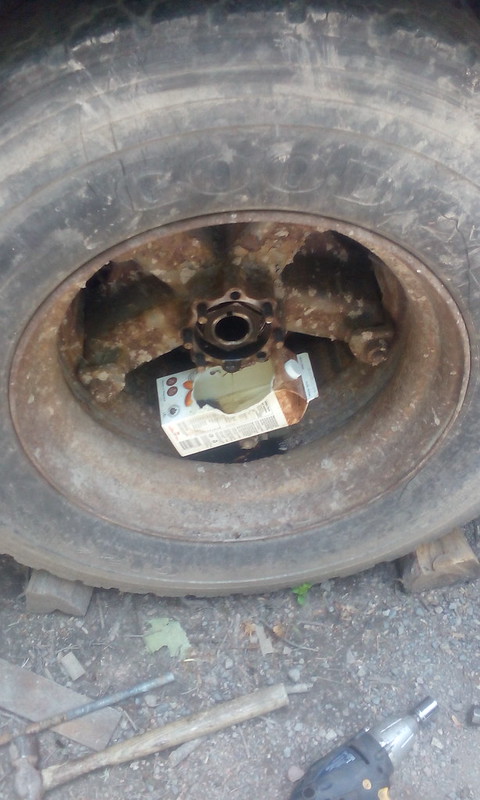
Oh, don't forget to drain the differential! I forgot and some gear oil dumped out of the hub.
The bearings also need to be removed. I don't own such a giant socket so I used a chisel and tapped the retainer nuts out.
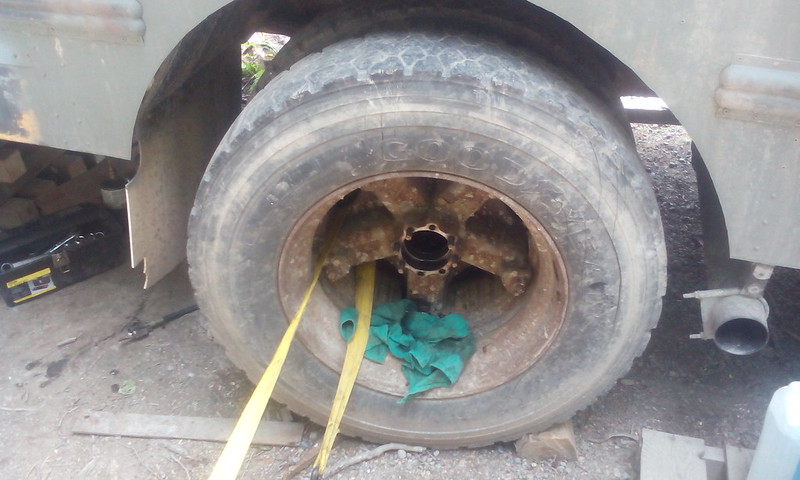
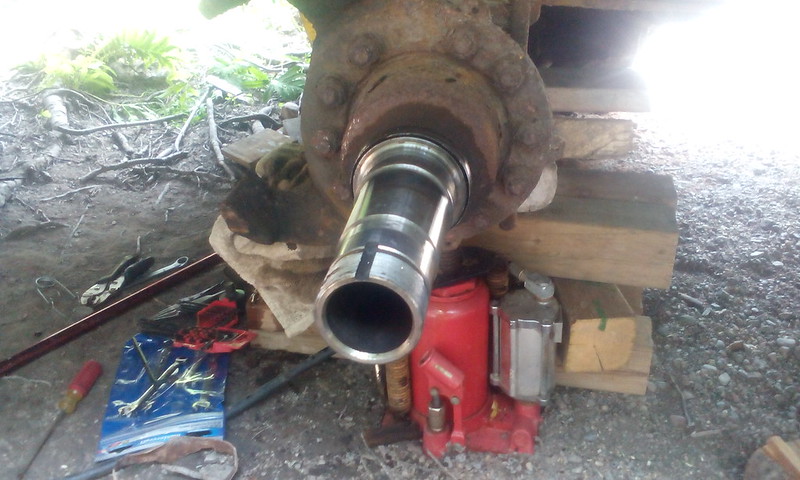
The next step was to disconnect the flexible brake line coming from the caliper and the solid brake line on the axle. Then I grabbed the Moto4 and pulled the wheel assembly off!
I have a friend who is a heavy-duty truck mechanic and he says that when they're doing this job on logging trucks out in the bush they use a slab of cardboard with grease smeared all over it so the wheel assembly slides easily out. I didn't want to deal with the mess
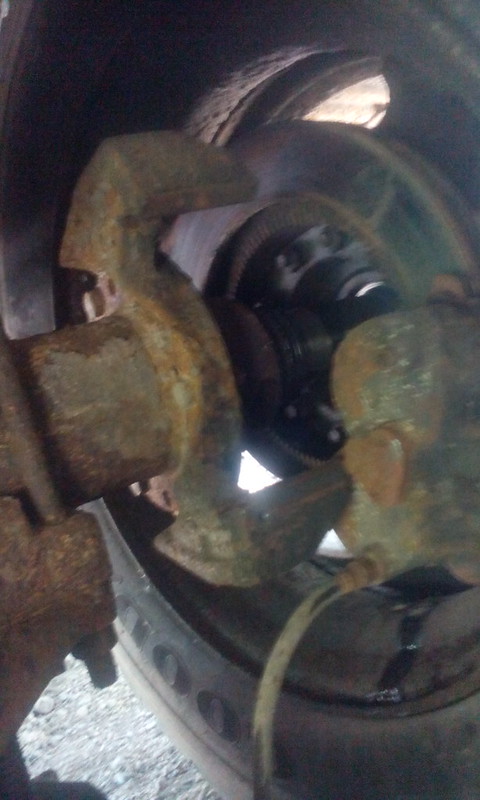
This is the rotor I'm going to replace. I suspect that, due to the caliper sticking and overheating the rotor, it is now warped. 10 bolts takes it off.
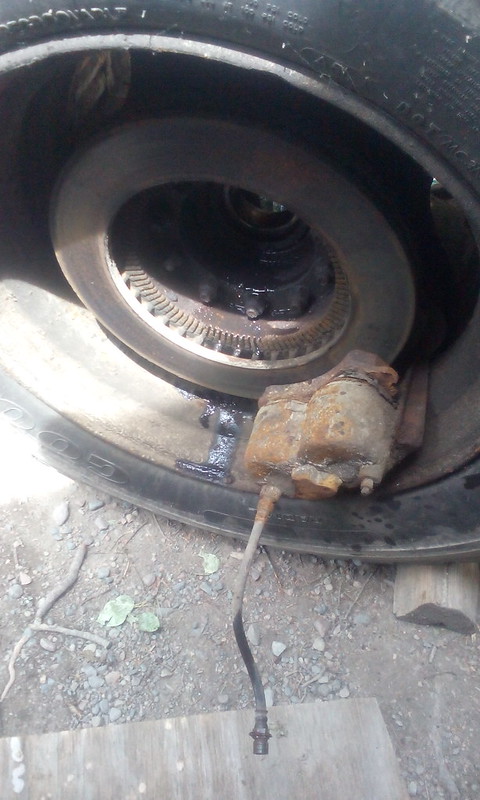
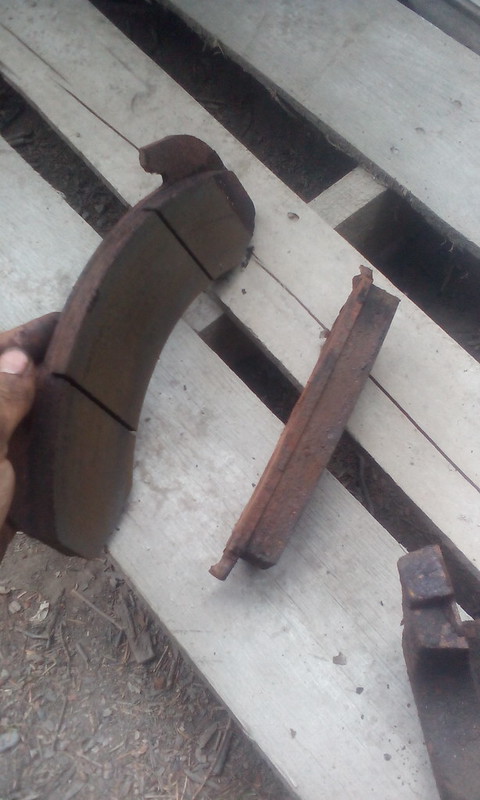
Pffft.. those pads are hardly worn! I'll be reusing them.
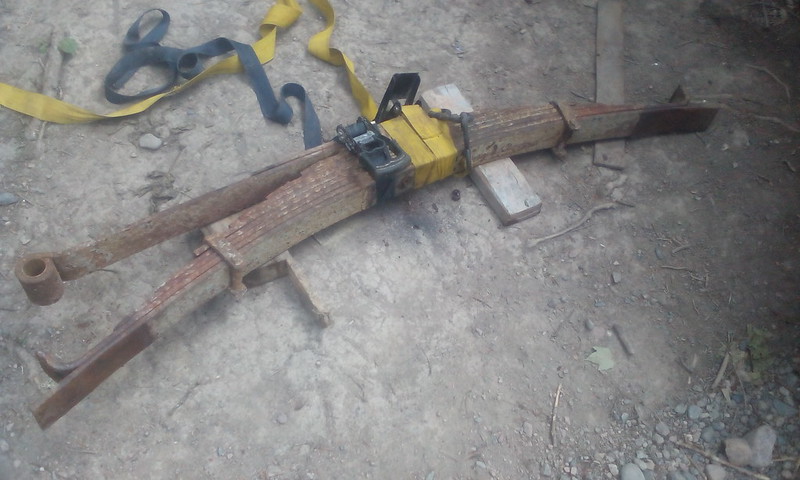
Took the leaf springs off. They are strapped so I can remove the center bolt. It worked well. I used an angle grinder and split the nut in half. One whack with the hammer and the spring pack separated. The straps worked well to keep things from taking off.
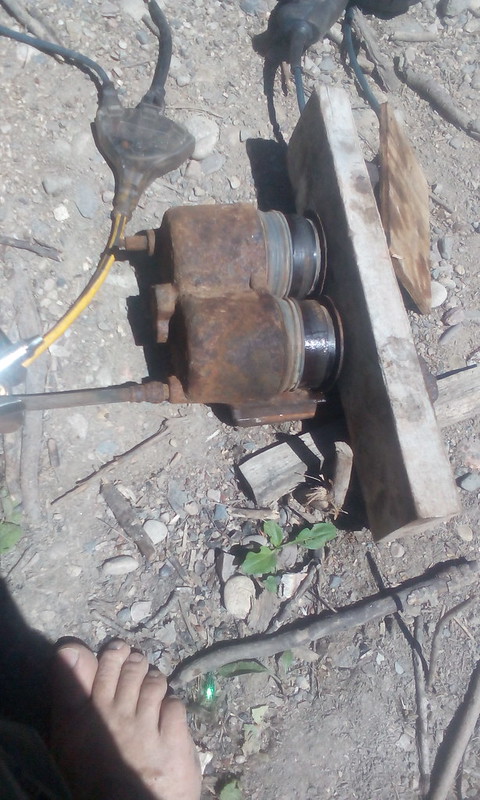
Cleaned up the first caliper. Everything is rusty on this bus, but I haven't found any rust that is affecting it's safety. This caliper is a prime example. It has all sorts of surface rust, but, despite the rubber boots around the pistons being cracked, the cylinder bores are in fine shape.
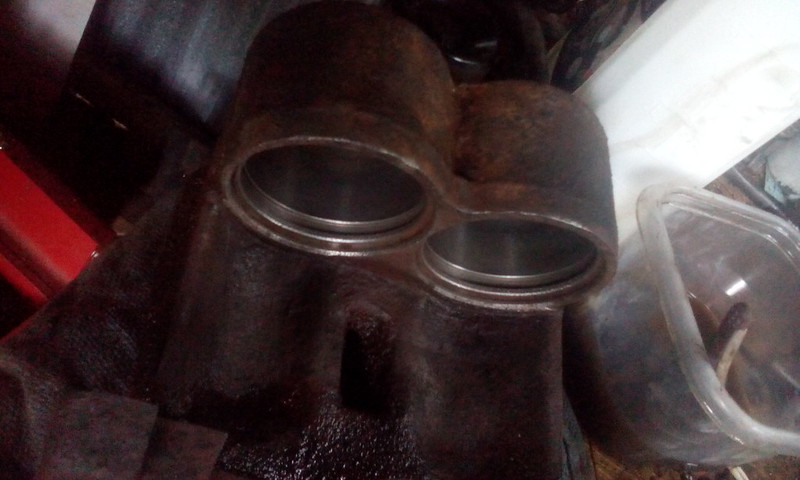
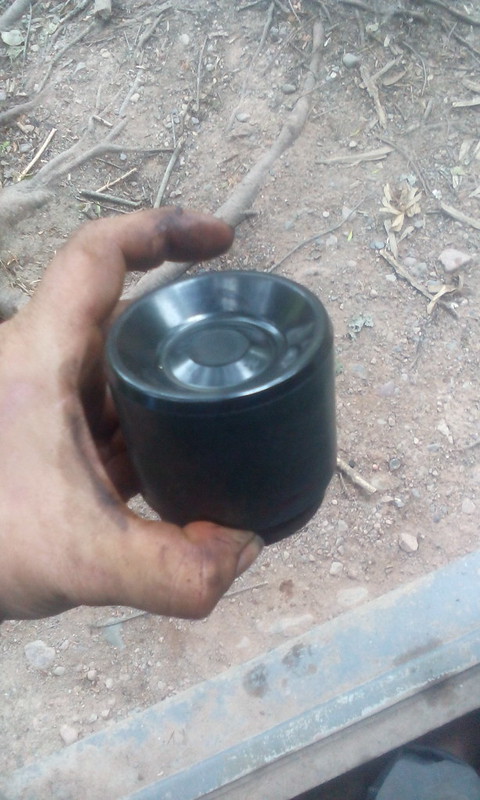
This is one of the pistons. They are of the phenolic type, so don't rust. Awesome.
I don't know much about phenolic caliper pistons, but word on the street is that they transmit less heat to the fluid. Despite that it seems that lots of people don't like them because they're more prone to sticking. I would have expected them to be LESS likely to stick, but that's what internet tells me.
That's all for now! I'll be back at it this afternoon.
|
|
|
|
|
06-29-2016, 02:09 PM
|
#196
|
|
Bus Crazy
Join Date: Nov 2011
Location: Sault Ste. Marie, Ontario
Posts: 1,793
Year: 1997
Coachwork: Thomas
Chassis: B3800 Short bus
Engine: T444E
Rated Cap: 36
|
Here's how I've been popping out the caliper pistons, by the way.
I start with a couple wood spacers in the caliper so that the pistons don't expand out too far. The first time I used a 2x4 and some plywood scraps. Then I put a compressed air gun up to the brake line and pop them out. Next remove one of the spacers and repeat. Do this until you can easily yank them out the rest of the way.
If you don't do it this way it is usually the case that one of the pistons will pop out while the other stays in place. The wood also helps to protect them from getting damaged.
|
|
|
|
|
06-29-2016, 09:08 PM
|
#197
|
|
Bus Crazy
Join Date: Nov 2011
Location: Sault Ste. Marie, Ontario
Posts: 1,793
Year: 1997
Coachwork: Thomas
Chassis: B3800 Short bus
Engine: T444E
Rated Cap: 36
|
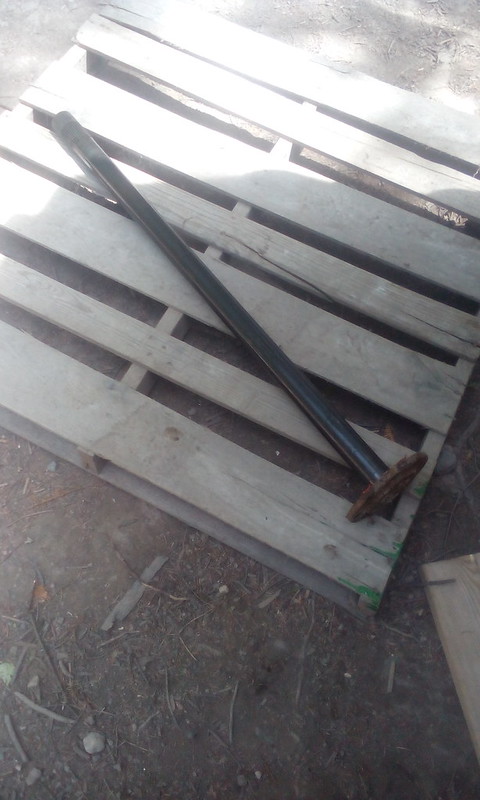
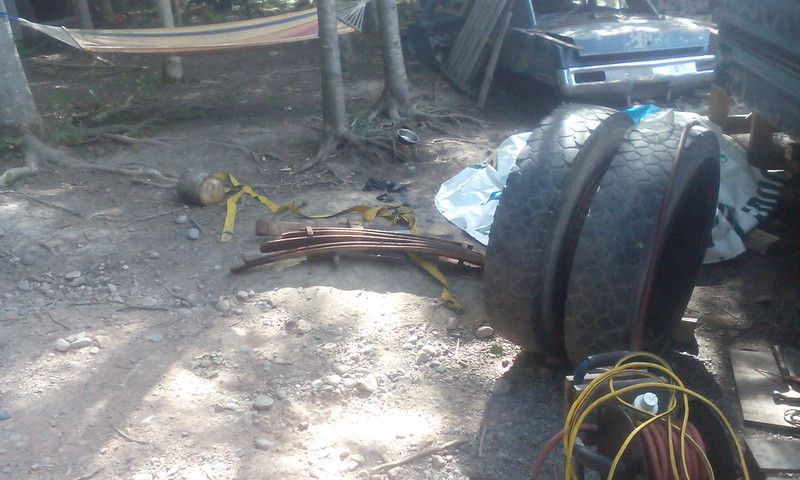
One leaf pack complete!
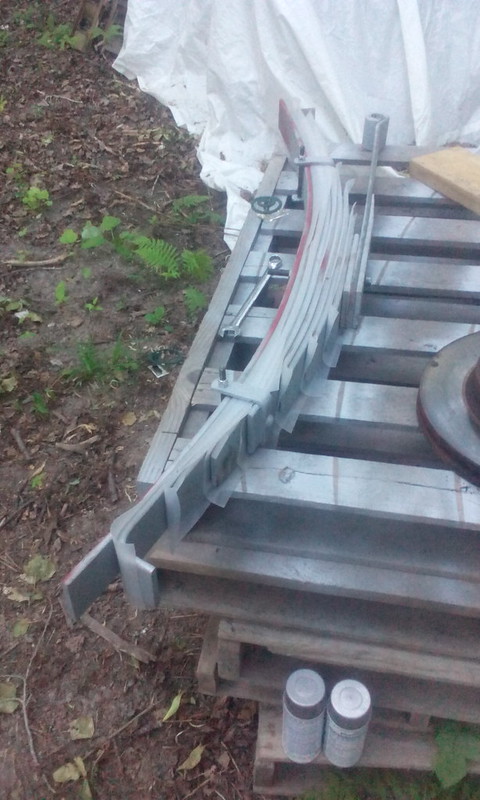
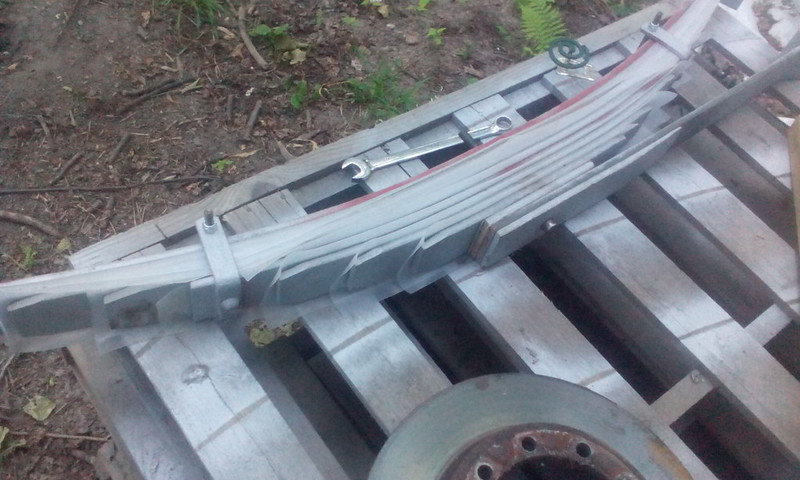
All of the leafs have been cleaned and flap-wheeled. I especially worked hard to polish the points where the ends of the leaves rub. Then I treated them with Ospho and painted them with a zinc galvanizing paint made by ProStar (Praxair). I expect it'll all wear off in the areas that the leaves rub, but it should remain in the low spots to help hold back rust.
You can also see the anti-friction material that was put between the leaves. Hopefully this will soften the ride further. I considered flipping or removing the bottom leaf to soften things, but decided against it. I felt that it would add some unnecessary stress to an aging leaf pack.
|
|
|
|
|
06-29-2016, 10:49 PM
|
#198
|
|
Bus Geek
Join Date: Apr 2012
Location: So Cal
Posts: 3,231
Year: 1935
Coachwork: Superior
Chassis: Chevy
Engine: 317 ci/tid / Isuzu
|
Probably a good idea to keep the entire leaf pack for the reason you pointed out. You should now have enough slip and slide to get a pretty good ride. Jack
|
|
|
|
|
07-02-2016, 11:43 AM
|
#199
|
|
New Member
Join Date: May 2016
Posts: 2
|
[QUOTE=jazty;151692]G'day Jdhill! Yes, my roof is a bit taller than the stock high-roof models. Simply flipping the transition cap would bring the roof to the stock high-roof model height, but I pushed even higher than that. This made it difficult to fit the cap, since the roof mating surfaces were no longer parallel, but I was able to make it work with some careful hammering and riveting then a liberal application of Supra Expert caulk to fill the gap between the rear mating surface of the cap and the roof
Thanks for the info. How much higher were you able to go above the stock high roof height. One of the options I am looking at is having a transition made that is 6" taller the the stock high roof transition. Doing the roof rise does not look to complicated, just the front transition. I don't want my bus to be to high, I like to go down lots of back roads.
|
|
|
|
|
07-19-2016, 08:26 AM
|
#200
|
|
Bus Crazy
Join Date: Nov 2011
Location: Sault Ste. Marie, Ontario
Posts: 1,793
Year: 1997
Coachwork: Thomas
Chassis: B3800 Short bus
Engine: T444E
Rated Cap: 36
|
Well, there's a big gap where I forgot to take pictures. In a nutshell the wheels are back on. There was some mucking about with getting parts since I bent one of the new axle seals and had to order another one. Also, I had a hell of a time getting an axle seal that would fit. The one I pulled out was a Stemco 2057 and there are many cross-referenced parts to choose from, but I tried a handful and the only other one-piece seal that would fit was a CR 35000.
I may go into more detail about the process later. I wanted to quickly share the few pictures I did take today. To start with, though, I'll post a link to this great guide from Timken for setting your bearing pre-load:
http://www.timken.com/en-us/solutions/automotive/aftermarket/heavyduty/documents/timken-wheel-adjustment-procedures.pdf. It's all pretty straightforward. You'll just need a 3.25" socket and a torque wrench that goes above 200lb/ft.
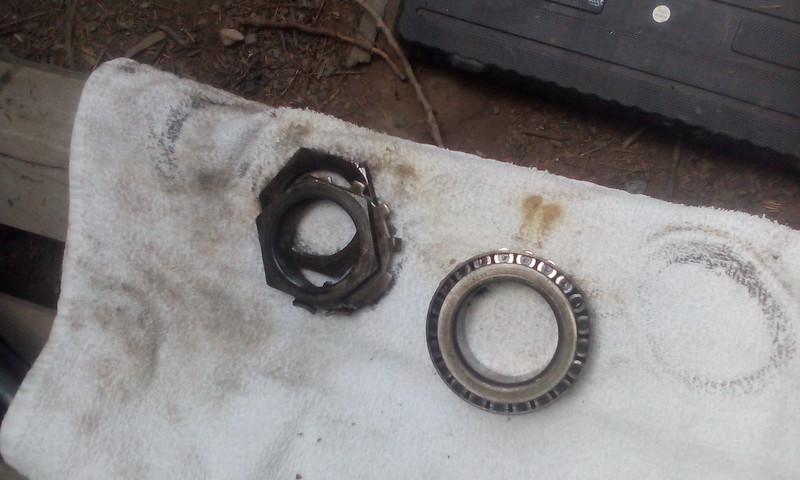
Oh, and you'll have to figure out how to bend the tangs on the lock washer. And this is what I'd like to mention today.
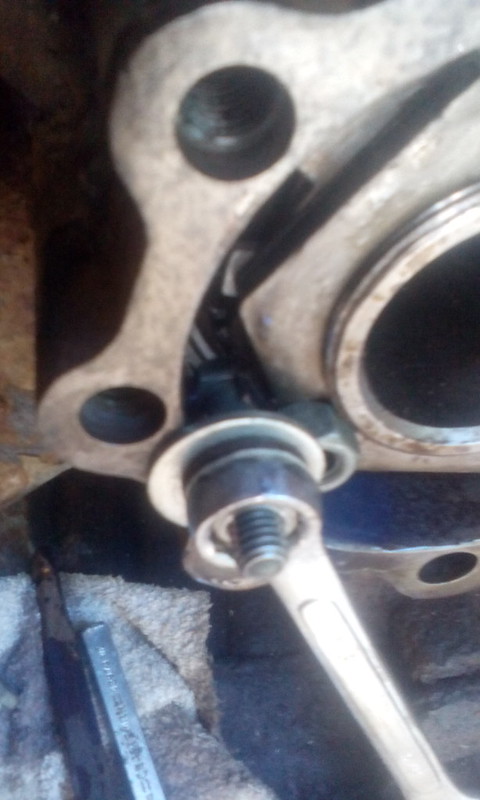
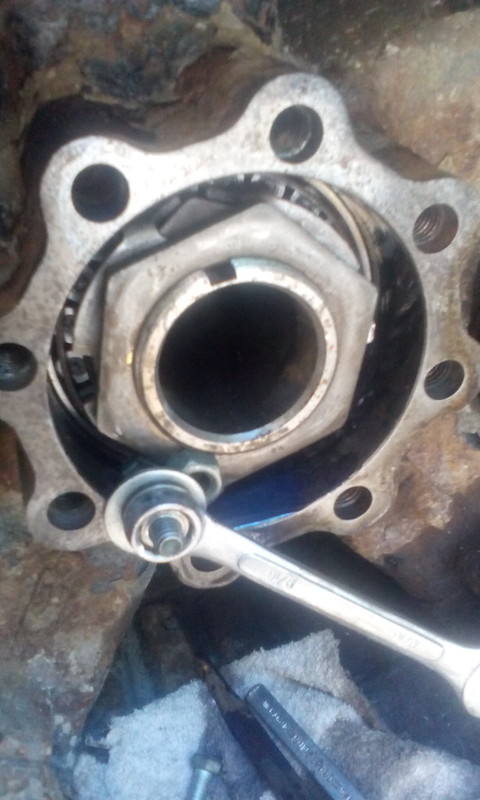
On many lighter-duty axles the two axle lock nuts are located close to the end of the hub so that you can get a beefy screw driver in there and lever the tangs upwards to lock the outer nut. This wasn't the case with these hubs. The tangs were so deep in the hub that there was no way to pry them upwards in that manner. I had to get a bit creative.
Here's a picture of the inner bearing, the axle nuts and the tang washer.
And here we have a couple terrible pictures of a bolt that I altered so that it could fit behind a tang (by the way, that's Por15 on my finger nail, not a hideous bruise). I ground down the head so that it could fit between the axle and the hub, then I used a cut-off disc to make a slot just behind the head. With this I was able to get behind the tang and use a wrench to pull the tang outward. That loose nut in there is to level the washers against the hub.
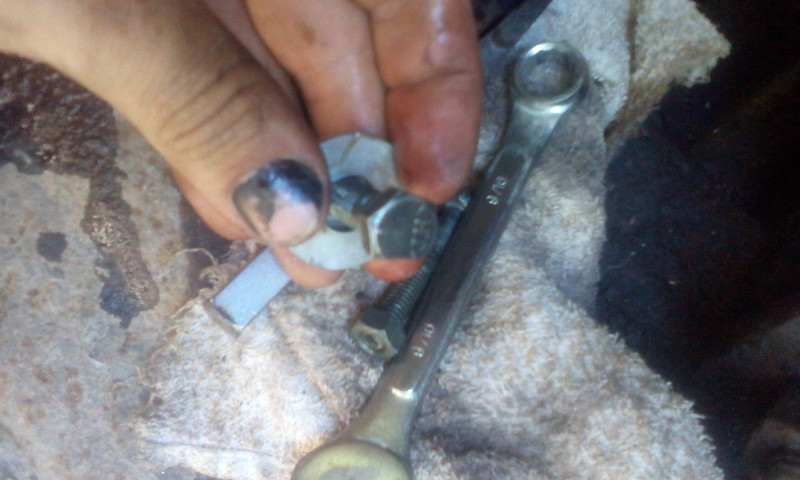
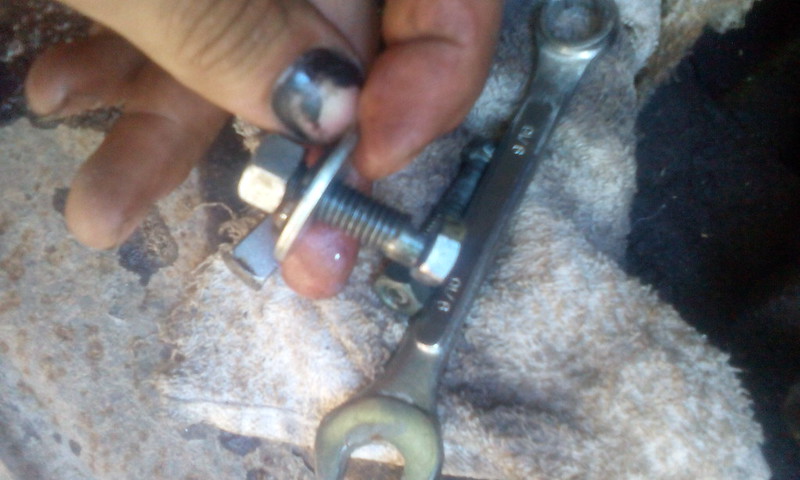
That loose nut in there is to level the washers against the hub.
|
|
|
|
|
|
| Thread Tools |
|
|
| Display Modes |
 Linear Mode Linear Mode
|
 Posting Rules
|
You may not post new threads
You may not post replies
You may not post attachments
You may not edit your posts
HTML code is Off
|
|
|
|
 » Recent Threads
 |
|
|
|
|
|
|
|
|
|
|
|
|
|
|
|
|
|
|
|
|
|
|
|
|
|
|
|
|
|
|
|
|
|
|
|
|
|


