 |
 01-01-2016, 10:51 PM
|
#1
|
|
Almost There
Join Date: Oct 2015
Location: Corvallis, OR
Posts: 94
Year: 1991
Coachwork: Collins
Chassis: Ford E350
Engine: 7.3L diesel
Rated Cap: 18
|
Betty the Bus build thread
I've been posting on and off here for a while with a bit of this and that, and though maybe I should make a build thread.
Betty the Bus is actually/technically my daughter's bus; or is it hers but technically mine? Anyway it's her primary project but I have been involved and it's currently living at our house while she's down working in Berkeley, CA. Since it's in my driveway I figure I might as well do some things with it.
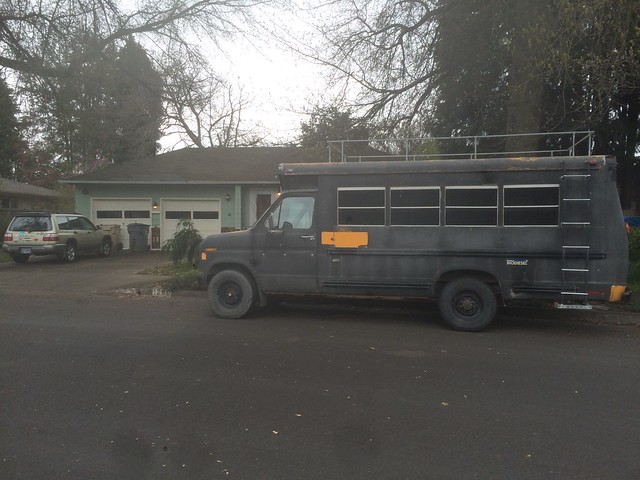
It's a Collins with a Ford E350 chassis and a nice big 7.3L diesel. Short bus, and rated for 18 passengers.
Acquisition
Up front cost was zero, as the previous owner gifted it to my daughter, which was a nice surprise. Mind you it took $1000 worth of work right off the bat (bad alternator and water pump leak), then later it was the fuel pump that went out.
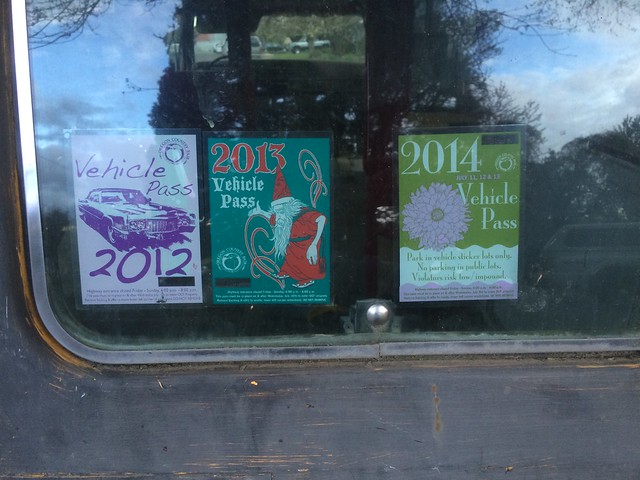
It started out as a Burning Man bus that had gone for 9 years, been an art car, been many things. So it had some history, as well as some interesting features such as red fur on the inside, a big hole in the roof where the steering arrangement was so you could drive it from the roof, and a crusty black paint job. Also a ton of dust in everything.
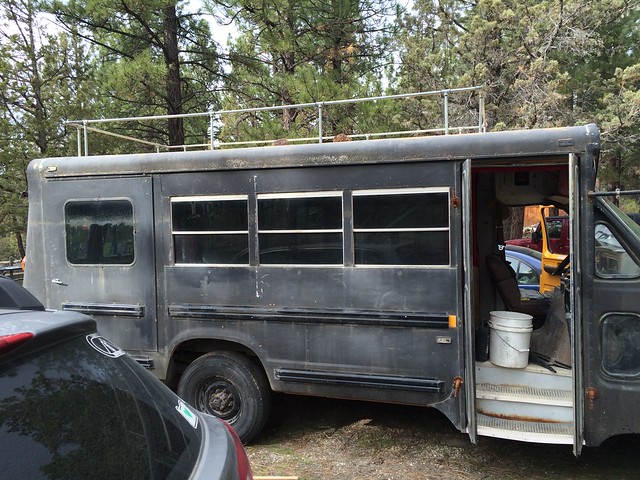

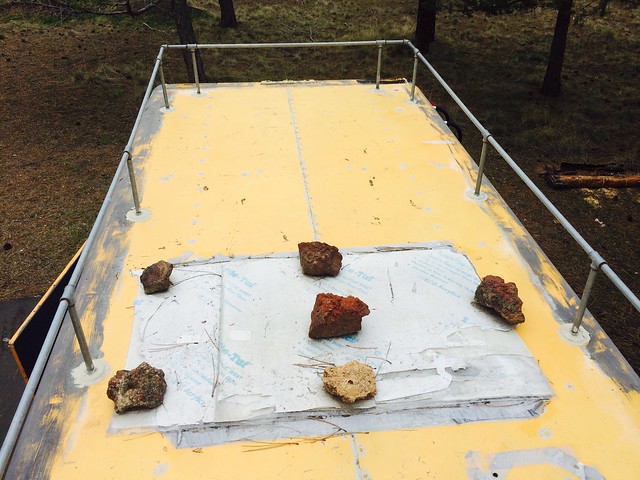
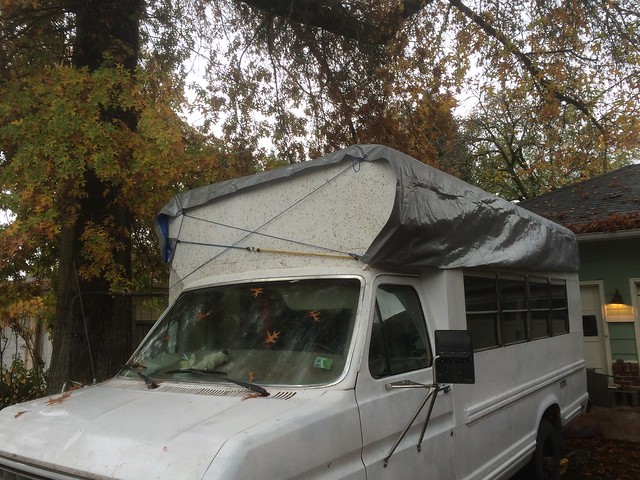
So that patch on the roof? A piece of Plexiglas held down with some rocks :/
Home finally in Corvallis, OR after a delayed trip over the mountains from Bend due to the bad alternator.
Continued in next post...
|

|

|
|
01-01-2016, 11:22 PM
|
#2
|
|
Almost There
Join Date: Oct 2015
Location: Corvallis, OR
Posts: 94
Year: 1991
Coachwork: Collins
Chassis: Ford E350
Engine: 7.3L diesel
Rated Cap: 18
|
Continuing the Betty story to get caught up to the present...
Initial Cleanup
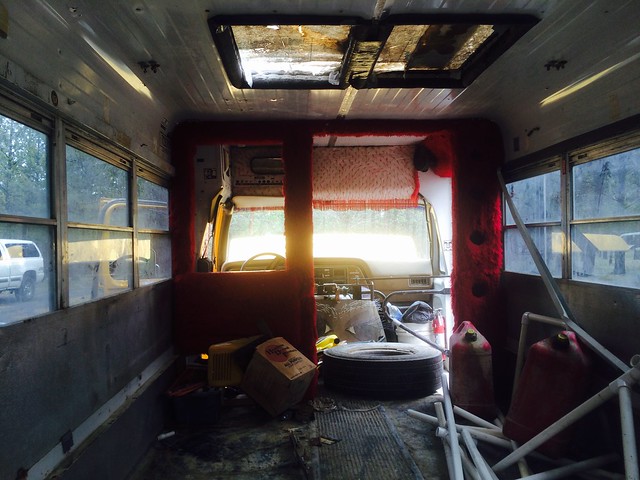
First order of business was to gut the interior of all the fur and other such trappings and get as much dust as we could out. We also put on some temporary plywood patches for big holes in the roof just to get it by for a while. Sorta waterproof, but good enough until we got things to the point where there couldn't be any leaks.
No pictures alas, but needless to say there were piles of fur and tons of wires that no longer did anything at all. Lots of the original wires remained from old bus lights and features, but they were no longer functioning
Down to Berkeley for a Lift and a Paint Job
At this point the bus went down to Berkeley where my daughter is, and she and her fiance took advantage of the facilities where they worked to do a lift of the bus. Basically it was chopped just above the windows, lifted with a forklift, then 1' long 1x1 steel posts welded in, and a new skin added on to fill the space. My daughter has a blog with some great photos and narration on the lift at the mellow fellow goes for a ride: Days 14, 15, 16, 17 and 18 (oh my!) with plenty of pictures.
Back up to Oregon
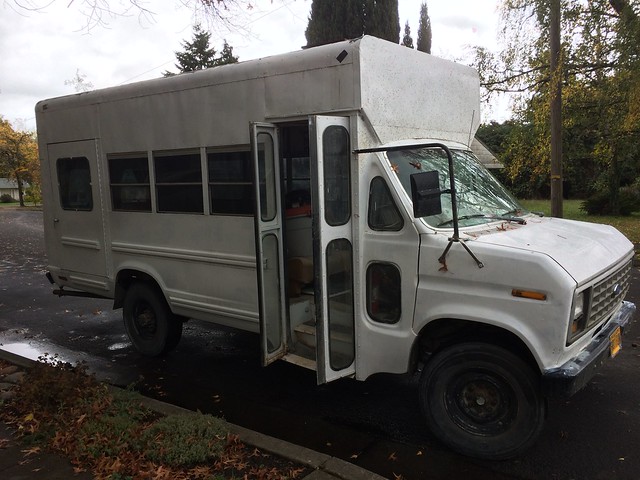
Fast forward now after the lift and several trips up and down the west coast, along with a first coat of white paint, the interior metal stripped from walls and ceiling, and some foam put in to give some insulation (both sound and temperature) since the bus was heading to Burning Man again
 Tackling Those Roof Holes
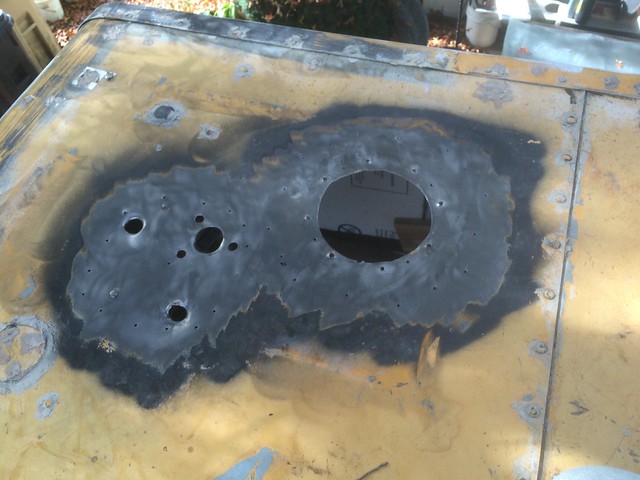
Earlier I mentioned there were some temp patched holes on the roof. At some point a big opening had been hacked into the roof for access, as well as a series of holes so that a steering wheel extension could be run down to the drivers area so the bus could be driven from the roof. Kind of crazy but that's what you get from an old art car.
The plywood patches weren't doing much in the rain, so it was time to take care of them a bit more properly.
First up, wire wheeling things all clean up there in preparation for some metal patches with some relatively thin stuff that was available...
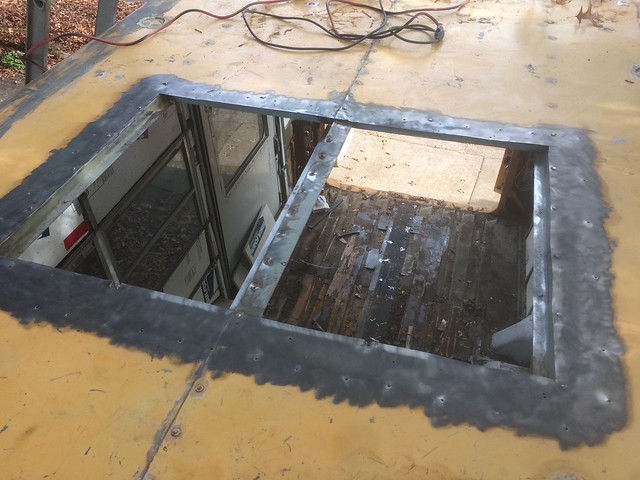
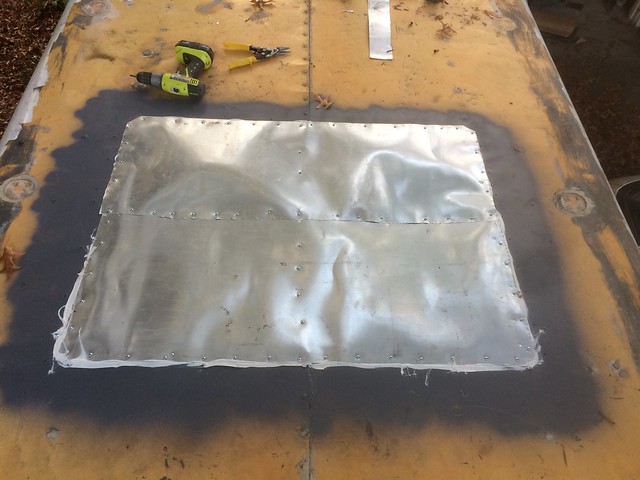
Then the patches, put down with sheet metal screws and liberal (but in the end not liberal enough) amounts of caulk between...
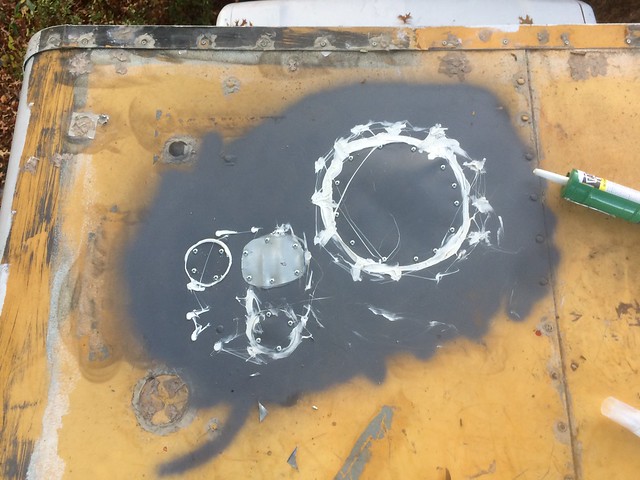
Unfortunately, the seals weren't that great, which I found out in the first good rain. The leaks were compounded by the fact that the flat roof was somewhat dished down in the middle from years of people dancing on top of it at Burning Man. When it rained, perhaps 3/16" or so of water would pool up around the big rectangular patch, and proceed to just find any little hole there was.
%*(!~ Leaks
Roof leaks were a pain. As mentioned above it was due to not so great caulking on my part combined with a dipped roof that pooled water. The solution ended up being two fold: get up on the roof in the rain and put on lots of Henry wet patch tar up around the joints until it stopped, and put wooden posts in temporarily to push the roof up from inside.
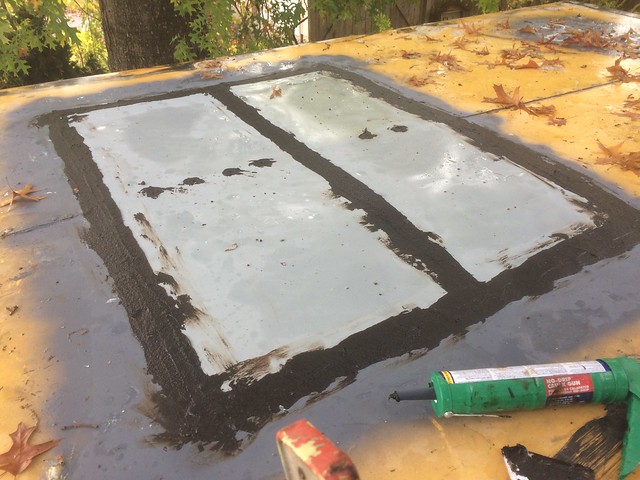
The patches did the job but it took a lot of repeat applications, and since the rain lasted a long time I actually found a number of other smaller pinpoint leaks I also fixed. It's not pretty, and I'll probably regret that Henry wet patch some day, but it stopped the leaks.
In the end there was one final small leak that was driving me crazy near the front, and getting tired of the routine broke down and gave the bus a raincoat.
|
|
|
|
|
01-01-2016, 11:48 PM
|
#3
|
|
Almost There
Join Date: Oct 2015
Location: Corvallis, OR
Posts: 94
Year: 1991
Coachwork: Collins
Chassis: Ford E350
Engine: 7.3L diesel
Rated Cap: 18
|
Continued...
Floor Prep
The original plywood floor was still in place, and wasn't that nice of condition. Some rot here and there, especially in the back. The goal is to put down an insulated floor anyway, so the plywood had to go so that the metal beneath could be checked out and cleaned, insulation put down, and new plywood put in.
The plywood came out pretty easily, partly because it was kind of rotten, though it took the angle grinder to grind off a few rusty screws. It's always a lot easier to tear something out when you aren't going to keep it.
What remained was a floor in pretty good shape, but with enough rust (and a ton of holes) that had to be taken care of with a wire wheel.
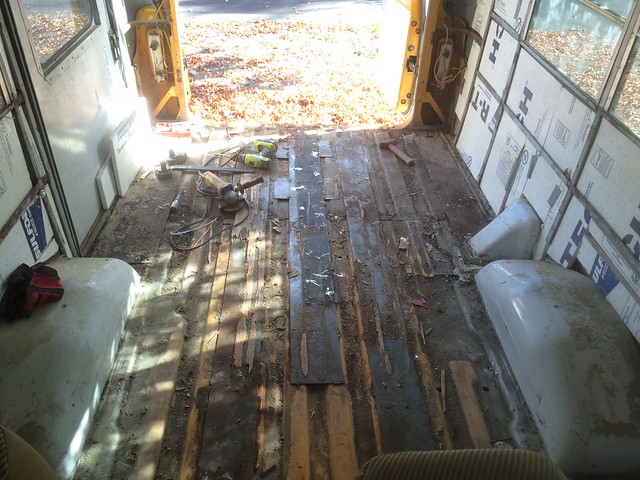
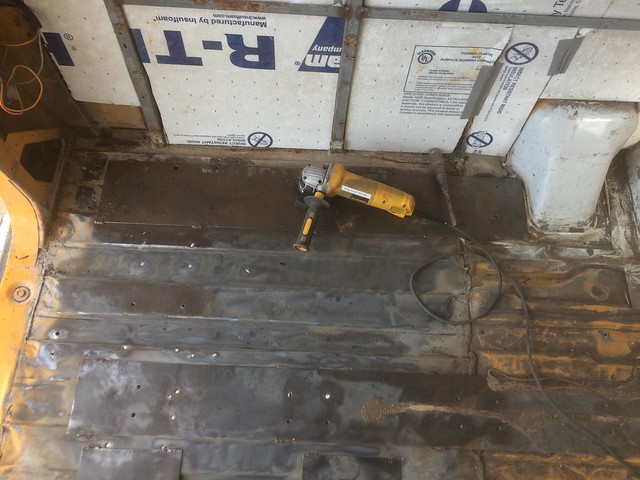
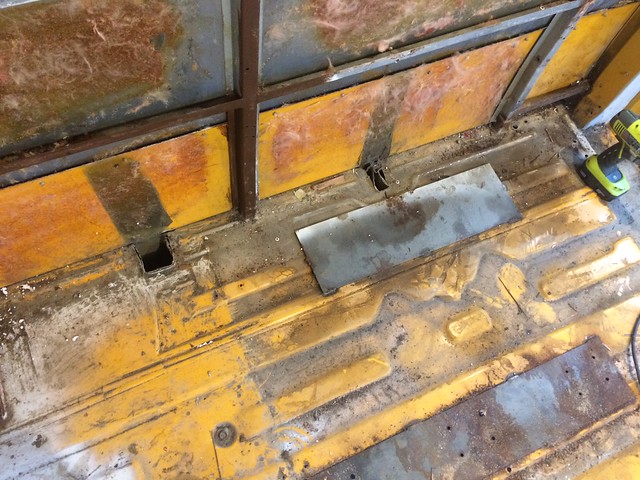
Found this interesting remnant of the old van format, which seems like it would be a good spot for a little secret compartment in the future. It's the foot well where the side door would be on a van.
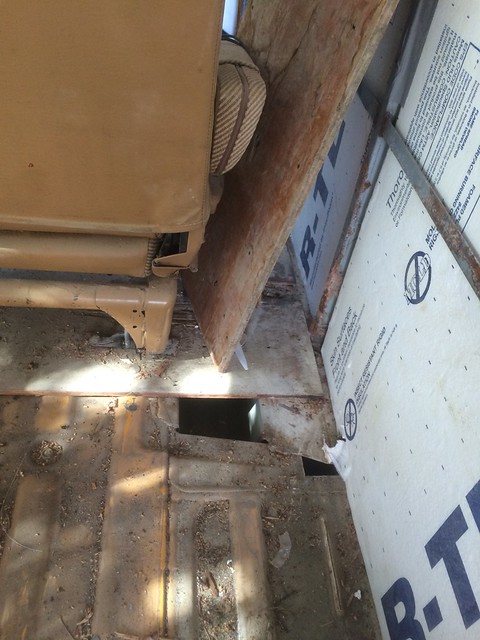
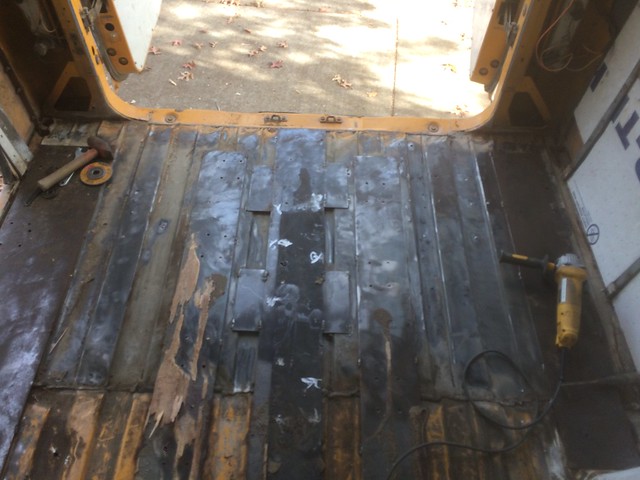
Holes in the floor got caulked and covered with a little metal divots, then a few coats of brown Rustoleum brushed on.
Collins, Really?
I did find this interesting "kludge" of a construction on the bus in the process of working on the floor. Around where the fuel comes in was a god awful bunch of old caulk, that I figured I'd peel off and replace.
Ends up it was covering up some strips of metal just tack welded down that were covering up an ugly set of cuts around where the fuel lines go down to the tank.
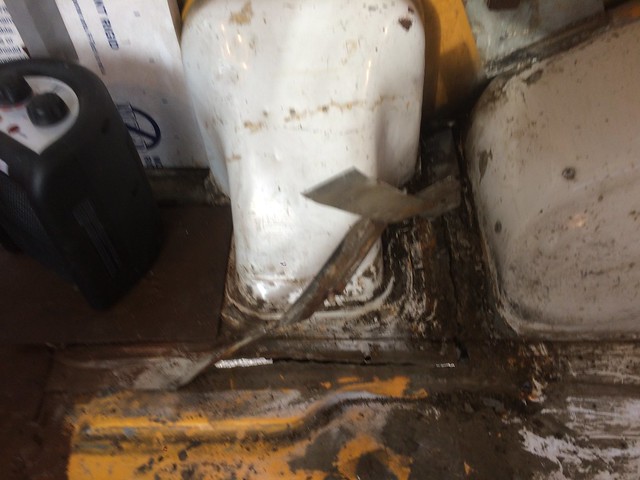
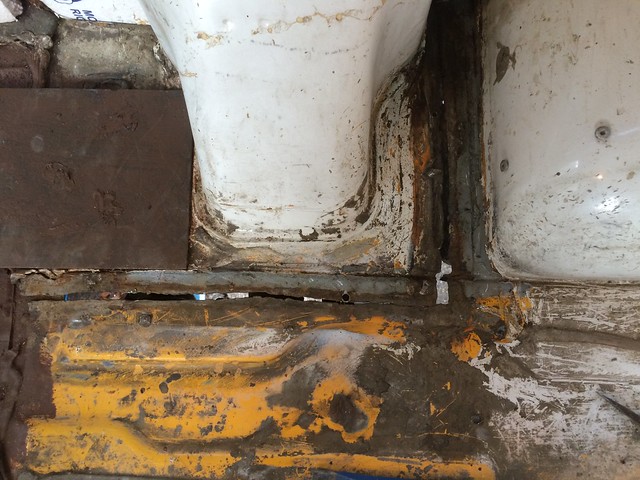
So, uh, I replaced it with my own kludge as follows...

It didn't seem to be any kind of structural patch at all - just something to cover the hole, and at least my version sealed it.
I should point out that I don't have a welding setup or access, so that's limiting how some of the repairs are being done. Welding would have been a lot nicer way to approach this and it's definitely how I'd have wanted to do it, but sometimes you do what you can with what you've got.
|
|
|
|
|
01-02-2016, 12:01 AM
|
#4
|
|
Bus Crazy
Join Date: Jul 2011
Location: Winlcok, WA
Posts: 2,233
|
I hope you didn't use silicone to seal up the roof patches. Silicone doesn't have a very long life expectancy when exposed to heat and light.
Butyl tape would have been a much better choice if you did use silicone.
EternaBond tape would have been a much better choice for sealing up all of the seams on the roof.
Once it stops raining and drys out (I know in western OR that is an iffy proposition) you may want to go over all of the seams with EternaBond. It works great and lives a long time when exposed to heat and light. EternaBond
It looks like you are going to have a pretty nice little rig when you have it all buttoned up.
I would suggest you take it to a scale and weight it. Those single rear wheel buses had very little weight carrying capacity.
You may want to look into getting a set of dual rear wheels for it. The axles, brakes, springs, and bearings are pretty much identical between the SRW and DRW versions of the E-350.
Good luck and happy trails.
|
|
|
|
|
01-04-2016, 01:30 AM
|
#5
|
|
Almost There
Join Date: Oct 2015
Location: Corvallis, OR
Posts: 94
Year: 1991
Coachwork: Collins
Chassis: Ford E350
Engine: 7.3L diesel
Rated Cap: 18
|
BTW I used a butyl caulk so am fairly confident in it. Long term though the bus needs some proper roof treatment, but for now I wanted to just get it well enough to last a few seasons.
Interesting idea for the dual rear wheels, hadn't though thought of that. And we haven't weighted it yet that I know of.
|
|
|
|
|
01-04-2016, 02:23 AM
|
#6
|
|
Almost There
Join Date: Oct 2015
Location: Corvallis, OR
Posts: 94
Year: 1991
Coachwork: Collins
Chassis: Ford E350
Engine: 7.3L diesel
Rated Cap: 18
|
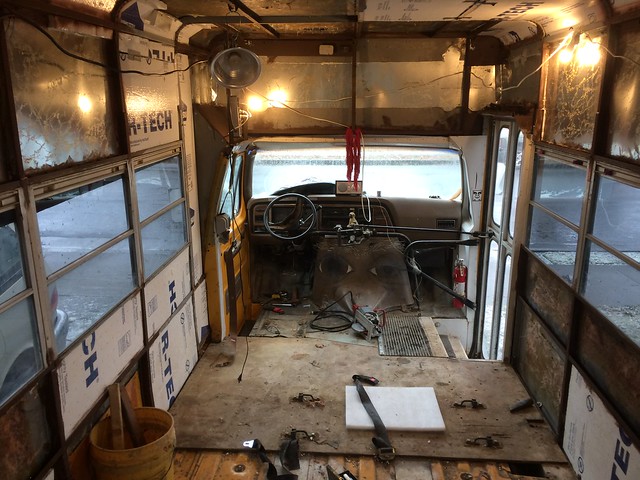
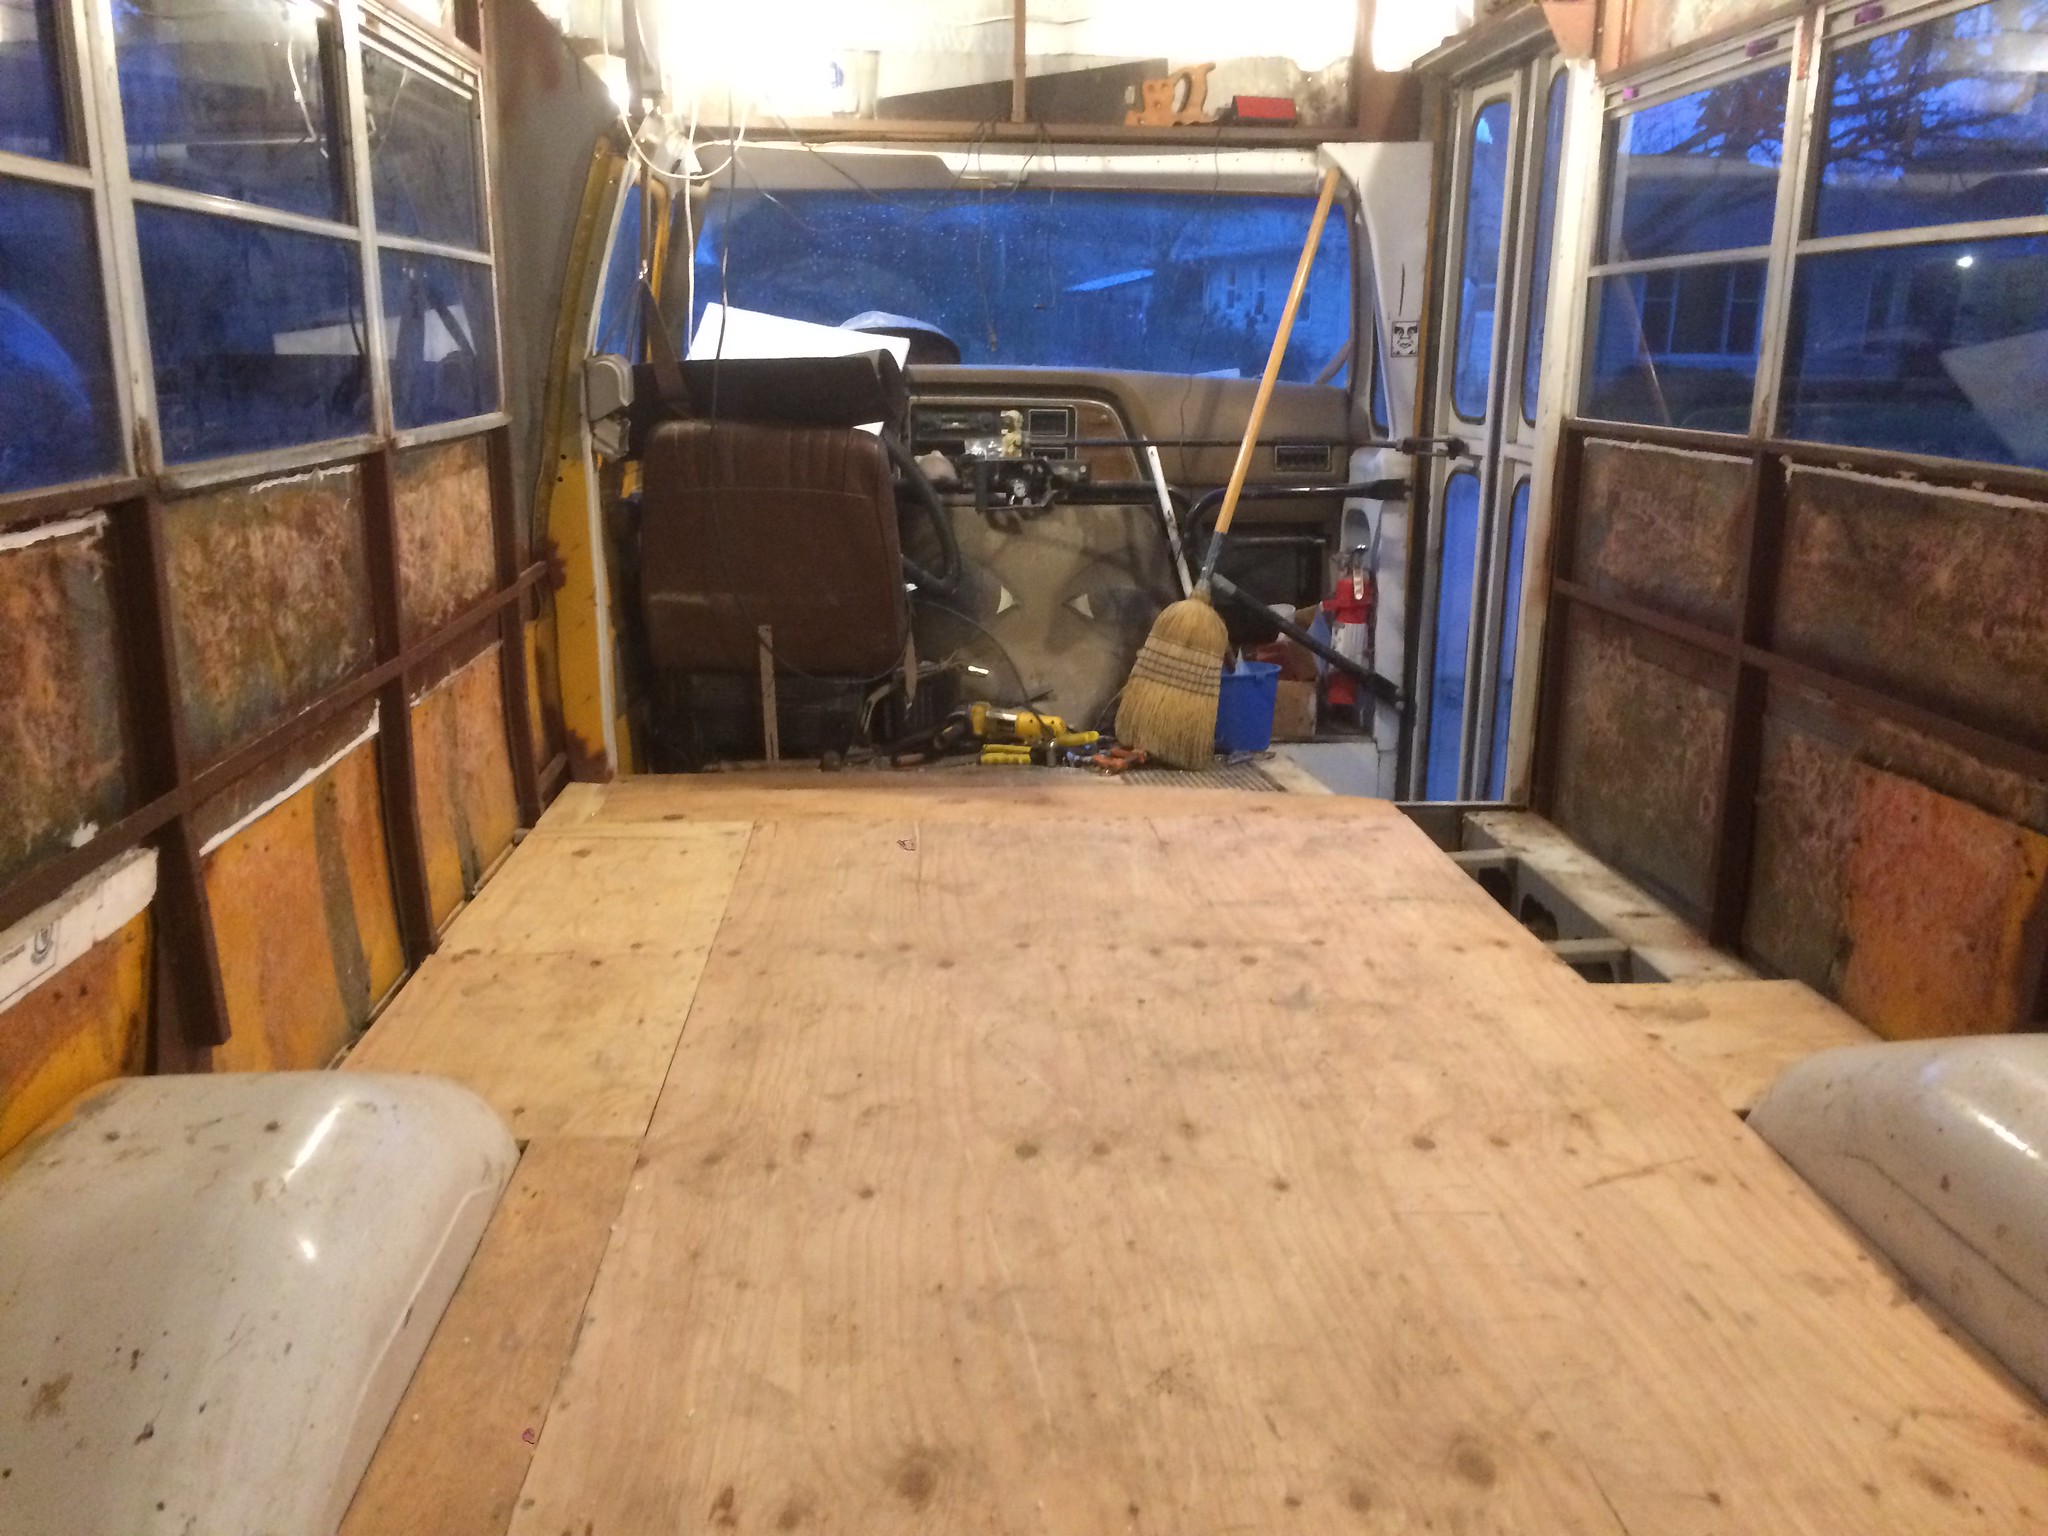
Floor Work
A round of work on the floor the last few days. Previously I'd taken out most of the plywood in the back where most of the water had gotten in in the past, specifically around the side back door and around some windows. Previous pictures showed the cleanup, though I forgot to mention I'd treated the metal after wire wheel cleanup with Ospho.
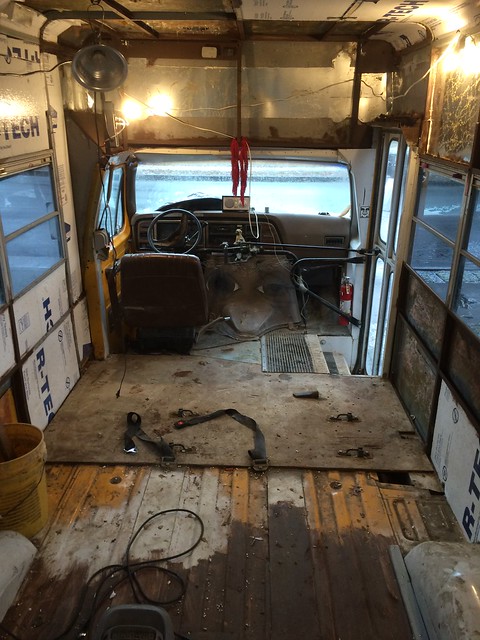
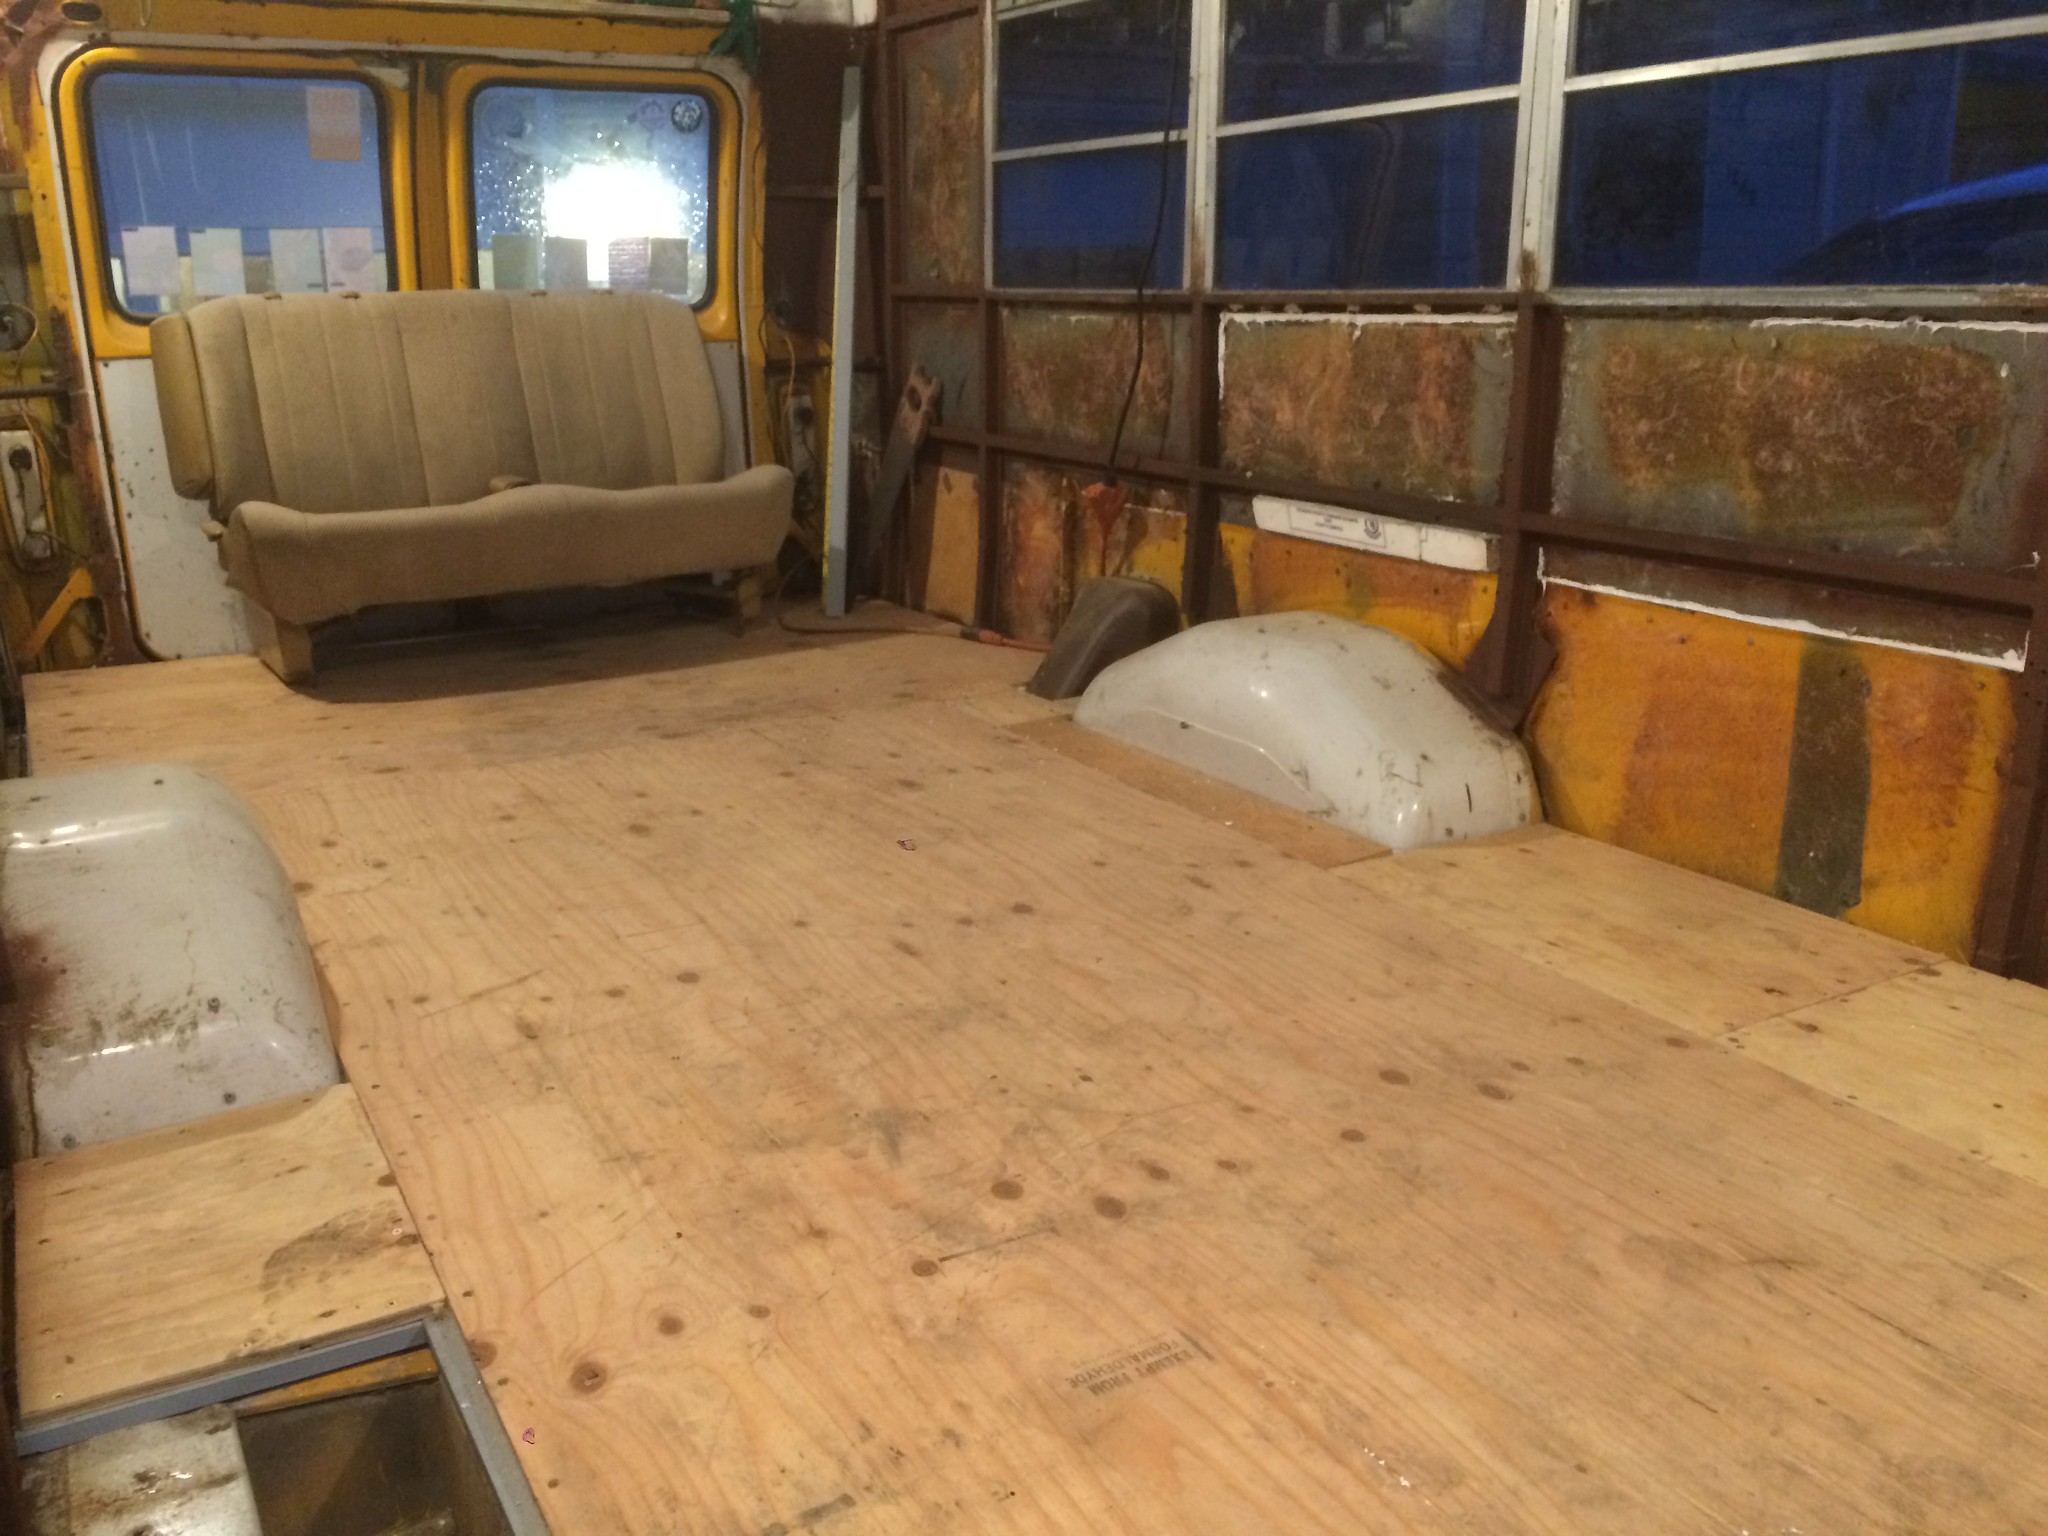
Here's a sequence with the front of the bus being cleared out. The four things that look like handles are attachment points for a Previa van seat we put in for the trip to Burning Man.
Also, you can see the amount of the lift in the first pic pretty well where the shiny new metal is.
[img][/img]
Curiosities
Here's the old step for if it was a passenger van. Thinking that this would be a good place for a secret storage locker or something. The boxy part with round holes I'm assuming was added later as a place to bolt down seats, and can go.

And at top you can see some of the plates that have been welded down to the floor. I always assumed they were for reinforcement for seats, and you can see that the bottom one has holes for the old seats, but the top one has no holes.
 Starting with the Back Floor
Here's a 3 shot sequence of putting in the flooring in the back. The basic plan is to put down primed 1x2 strips with construction adhesive and sheet metal screws every foot or so. Then insulation (using old pieces that were in the walls) in the between space, and lastly 1/2" ply screwed down to the wooden strips.
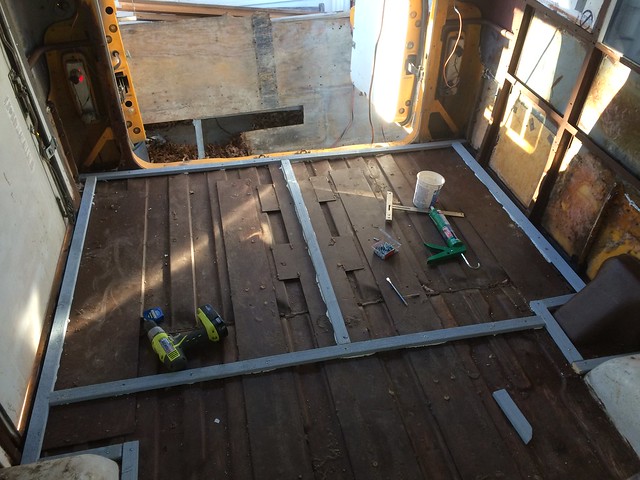
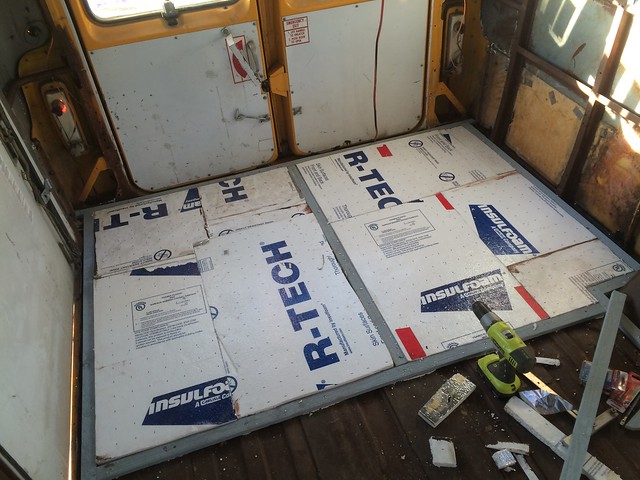
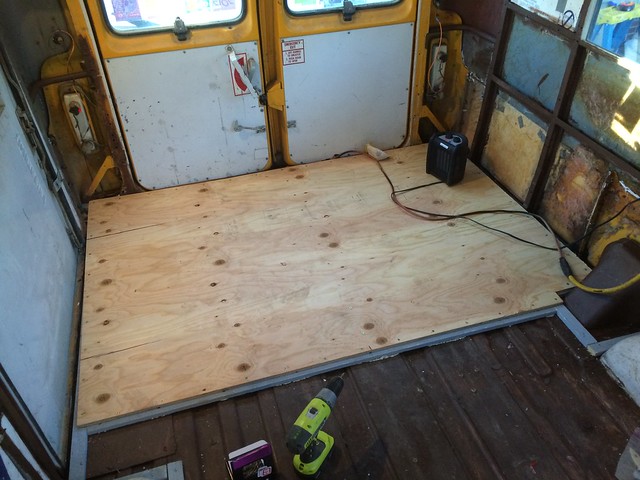
Feels (and looks) good to have even a bit of subfloor down! After the Ospho dries and some paint goes on the front, it will be time to continue on the flooring to the front. But that's for another post...
One Last Burning Man Pic
Here's my daughter and her fiance with the bus in our camp.
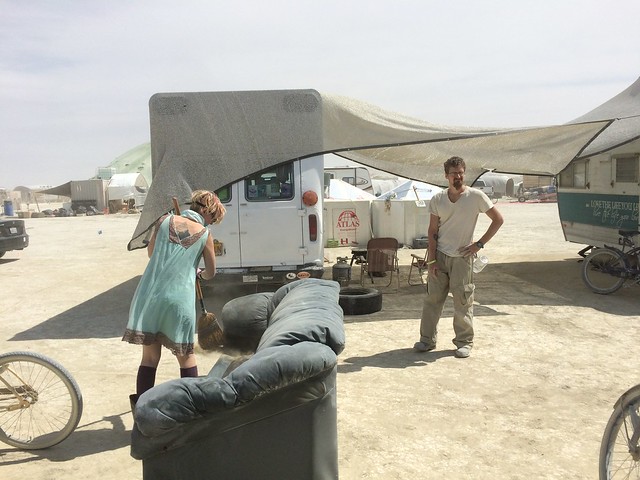
Nasty dust storms early on that just caused all kinds of havoc and got dust into everything. We didn't sleep in the bus but used it as storage and a kitchen, while we camped in hexayurts that are behind the bus.
|
|
|
|
|
01-04-2016, 06:05 AM
|
#7
|
|
Bus Nut
Join Date: Apr 2015
Location: Tomball, TX
Posts: 313
Year: 1988
Coachwork: Blue Bird
Chassis: TC/2000
Engine: Cummins 5.9TA
|
This is confusing, my bus is also named Betty the Bus.
Nice ride. What are the ultimate plans for your bus? Bed/toilet/shower?
|
|
|
|
|
01-04-2016, 06:25 AM
|
#8
|
|
Bus Geek
Join Date: Sep 2014
Location: Eustis FLORIDA
Posts: 23,764
Year: 1999
Coachwork: Thomas
Chassis: Freighliner FS65
Engine: Cat 3126
Rated Cap: 15
|
How about "burning betty"?
|
|
|
|
|
01-04-2016, 12:48 PM
|
#9
|
|
Almost There
Join Date: Oct 2015
Location: Corvallis, OR
Posts: 94
Year: 1991
Coachwork: Collins
Chassis: Ford E350
Engine: 7.3L diesel
Rated Cap: 18
|
Quote:
Originally Posted by EastCoastCB

How about "burning betty"?
|
Hehe I like that - must consult with owner 
RE: plans
Originally it was to be as complete as possible, but right now we're just taking it stages. First will be bed, basic kitchen, and other such basic things. Toilet perhaps in the future? Just taking it one step at a time for now, with the goal basically being a fun conversion for shorter getaways and not necessarily full time habitation.
|
|
|
|
|
01-11-2016, 04:50 PM
|
#10
|
|
Mini-Skoolie
Join Date: May 2015
Posts: 24
|
Quote:
Originally Posted by austin1989us
This is confusing, my bus is also named Betty the Bus.
Nice ride. What are the ultimate plans for your bus? Bed/toilet/shower?
|
I also know someone else with a Betty the Bus, but's a blue one. https://www.facebook.com/BettietheBlueBus/?fref=ts
|
|
|
|
|
01-12-2016, 06:03 AM
|
#11
|
|
Bus Crazy
Join Date: Jul 2011
Location: Winlcok, WA
Posts: 2,233
|
The panels welded onto the floor that didn't have holes would have had holes if the bus had been a wheelchair bus. The tie downs would have needed some place for the anchors to have been bolted down.
|
|
|
|
|
01-12-2016, 11:06 AM
|
#12
|
|
Almost There
Join Date: Oct 2015
Location: Corvallis, OR
Posts: 94
Year: 1991
Coachwork: Collins
Chassis: Ford E350
Engine: 7.3L diesel
Rated Cap: 18
|
Quote:
Originally Posted by cowlitzcoach
The panels welded onto the floor that didn't have holes would have had holes if the bus had been a wheelchair bus. The tie downs would have needed some place for the anchors to have been bolted down.
|
Hmm though it actually was setup for wheelchairs - there was a lift that got removed. Maybe it was just sort of their standard prep for any bus floor but depending on configuration it would be drilled or not drilled.
It's all metal under the insulated plywood floor now
|
|
|
|
|
01-12-2016, 12:38 PM
|
#13
|
|
Bus Crazy
Join Date: Jul 2011
Location: Winlcok, WA
Posts: 2,233
|
Quote:
Originally Posted by Puggy
Hmm though it actually was setup for wheelchairs - there was a lift that got removed. Maybe it was just sort of their standard prep for any bus floor but depending on configuration it would be drilled or not drilled.
It's all metal under the insulated plywood floor now |
Excuse me, I wasn't clear.
All of the buses go down the same production line regardless of the final configuration and have the same basic stuff under the skin. As they go down the line they will add or not add a lift door and a lift.
It is much easier to prep under the floor for all applications than to slow the process down to add additional prep for certain models.
|
|
|
|
|
01-18-2016, 08:54 PM
|
#14
|
|
Almost There
Join Date: Oct 2015
Location: Corvallis, OR
Posts: 94
Year: 1991
Coachwork: Collins
Chassis: Ford E350
Engine: 7.3L diesel
Rated Cap: 18
|
Have continued the last week or so finishing up the flooring, and chasing down one last (hah yea right) leak in the back...
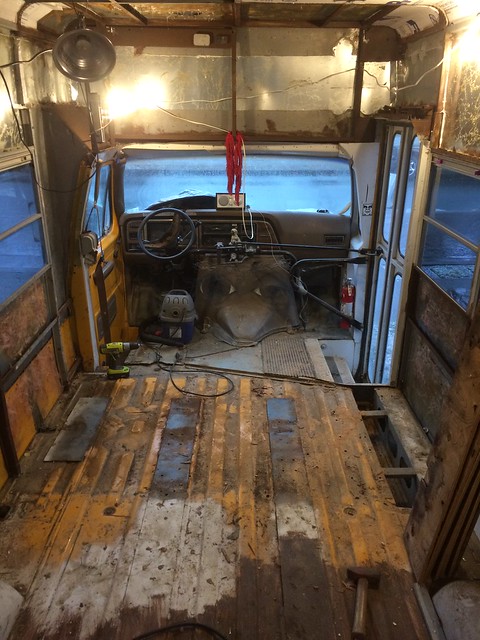
Flooring
As mentioned before, it's 1x2 primed fascia/trim boards glued and screwed down, with insulation between and 1/2" plywood on top. Plywood is screwed into the 1x2s.

Old van seat temporarily setup in the back. There will be a fold up bed/couch back there eventually.
That hole in the floor by the passenger door is the old foot well area if it was a typical side-door van. Hoping to take out the extra metal (which is there as a bolt down for bus seats) and turn it into storage, possibly for batteries if I can find them small enough.
Last leak, I swear!
I'm being pretty paranoid about leaks. Basically I know if I don't find them now, I'll never find them when the walls and such are finished, at least until water stains start showing up after it's been leaking for a while. This is the last/latest, above the back doors. The hollow framing above the doors has been accumulating a bit of water, that leads to some drips when it's been pouring. We had over 1" of rain yesterday so it was "expressing" itself well.
I finally tracked it down (I hope) to this small gap in the gutter above the back door....
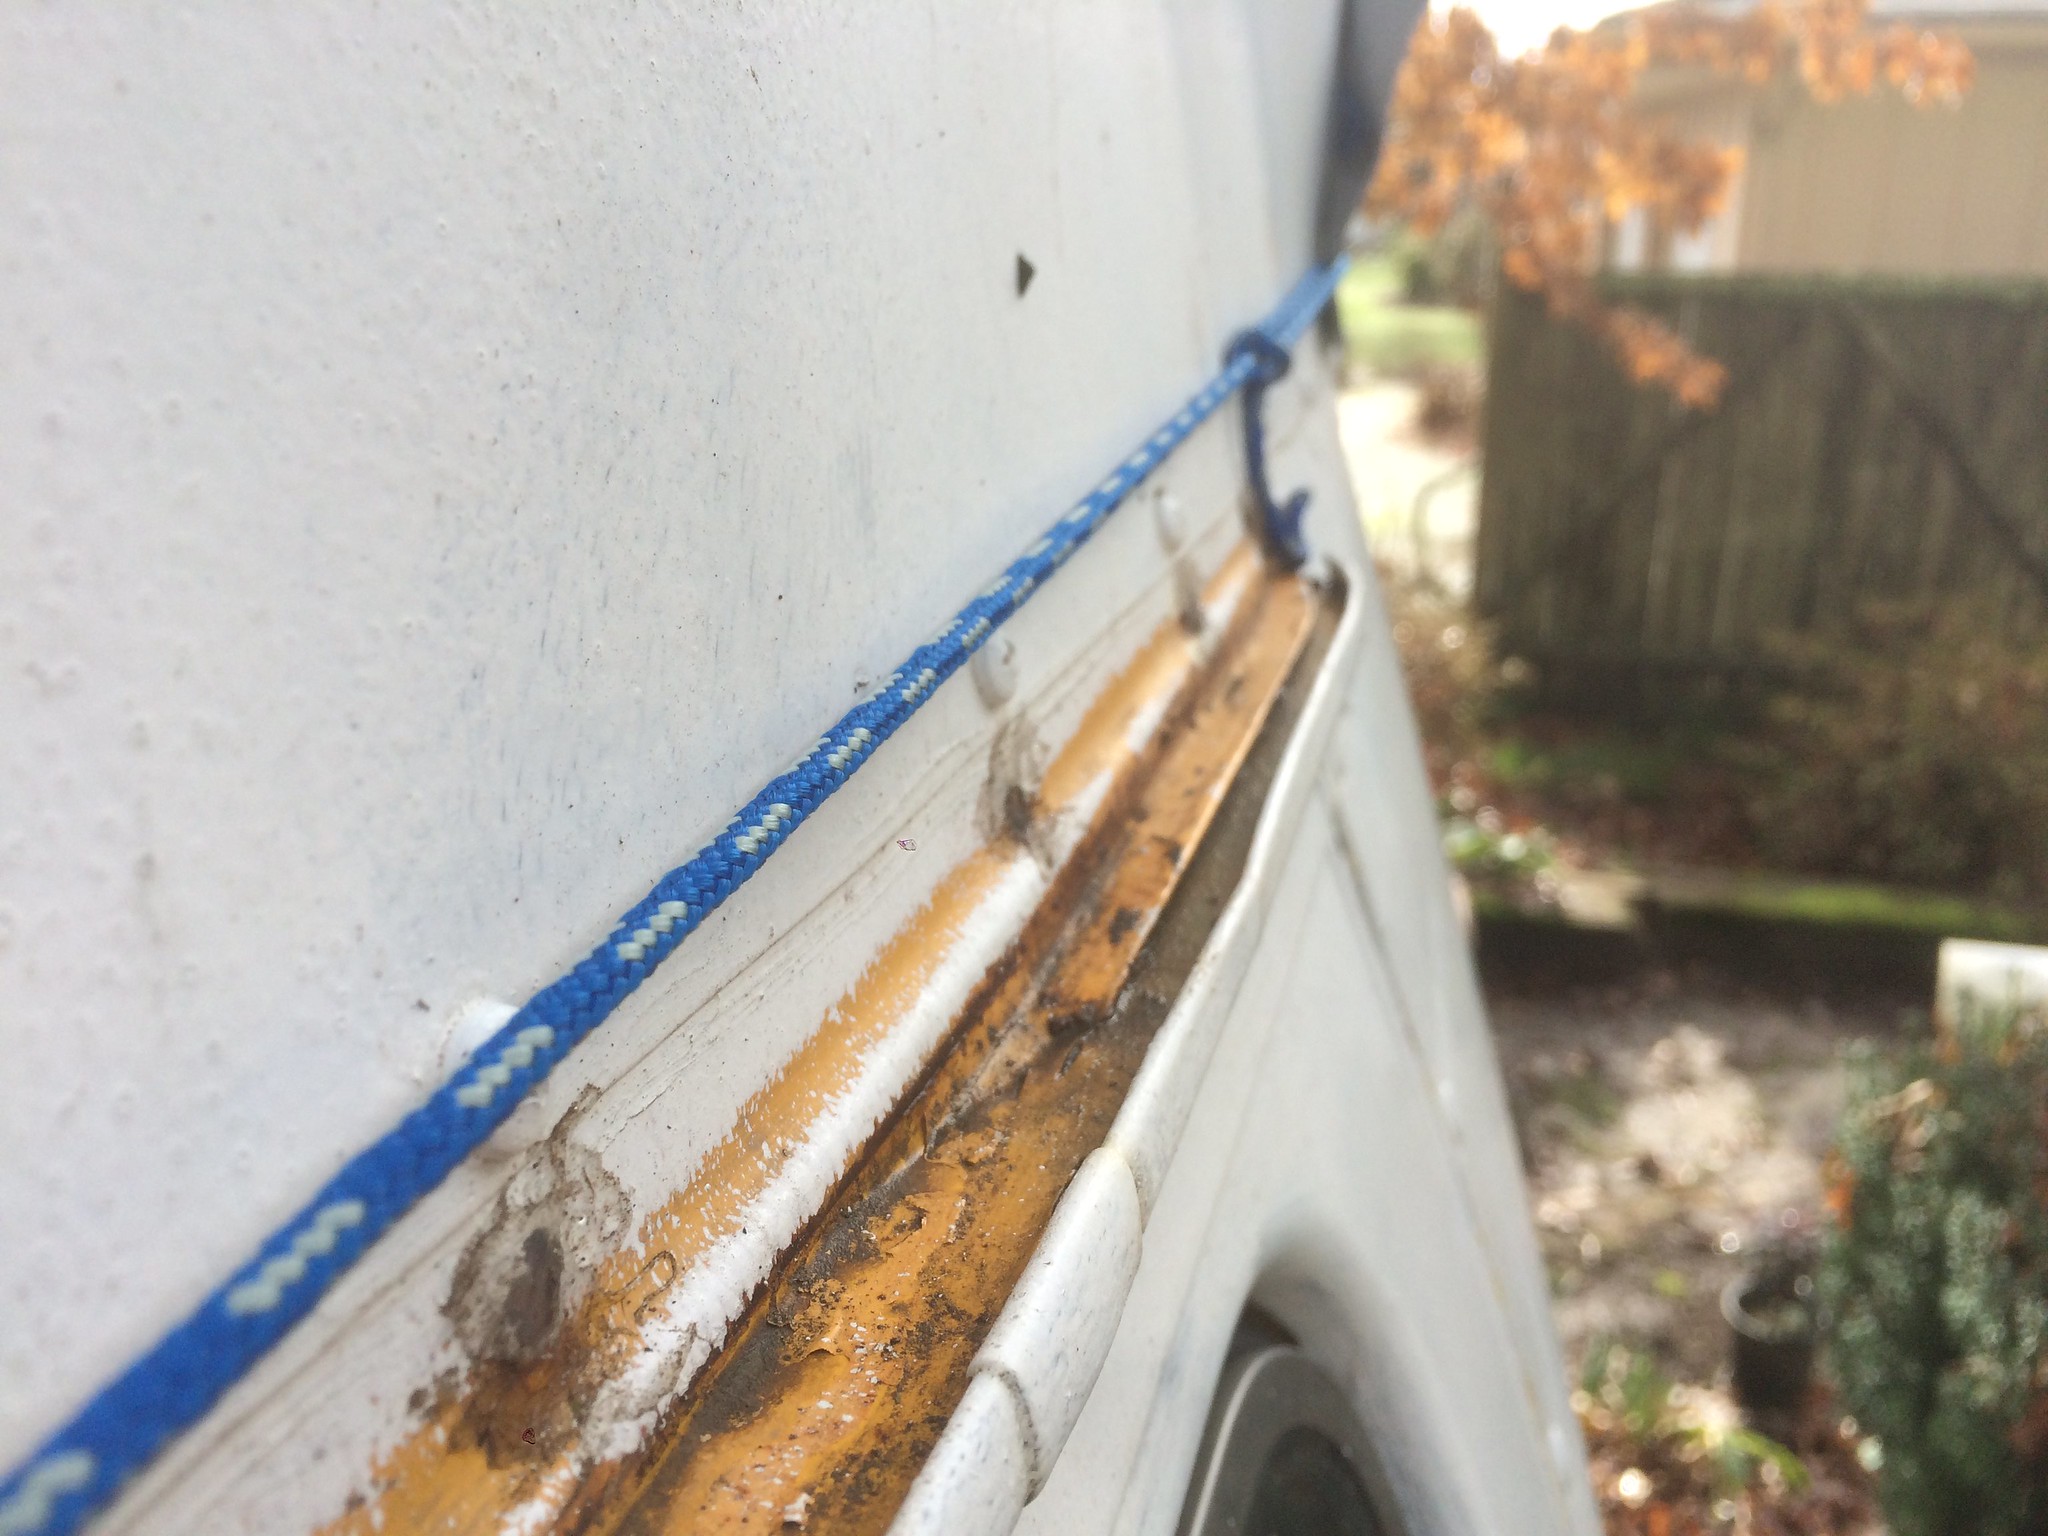
I blasted the gap dry with the compressor, and filled it liberally with butyl caulk, then did a bit of hammering to close the gap. Hope that fixes things.
The other problem was the water that had accumulated in the void area above the back door, shown below. It looks like it's been doing it for quite a while based on some rust in there.
I'm wondering if it might not be a good idea to just chop the whole thing off and replace it with some new steel framing. It's been an ongoing leak for many years I believe, and I'm not able to get inside and really treat it or paint it.
After sealing the gap (I hope), I had to get the water out of there, so stuck the shop vac with the hose on "blow" into the end holes. I let it run for about 15 minutes, and it did a great job of drying out the hole. Next stop is to fill the void with some closed cell foam I think. Not so much to stop leaks, but just to insulated it and fill the void (and be closed cell in case it may leak in the future. But not until I know I've fixed the leak on the outside.
|
|
|
|
|
01-24-2016, 08:29 PM
|
#15
|
|
Almost There
Join Date: Oct 2015
Location: Corvallis, OR
Posts: 94
Year: 1991
Coachwork: Collins
Chassis: Ford E350
Engine: 7.3L diesel
Rated Cap: 18
|
Last Week's Update
It's been raining a lot, but since the roof isn't leaking anymore (YES!) it's easy to work inside the bus. The main thing to do this week was investigate what that leak in the gutter above the rear doors has been up to, and use some expanding foam to fill in a few areas around the floor.
Back Door Leak
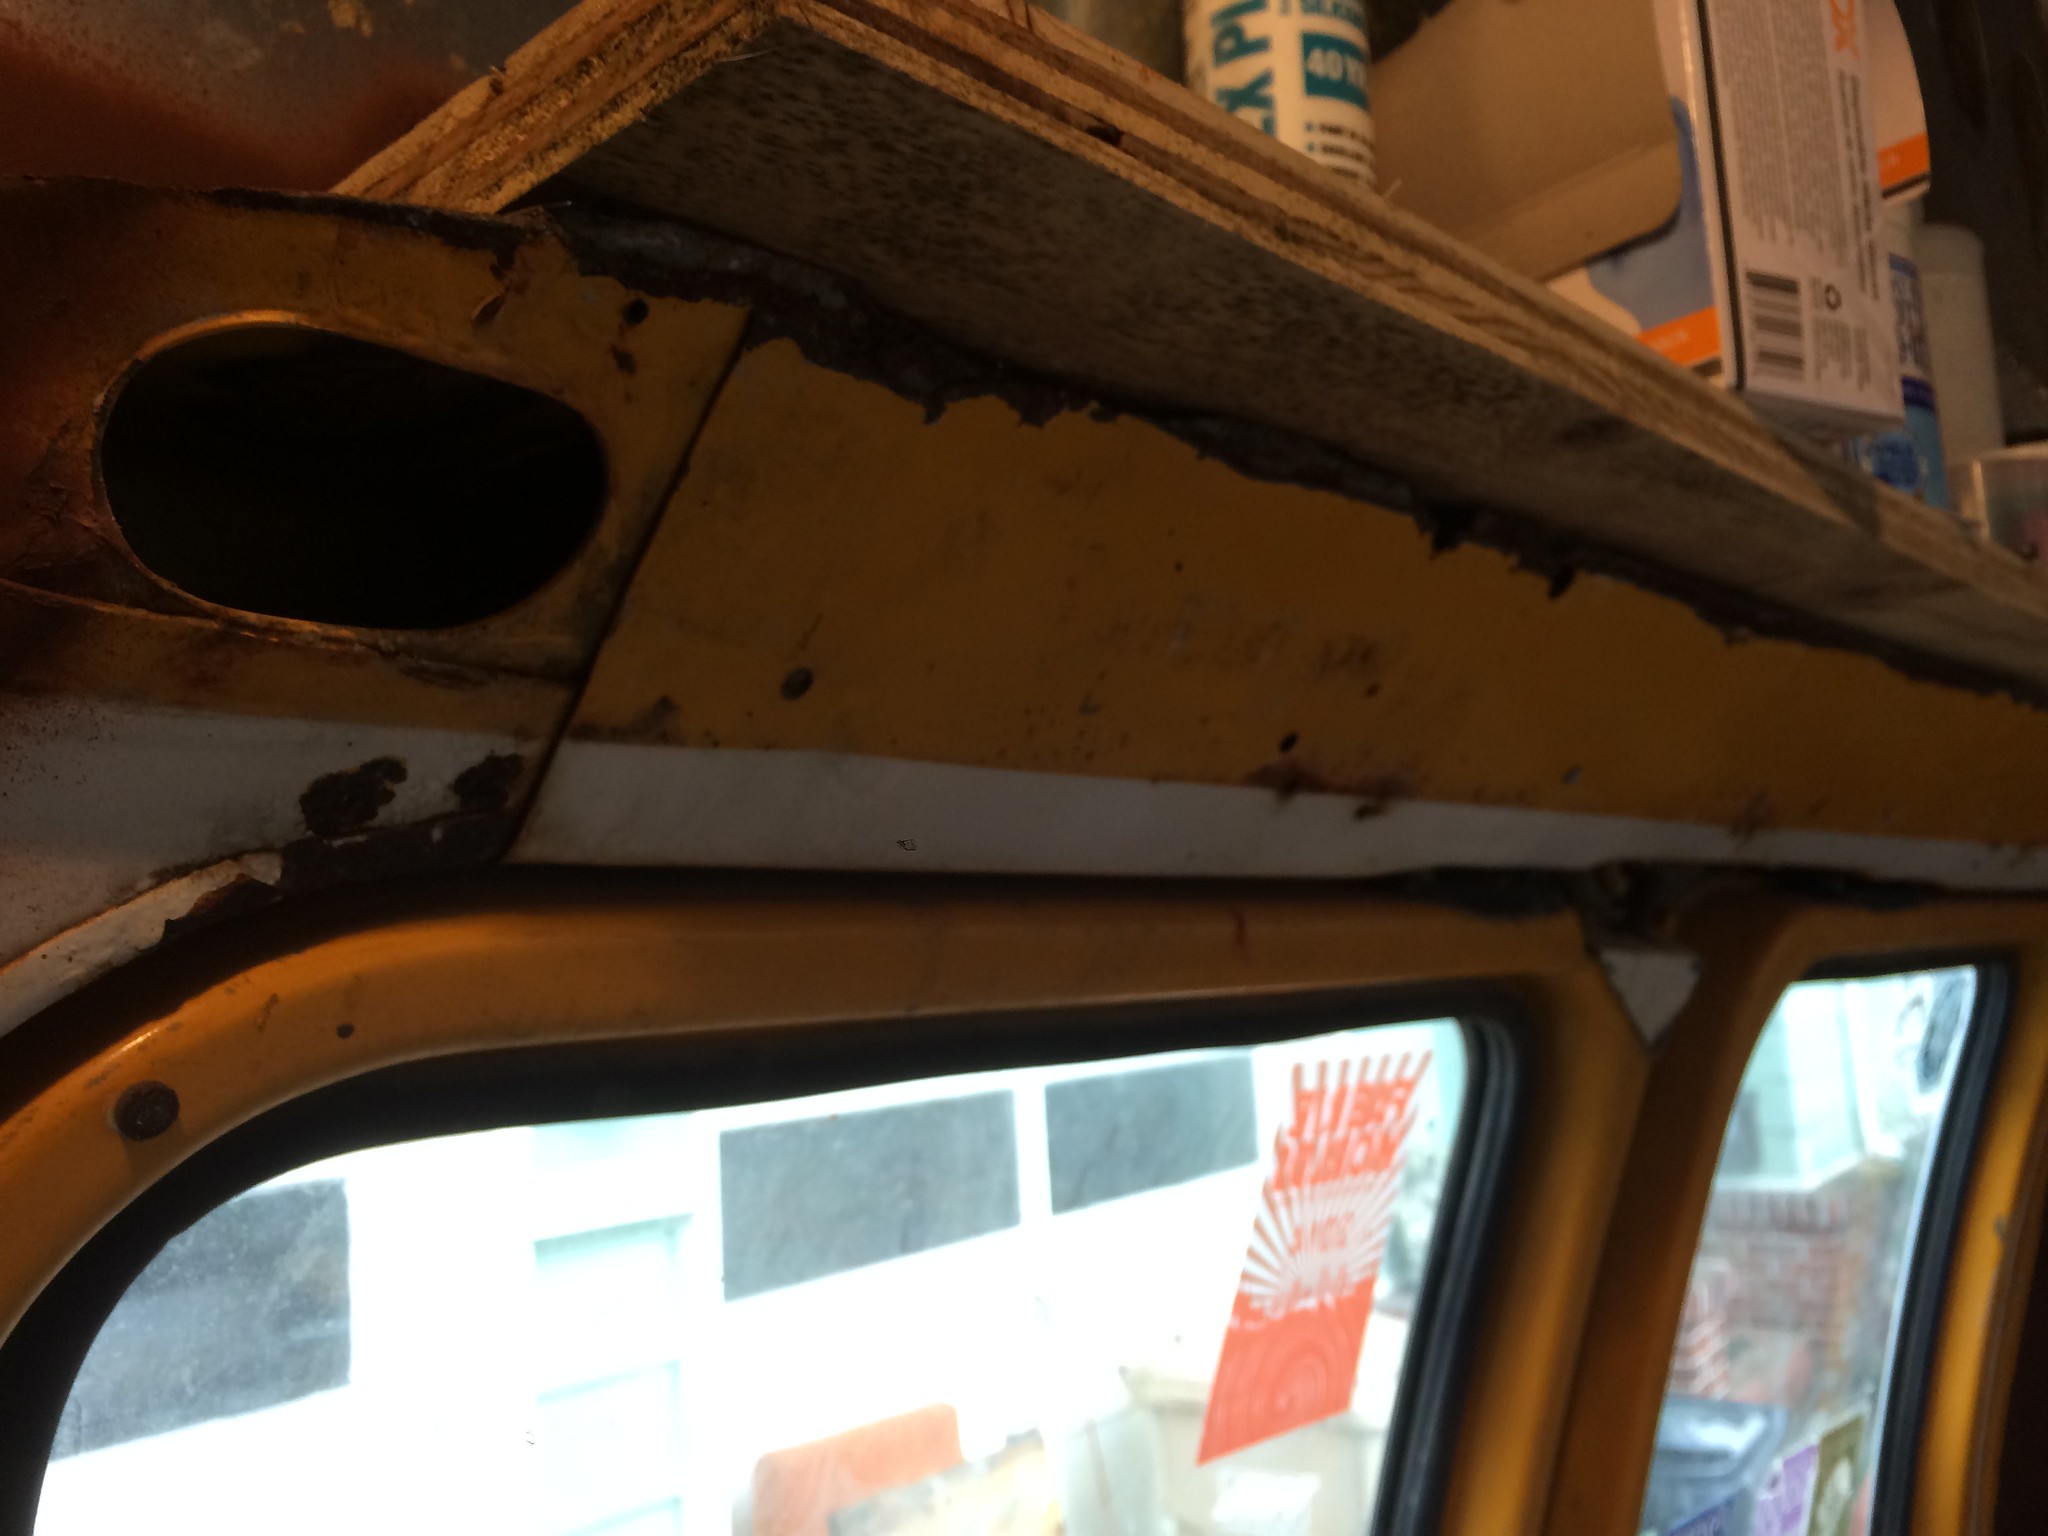
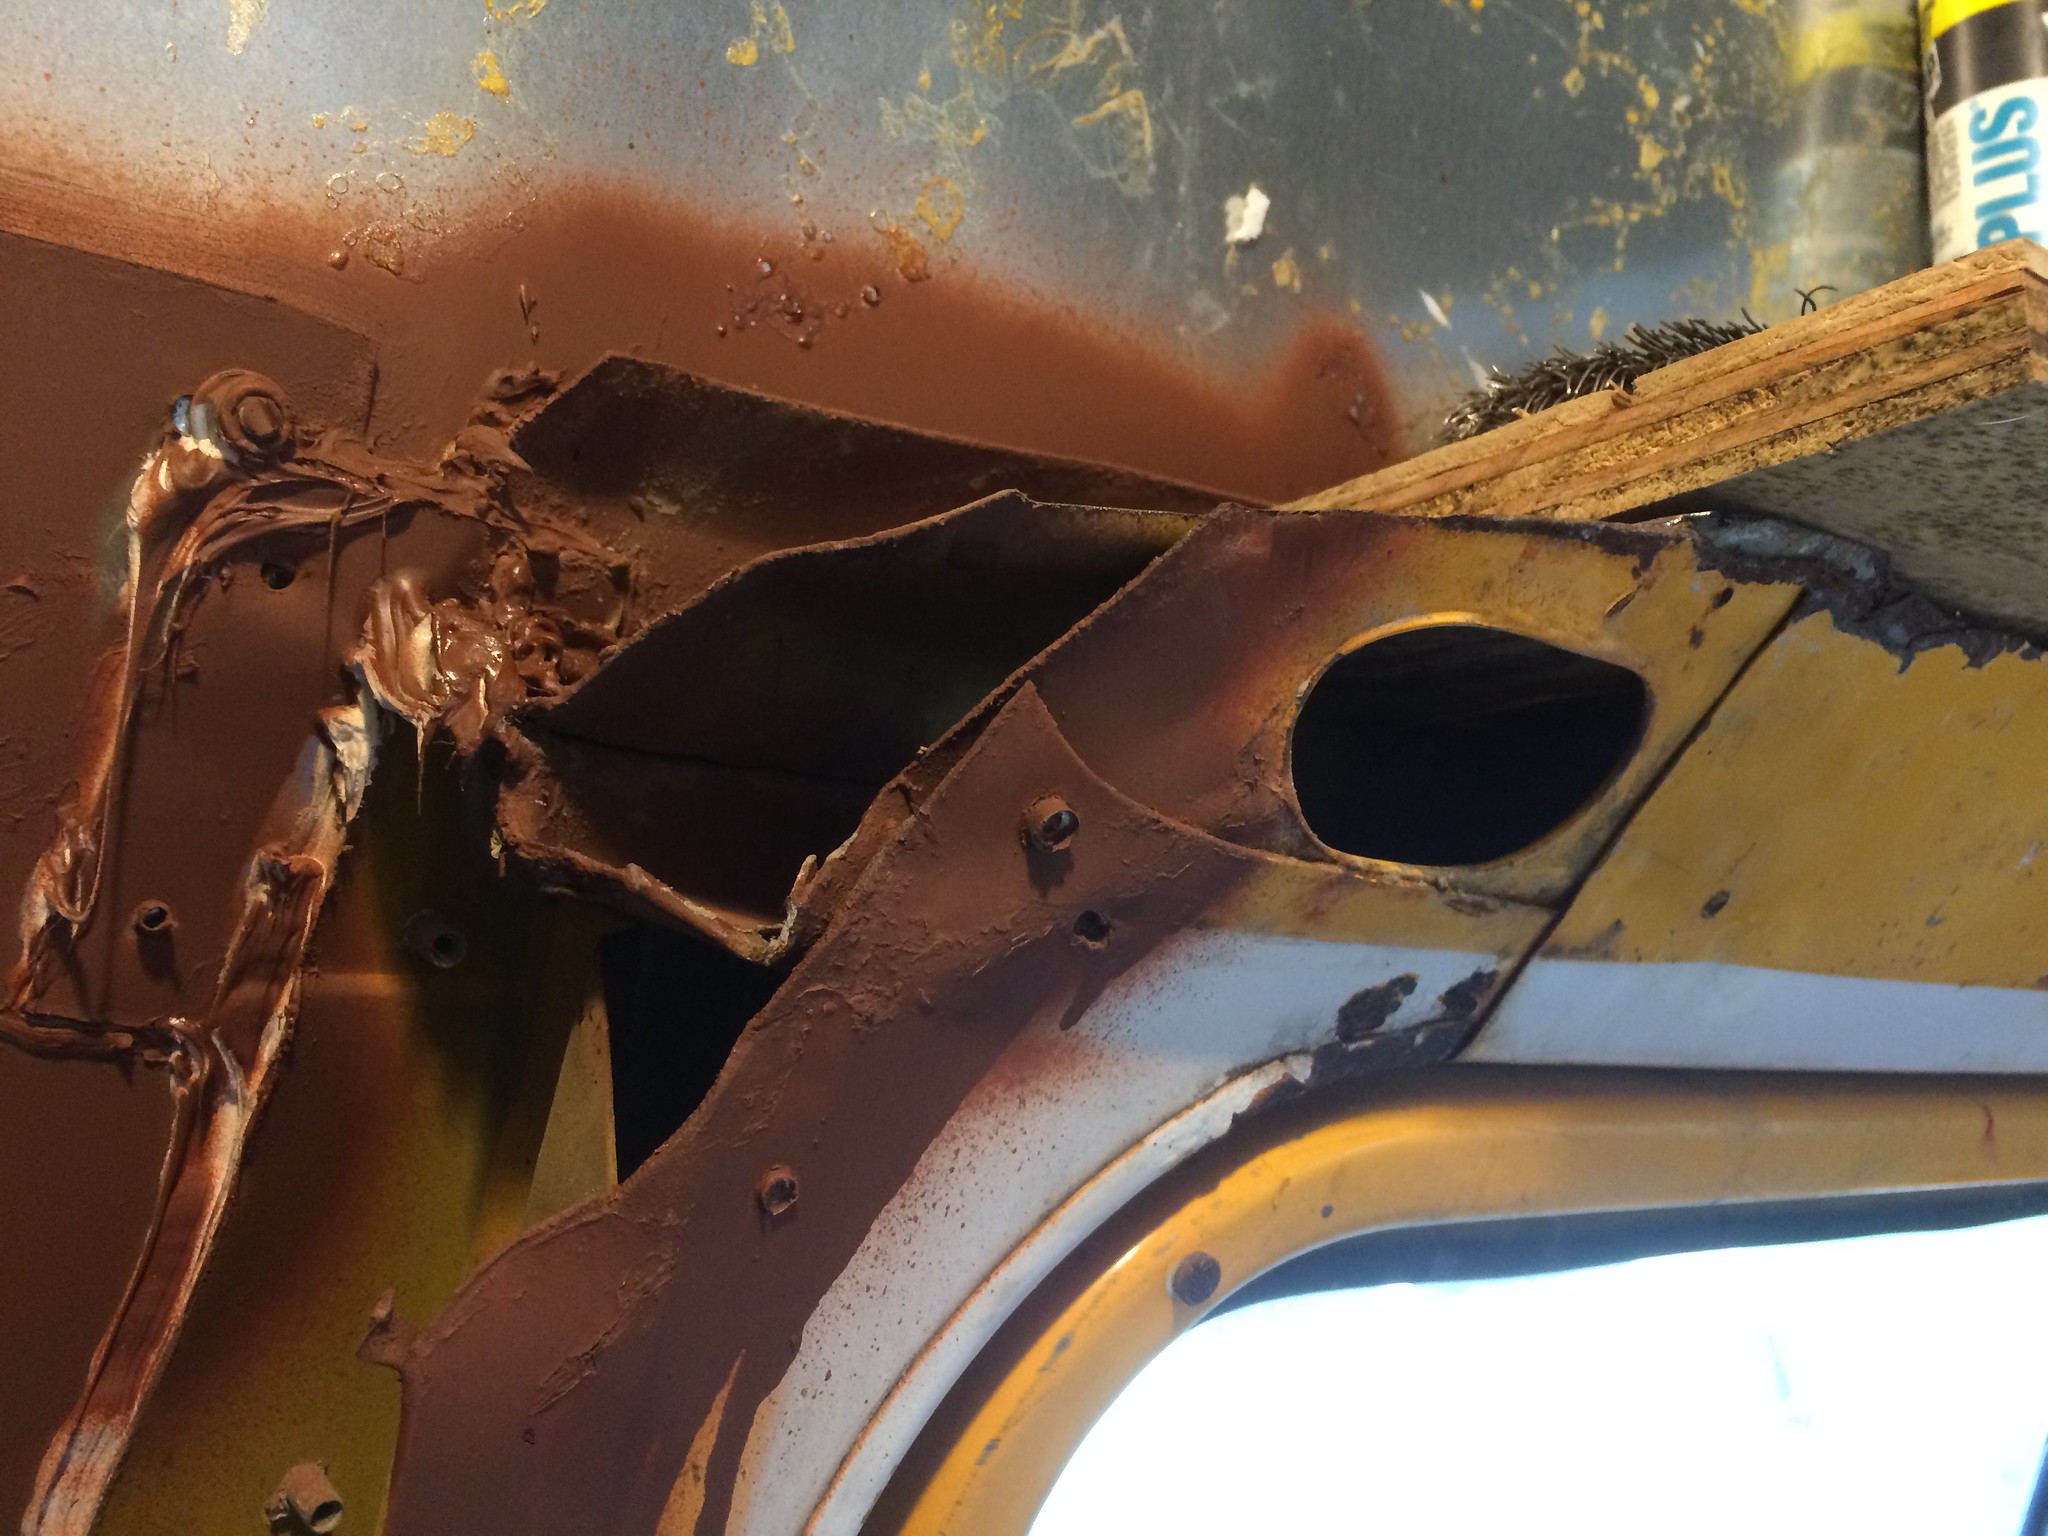
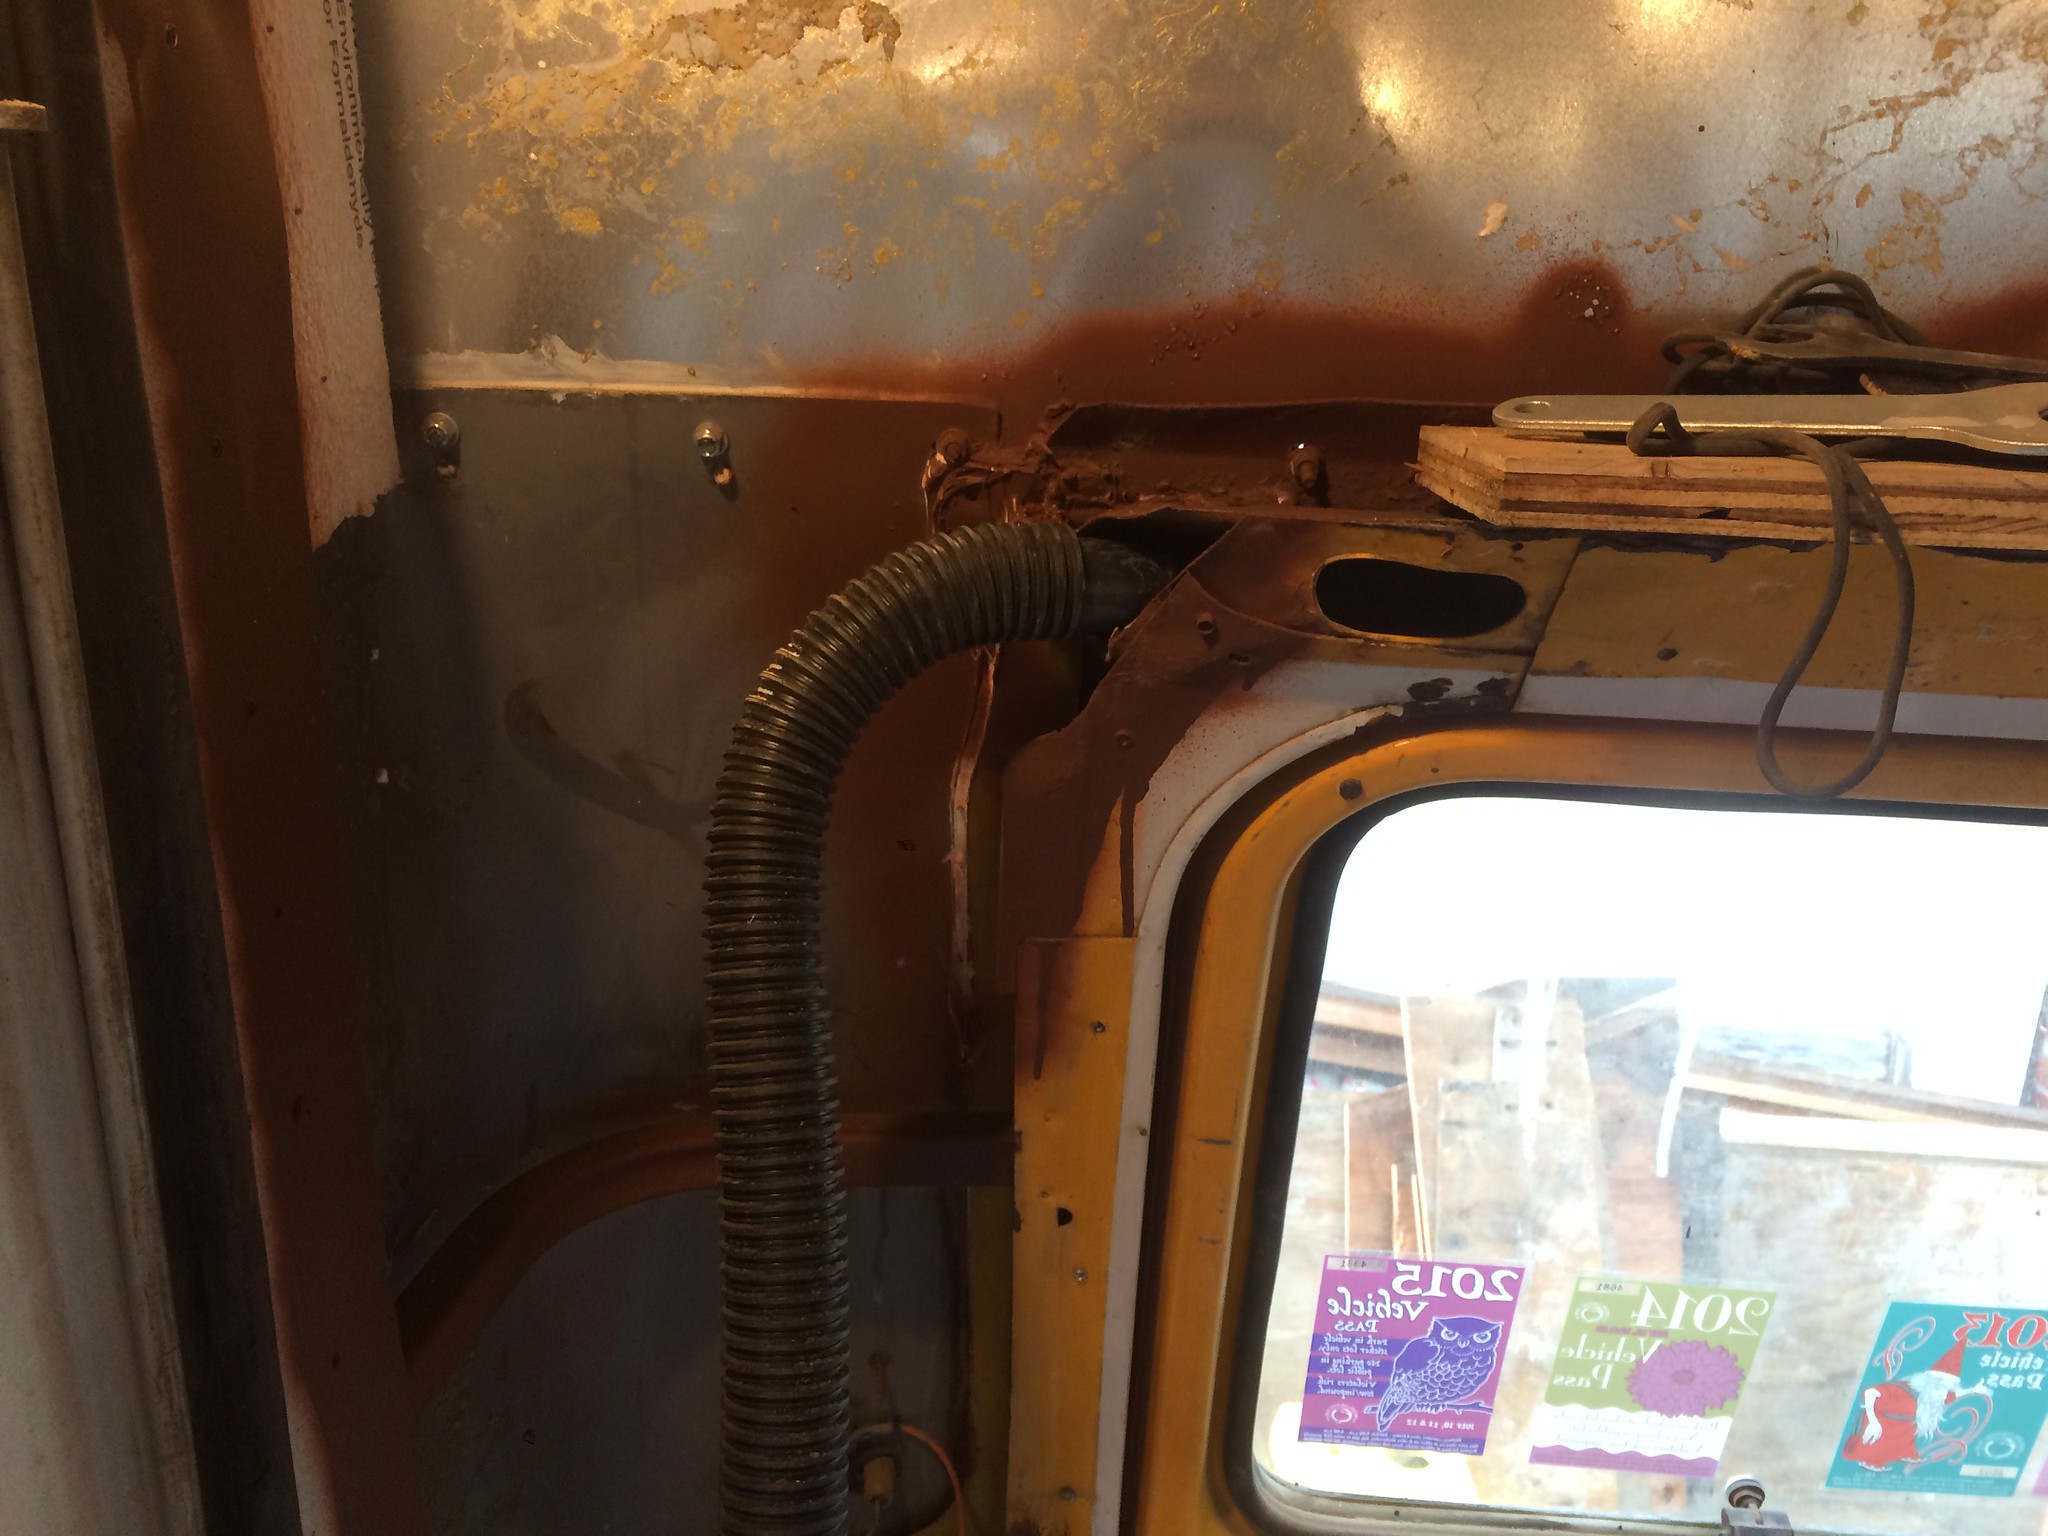
The more I looked at that rust in the structure over the back doors, the more I thought I really needed to get in there and see what it was like inside the hollow metal enclosure. So out came the angle grinder and a cutoff wheel. And what I found was there'd been a long-term leak that was coming in via that seam in the gutter. And of course rust as a result. Who in their right (engineering) mind puts a seam right inside of a thing that's supposed to hold, pool, and channel water!?
The culprit for the leak that was coming in over the back doors
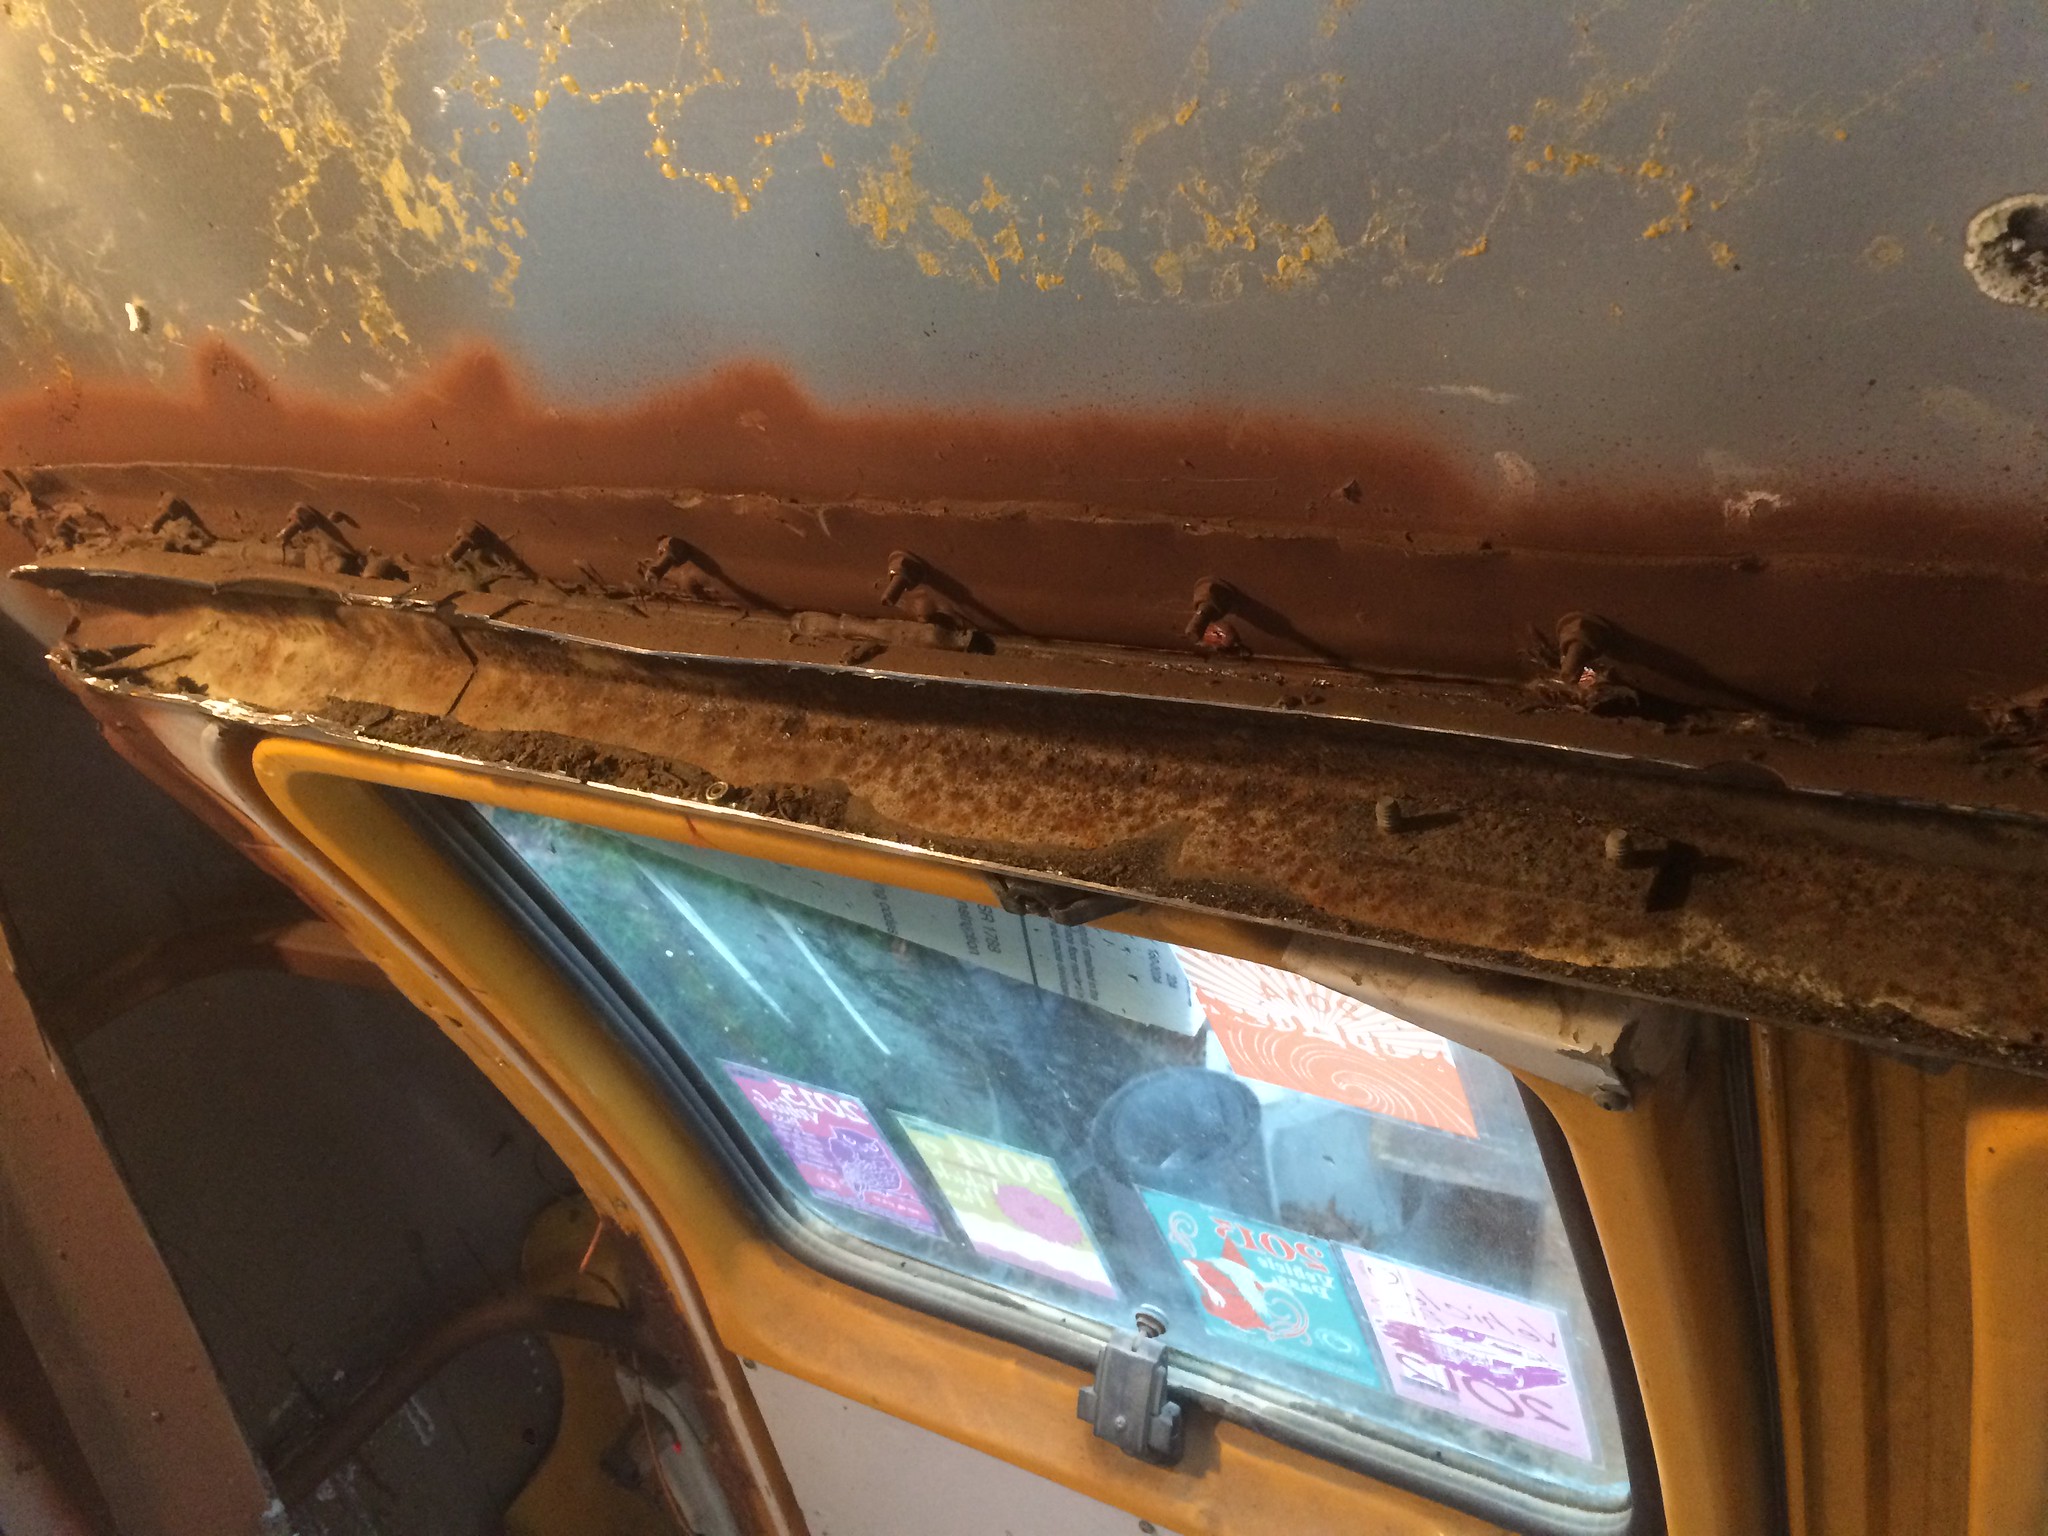 Inside metal above back door chopped off to reveal rust
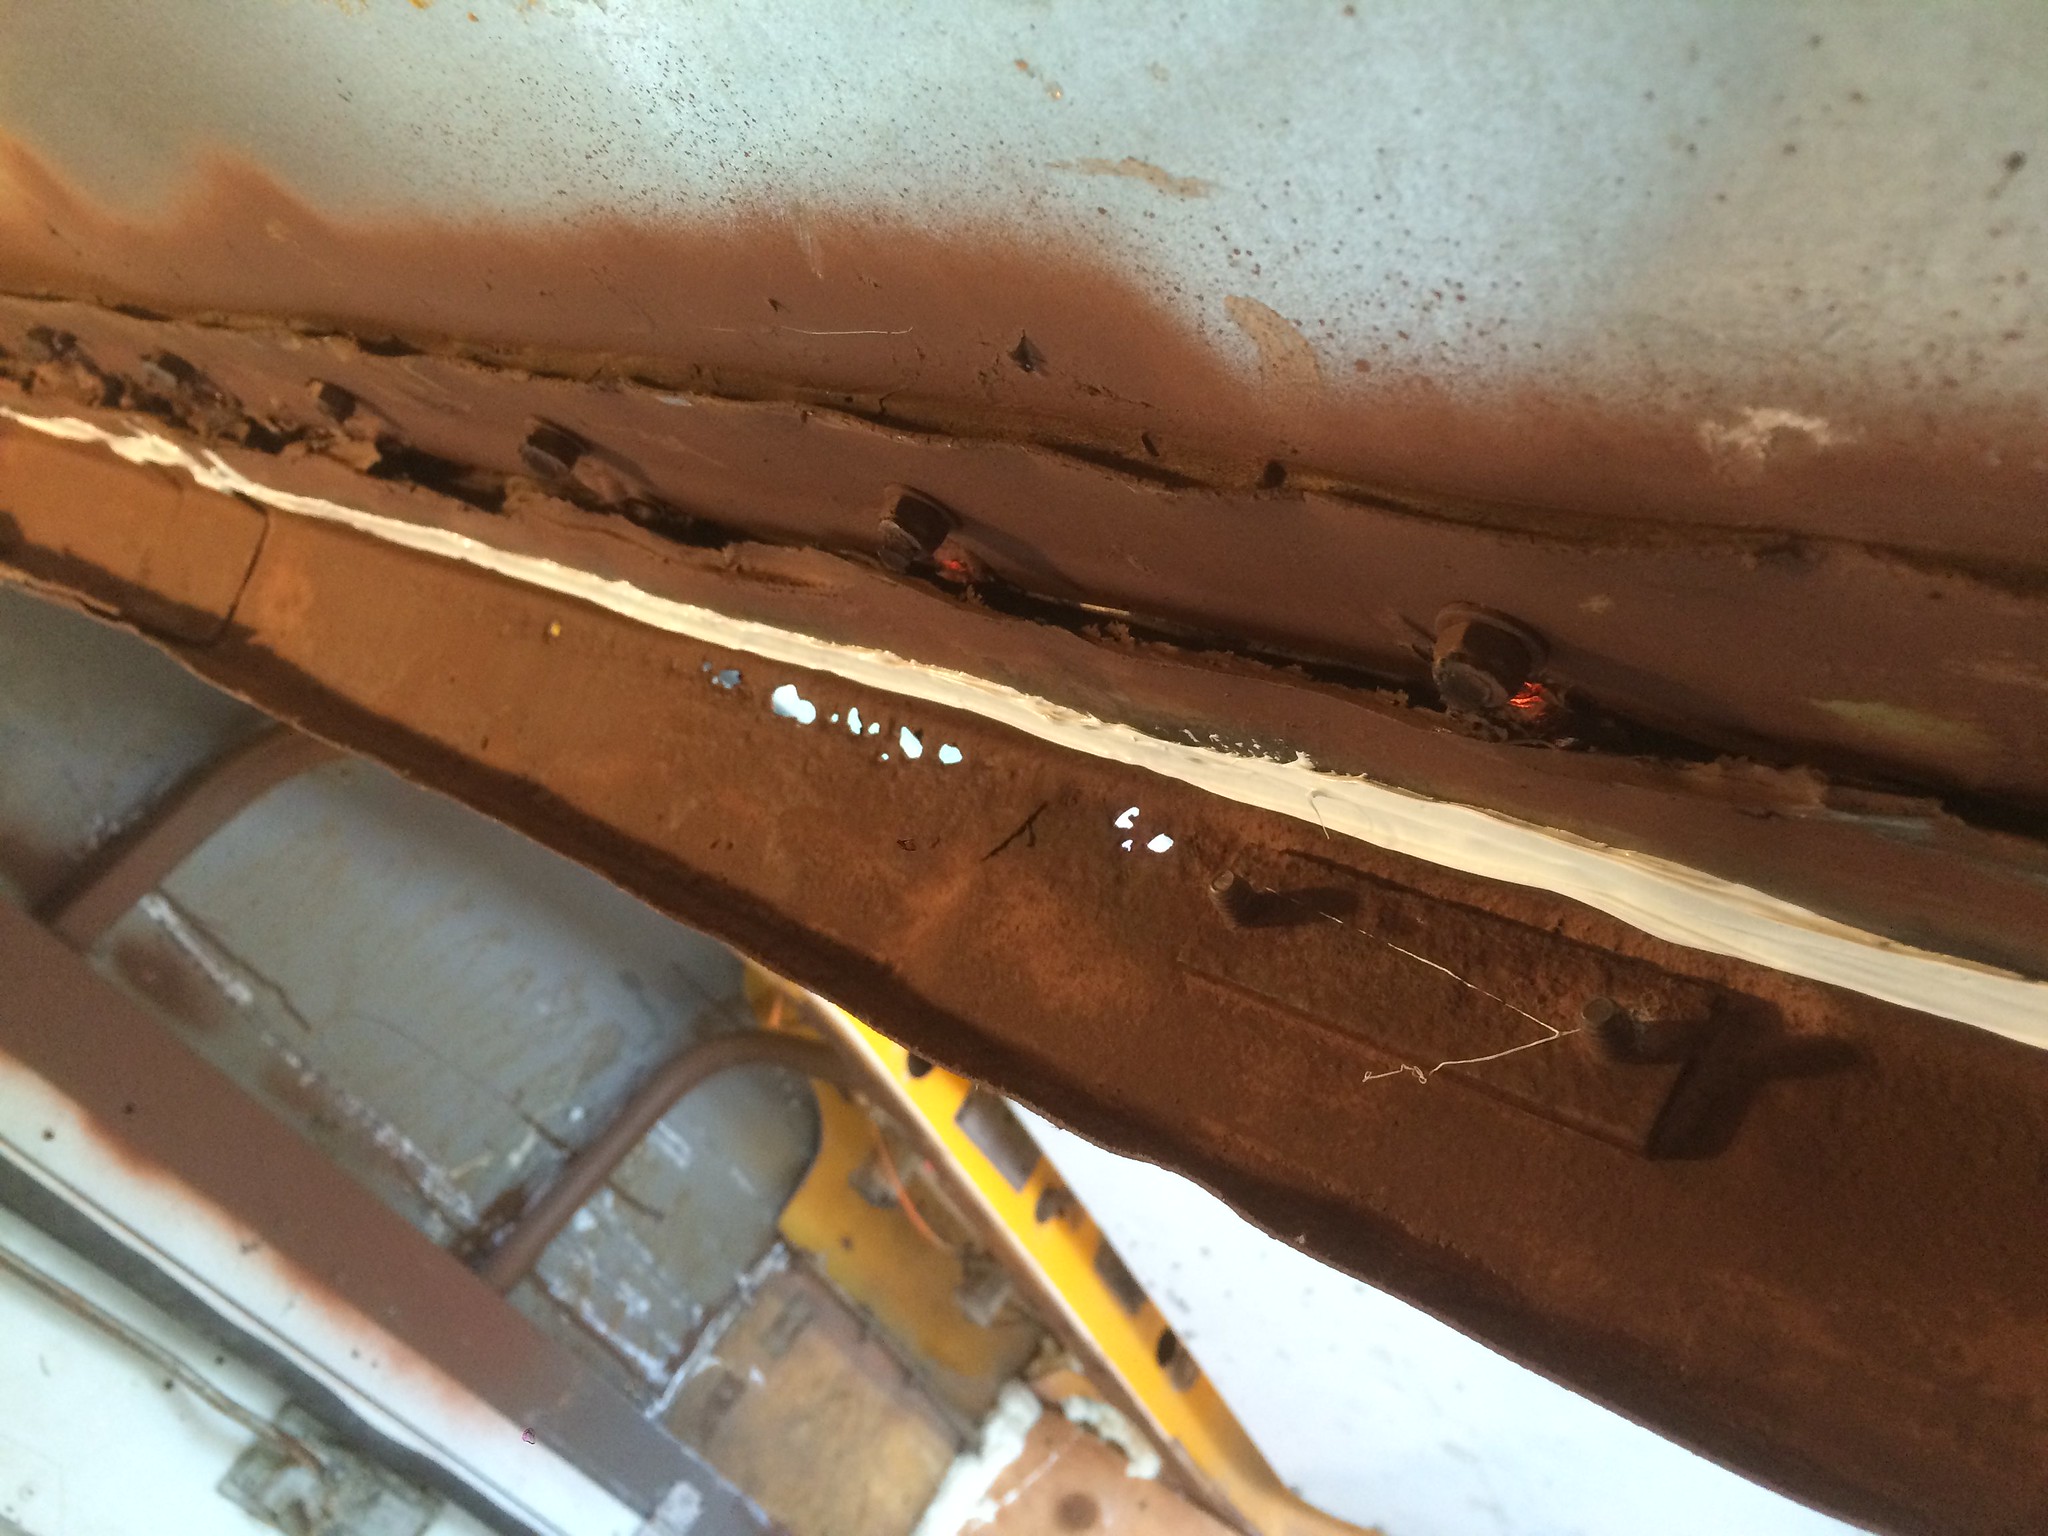 Holes in the metal that came out after some wire wheel work to take off the rust
The open seam in the gutter has been all caulked inside and out, and the interior metal all wire wheeled, treated with Ospho, and repainted. Ultimately I'll need to seal up those pinholes holes in the metal, but fortunately it's in an area that shouldn't get further water exposure now that I've fixed the leaking.
I <3 Expanding Foam
Expanding foam is so much fun to play with! But you just have to make sure you've got enough stuff to use the whole can, otherwise it just dries in the tube and you have to chuck the whole thing!
There was a gap all around the base of the new flooring I did that needed to be taken care of, along with some smaller gaps around the wheel wells and the wall. I picked up a can of closed cell foam (I forget the brand, but not "Great Stuff") and went to town.
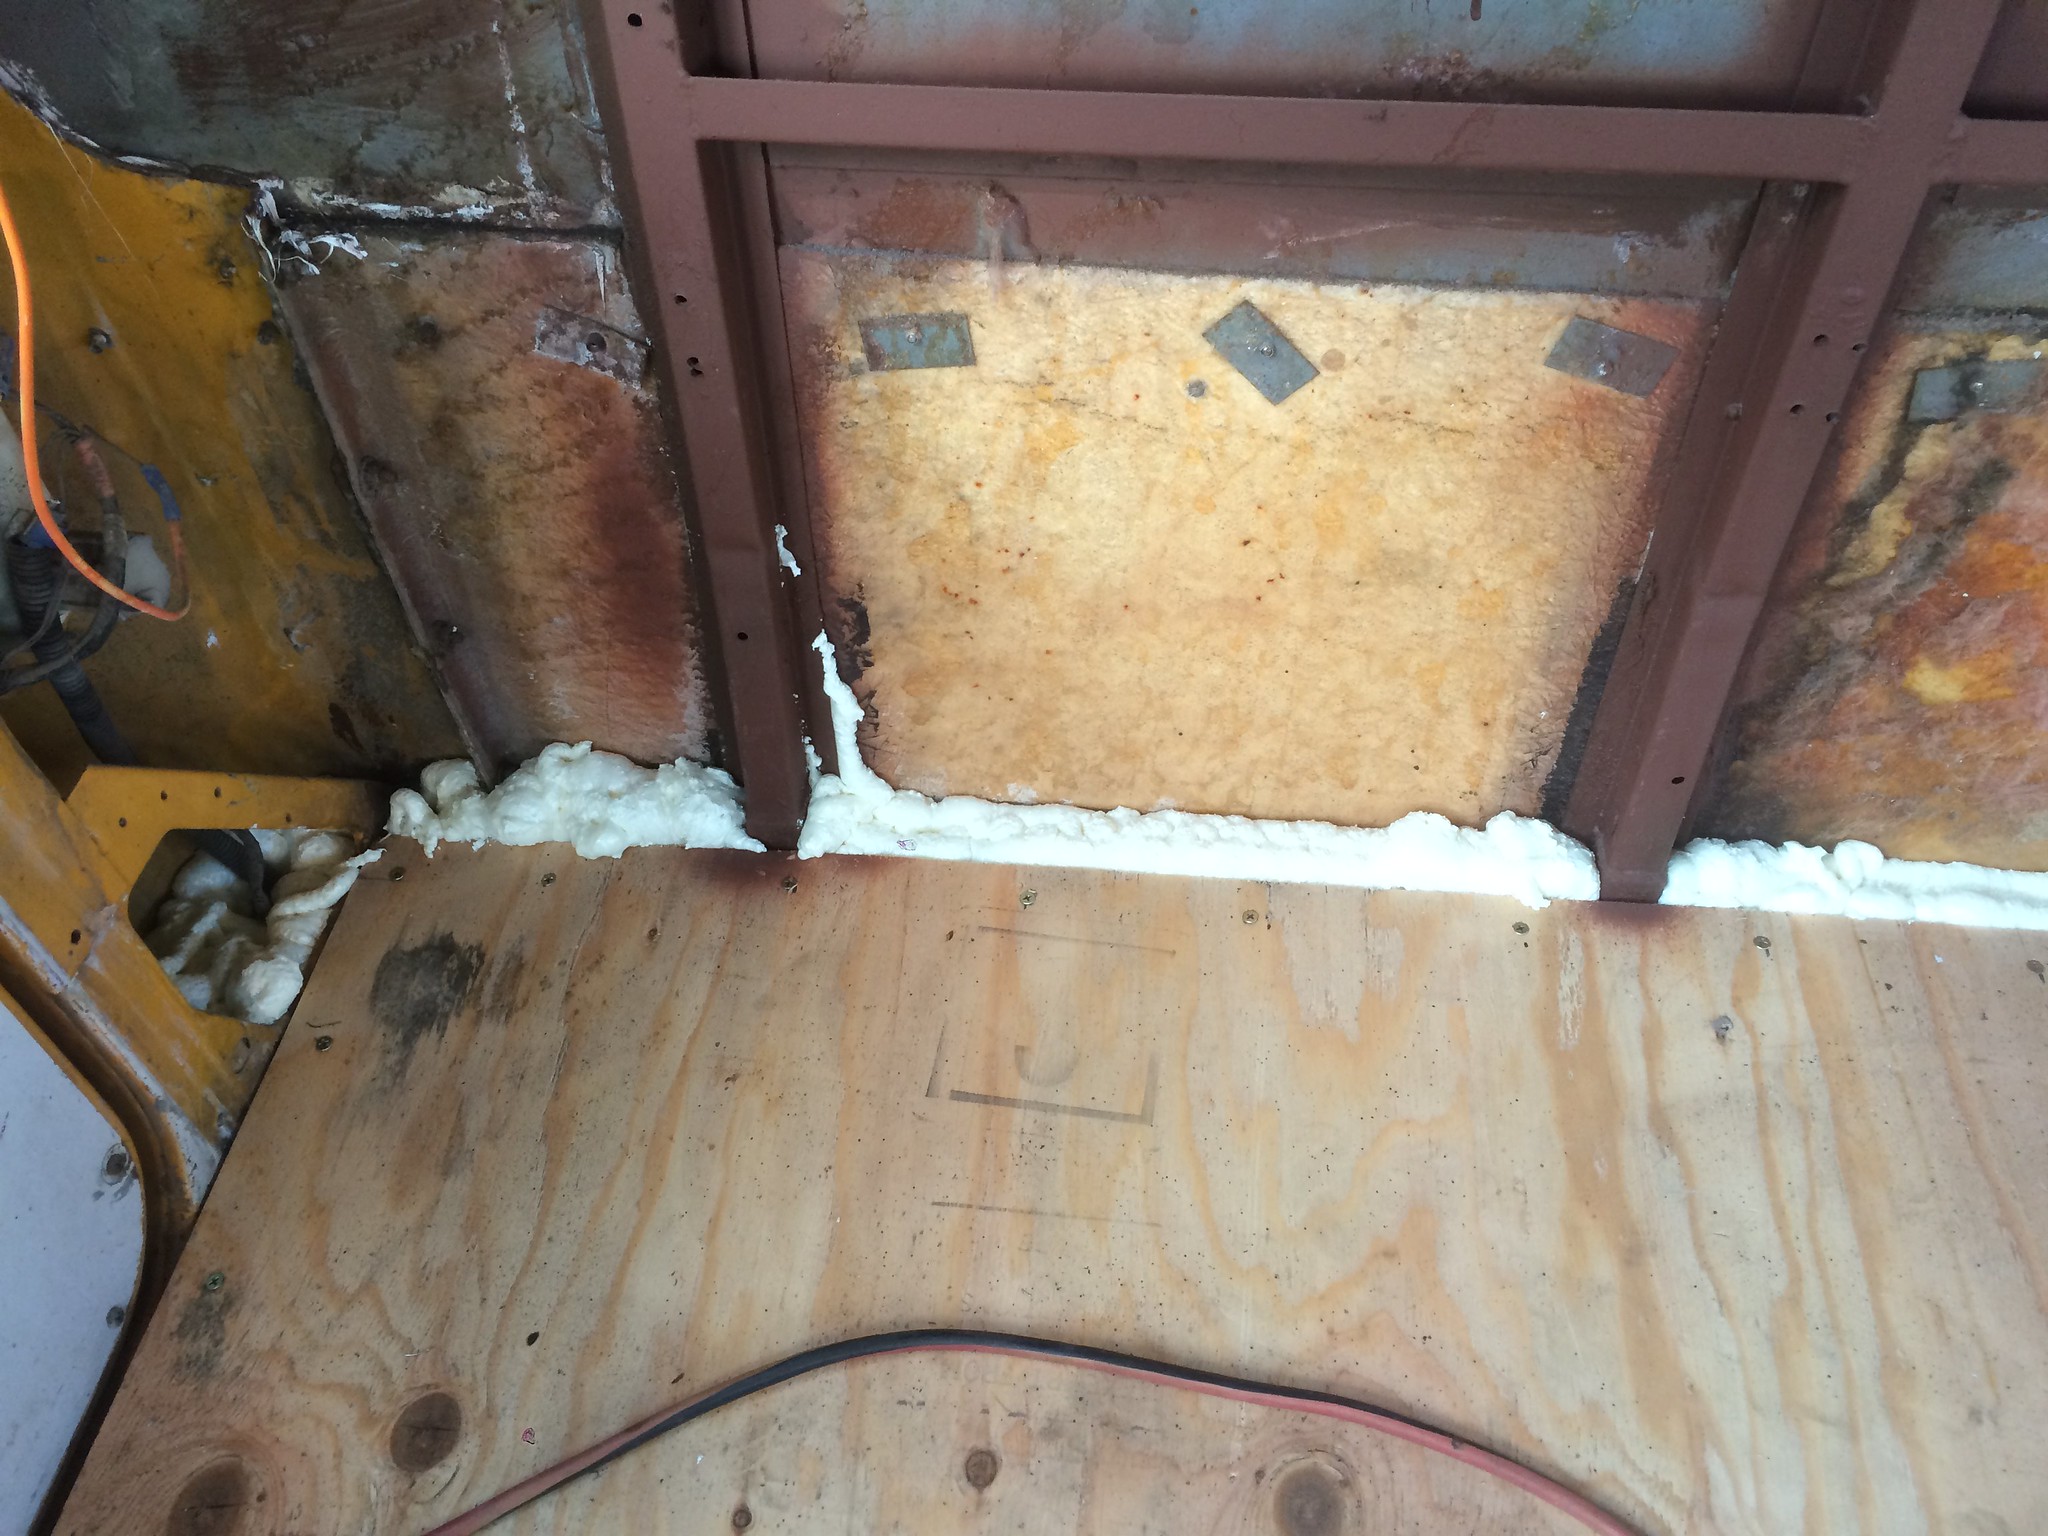 Drivers side rear foaming
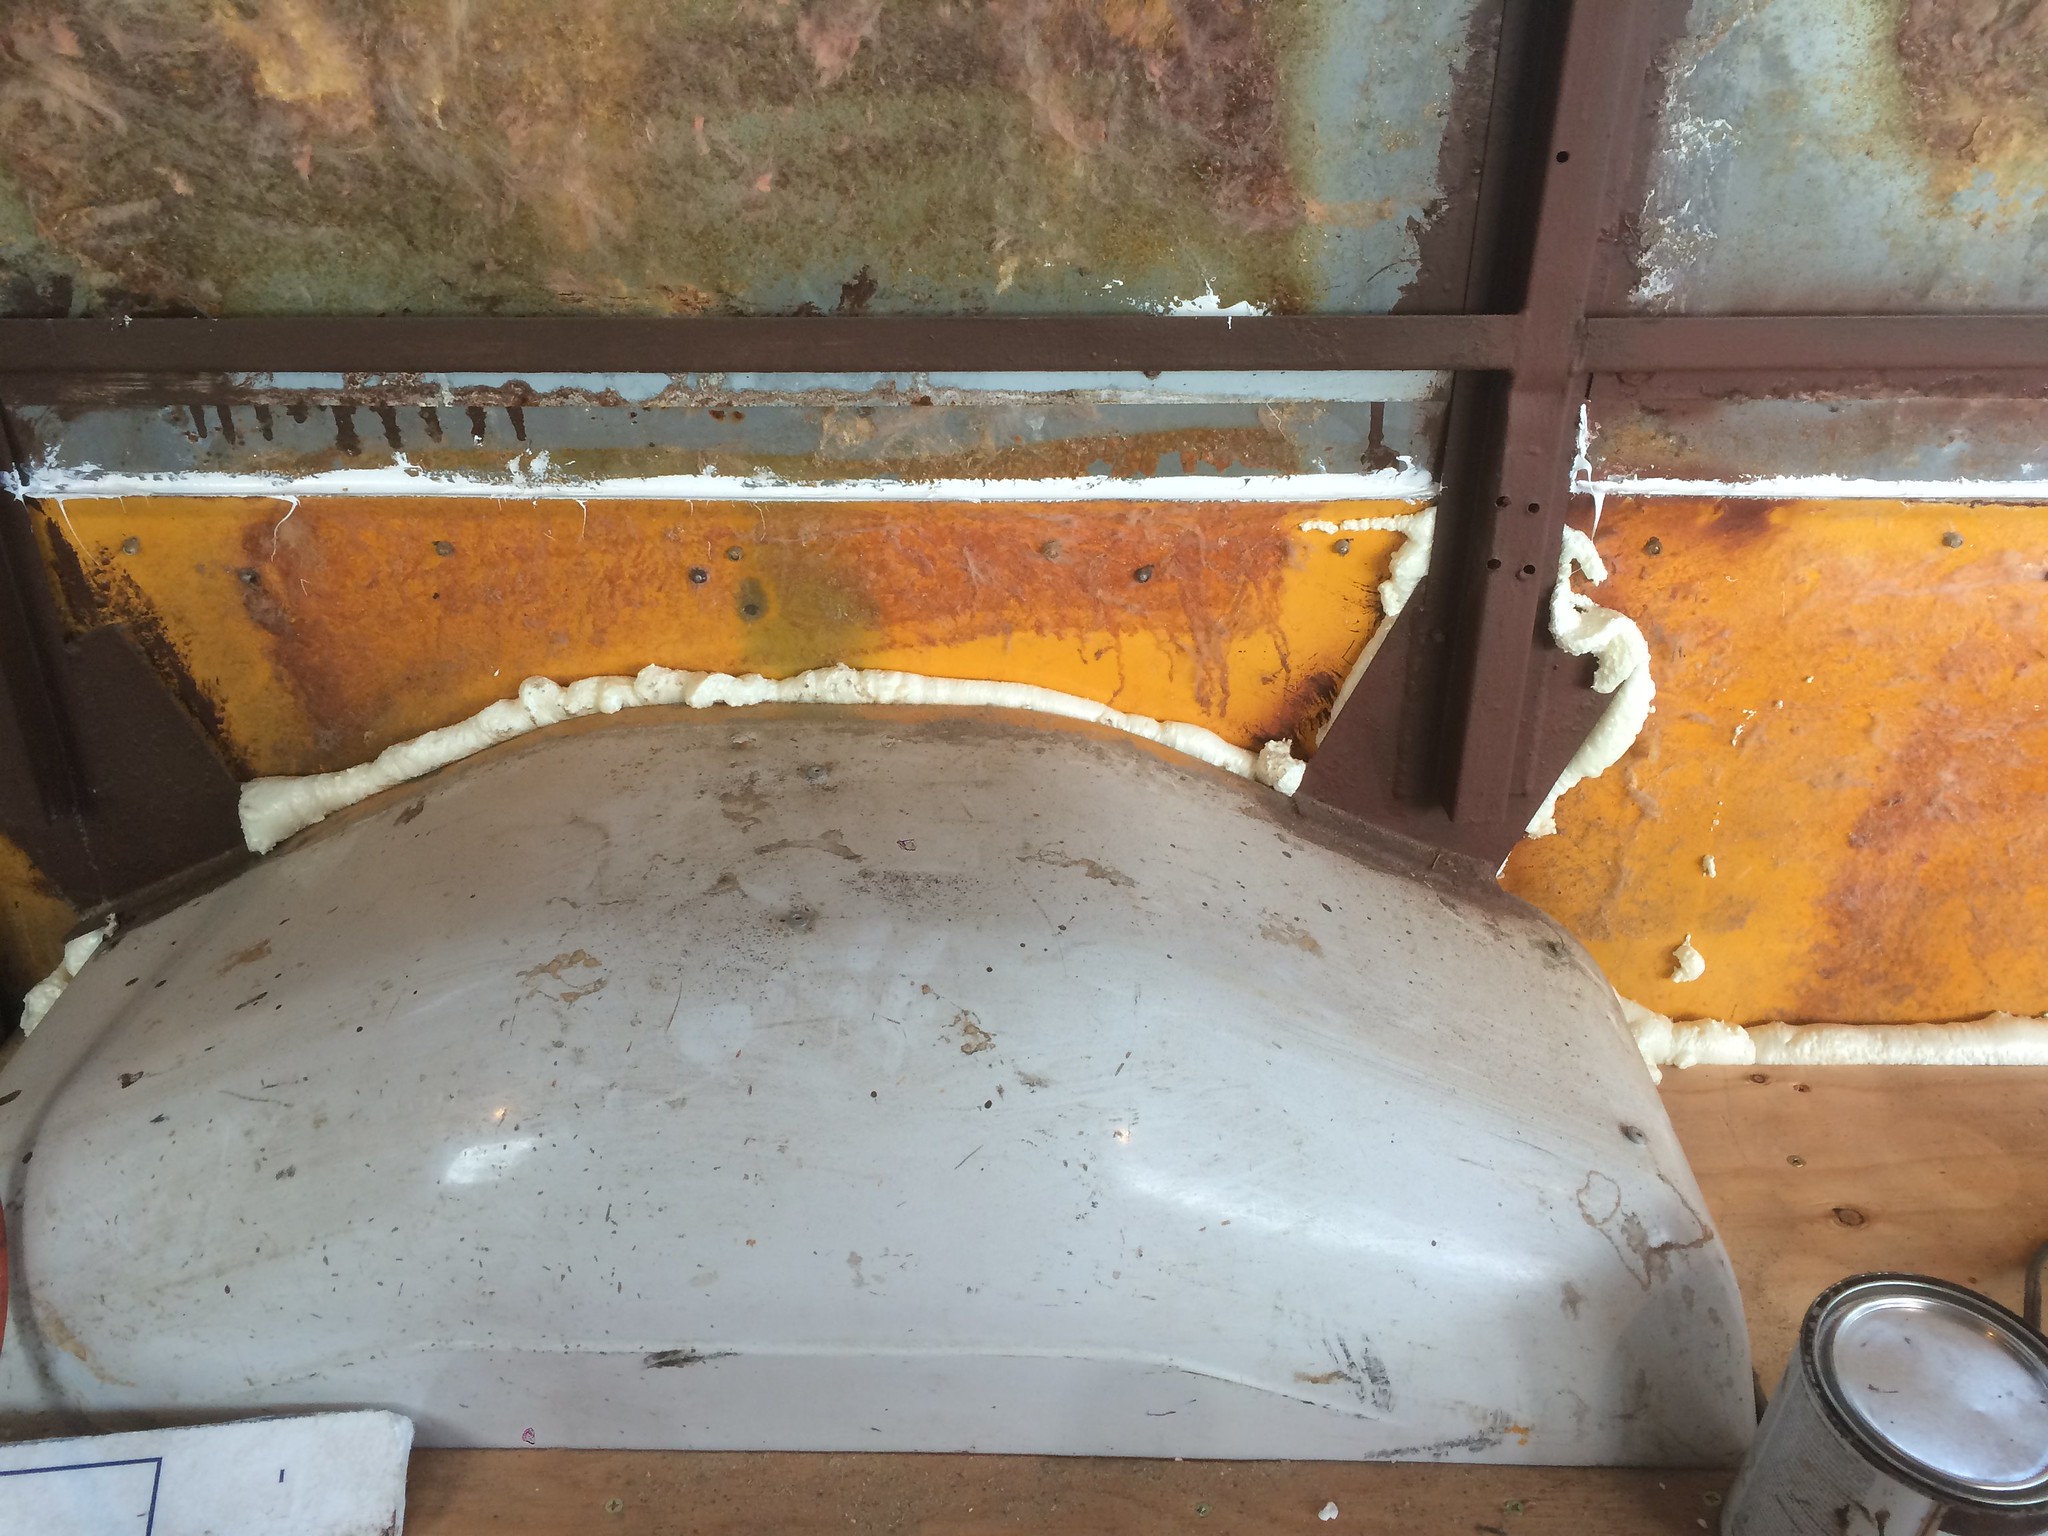 Foam around wheel wells
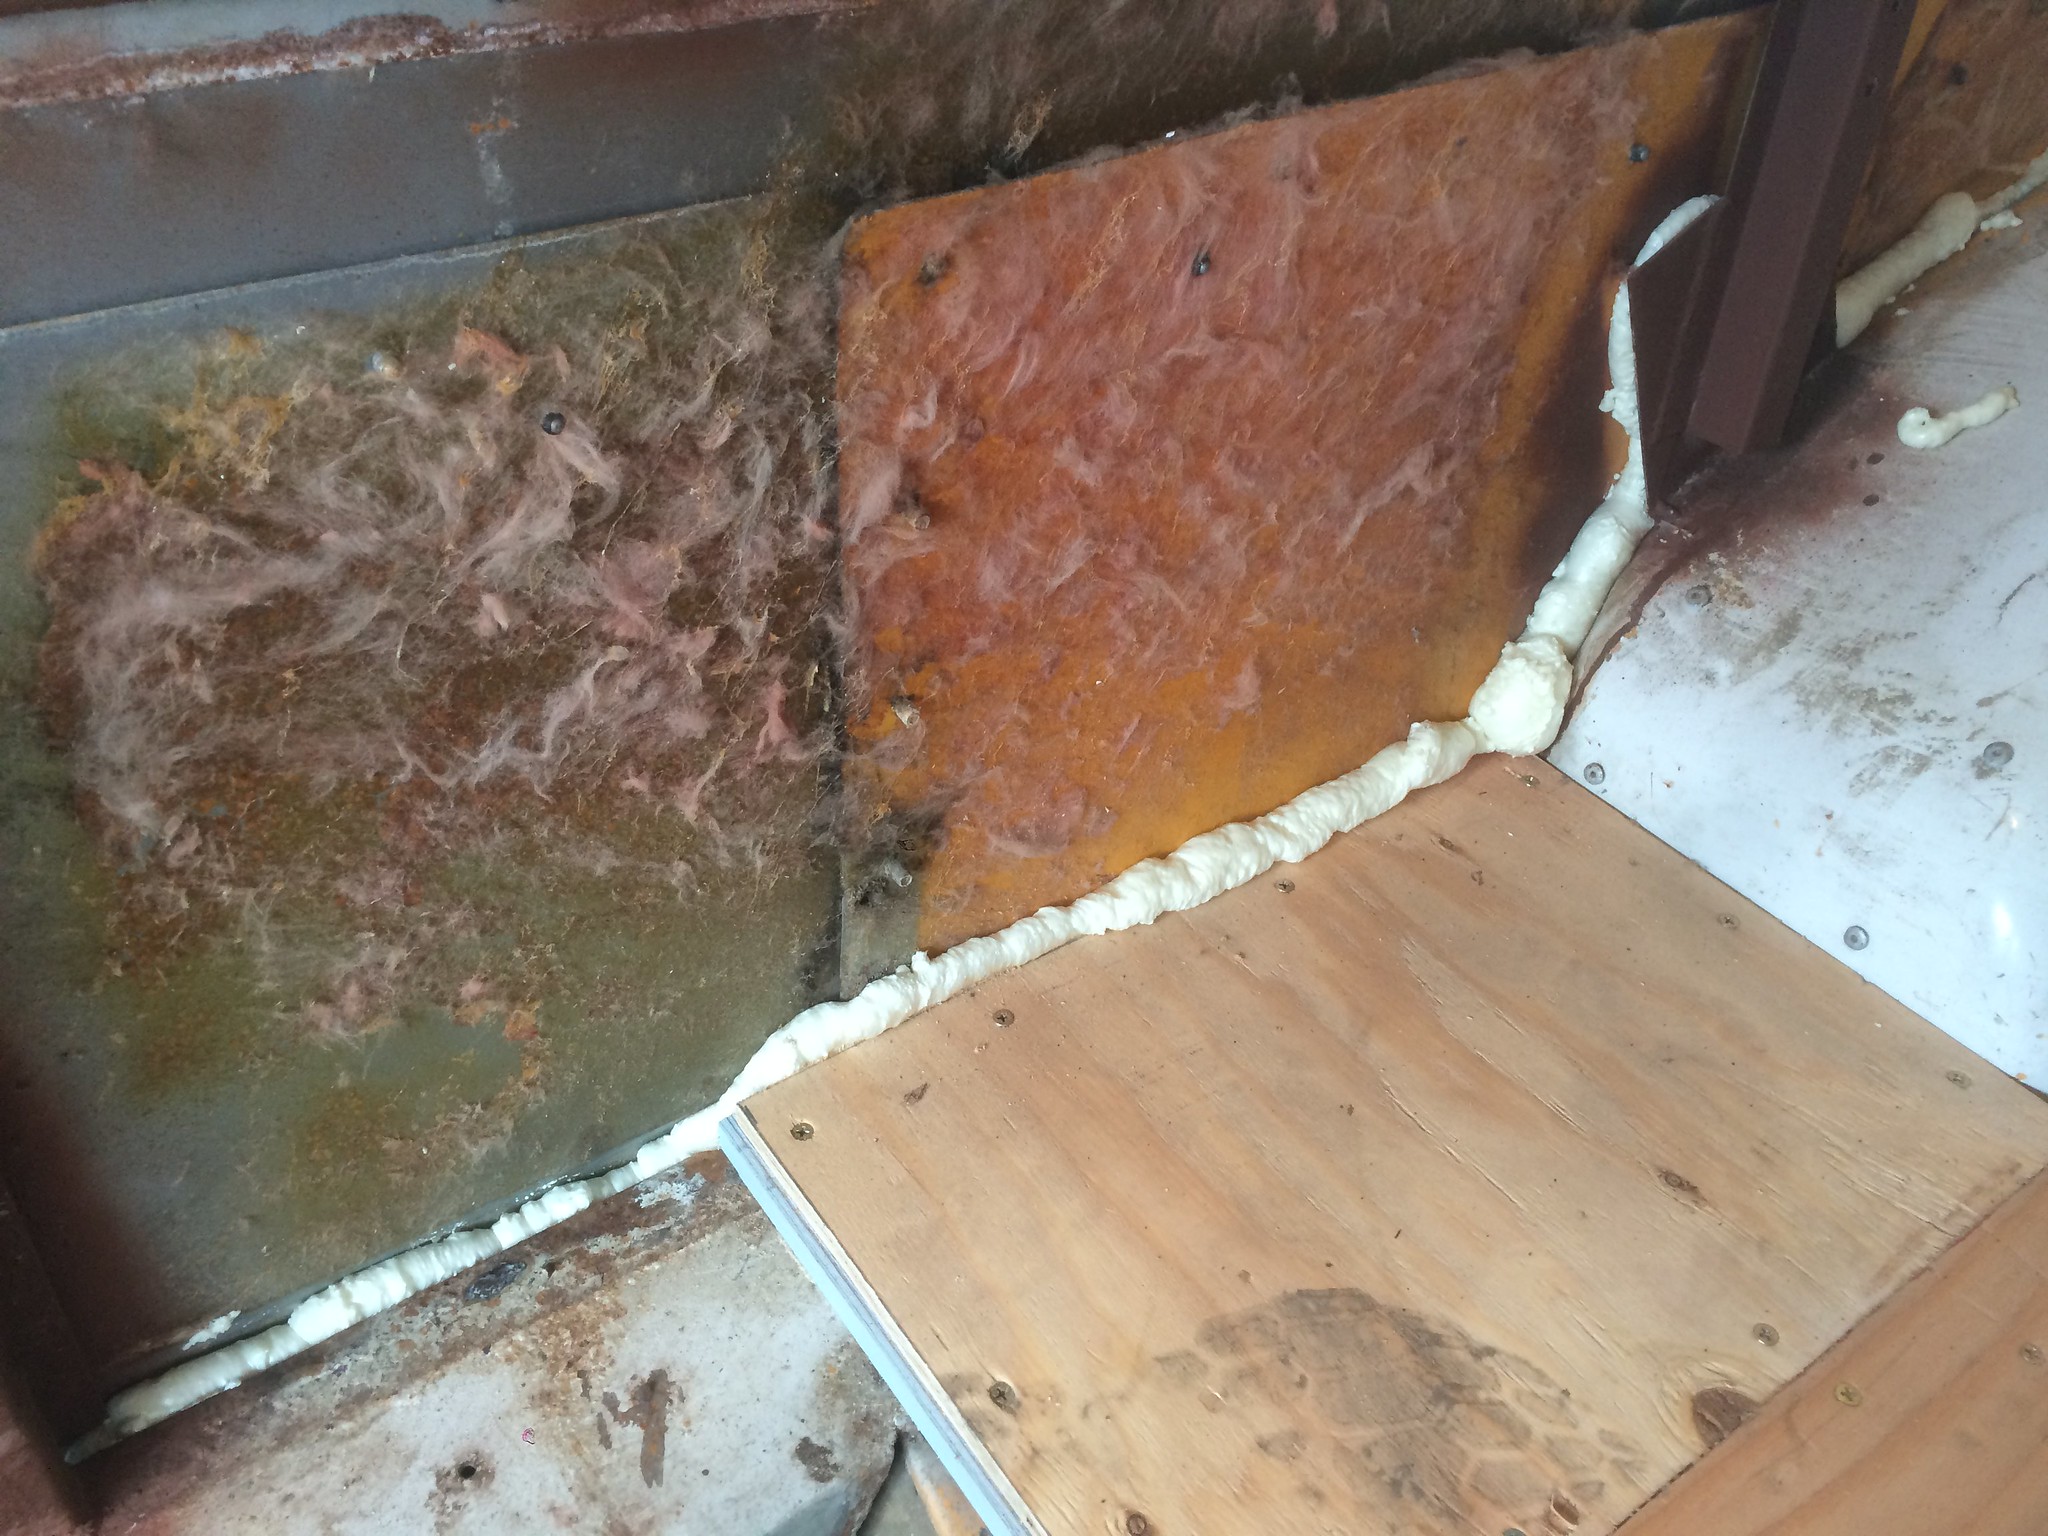 Just too much fun
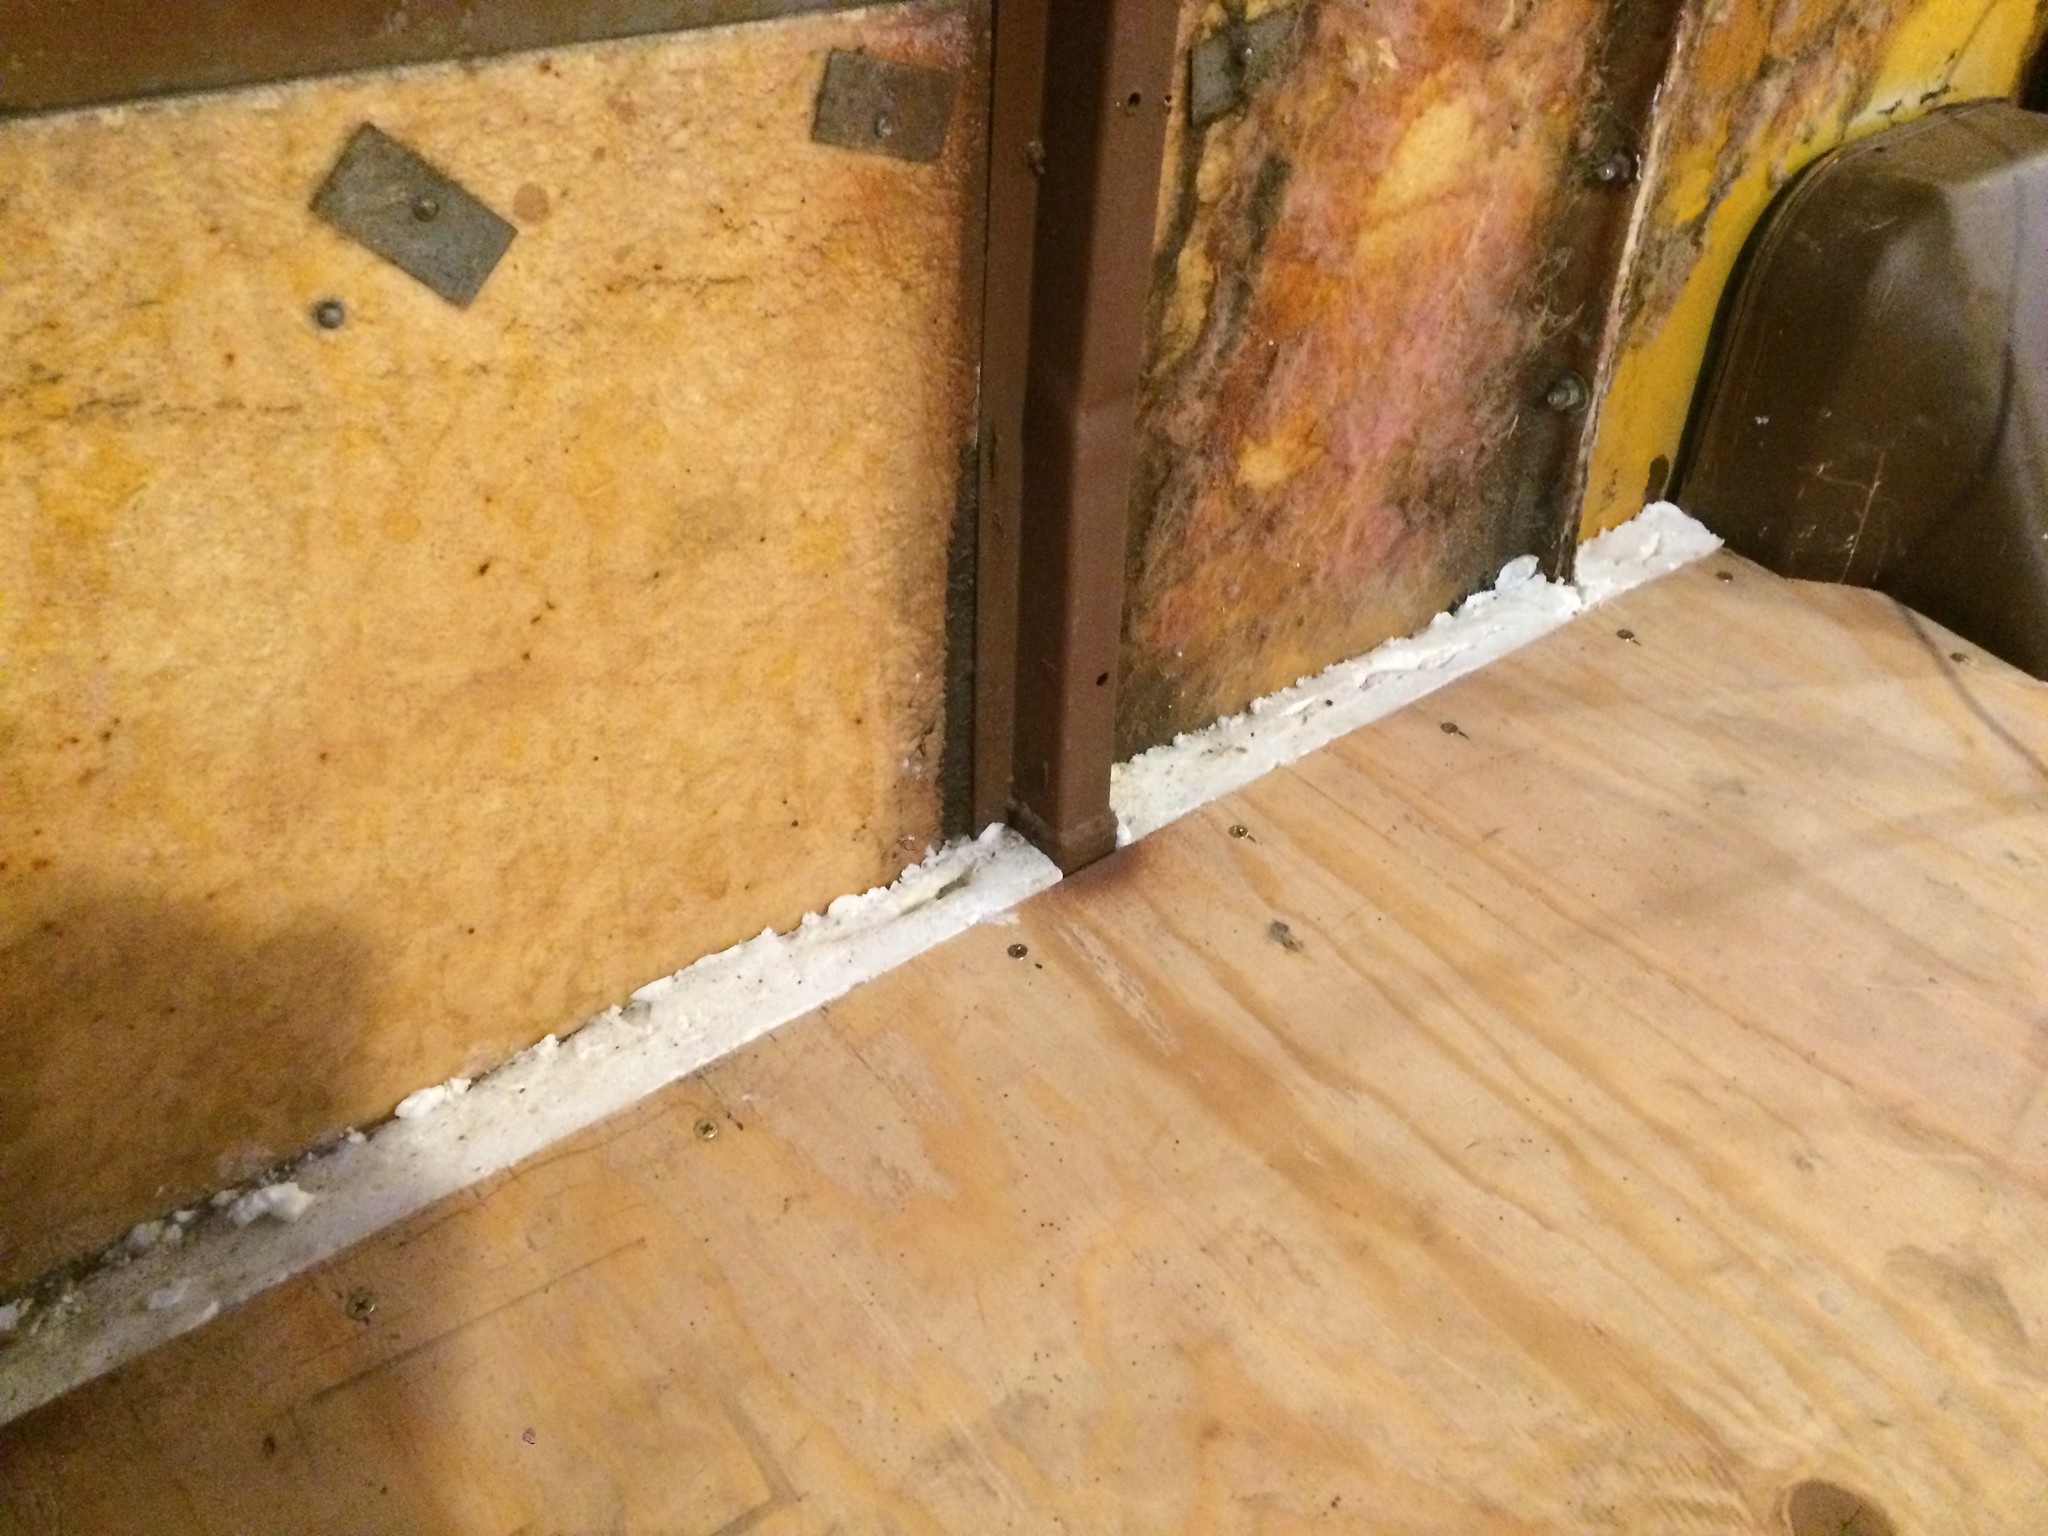 Foam trimmed down with a thin/long knife blade
Prepping the Wall Above the Back Doors
Foam trimmed down with a thin/long knife blade
Prepping the Wall Above the Back Doors
So above the aforementioned leaking back doors, there is a large expanse of rather unsupported metal due to the lift. I needed to make it stop flexing and popping, but also needed something to attach a piece of plywood to for finishing off the back wall.
What I did was basically use the same approach as I did with the floor. I used construction adhesive and screws to attach 1-by pre-primed wood to the surface. But in this case the screws are from the outside.
It really made the back metal much more even as well as took out all the "pop" that you'd get when you pushed on it. The metal from the lift is pretty thin, and also not super flat and prone to noisily popping in/out when you push on it. This helped a lot with that "not flat" part.
Just one picture but it should give you the idea...

For reference, the lower part of that wall that's painted brown is the new metal from the lift.
Still need to put up some more strips around the outer edges, but after that I'll put sheet foam in between, then cover the whole thing with some 1/2" plywood that will then get covered with something nice and/or paintable. I'm hoping this will be a sufficiently rigid setup that I can then use to mount some lightweight shelves or storage - nothing heavy.
Speaking of Foam Sheeting
I've been wondering about what kind of adhesive to use for gluing the foam to the inner walls and ceiling, and specifically how to do it fairly cheaply. I did a bit of an experiment today with a hot glue gun, and found that it does a good job. Yes it might get a bit loose over time, or even melt some in the hot sun, but once the inner walls go up, they will hold the foam pretty snugly in place. The hot glue gun is a good way to put it up quickly without getting all exotic adhesivey (and spendy).
|
|
|
|
|
01-24-2016, 09:13 PM
|
#16
|
|
Bus Crazy
Join Date: Feb 2012
Location: Salt Lake City Utah
Posts: 1,635
Year: 2000
Chassis: Blue Bird
Engine: ISC 8.3
|
I don't know how hot glue compares for cost per lineal foot or whatever metric might be used.. but anyway, one shouldn't have any trouble finding a tube of foam-compatible adhesive in an 10 oz "caulk tube" package. Home Depot lists "Loctite PL300 Foamboard Adhesive" for $3.68 on their web site for instance. I'd think it would be hard to keep hot glue hot long enough to get a good bond to both the metal and the foam.
|
|
|
|
|
01-24-2016, 09:33 PM
|
#17
|
|
Almost There
Join Date: Oct 2015
Location: Corvallis, OR
Posts: 94
Year: 1991
Coachwork: Collins
Chassis: Ford E350
Engine: 7.3L diesel
Rated Cap: 18
|
Quote:
Originally Posted by family wagon
I don't know how hot glue compares for cost per lineal foot or whatever metric might be used.. but anyway, one shouldn't have any trouble finding a tube of foam-compatible adhesive in an 10 oz "caulk tube" package. Home Depot lists "Loctite PL300 Foamboard Adhesive" for $3.68 on their web site for instance. I'd think it would be hard to keep hot glue hot long enough to get a good bond to both the metal and the foam.
|
The foam I'm using actually has mylar on both faces, so I don't think I actually need the foam-compatible stuff - simple construction adhesive might work. And you're right that it does cool fast - good point. Thought that said the fast cooling is what makes it easy to stick it and forget it with that fast drying time.
Mainly I just want something to tack it up and hold the foam until I get the sheathing in place.
The main motivation is that I have a ton of odd, colored hot glue gun glue from some old project and am trying to figure out how to use it up
|
|
|
|
|
03-03-2016, 12:33 AM
|
#18
|
|
Almost There
Join Date: Oct 2015
Location: Corvallis, OR
Posts: 94
Year: 1991
Coachwork: Collins
Chassis: Ford E350
Engine: 7.3L diesel
Rated Cap: 18
|
Well it's been a while since an update on Betty the Burner Bus, but that's not due to lack of work.
It's come time to start making things a bit pretty here and there inside the bus, and that starts with covering the bare walls.
The plan was to put up a thinner plywood siding inside - maybe even door skin plywood, with rigid foam underneath.
Attaching The Plywood
First step was to think about how the plywood interior was to attach to the framing. What I did was screw narrow strips of 3/4" exterior pre-primed trim to the sides of the 1x1 steel framing, using a bit of construction adhesive to make it all good.
This picture is post-insulation, but you can see the strips in place...
The idea is to glue and nail (with a brad nailer) plywood panels to the strips.
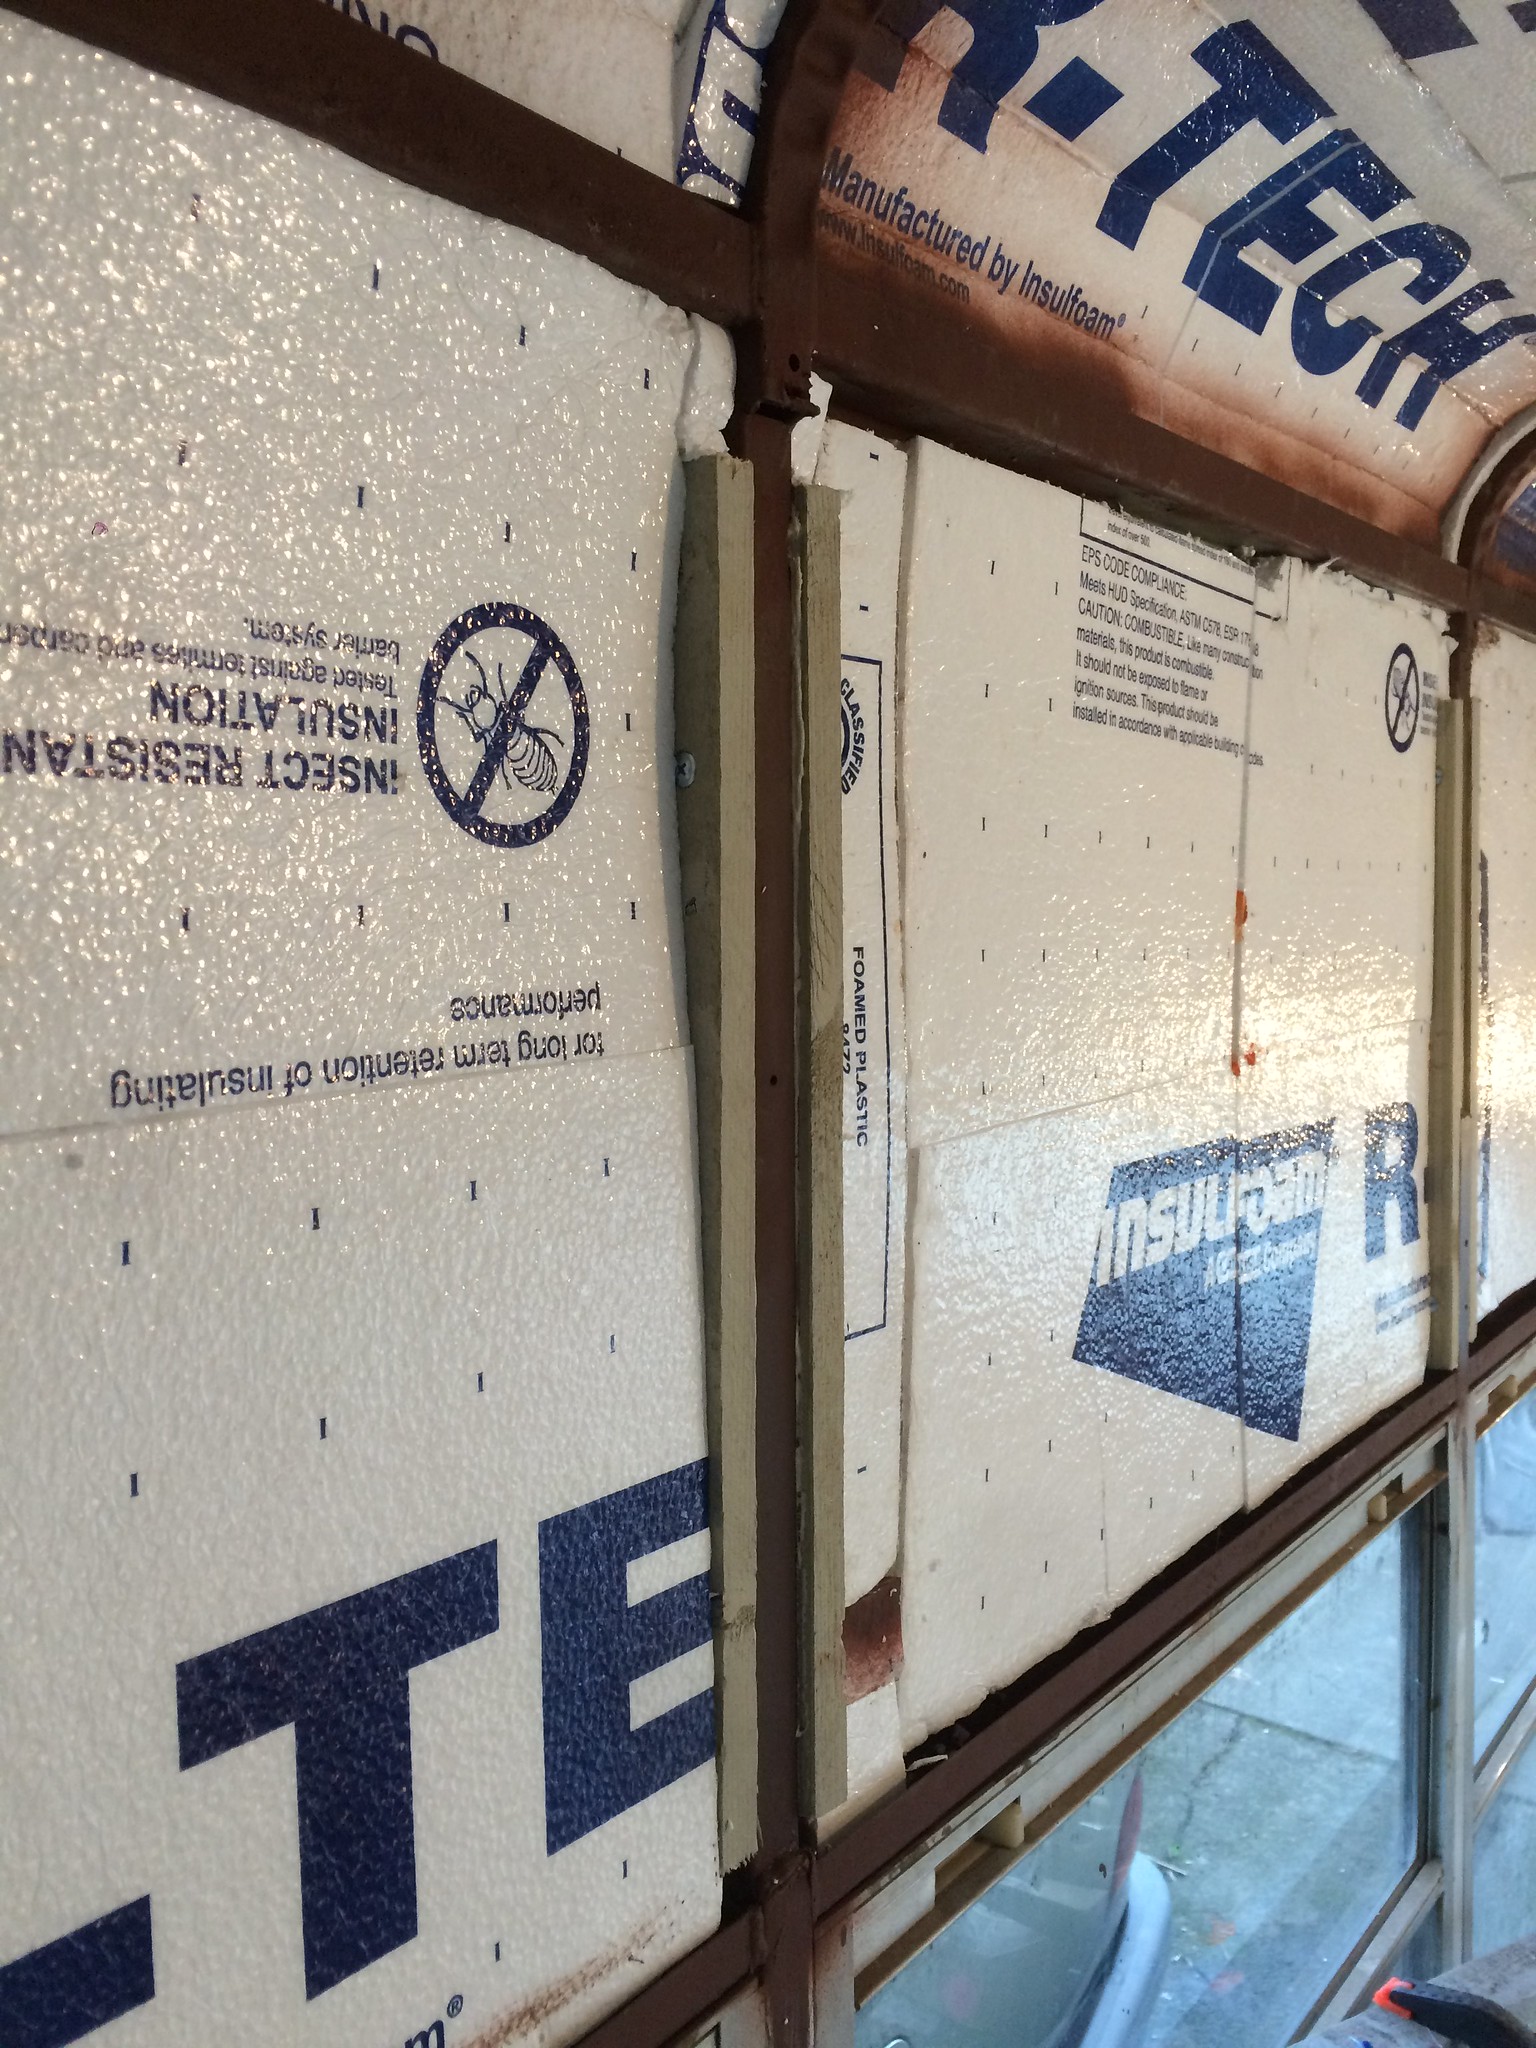
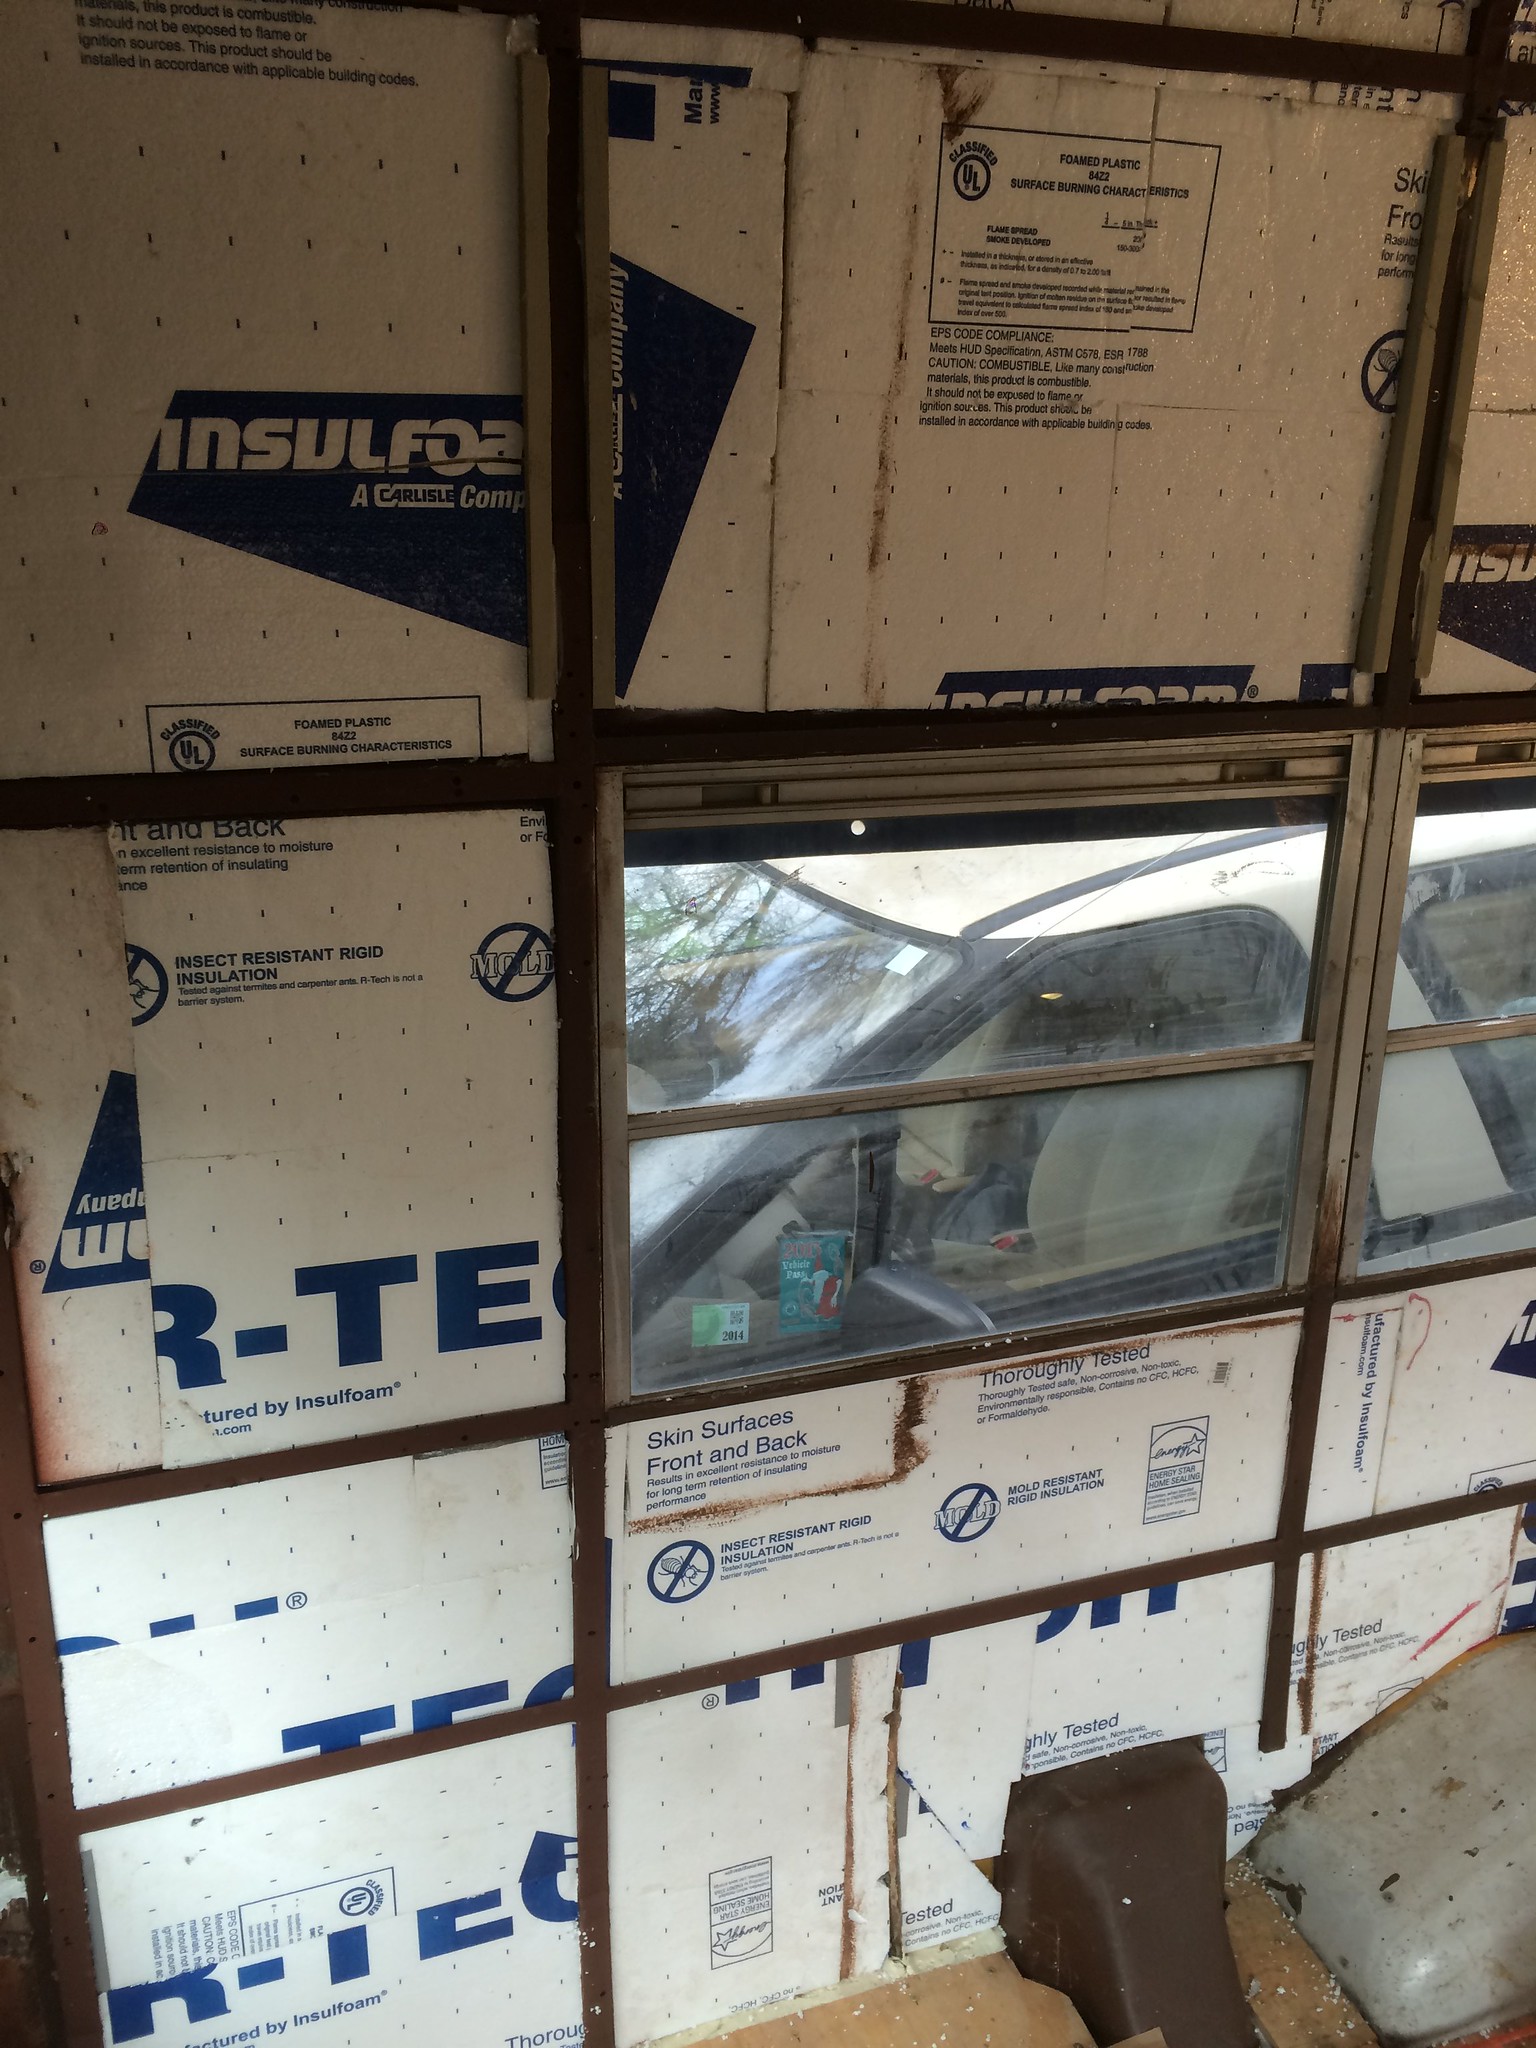
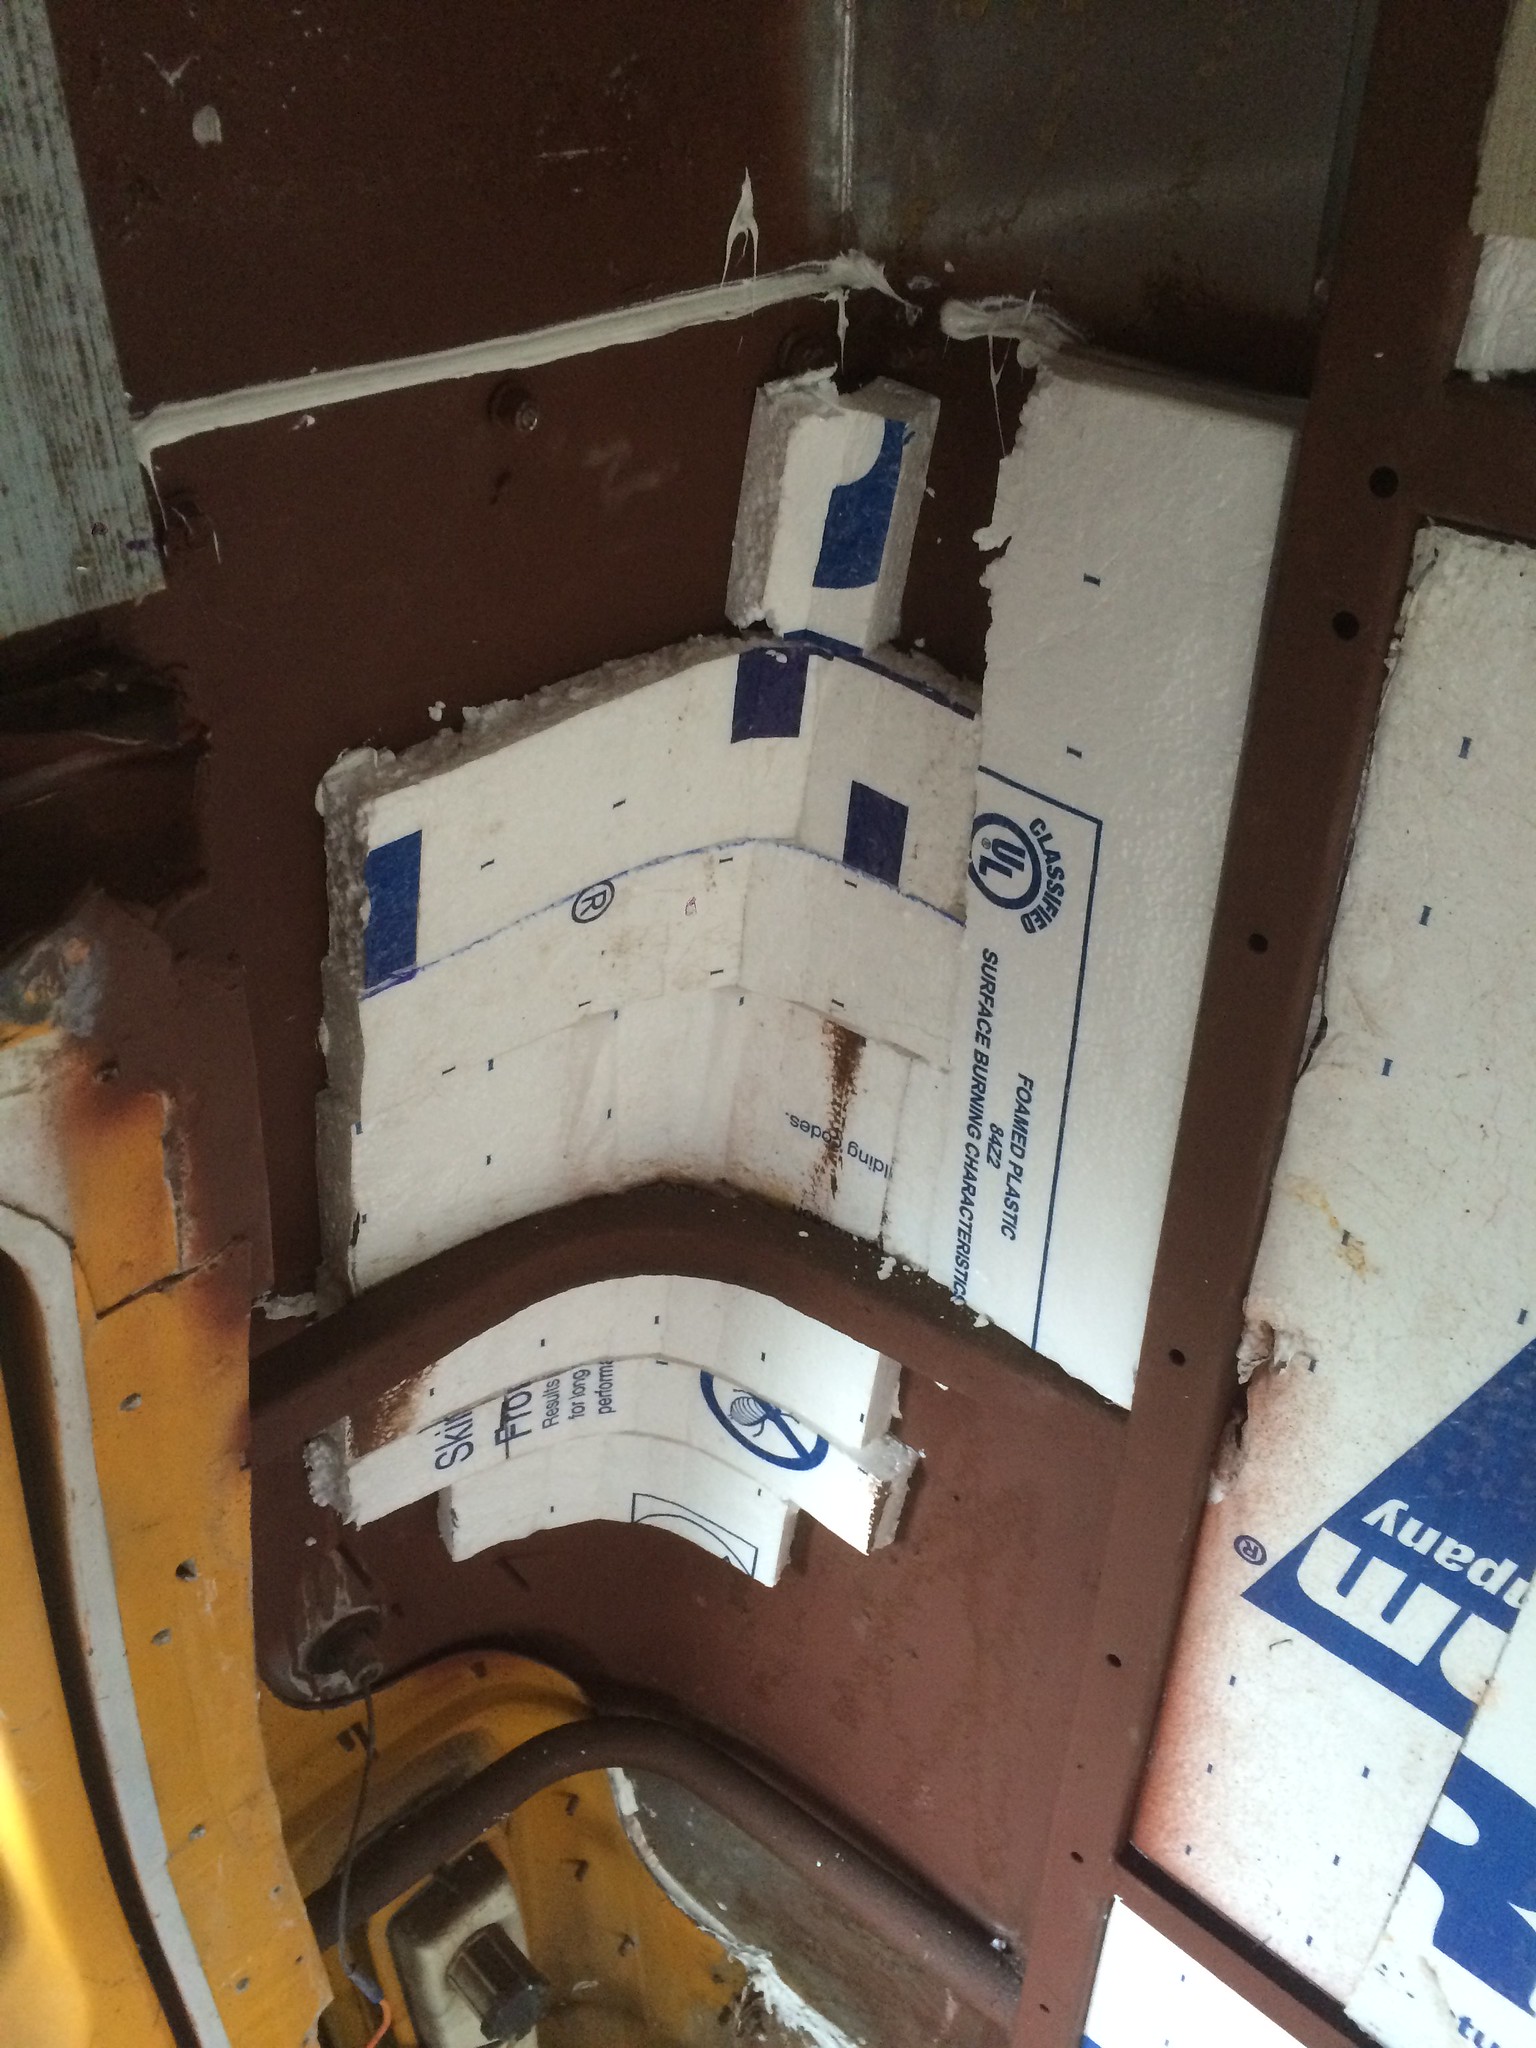
Insulation
I used hot glue gun glue (I had a lot of it, and it actually works well) to put up 1" rigid foam on the walls, but I did find that a bit of polyurethane caulk did a good job of making it stick too. For curved areas in the back, I kerfed the back of the foam, and put it up with lots of smaller strips to make it easier to work with. Then rigid foam to fill in the gaps and other spots.
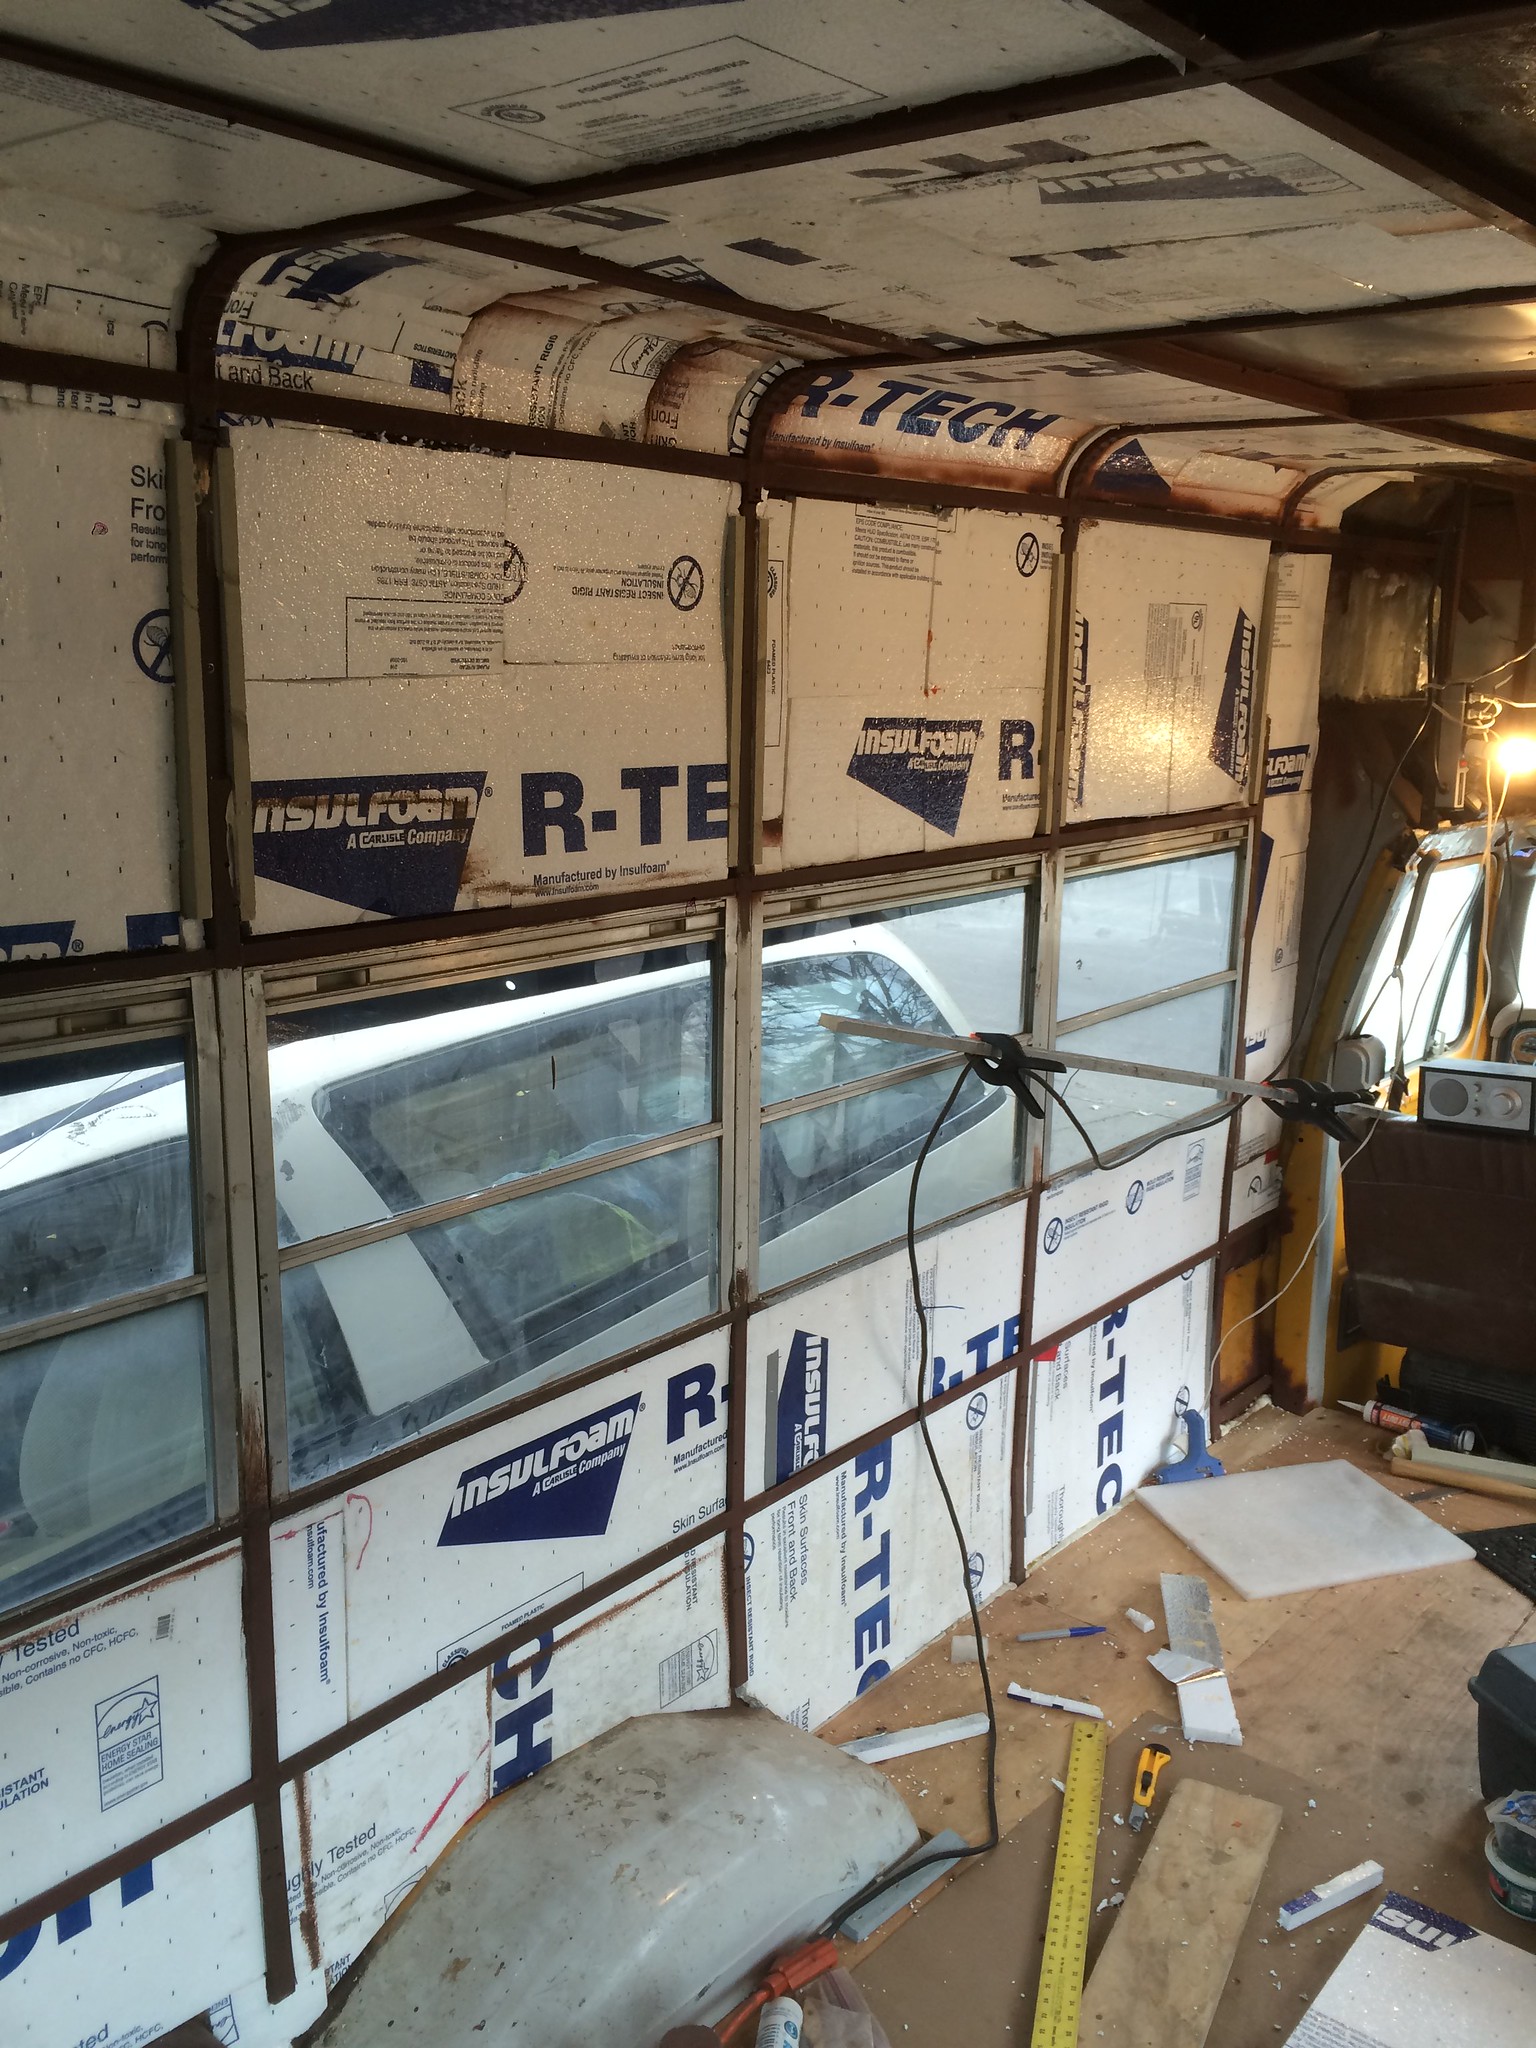
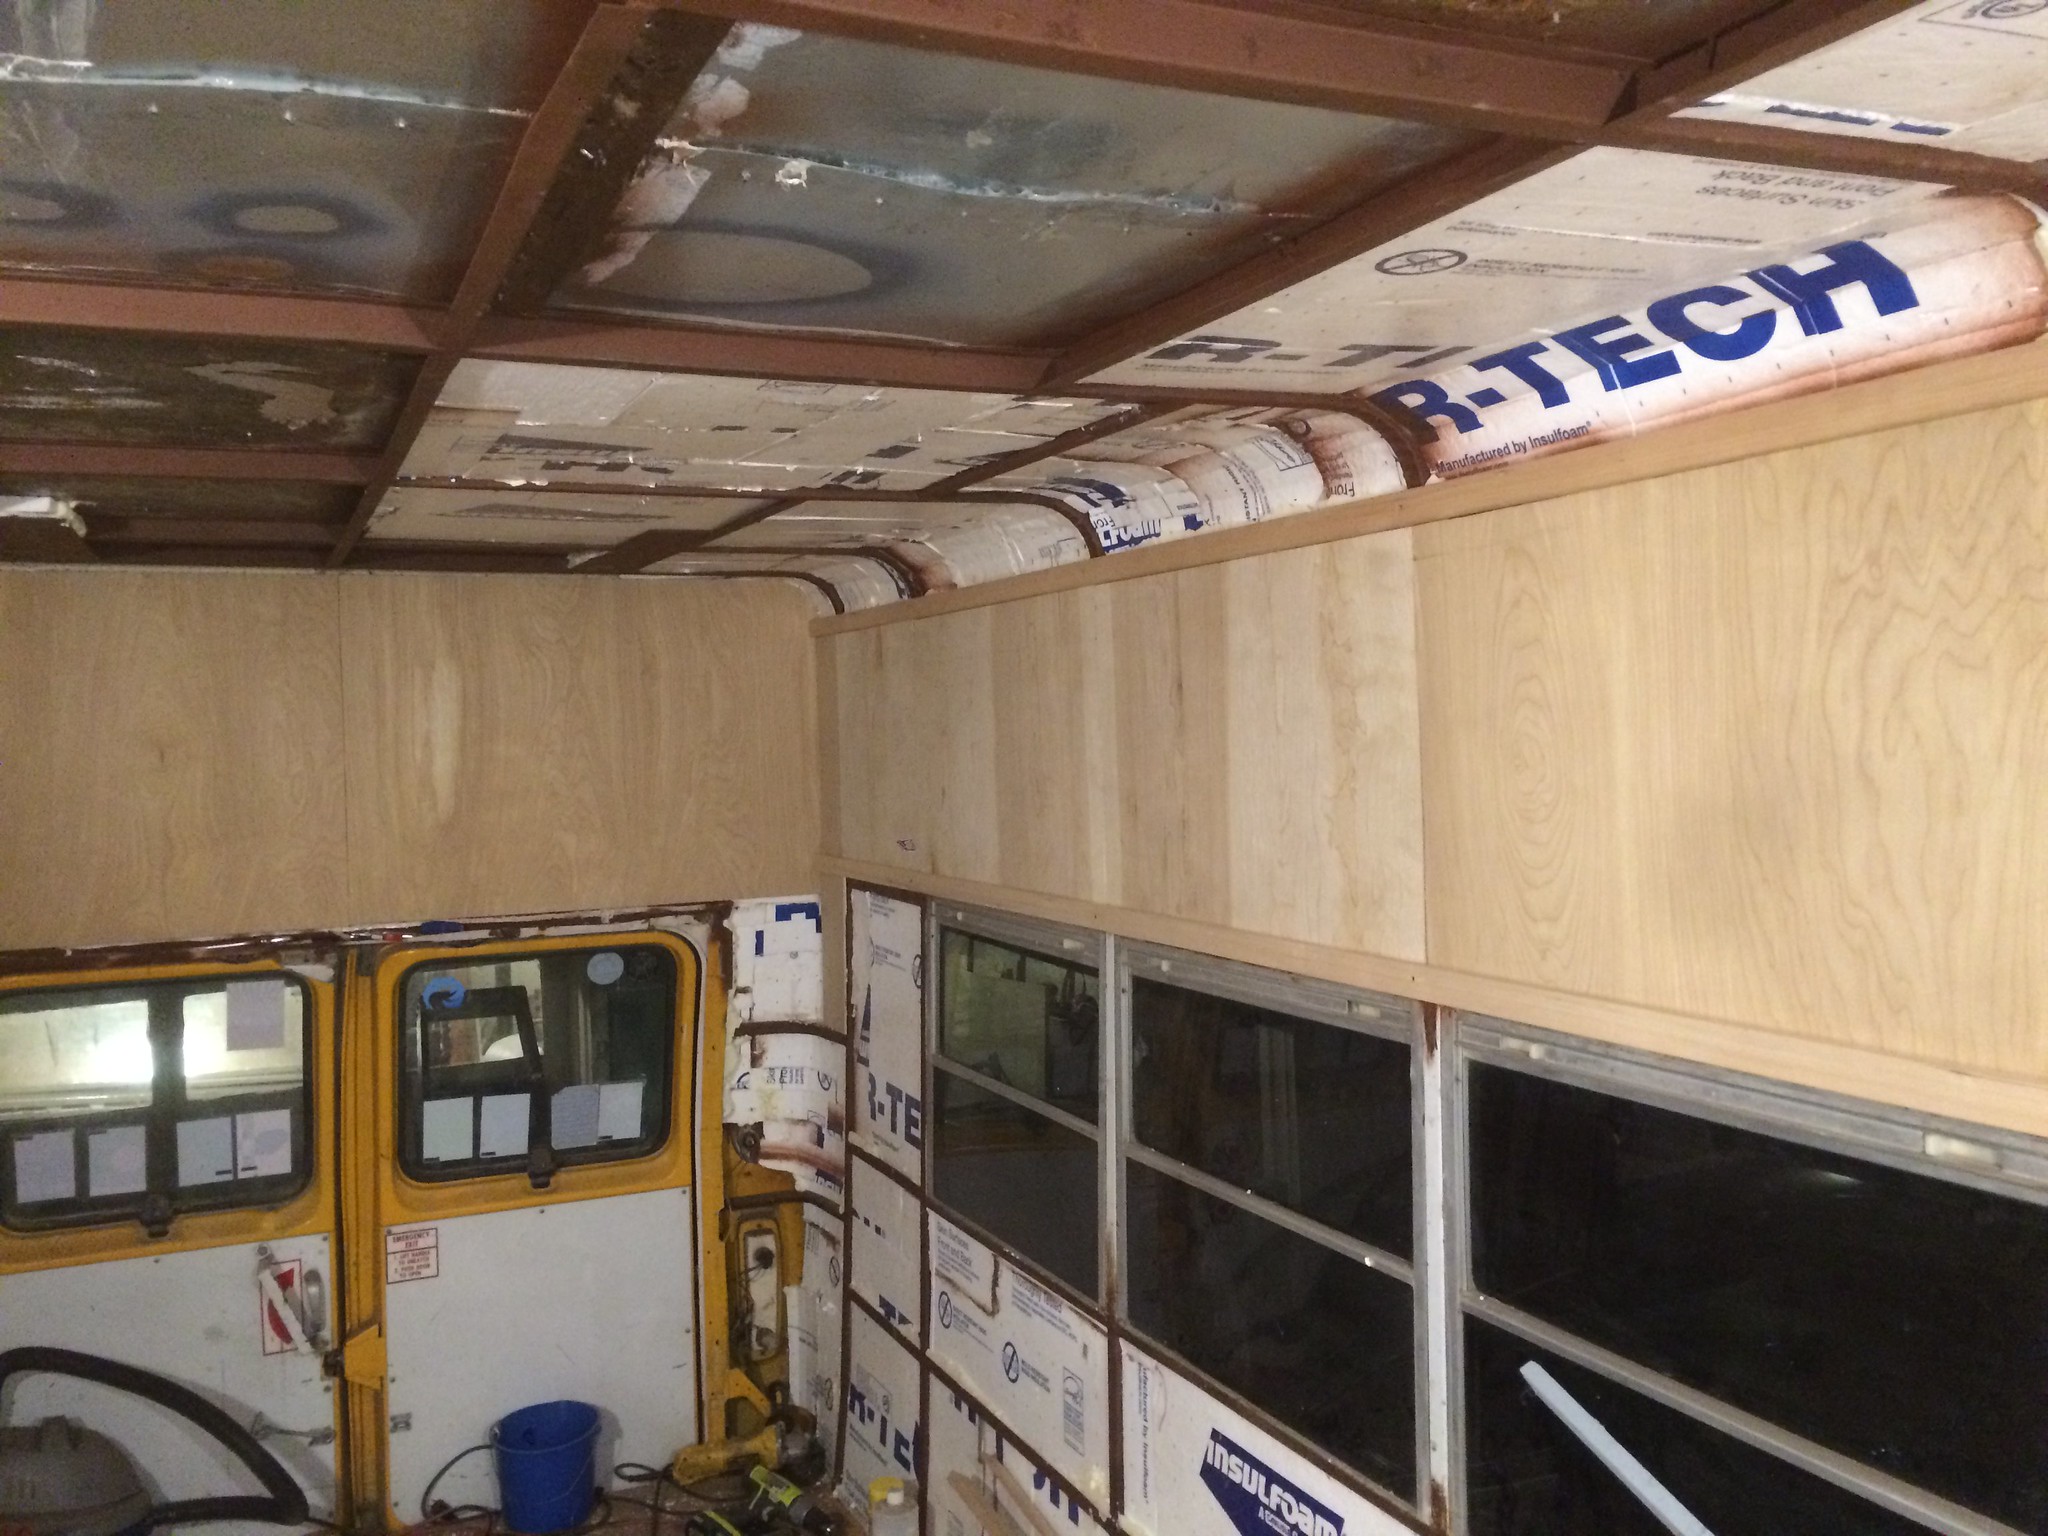
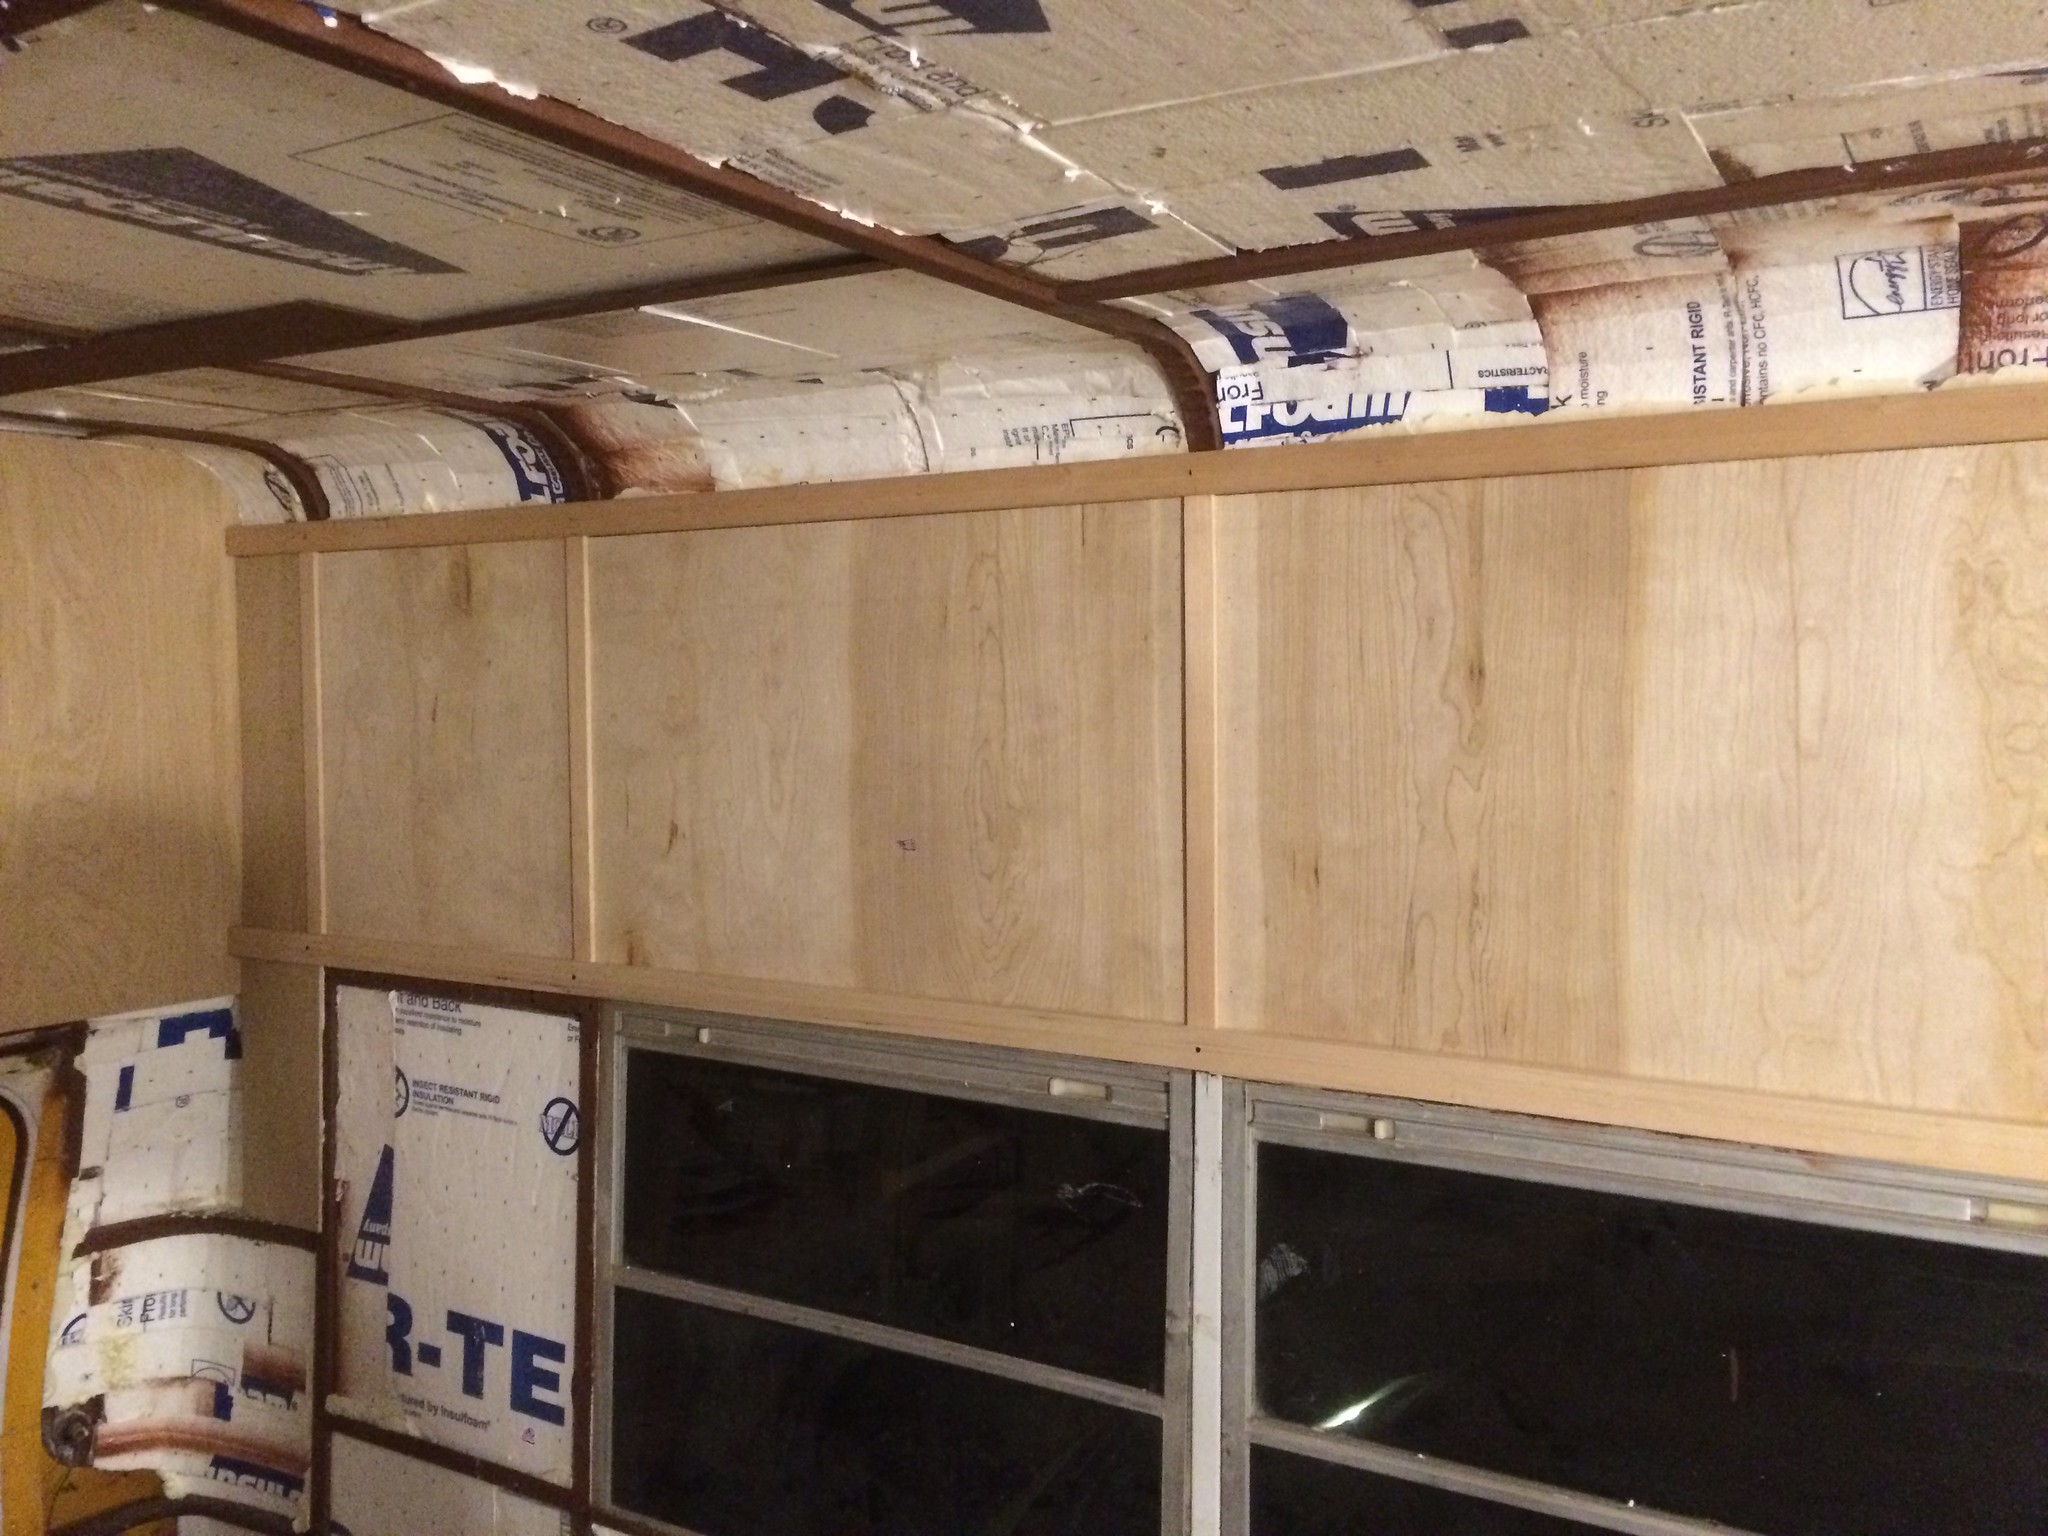
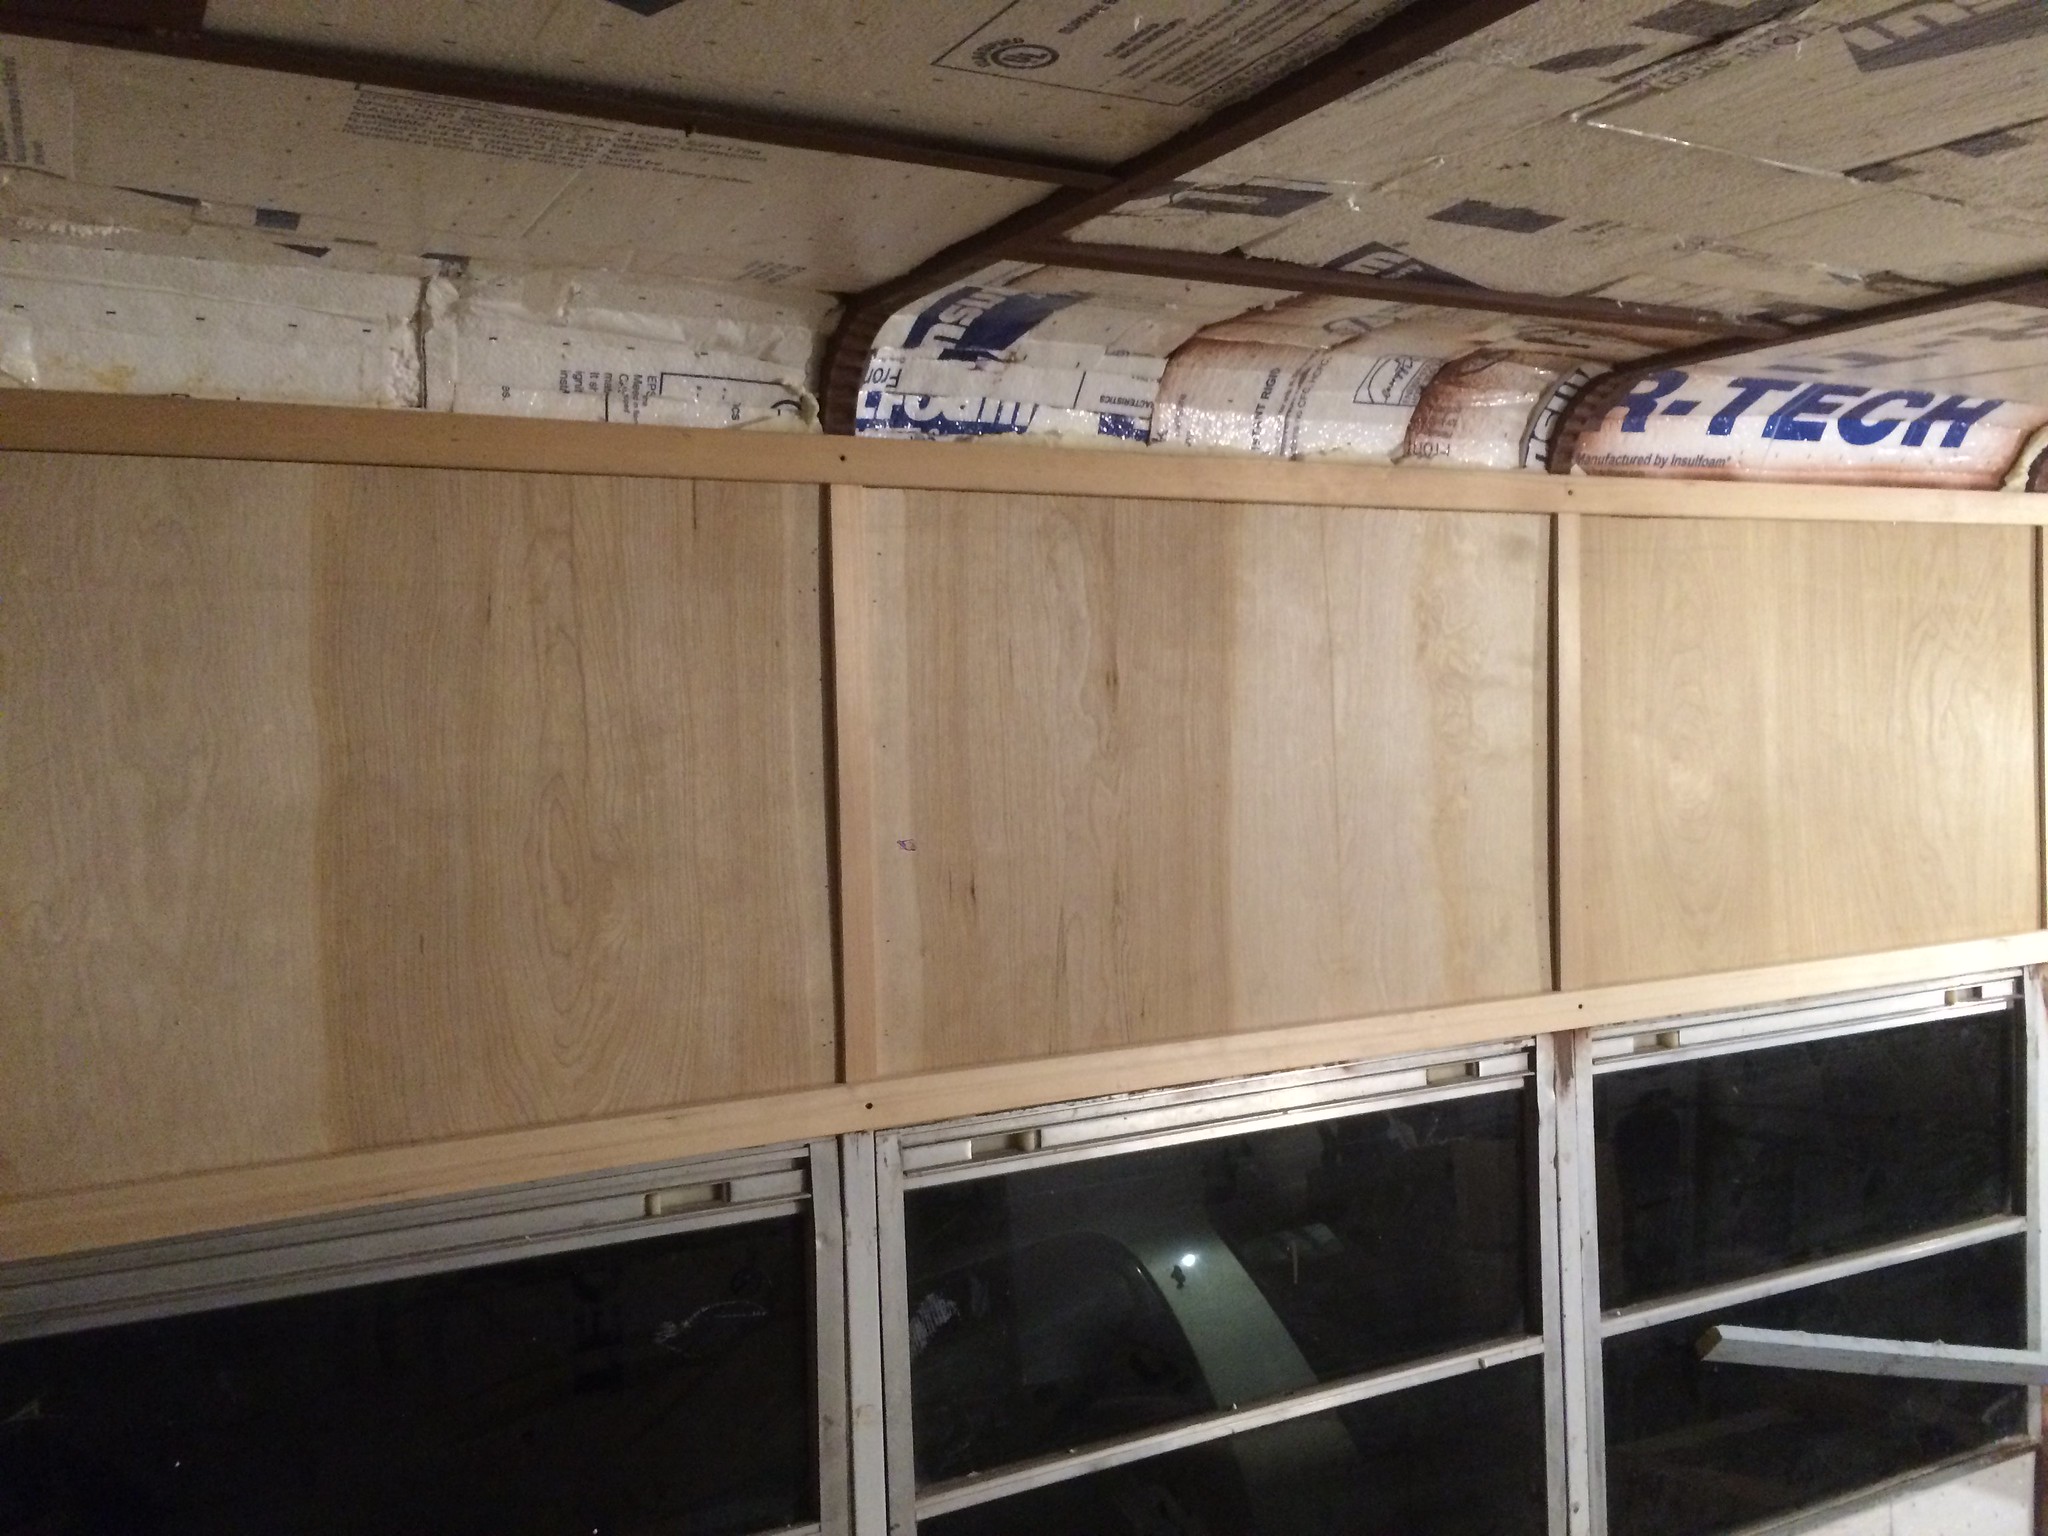
 Plywood and Trim
Next up was putting on the plywood and trim. The plywood is 1/4" underlayment that I found at a good price. One side has a nice light wood veneer that looks great - the heck with the spendy birch stuff The trim top and bottom is 1x2 hemlock, and the vertical pieces are thinner hemlock about 1/4" thick.
First thing was to cover the back with two larger pieces. I put construction adhesive on the wooden backing strips, then 5/8" finishing nails to hold it in place.
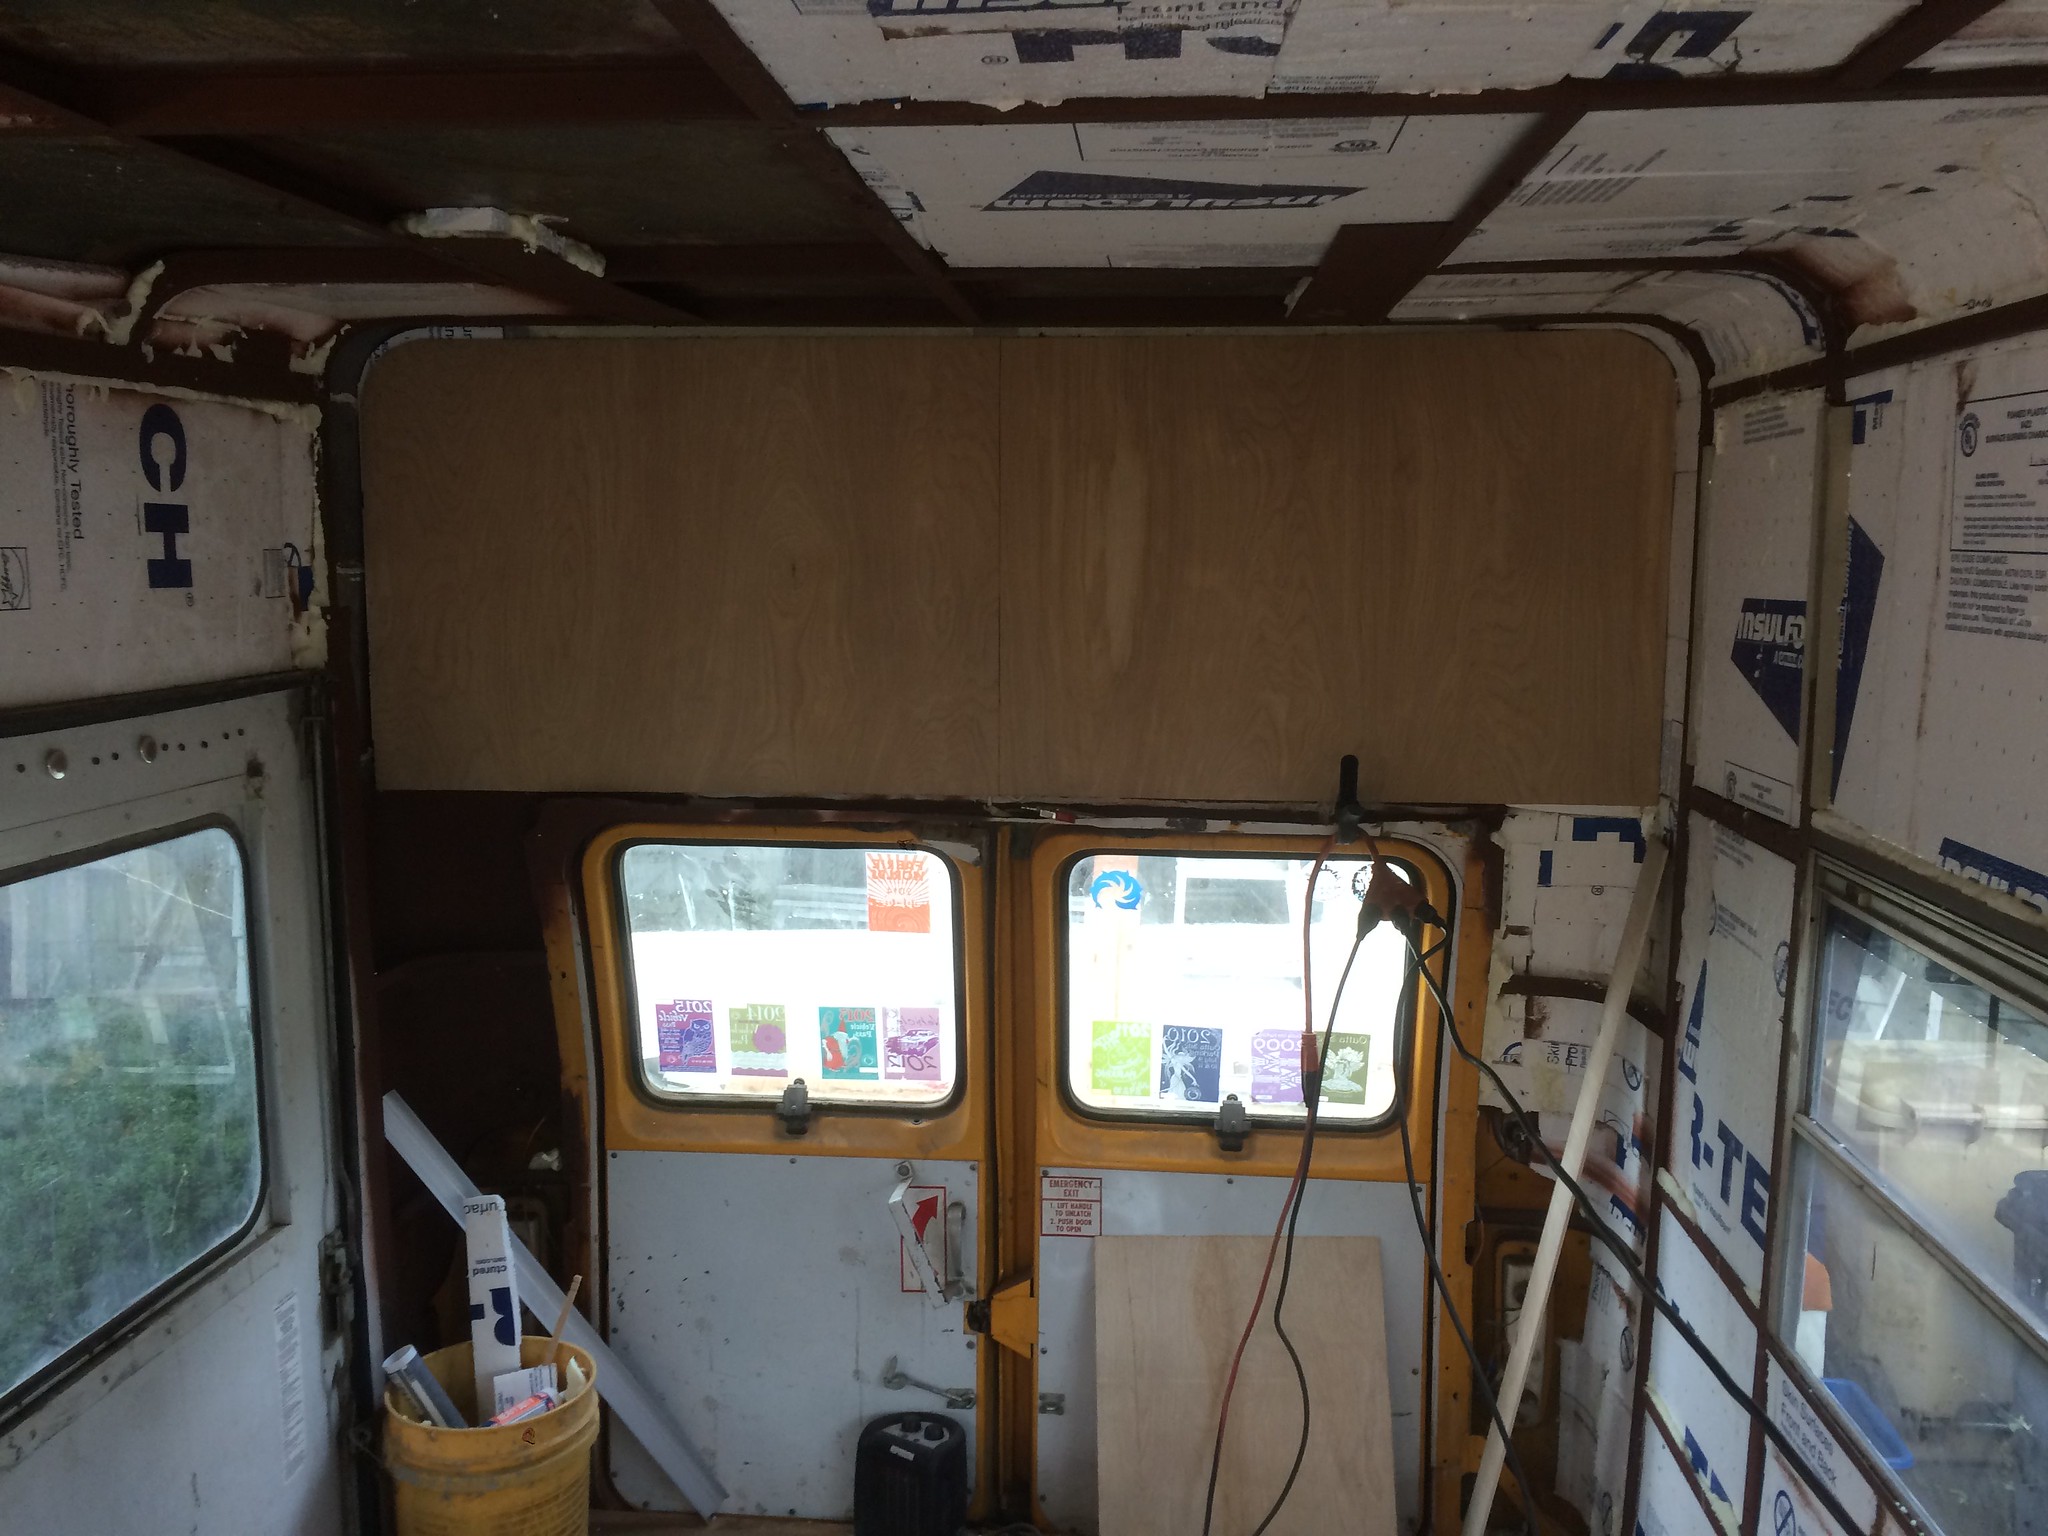
For above the window, I started with the top strip of 1x2, screwing it into the metal framing at each post using finishing screws (tiny little heads) that I put into pre-drilled holes into the metal.
Next up are 30" x 20" pieces of plywood butted up against the bottom of the top strip. I put some construction adhesive on the wooden support strips added earlier, then finishing nails to hold the plywood in place.
Next, another 1x2 strip along the bottom, this time on top of the plywood. Same attachment method with screws.
Lastly, 18.5" strips of the thin hemlock to cover each vertical seam in the plywood.
 Next Steps
From here I'm going to just keep repeating the pattern on the rest of the walls. It gets a bit tricky in the back corners (but have a few ideas), and also I need to seal in some gaps along the bottom of the window frame to prevent future leaks.
|
|
|
|
|
| Thread Tools |
|
|
| Display Modes |
 Linear Mode Linear Mode
|
 Posting Rules
|
You may not post new threads
You may not post replies
You may not post attachments
You may not edit your posts
HTML code is Off
|
|
|
|
 » Recent Threads
 |
|
|
|
|
|
|
|
|
|
|
|
|
|
|
|
|
|
|
|
|
|
|
|
|
|
|
|
|
|
|
|
|
|
|
|
|
|


