Missy and I are going to meander back east a little later this summer. A family wedding is the main reason. Since there, might as well visit a bunch of folks I haven't seen in a while and spend a couple weeks at the home office. It will end up being a couple month long trip, or more.
Since I am not a huge fan of heat & humidity (especially the latter), I figured I had better get busy working on the air conditioners.
Ive spent more than a year trying to decide on the best cooling system for my particular situation/equipment that can be used when driving as well as parked/camping. It seems the perfect solution may be out of reach. Nonetheless, I decided that a fairly typical motorhome style system is the way to go. How these are to be powered is a whole other conversation. For now, shore power. However; it will get a whole lot more interesting than that!!
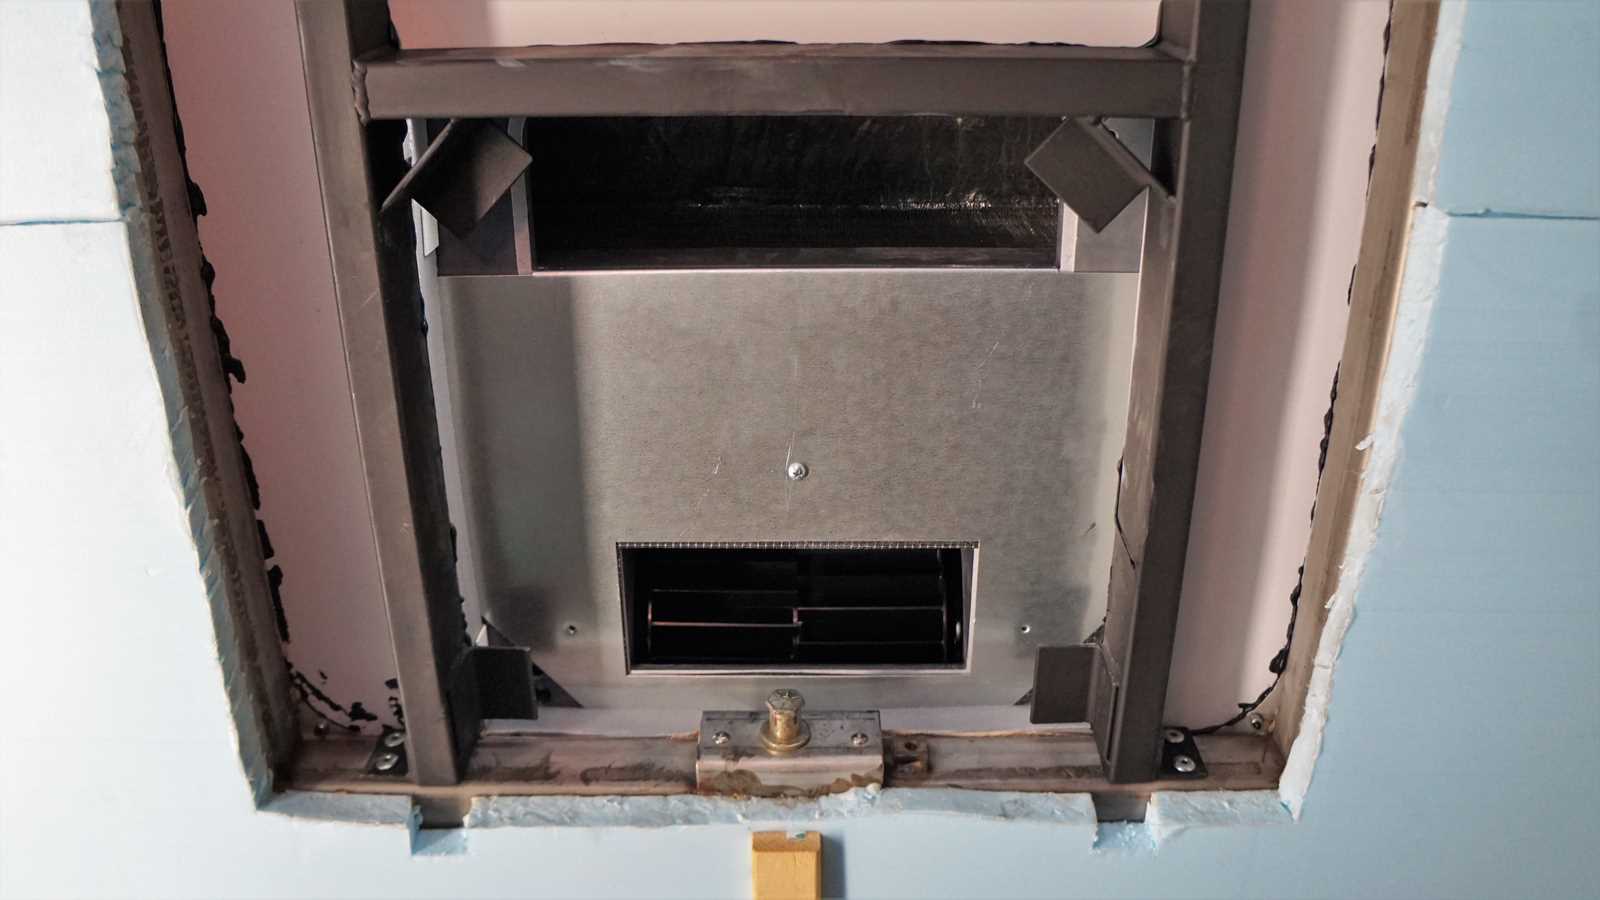
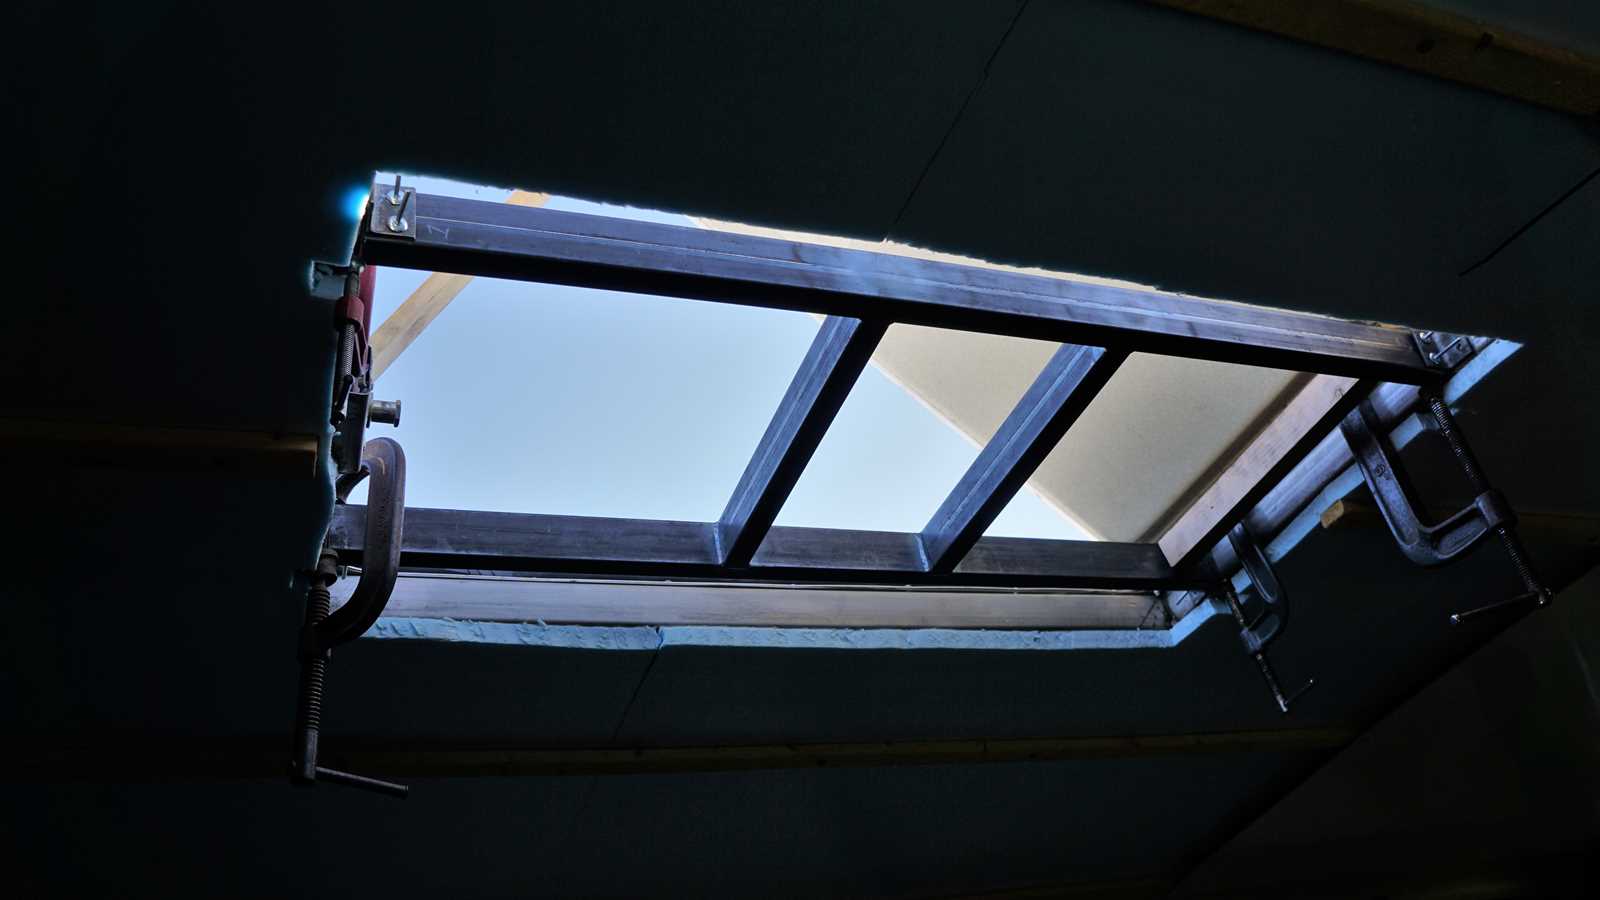
The two emergency hatches in the roof/ceiling needed to go away sort of. I decided to construct a metal framework that would fit inside the open space. This framework provides two 14" square holes for an air conditioner and also a Fan-Tastic Vent. This allowed using existing holes in the roof. The negative is that it puts the vent immediately in front of the A/C unit.
One of the big design questions was ducting the refrigerated air. Ive owned a motorhome that had ducted air and one that did not. The non-ducted style was far too loud to be comfortable I want ducted air. When I built the ceiling, I included two air spaces to use for cold air and air return. I admit, the space is small (short but wide) but I am hoping it is enough to support the necessary flow of air.
I decided on the
Coleman Mach 8 low profile, 15,000 BTU heat pumps.
These units include a condensate pump that takes the condensation that forms from the cooling action and pumps it down a hose. Often, RV manufacturers just let this moisture down onto the roof and down the side of the RV. I hated that approach! Mine will drain onto the ground under the coach.
Lot of measuring was required to ensure that I could accomplish the goal. It seemed it would work so, with fingers crossed, two of the A/C Heat Pump units were ordered.
The vent I chose was the
Fan-Tastic Vent 7350 Series Vent. It is remote controlled and has lots of options such as automatic operation based on temperature or manually selecting the speed. It also includes a rain sensor which causes it to close automatically. A couple
Ultra Breeze vent covers were also ordered.
I would have preferred for the metal framework to be stainless steel (to match the chassis) and welded in place. However; welding to a chassis with a whole bunch of electrical components attached to it scares me so I went with mild steel and riveted in place. I know about dissimilar metals and galvanic corrosion but went ahead anyway.
Some careful fitting was done to create the steel framework. My friend John welded this up for me and did an amazing job beautiful work!! The trickiest part of this is locating four tabs thru which the air conditioner bolts go to secure it to the roof.
Once the frame was in place, sheet metal was riveted in place to fill the holes. Lots of
Dicor sealant was used to ensure no water leaks.
The vent and air conditioner/heat pump were then secured in place.
Power is required for both the air conditioning and Fan-Tastic vent/fan. So, 120VAC power and 12VDC power was wired to each location.
That all went fairly smoothly but lots of engineering on the fly. The aft installation was much quicker and easier as it was exactly the same.

Two of these
Coleman 8530-3481 thermostats were purchased. They are digital, for heat pumps, and offer a 12VDC output to switch on a furnace. Perfect!
As I was attempting to hook up the electrical, it became obvious that something was missing. I eventually found up a YouTube video that provided the missing information.
I needed a "Control Box". This is available from
Coleman as this little unit.
This control box takes the signals from the thermostat and makes the Air Conditioning/Heat Pump do something (heat or cool).
Once this was installed, the air conditioner fan fired right up. However; the compressor would not turn on so the air was room temperature.
I experimented with the heating function and that worked just great.
The "control box" came without instructions. It did have a neat little temperature sensor but I only knew this as I've seen them before - it was not marked. I guessed that it went onto the two "Freeze" inputs on the control box. As soon as it was connected - the compressor kicked in and cold air started blowing! It makes sense that, without the temperature sensor, the control box assumes the air conditioner is froze up and does not turn on the compressor.
I let it run a while and then made a run to the home improvement store for parts (for another task).
I returned to a nice cool motorhome!!
As I walked to the back, under the air conditioner, I got a drip of water on my head. I forgot to connect the condensate pump to a drain line! So, there was a nice puddle of water up in the A/C unit that was slowly dripping on my floor.

That was quickly cleaned up and a temporary hose connected to solve the problem.
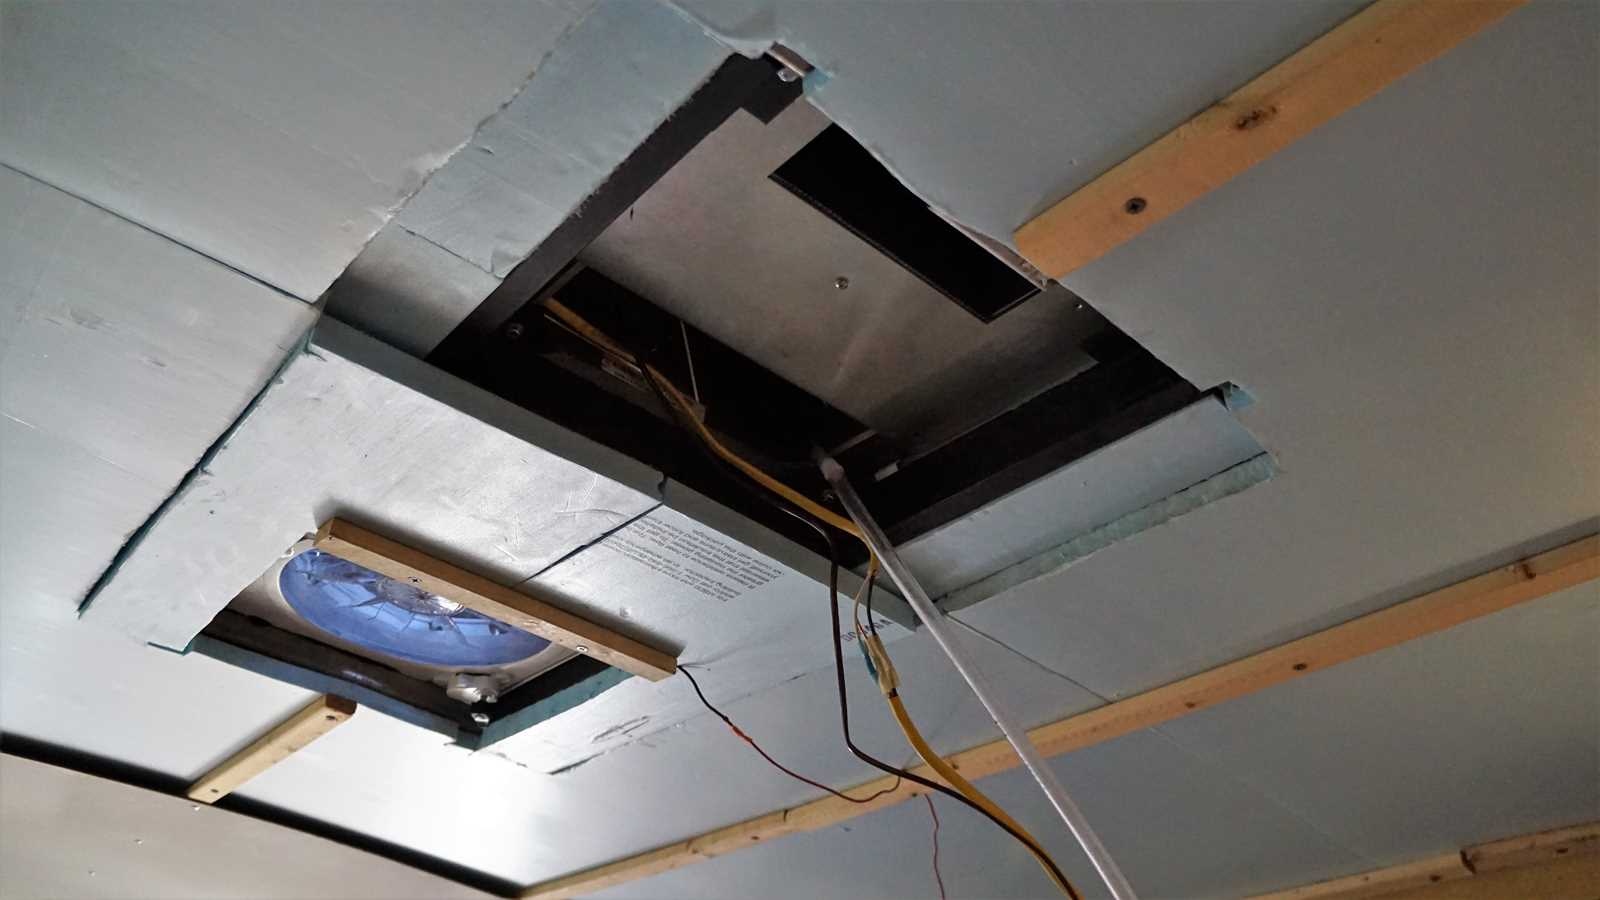
All of this required an updated electrical diagram. Note that this is still not the final plan - just current system.

Yes, there is still lots to do. Getting the wiring and drain hose permanently mounting up inside the ceiling is at the top of the list. Right behind that is the ceiling panels, trim, and duct work.
I have to be very careful not to work too fast
I'll end up with nothing to do!!


 My Dad lives in SE Ohio and I really need to spend some time with him. That's probably the furthest east I would go. However; if there was a beautiful single woman with a really great sailboat somewhere further east that wanted to meet me.... well... I might be so inclined... An eastern trip is problematic for me as I start getting headaches as I pass the Pecos river and seriously ill east of the Mississippi. Somewhat ironic, these symptoms magically disappear a few miles from the Bahamas.
 Linear Mode


