 |
|
 01-15-2021, 08:20 AM
|
#61
|
|
Almost There
Join Date: Aug 2020
Posts: 74
Year: 2001
Coachwork: Gillig
Chassis: Phantom
Engine: ISM 10.8L, B400R
|
That seems like a fair price for a quality paint job. The guy I bought my phantom from runs a fleet (6-  of black party bus phantoms. He usually has 2-3 painted a year so he gets a big discount. He pays $5k for a super quick prep and spray of single stage. It has boat loads of orange peel, lots of dry spots and usually doesnt last super long. Now, when his drivers hit something its easy to touch up. They all look fine for their intended purpose but I personally would not be proud of the job. He said his guy would paint mine in the same spirit for 7k. I think you came out just fine on that great looking paint job!
|

|

|
|
03-12-2021, 10:20 PM
|
#62
|
|
Skoolie
Join Date: Jan 2020
Location: California
Posts: 111
Year: 1967
Coachwork: Gillig
Chassis: Chevrolet B-Series
Engine: 366 V-8
|
Part 5 of the video series is finally out!
|
|
|
|
|
05-16-2021, 11:10 PM
|
#63
|
|
Skoolie
Join Date: Jan 2020
Location: California
Posts: 111
Year: 1967
Coachwork: Gillig
Chassis: Chevrolet B-Series
Engine: 366 V-8
|
Fresh update for early summer!
Work has been progressing at a slow but steady rate. Been pretty busy with everything else that life throws at ya, but I'm sure you all are familiar with that. Here is a list of what's happened since the last update:
- refurbished the step well with new step tread and custom toe-kicks
- finished the roof hatch (thank gawd)
- just about wrapped up on the weather stripping
- repaired the rust in the rear wheel wells
- installed the rest of the windows (some temporarily)
- relocated the air tank
- installed sub-floor supports for the new air seat
- started the bracketry for the water tanks
My first priority was to get the bus weather tight so that it could live outside the shop while I am away this summer. The roof hatch took months to get dialed in but it was worth it. I am very happy with the result which looks good and functions well. The hole for the hatch was made by the previous owner, so I was committed to seeing it through. I started by finding a barely-used Bomar marine hatch on eBay. I then manufactured a sleeve/platform out of 1/8" steel that would sit in the hole, span the gap of the inner and outer skins of the roof, provide a flange to seal again the outside skin, and provide a flat platform to mount the Bomar hatch. The sleeve was then powder coat primered then painted with matching interior/exterior colors. I used Bed-It butyl tape to seal the sleeve's outside flange as well as the hatch. 16 stainless steel bolts fastened through the roof hold everything in place. The City of Sacramento graciously (and potentially unknowingly) donated a BUMP road sign for me to make a nice aluminum trim surround piece to cap off the inside.
A few of the windows are temporarily installed because when I return in the fall I will be replacing the glass with metal "blank" panes behind appliances and walls. More on that later.
The wheel wells were straight forward; just two rectangular patch panels welded in where the rusted sections were cut out. Seam sealed, painted, and done. Pretty much the only rust on the bus. We are spoiled in California.
To make room for both of my 100 gallon water tanks, I had to move one of the air tanks forward to under the driver seat. Unfortunately, it was the tank with 5 lines going to it, not the one with only 2 lines. Some drilling, brake line rerouting, and a few brass fittings and we're good to go.
The new air seat weighs substantially more than whatever was there originally so I needed to beef up the supports for it under the plywood floor. Now, one side of the seat bolts all the way through the frame rail and the other side through a 2" piece of 1/4" wall square stock, which is welded between two cross members. I don't think the seat's going anywhere.
|
|
|
|
|
05-16-2021, 11:38 PM
|
#64
|
|
Skoolie
Join Date: Jan 2020
Location: California
Posts: 111
Year: 1967
Coachwork: Gillig
Chassis: Chevrolet B-Series
Engine: 366 V-8
|
My final project before I shelve the bus for the summer is to finish the bracketry for the water tanks and I'm currently about 50% of the way. This is one of those projects that took about 10x more time to contemplate, design, hum and ha over than it takes to actually do it. I've been putting it off because I was waiting for the tanks to arrive, which took 4 months, to confirm fitment and I was dreading having to relocated the air tank. Once both of those things happen, it was off to the races.
There are two 100 gallon tanks: one for fresh, one for grey. They will be located under the floor, directly opposite each other about midway on the bus. I won't go into the months of deliberation that led them to this location unless anyone is curious. At any rate, this is a serious amount of weight that will be sloshing around when the bus is moving so I wanted to make sure to over-engineer the brackets.
The tanks will be suspended from 3 crossmembers of 2", 1/4" wall square stock that sit on the frame rails. The tanks will be cradled in a perimeter frame of angle iron with a plywood floor and 2" square stock cross supports underneath. Custom 1/2" U-bolts will tie the the tank frames to the upper cross members.
I've finished welding in the 3 cross members which required temporarily cutting out sections of the floor support rails. I've also built the tank perimeter frames. Next is to attach the 2" supports to the bottom of the perimeter frames then fit the plywood floor to them. Waiting on the custom U-bolts to come in.
Pictures:
1 - new tanks!
2 - cutting out sections of the floor support rails
3 - installing 3 additional cross members (look closely, their the ones not covered in rust
4 - welding back in the floor support sections
5 - setting the aisle floor back in so I don't fall through and break my face (surprised it hasn't happened yet)
6 - constructing the tank perimeter frames
|
|
|
|
|
05-17-2021, 10:17 AM
|
#65
|
|
Bus Geek
Join Date: Apr 2012
Location: So Cal
Posts: 3,231
Year: 1935
Coachwork: Superior
Chassis: Chevy
Engine: 317 ci/tid / Isuzu
|
Right handsome work. Do the tanks have baffles--though as shallow as they are you probably don't need to worry about under bus tsunamis like the rest of us with tall tanks.
Jack 
|
|
|
|
|
05-17-2021, 10:53 PM
|
#66
|
|
Skoolie
Join Date: Jan 2020
Location: California
Posts: 111
Year: 1967
Coachwork: Gillig
Chassis: Chevrolet B-Series
Engine: 366 V-8
|
Quote:
Originally Posted by ol trunt

Right handsome work. Do the tanks have baffles--though as shallow as they are you probably don't need to worry about under bus tsunamis like the rest of us with tall tanks.
Jack |
Thanks Jack!
The tanks don't have baffles but I think you're right about them being shallow. Have you had turbulence-related issues with your tanks?
|
|
|
|
|
05-18-2021, 09:41 AM
|
#67
|
|
Bus Geek
Join Date: Apr 2012
Location: So Cal
Posts: 3,231
Year: 1935
Coachwork: Superior
Chassis: Chevy
Engine: 317 ci/tid / Isuzu
|
My tanks (1 forty gallon grey and 2 thirty gallon fresh) do have baffles though the baffles only partly enter the tanks. So far I haven't noticed sloshing so either the baffles are working or it's not a problem. I've seen folks with car wash rigs have trouble managing their vehicles when trying to stop as the water tries to keep on keeping on.
My 27 gallon black tank is only 7 inches tall but long and wide so not much room for sloshing.
Jack
 .
|
|
|
|
|
10-21-2021, 11:36 PM
|
#68
|
|
Skoolie
Join Date: Jan 2020
Location: California
Posts: 111
Year: 1967
Coachwork: Gillig
Chassis: Chevrolet B-Series
Engine: 366 V-8
|
Ok folks, we're back on line. I took a few months off to go work in Colorado for the summer (had an epic time). I've been back for a couple months and making great progress on the Gillig, I just haven't had the time to post. Let's get caught up:
Windows are all permanently in, including the blanks. The blanks are windows that I "reglazed" with black powder coated steel instead of glass. These were used where windows would be made inaccessible by walls and other fixings but still look like windows from the outside. The interior side panels were then reinstalled. Finally!
The spare tire compartment was rebuilt into a battery/electrical compartment. This involved building a new floor and welding in walls. We'll revisit this area when we do the electrical. The spare tire will eventually be relocated elsewhere under the bus and be lowered by a winch.
The propane tank platform is mounted. It is designed to hold 3 tanks. The propane plumbing is almost complete. Just need to run a section on the inside once the framing is done. I pressure checked what I finished so far and it's held 100psi for 3 days now.
The water tanks are finally mounted! This is a huge step because it has been the pivotal point between working under the bus and moving inside. Moreover, it means the floor will be going down permanently this weekend. For those who are interested, here is how I mounted the tanks: I started by welding in three 2in/.25wall square tubing cross members in the bus (which I believe was outlined a few posts ago). Next I built platforms with a steel frame and plywood floor for the tanks each to sit on. Custom U-bolts tie the platforms to the cross members with the tanks (gently) sandwiched in between. Catastrophically overbuilt, but a good design for my situation. Keeps the weight of the water low and in between the front and rear axles, and utilizes otherwise wasted space under the bus since I don't have any storage compartments (aside from the spare tire compartment at the back).
I'll snap a few more pictures but here's what I have for tonight. Insulation and interior siding are next.
|
|
|
|
|
11-06-2021, 11:12 PM
|
#69
|
|
Skoolie
Join Date: Jan 2020
Location: California
Posts: 111
Year: 1967
Coachwork: Gillig
Chassis: Chevrolet B-Series
Engine: 366 V-8
|
Ok, big update. The Gillig has been a flurry of activity for the past two months. Almost all the under-floor utilities are complete and the floor has been screwed down PERMANENTLY (first time in a year and a half!). Nailing strips have been put up followed by framing for interior walls. What then ensued was three days of milling down a 20-year-old pile of rough-sawn cedar into nice interior siding (I'm still trying to get all the sawdust out of my hair). Efficient, healthy and environmentally-conscious wool isulation has been added, followed by the siding which is going up at a reasonable pace. The pieces that follow the curve of the roof are a real bear though.
We're actually getting somewhere!
|
|
|
|
|
11-06-2021, 11:12 PM
|
#70
|
|
Skoolie
Join Date: Jan 2020
Location: California
Posts: 111
Year: 1967
Coachwork: Gillig
Chassis: Chevrolet B-Series
Engine: 366 V-8
|
I've literally been wading through sawdust...
|
|
|
|
|
11-07-2021, 06:36 PM
|
#71
|
|
Bus Nut
Join Date: Jul 2017
Location: Rapid City, SD
Posts: 993
Year: 2001
Coachwork: Blue Bird
Chassis: CS RE
Engine: ISC 8.3 L 260 hp
Rated Cap: 36
|
Great progress! The cedar looks good.
Ted
|
|
|
|
|
11-08-2021, 12:14 AM
|
#72
|
|
Skoolie
Join Date: Jan 2020
Location: California
Posts: 111
Year: 1967
Coachwork: Gillig
Chassis: Chevrolet B-Series
Engine: 366 V-8
|
Thanks Ted! The cedar has been a lot of work but it was free and I like the result.
|
|
|
|
|
03-04-2022, 12:45 AM
|
#73
|
|
Skoolie
Join Date: Jan 2020
Location: California
Posts: 111
Year: 1967
Coachwork: Gillig
Chassis: Chevrolet B-Series
Engine: 366 V-8
|
A long overdue video update. This was filmed back in November just before I left for the ski season and I just got around to putting it together. Not much that I haven't already posted on here but things look a bit more finished off in the video. Next update will probably be this fall when I get back from the PCT.
|
|
|
|
|
09-30-2022, 09:57 PM
|
#74
|
|
Skoolie
Join Date: Jan 2020
Location: California
Posts: 111
Year: 1967
Coachwork: Gillig
Chassis: Chevrolet B-Series
Engine: 366 V-8
|
Alright folks, we're back online after quite a hiatus.
Parked the bus last November, headed over to Mammoth to work the ski season, came back to Sonora for a week to unpack and repack, then spent the past 4 months hiking from Mexico to Canada on the Pacific Crest Trail. Needless to say, the bus has been waiting patiently for some progress. And progress has been made.
First order of business was moving the bus into the shop. It started up surprisingly quickly but the chronic backfiring and low compression reminded me that an engine rebuild or crate motor are in the future.
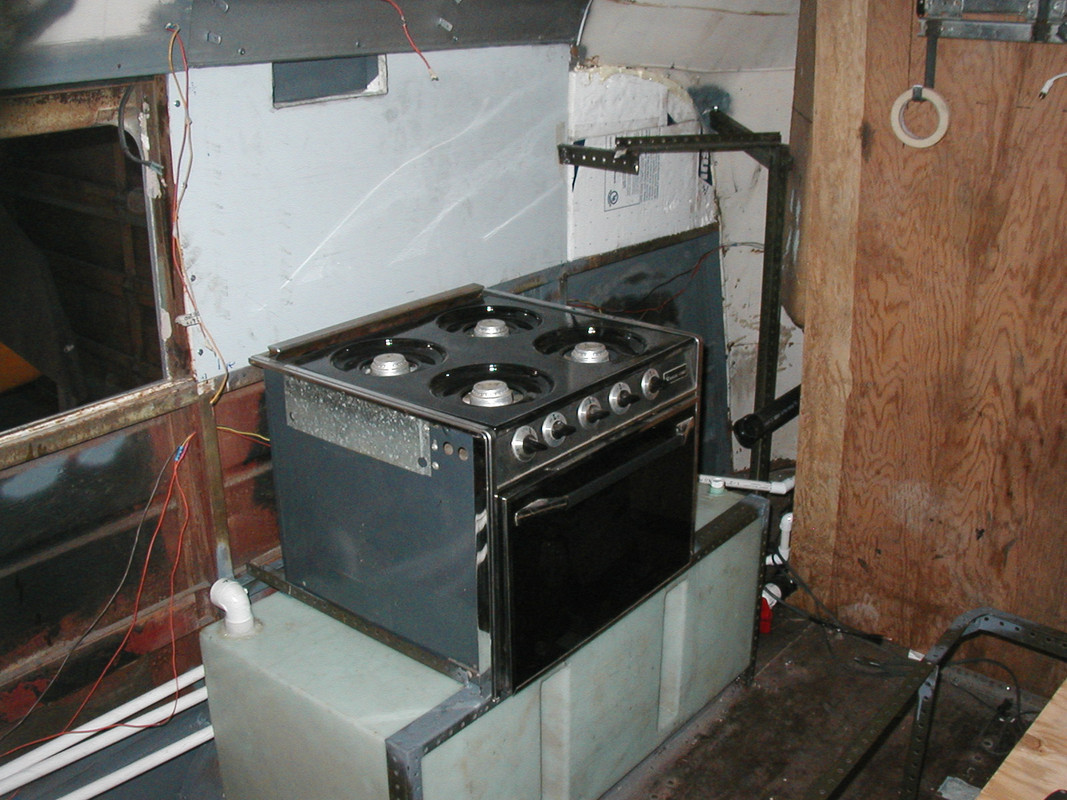
I had to wrap up the propane system before much else could be done. This proved just as agrivating as I thought it would be a year ago. Had to remake a nipple that was too short and cut/thread several new pieces to reach the stove and into the closet to the furnace. A cutout had to be made in the side of the stove for clearance. After the valves were put on, everything was pressure-checked to 30lbs.
|
|
|
|
|
09-30-2022, 10:02 PM
|
#75
|
|
Skoolie
Join Date: Jan 2020
Location: California
Posts: 111
Year: 1967
Coachwork: Gillig
Chassis: Chevrolet B-Series
Engine: 366 V-8
|
Next was finalizing the water heater installation (without actually installing it). Fresh-air vents were cut in the floor and high-temp sealant was used around the exhaust. Then a short riser was constructed to support the heater.
|
|
|
|
|
09-30-2022, 10:20 PM
|
#76
|
|
Skoolie
Join Date: Jan 2020
Location: California
Posts: 111
Year: 1967
Coachwork: Gillig
Chassis: Chevrolet B-Series
Engine: 366 V-8
|
With those chores out of the way, I could finally install the much-anticipated kitchen cabinets! The cabinets were delivered in November, the day I left for Mammoth actually. So I hadn't even unpacked them until 9 months later. I got them from Lowes when they were having a sale. They have solid finished wood fronts and plywood boxes (which were a premium over particleboard). Overall very pleased for the price.
First was cutting holes for the water lines and electrical conduit. Then the water heater, sink drain, and propane. The last picture doesn't show it but the water heater is accessed through the side of the end cabinet, under the couch seat.
When I installed the cabinets, I reinforced them where it was reasonable. Even though I sprang for plywood boxes, they weren't as sturdy as I would have thought. But, screwed together and to the wall, with corner bracing, I think they'll handle the road.
|
|
|
|
|
09-30-2022, 10:31 PM
|
#77
|
|
Skoolie
Join Date: Jan 2020
Location: California
Posts: 111
Year: 1967
Coachwork: Gillig
Chassis: Chevrolet B-Series
Engine: 366 V-8
|
Then this week has been the couch. Simple in theory, complex in execution. The plan was for the seat to lift up to access storage, propane tanks, water pump and water heater. The front was going to swing up to make a bed. And the whole thing had to be built to allow clearance for water heater access.
After framing it up the first time (yes, the first time), I nixed the bed extension, reasoning that the seat, with the back cushions removed, is plenty wide enough. Next, I discovered that the seat was too high, by 4in to be exact. So the whole thing got torn apart, shortened, and rebuilt. This time with a special cutout in the framing for the water heater. I'll have some finished pictures this weekend.
|
|
|
|
|
10-02-2022, 12:09 AM
|
#78
|
|
Skoolie
Join Date: Jan 2020
Location: California
Posts: 111
Year: 1967
Coachwork: Gillig
Chassis: Chevrolet B-Series
Engine: 366 V-8
|
And except for staining and cushions, the couch is done!
|
|
|
|
|
11-19-2022, 09:18 PM
|
#79
|
|
Skoolie
Join Date: Jan 2020
Location: California
Posts: 111
Year: 1967
Coachwork: Gillig
Chassis: Chevrolet B-Series
Engine: 366 V-8
|
Quite a bit of progress in the past couple months.
The couch was finished and stained a while back. Will need to make some cushions at some point, but that's down the list. For now, it's my workbench.
|
|
|
|
|
11-19-2022, 09:33 PM
|
#80
|
|
Skoolie
Join Date: Jan 2020
Location: California
Posts: 111
Year: 1967
Coachwork: Gillig
Chassis: Chevrolet B-Series
Engine: 366 V-8
|
Next was the shower. Since I could not find a shower pan in the dimensions I wanted and having a copper custom one made was cost-prohibitive, I build one out of steel and had it powder coated. I picked out a "hammered copper" finish but got baby poop. Oh well. I sloped the floor of the pan substantially so that the shower would drain even if the bus was not level.
Pex plumbing was installed in the wall to the shower valve, then copper the rest of the way. An additional drain valve was installed to drain the shower plumbing to protect it from freezing.
After that was installed, I milled some shiplap out of the cedar that I've been using in the bus. This was stained and received several coats of polyurethane. As I was nailing it up, I was reminded of how difficult the curved roof pieces can be.
Overall, pretty happy. Other than the short roof, it doesn't feel cramped.
|
|
|
|
|
|
 Posting Rules
|
You may not post new threads
You may not post replies
You may not post attachments
You may not edit your posts
HTML code is Off
|
|
|
|
 » Recent Threads
 |
|
|
|
|
|
|
|
|
|
|
|
|
|
|
|
|
|
|
|
|
|
|
|
|
|
|
|
|
|
|
|
|
|
|
|
|
|


 Linear Mode

