 |
|
 09-24-2020, 06:36 PM
|
#1361
|
|
Bus Geek
Join Date: Jan 2019
Location: Philadelphia
Posts: 7,000
Year: 2003
Coachwork: International
Chassis: CE 300
Engine: DT466e
Rated Cap: 65C-43A
|
Building the corner posts for my rear wall.

Making them out of two pieces of 1X so I can fill in the corner with XPS and prevent cold corners.

Making sure the joined pieces still fit and can maneuvered into place. There's about a 96% chance I'm going to rip out one of my new wires in the course of this.

Added a couple of wings to hold foam board.

Gluing in XPS on the backside of the corner.


Fitting the driver's side post.


|

|

|
|
09-25-2020, 02:28 AM
|
#1362
|
|
Bus Geek
Join Date: Sep 2015
Posts: 3,856
Year: 2002
Coachwork: Thomas Built Bus
Chassis: Freightliner FS65
Engine: Caterpillar 3126E Diesel
Rated Cap: 71 Passenger- 30,000 lbs.
|
Foamboard on a stick ... is that a new state fair treat?
|
|
|
|
|
09-25-2020, 05:07 AM
|
#1363
|
|
Bus Geek
Join Date: Jan 2019
Location: Philadelphia
Posts: 7,000
Year: 2003
Coachwork: International
Chassis: CE 300
Engine: DT466e
Rated Cap: 65C-43A
|
Quote:
Originally Posted by Native

Foamboard on a stick ... is that a new state fair treat?
|
Ha ha, can't be any less healthy than the regular stuff.
|
|
|
|
|
09-27-2020, 08:36 PM
|
#1364
|
|
Bus Geek
Join Date: Jan 2019
Location: Philadelphia
Posts: 7,000
Year: 2003
Coachwork: International
Chassis: CE 300
Engine: DT466e
Rated Cap: 65C-43A
|
Added another two layers of PT 2x to the front blocks - still not level. Also added a couple of wheels to the biggest one, which is just way too heavy to drag around easily.

|
|
|
|
|
09-28-2020, 05:50 PM
|
#1365
|
|
Bus Geek
Join Date: Jan 2019
Location: Philadelphia
Posts: 7,000
Year: 2003
Coachwork: International
Chassis: CE 300
Engine: DT466e
Rated Cap: 65C-43A
|
|
|
|
|
|
09-28-2020, 06:08 PM
|
#1366
|
|
Bus Nut
Join Date: Aug 2020
Location: Mesa, AZ
Posts: 787
Year: 1993
Coachwork: 44' Newell Coach
Engine: 8v92T Detroit
Rated Cap: 2 adults and two pigeons
|
Smart idea! I was looking at ready made ramps and they are $700 a pair. Crazy!
__________________
--Simon
|
|
|
|
|
09-29-2020, 08:56 AM
|
#1367
|
|
Bus Geek
Join Date: Jan 2019
Location: Philadelphia
Posts: 7,000
Year: 2003
Coachwork: International
Chassis: CE 300
Engine: DT466e
Rated Cap: 65C-43A
|
I just realized something I could have taken advantage of with more advanced planning. I'm not super-concerned about AC so I'm not going into the expense and effort of installing a mini-split. My plan is to use a window unit or two when necessary, although obviously this is a bit of a pain if you have to take them out before driving anywhere.
I just realized that because of my bulkhead wall behind the driver's seat, I could have mounted a window AC unit in the bulkhead (since the cab is not part of my insulated living space and is effectively outside) in place of one of the windows. I may still do this anyway since the windows are only bolted to the steel frame of the wall, but had I thought ahead I would have made one window easily removable and swappable with a window AC unit that fit the same opening. Since the condenser would be sticking out inside the cab instead of outside the bus, I wouldn't have to remove it before driving.
|
|
|
|
|
09-29-2020, 09:08 AM
|
#1368
|
|
Bus Nut
Join Date: May 2018
Location: Wamego Ks
Posts: 617
Year: 2007
Chassis: Collins
Engine: 6.6L LMM Duramax
|
Quote:
Originally Posted by musigenesis
I just realized something I could have taken advantage of with more advanced planning. I'm not super-concerned about AC so I'm not going into the expense and effort of installing a mini-split. My plan is to use a window unit or two when necessary, although obviously this is a bit of a pain if you have to take them out before driving anywhere.
I just realized that because of my bulkhead wall behind the driver's seat, I could have mounted a window AC unit in the bulkhead (since the cab is not part of my insulated living space and is effectively outside) in place of one of the windows. I may still do this anyway since the windows are only bolted to the steel frame of the wall, but had I thought ahead I would have made one window easily removable and swappable with a window AC unit that fit the same opening. Since the condenser would be sticking out inside the cab instead of outside the bus, I wouldn't have to remove it before driving.
|
Good call- you would need a way to capture condensation that would drop from the window unit, but that could be as easy as a 5 gallon bucket...
Good work on all of the wiring removal! It took me awhile on mine. However I removed so much wiring I used a lot of it for the bus build. I only had to buy some heavier wire for certain things like an invertor, and a winch for my bed... I also purchased some Marine wire that has red/black wires on it to run for my see level II gauges. It might be a good time to run wiring for gauges if you plan to have tank monitoring system, wiring for water pump etc. Like others have said a built in chase is nice. I used a board horizontally to creat a flat shelf for the wiring to run in, then I used another board vertical that I can easily remove with a couple screws if I need access to the wires.
|
|
|
|
|
09-29-2020, 09:43 AM
|
#1369
|
|
Bus Geek
Join Date: Jan 2019
Location: Philadelphia
Posts: 7,000
Year: 2003
Coachwork: International
Chassis: CE 300
Engine: DT466e
Rated Cap: 65C-43A
|
Quote:
Originally Posted by Frochevy
Good call- you would need a way to capture condensation that would drop from the window unit, but that could be as easy as a 5 gallon bucket...
Good work on all of the wiring removal! It took me awhile on mine. However I removed so much wiring I used a lot of it for the bus build. I only had to buy some heavier wire for certain things like an invertor, and a winch for my bed... I also purchased some Marine wire that has red/black wires on it to run for my see level II gauges. It might be a good time to run wiring for gauges if you plan to have tank monitoring system, wiring for water pump etc. Like others have said a built in chase is nice. I used a board horizontally to creat a flat shelf for the wiring to run in, then I used another board vertical that I can easily remove with a couple screws if I need access to the wires.
|
Do you have any pics of your chase? I'm still not sure how I'm going to run these wires from front to back, although I have vague ideas.
|
|
|
|
|
09-29-2020, 10:28 AM
|
#1370
|
|
Bus Nut
Join Date: May 2018
Location: Wamego Ks
Posts: 617
Year: 2007
Chassis: Collins
Engine: 6.6L LMM Duramax
|
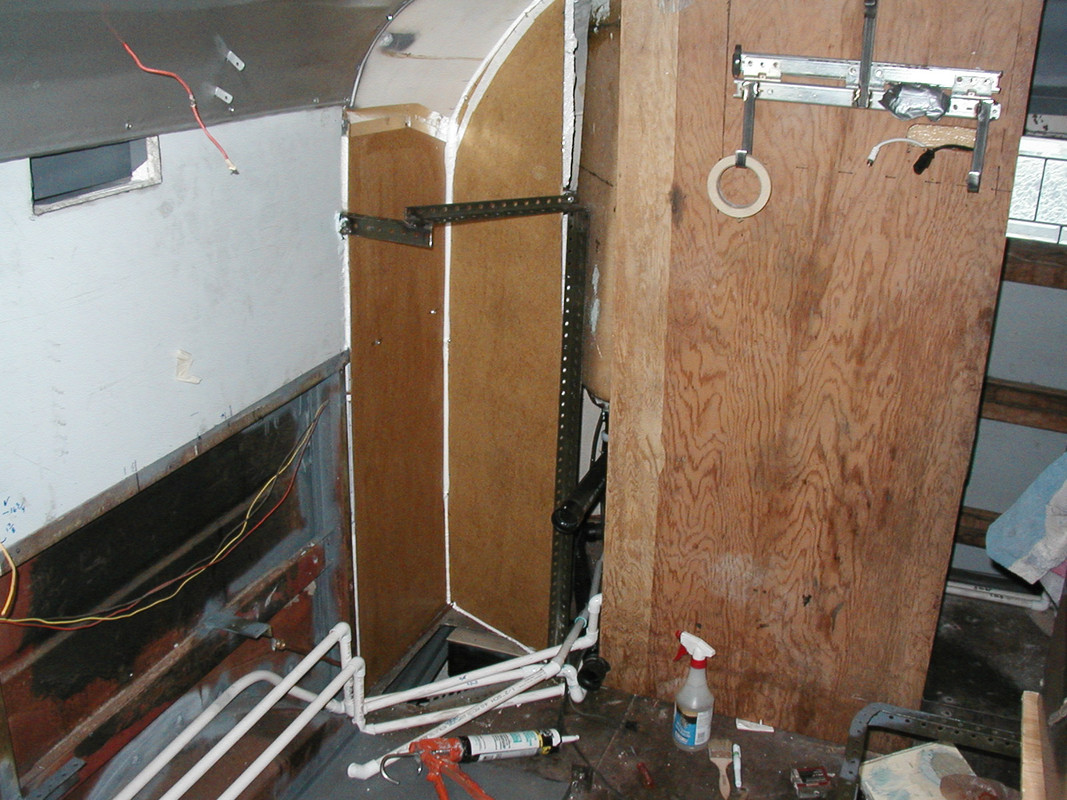
Hopefully my quick hand drawing makes sense.... I have furring strips screwed into the metal ribs behind my insulation and wall board. I screwed 2x2 ish blocks into it. This gave me a place to screw a board on the bottom of these blocks that creat a shelf for the wires to lay on. I then put a piece of tongue and groove car siding (same as I used on the ceiling) and used the tongue to go in behind where and meet the edge of the roof panel. This creates a spot for it to wedge in and then screwed the bottom of that board to the shelf board. This allows for only a few screws and tight fit which makes quick access. You can adjust the width of the "shelf" board so you get the wedging action against your ceiling panels (if you have them).
Hope this helps!! Let me know if you need additional details. I could remove that board and take a picture inside... (That picture is inside the bathroom) However, where I have overhead cabinets, the wires simply are on top of it at the rear. I haven't installed a facia over these areas yet above my cabinets but plan to in the future.
|
|
|
|
|
09-30-2020, 09:41 AM
|
#1371
|
|
Bus Crazy
Join Date: Feb 2018
Location: Golden Valley AZ
Posts: 1,036
Year: 1993
Chassis: ThomasBuilt 30'
Engine: need someone to tell me
Rated Cap: me + 1
|
Quote:
Originally Posted by musigenesis
I just realized something I could have taken advantage of with more advanced planning. I'm not super-concerned about AC so I'm not going into the expense and effort of installing a mini-split. My plan is to use a window unit or two when necessary, although obviously this is a bit of a pain if you have to take them out before driving anywhere.
I just realized that because of my bulkhead wall behind the driver's seat, I could have mounted a window AC unit in the bulkhead (since the cab is not part of my insulated living space and is effectively outside) in place of one of the windows. I may still do this anyway since the windows are only bolted to the steel frame of the wall, but had I thought ahead I would have made one window easily removable and swappable with a window AC unit that fit the same opening. Since the condenser would be sticking out inside the cab instead of outside the bus, I wouldn't have to remove it before driving.
|
How are you going to remove the heat from the cab/oven, leave the door open? fan in an open window?
|
|
|
|
|
09-30-2020, 09:55 AM
|
#1372
|
|
Bus Geek
Join Date: Apr 2012
Location: So Cal
Posts: 3,231
Year: 1935
Coachwork: Superior
Chassis: Chevy
Engine: 317 ci/tid / Isuzu
|
I wondered that too. I've seen some snazzy side roll screen doors for patios that might work. Maybe a window shade with screen substituted for the shade material and stood on end would work. That way you wouldn't have to deal with the screen door swatting you on the ass every time you passed through.
Jack 
|
|
|
|
|
09-30-2020, 10:16 AM
|
#1373
|
|
Bus Geek
Join Date: Jan 2019
Location: Philadelphia
Posts: 7,000
Year: 2003
Coachwork: International
Chassis: CE 300
Engine: DT466e
Rated Cap: 65C-43A
|
I'll be able to open the driver's side window and the two forward-most passenger windows (also the passenger door if I felt like it, but I'll generally keep that closed since I'll have a lot of stuff stored in the cab, including my bikes), since those aren't part of my internal space. I won't need screens on anything in the cab since it's effectively a porch.
|
|
|
|
|
09-30-2020, 11:28 AM
|
#1374
|
|
Bus Geek
Join Date: May 2009
Location: Columbus Ohio
Posts: 18,830
Year: 1991
Coachwork: Carpenter
Chassis: International 3800
Engine: DTA360 / MT643
Rated Cap: 7 Row Handicap
|
what about the drippy water.. normally on a window unit that gets slung into the condensor fan and sprayed all over.. or evaporated which means you are going to be loading up your tools and such with lots of warmth and moisture even if you have a window open..
A/C's need to be outside.. at least the hot portions of them do..
|
|
|
|
|
09-30-2020, 11:51 AM
|
#1375
|
|
Bus Geek
Join Date: Apr 2012
Location: So Cal
Posts: 3,231
Year: 1935
Coachwork: Superior
Chassis: Chevy
Engine: 317 ci/tid / Isuzu
|
My window AC is entirely within the bus as close to the ceiling as I could get it. I put a drain hose on the condensation pan and routed it out the bottom of the bus. I ducted the hot air from the condenser down and out the bottom of the bus via a chase-way. I wasn't sure it would work but the chase is large enough and the exhaust fan powerful enough so it works just fine.
Jack
 .
.jpg) .
.jpg) .
|
|
|
|
|
10-01-2020, 09:22 AM
|
#1376
|
|
Bus Crazy
Join Date: Feb 2018
Location: Golden Valley AZ
Posts: 1,036
Year: 1993
Chassis: ThomasBuilt 30'
Engine: need someone to tell me
Rated Cap: me + 1
|
Quote:
Originally Posted by cadillackid
what about the drippy water.. normally on a window unit that gets slung into the condensor fan and sprayed all over.. or evaporated which means you are going to be loading up your tools and such with lots of warmth and moisture even if you have a window open..
A/C's need to be outside.. at least the hot portions of them do..
|
Maybe an (insulated?) elbow from the back of the A/C condenser to the nearest window to redirect the hot air outside. Perhaps the elbow could be made out of a fabric so that it could be removed easily when the space was needed for some other use.
This would essentially turn the A/C window unit into one of those expensive self contained units as sold in the big box stores to be vented outside, only better?
|
|
|
|
|
10-06-2020, 10:27 AM
|
#1377
|
|
Bus Geek
Join Date: Jan 2019
Location: Philadelphia
Posts: 7,000
Year: 2003
Coachwork: International
Chassis: CE 300
Engine: DT466e
Rated Cap: 65C-43A
|
Found a pair of double-hung windows on CL for $20 each, and pulled off the outer frames.


One of the windows has a bunch of condensation inside it so I decided to cut/pry the frame off. I didn't think the frame was part of the hermetic seal and I'm happy to see that it's not.


My plan for my windows (I'm keeping all the originals) is to cover them with removable insert panels of 2" XPS foam board in winter, but I want to build a few inserts that are mostly these double-paned window panels, so that I can still get some light inside.
I was originally going to incorporate them with the vinyl frame still on each window, but it's cool to know I can use just the glass unit. If the seal eventually fails I can easily replace the window.
|
|
|
|
|
10-06-2020, 03:33 PM
|
#1378
|
|
Bus Geek
Join Date: Sep 2015
Posts: 3,856
Year: 2002
Coachwork: Thomas Built Bus
Chassis: Freightliner FS65
Engine: Caterpillar 3126E Diesel
Rated Cap: 71 Passenger- 30,000 lbs.
|
It is nice to know they can be dismantled down to the essential parts.
|
|
|
|
|
10-06-2020, 03:41 PM
|
#1379
|
|
Bus Geek
Join Date: Jan 2019
Location: Philadelphia
Posts: 7,000
Year: 2003
Coachwork: International
Chassis: CE 300
Engine: DT466e
Rated Cap: 65C-43A
|
Quote:
Originally Posted by Native
It is nice to know they can be dismantled down to the essential parts.
|
Yeah, I never knew. This particular one ended up 24" x 20", and ordering a custom unit of this size is something like $75. Not bad for $10 and some sawzalling.
|
|
|
|
|
10-12-2020, 09:38 AM
|
#1380
|
|
Bus Geek
Join Date: Jan 2019
Location: Philadelphia
Posts: 7,000
Year: 2003
Coachwork: International
Chassis: CE 300
Engine: DT466e
Rated Cap: 65C-43A
|
Urg, got a quote from the mechanic to fix my ABS light: $6000. Says I need new harnesses for both the left and right wheels, and need the ABS unit reprogrammed. I don't think he's scamming me because he also recommended not doing it and I'm not going to. I will give it the ol' electrical tape fix.
I suspect an ABS light would cause me to fail a safety inspection, which will be interesting in the future.
|
|
|
|
|
|
| Thread Tools |
|
|
| Display Modes |
 Linear Mode Linear Mode
|
 Posting Rules
|
You may not post new threads
You may not post replies
You may not post attachments
You may not edit your posts
HTML code is Off
|
|
|
|
 » Recent Threads
 |
|
|
|
|
|
|
|
|
|
|
|
|
|
|
|
|
|
|
|
|
|
|
|
|
|
|
|
|
|
|
|
|
|
|
|
|
|


