 |
|
 09-02-2013, 10:49 AM
|
#261
|
|
Skoolie
Join Date: Feb 2013
Location: Hampton, Ontario, Canada
Posts: 103
Year: 1999
Coachwork: BlueBird
Chassis: 3800 International
Engine: DT466E
|
Re: The Journey Visvi 1999 Thomas MVP ER
I ran into one of those when i put my door in the side of the bus... sooo many rivets! you must be an expert rivet remover by now though lol.
Looking really good man!
|

|

|
|
09-03-2013, 07:15 PM
|
#262
|
|
Bus Nut
Join Date: Jun 2013
Location: West Lafayette, IN
Posts: 832
Year: 1999
Coachwork: Thomas
Engine: 3126
Rated Cap: 72
|
Re: The Journey Visvi 1999 Thomas MVP ER
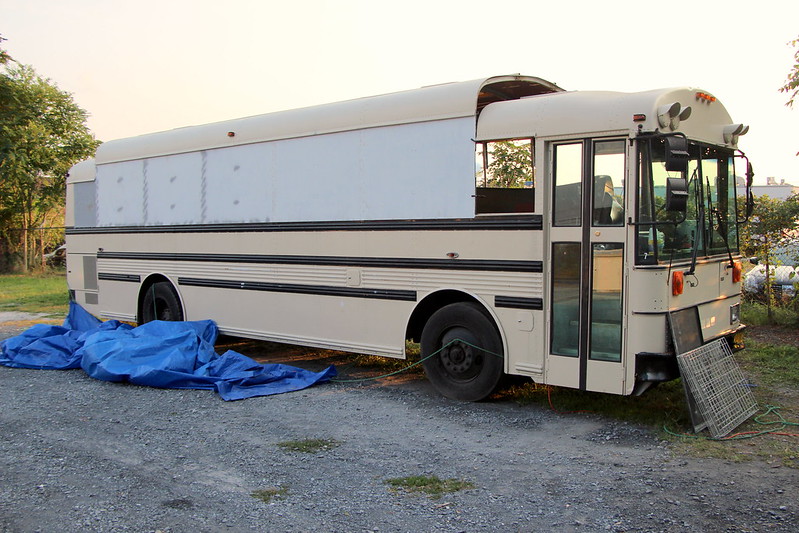
Aaaah relief. Even though it was 88, only 4 degrees cooler. With almost no humidity, it felt good to work out side tonight. I wish the sun wasn't going down earlier.
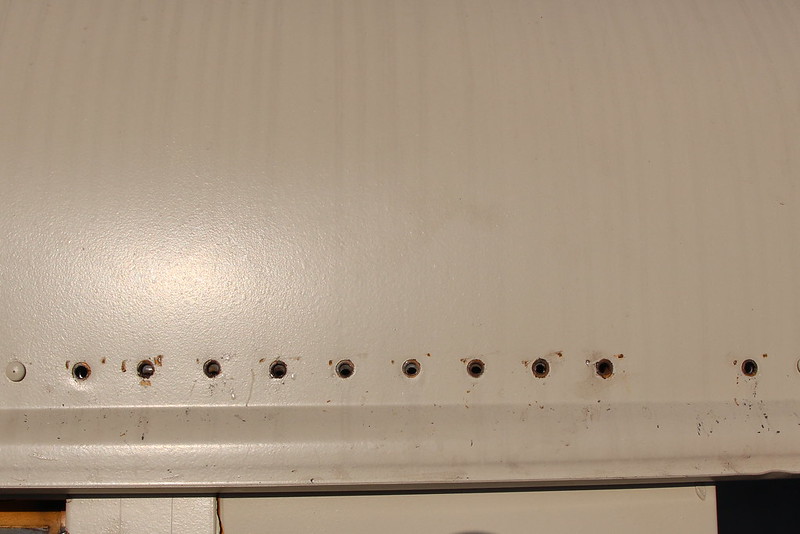
I started to drill out the rivets to get the sheet metal for the emergency door out. After the first 11 rivets where out the first piece almost fell off.
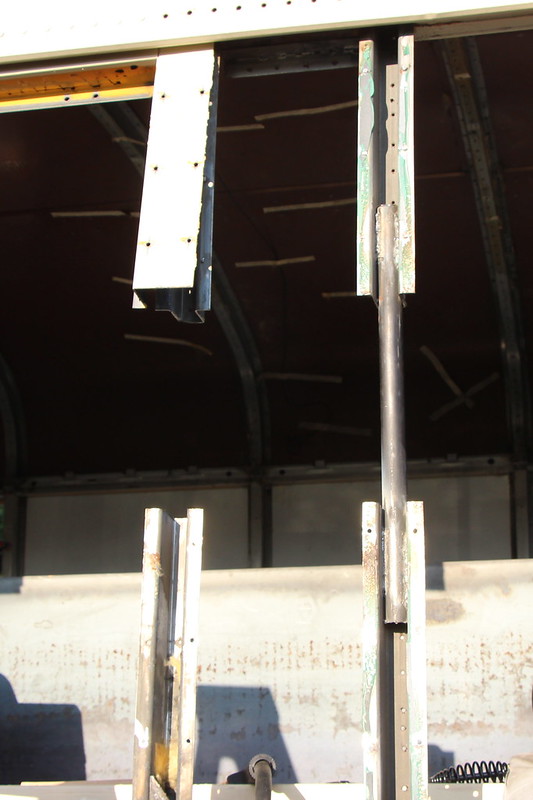
I decided I needed a break from drilling, so I welded in the support.
I only have about two hrs after I get home from work, but I did get ten more rivets drilled. That leaves eleven left to finish.
It is suppose to be like this all week and weekend 
|
|
|
|
|
09-04-2013, 08:25 PM
|
#263
|
|
Bus Nut
Join Date: Jun 2013
Location: West Lafayette, IN
Posts: 832
Year: 1999
Coachwork: Thomas
Engine: 3126
Rated Cap: 72
|
Re: The Journey Visvi 1999 Thomas MVP ER
My quality assurance team had to come out and check the work I'm doing.
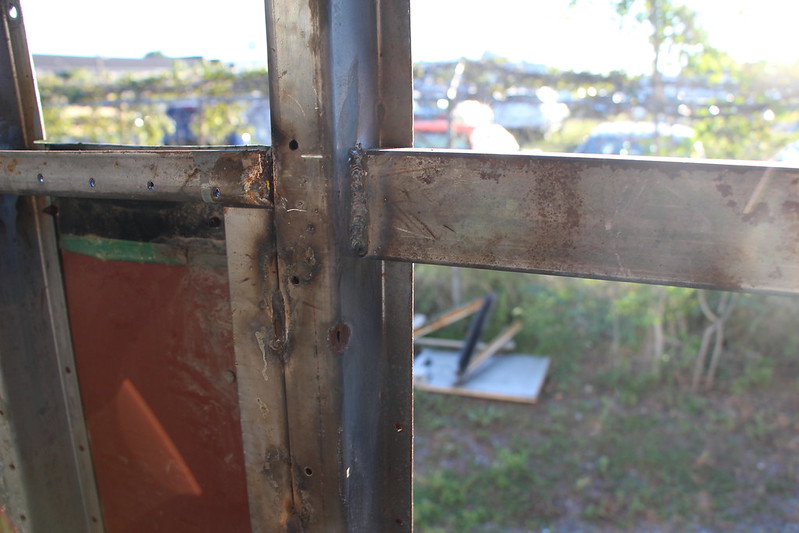
I got the rest of the rivets drilled and removed the sheet metal for the emergency door. I then realized that this was the top half, I still have to do something with the bottom half.
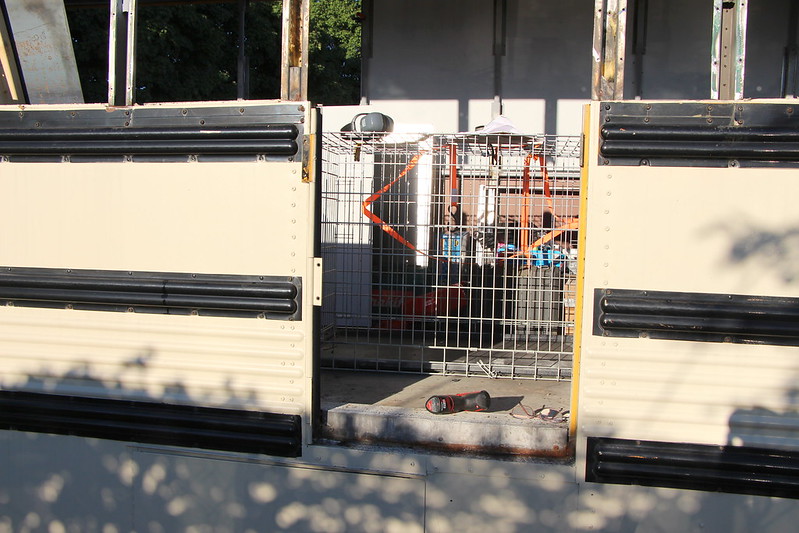
Checking it out the emergency door frame is held in with screws, between the supports and the old skin.

I can remove the screws and pry this out. Then I can put the new skin in the same place. I still have to order it because I forgot.

It was easy to remove , all the screws but two came out. I have to weld a support horizontal where the window sill would have been if it wasn't a door. This will be used to rivet the top piece over the bottom.
|
|
|
|
|
09-04-2013, 09:06 PM
|
#264
|
|
Bus Geek
Join Date: Aug 2011
Location: Stony Plain Alberta Canada
Posts: 2,937
Year: 1992
Coachwork: Bluebird
Chassis: TC2000 FE
Engine: 190hp 5.9 Cummins
Rated Cap: 72
|
Re: The Journey Visvi 1999 Thomas MVP ER
What is your procedure for drilling out the rivets? Size and type of drill bit, ect. Do you use the same size bit all the way, or change bits? Drill part way then use a center punch? How many rivets are your bits lasting.
Also when a screw will not come out with my 1\4 impact, I just give it a few wackes sideways with the cold chisel and a 4 pound hammer. Then they come out every time.
Your thread is my favorite on skoolie.net right now.
Thx Nat
__________________
"Don't argue with stupid people. They will just drag you down to their level, and beat you up with experience."
Patently waiting for the apocalypses to level the playing field in this physiological game of life commonly known as Civilization
|
|
|
|
|
09-05-2013, 06:39 AM
|
#265
|
|
Bus Nut
Join Date: Jun 2013
Location: West Lafayette, IN
Posts: 832
Year: 1999
Coachwork: Thomas
Engine: 3126
Rated Cap: 72
|
Re: The Journey Visvi 1999 Thomas MVP ER
Wow thanks Nat,
My rivets are 3/16, so I use a 3/16 Milwaukee Thunderbolt Black Oxide drill bit . I also use 3 in 1 oil to help keep the drill bit from getting to hot and take my time. I drill until I'm even with the piece the rivet is in, and then I can chisel the head off. Most times I can punch the rest of the rivet out too, if not I drill some more until it comes out.
I get about fifteen rivets before it starts to slow down being able to drill. The trick is to not drill too fast, heat is your enemy. I have a drill doctor, but can only get three sharpening before the bit does not work as well.
I never thought of wacking the screw, I use the magic flat screw method.
|
|
|
|
|
09-05-2013, 09:31 AM
|
#266
|
|
Bus Geek
Join Date: Aug 2011
Location: Stony Plain Alberta Canada
Posts: 2,937
Year: 1992
Coachwork: Bluebird
Chassis: TC2000 FE
Engine: 190hp 5.9 Cummins
Rated Cap: 72
|
Re: The Journey Visvi 1999 Thomas MVP ER
I too am removing rivets by the hundreds on my current project.
You are spot on about heat being your enemy when drilling. To avoid the mess of cutting oil, I've been cooling my bit every 5 to 10 rivets by just plunging the drill bit into the moist cool ground. While that one is cooling, I use my other drill to drill 5 or 10 more, then repeat.
I've been using a 3/16 Milwaukee Cobalt drill bit. They cost about $10 but I'm able to drill about 50 rivets before it stars drilling slower. I get over 200 rivets before its to dull to use any farther. Same as you, I drill into the rivet flush with the steel underneath, then hit with a flat cold chisel. Most times one hit is all it takes .
Ive been using my Dewalt 20 volt drills to power the bit. I can drill around 100 rivets per 3 ah battery. I also have Milwaukee 12 volt impacts and drills. I like them too.
Thanks for sharing
Nat
__________________
"Don't argue with stupid people. They will just drag you down to their level, and beat you up with experience."
Patently waiting for the apocalypses to level the playing field in this physiological game of life commonly known as Civilization
|
|
|
|
|
09-05-2013, 09:37 AM
|
#267
|
|
Bus Nut
Join Date: Jun 2013
Location: West Lafayette, IN
Posts: 832
Year: 1999
Coachwork: Thomas
Engine: 3126
Rated Cap: 72
|
Re: The Journey Visvi 1999 Thomas MVP ER
Quote:
|
Originally Posted by nat_ster
I too am removing rivets by the hundreds on my current project.
I've been using a 3/16 Milwaukee Cobalt drill bit. They cost about $10 but I'm able to drill about 50 rivets before it stars drilling slower. Nat
|
My Home Depot only has the $2.37 Black Oxide drill bit. I may have to look arund for the Milwaukee Cobalt drill bit, save me time sharpening drill bits.
My Milwaukee 12 volt drill started to smoke, so I switched to my corded drill. It has more power and makes drilling easier.
|
|
|
|
|
09-05-2013, 09:39 AM
|
#268
|
|
Bus Nut
Join Date: Jun 2013
Location: West Lafayette, IN
Posts: 832
Year: 1999
Coachwork: Thomas
Engine: 3126
Rated Cap: 72
|
Re: The Journey Visvi 1999 Thomas MVP ER
Quote:
|
Originally Posted by nat_ster
To avoid the mess of cutting oil, I've been cooling my bit every 5 to 10 rivets by just plunging the drill bit into the moist cool ground. While that one is cooling, I use my other drill to drill 5 or 10 more, then repeat.
Nat
|
I drilled a trough into the platic top of my ladder and fill it with oil and just dip the drill bit in every so often. I swear the bit drilles better with the oil.
|
|
|
|
|
09-05-2013, 10:06 AM
|
#269
|
|
Bus Crazy
Join Date: Feb 2009
Location: Austin, TX
Posts: 1,489
Year: 1996
Coachwork: Thomas
Chassis: International
Engine: DT466/AT545
|
Re: The Journey Visvi 1999 Thomas MVP ER
I used to work in a machine shop, and we always used oil or another form of liquid coolant/lubricant when cutting steel. The purpose is to cool the cutting edge, lubricate the non-cutting surfaces and chips, and wash away fine chips. Yes, it is messy and smokey, but it definitely helps you to drill faster and of course extends the life of the drill bit.
|
|
|
|
|
09-05-2013, 10:53 AM
|
#270
|
|
Bus Nut
Join Date: Jun 2013
Location: West Lafayette, IN
Posts: 832
Year: 1999
Coachwork: Thomas
Engine: 3126
Rated Cap: 72
|
Re: The Journey Visvi 1999 Thomas MVP ER
Ordered my Natures Head Composting Toilet today http://www.natureshead.net/ It is shipped from PA, so I should get it by Monday or Tuesday.
Since I don't need a black water tank, or any tank directly below my toilet. I may put my bathroom in the rear of the bus. My bedroom may only have a 5' wall making the bus look more open on the inside. Still playing around with this idea. It looks like I have plenty of room to run the drain for the shower and sink. My grey water tank will be forward of the rear axel. Fresh water will be under my bed.
|
|
|
|
|
09-05-2013, 04:00 PM
|
#271
|
|
Bus Nut
Join Date: Dec 2009
Location: MN
Posts: 732
Year: 1991
Coachwork: Wayne
Chassis: International 3800
Engine: DT466
Rated Cap: 72
|
Re: The Journey Visvi 1999 Thomas MVP ER
Awesome prgress!! So many little things, eh? It amazes me how many minor road blocks I have to deal with on any give project with the bus. I just keep visualizing the goal. Cool deal with the toilet! Ours will be a 5 gallon bucket for now, lol 
__________________
The journey is the destination...
Brutus
|
|
|
|
|
09-06-2013, 12:49 AM
|
#272
|
|
Bus Crazy
Join Date: Feb 2009
Location: Austin, TX
Posts: 1,489
Year: 1996
Coachwork: Thomas
Chassis: International
Engine: DT466/AT545
|
Re: The Journey Visvi 1999 Thomas MVP ER
Quote:
|
Originally Posted by JakeC
... Cool deal with the toilet! Ours will be a 5 gallon bucket for now, lol |
Hey man, the bucket toilet has been working great for me. The only time I have a problem is when the whole family is using it and the kids aren't covering thoroughly enough with the kitty litter. It can start to stink. But generally speaking, it has been working out great for me. I spend at least two or three evenings a week hanging out in my bus, sometimes with one of the kids, and my bucket toilet can go at least 2 weeks before I need to empty it under those circumstances. When camping with 5 people, though, it should really be emptied once a day.
|
|
|
|
|
09-06-2013, 07:57 PM
|
#273
|
|
Bus Nut
Join Date: Jun 2013
Location: West Lafayette, IN
Posts: 832
Year: 1999
Coachwork: Thomas
Engine: 3126
Rated Cap: 72
|
Re: The Journey Visvi 1999 Thomas MVP ER
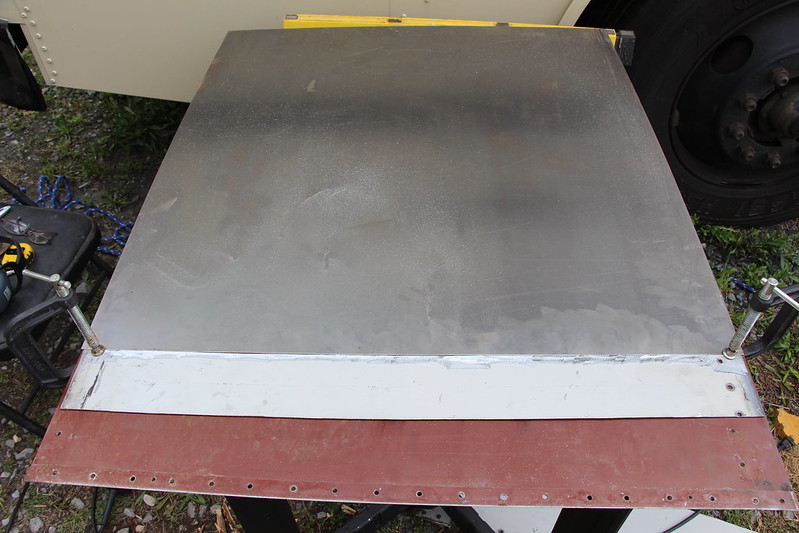
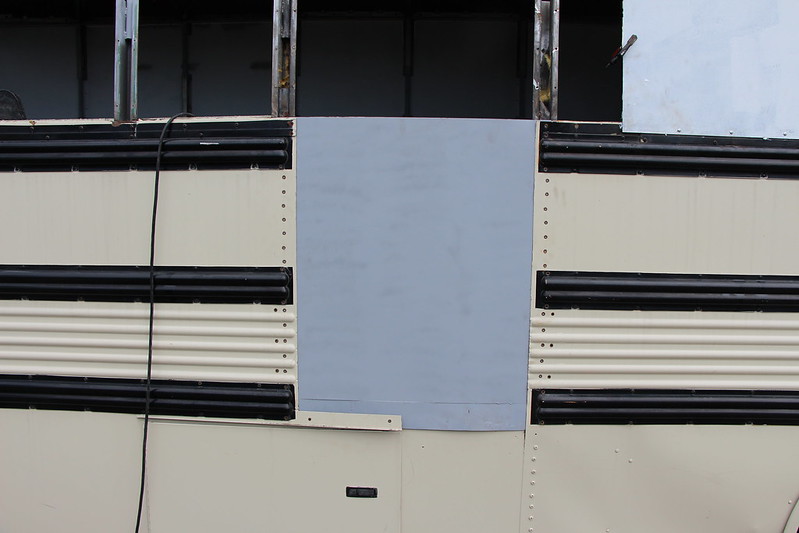
I got the rest of the new skin pre-drilled, all I have to do in the morning is clean and paint. I have six left, I hope to get them all done this weekend.
I was looking through my scrap steel for a piece to weld in as a window sill across the emergency door. Everything I have is too small. So I cut two pieces square and welded them together.
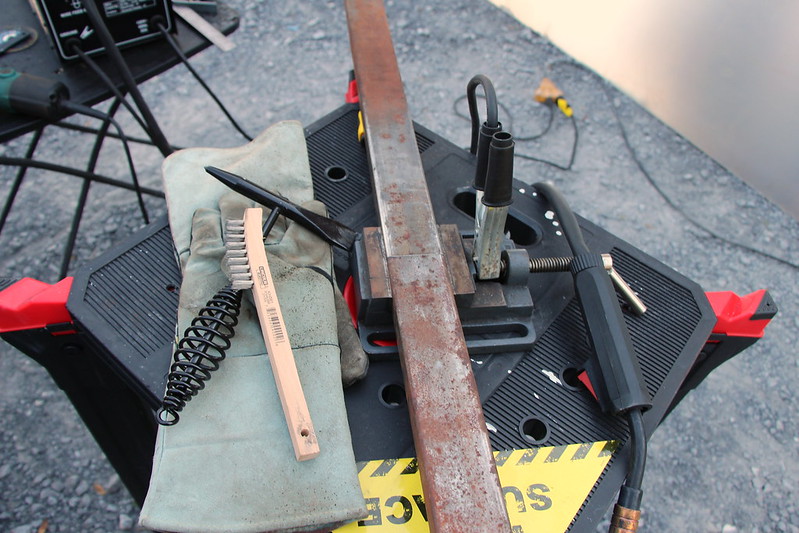
Cut and clamped together.
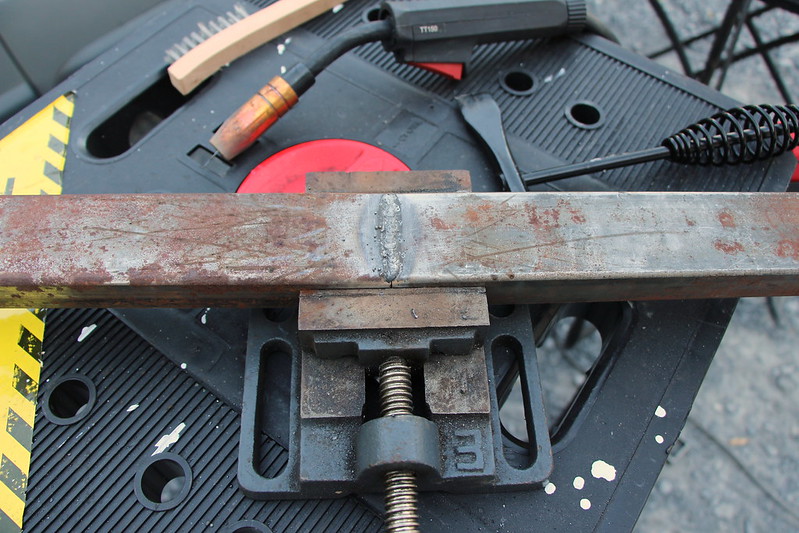
Welded up. I'm welding all four sides.
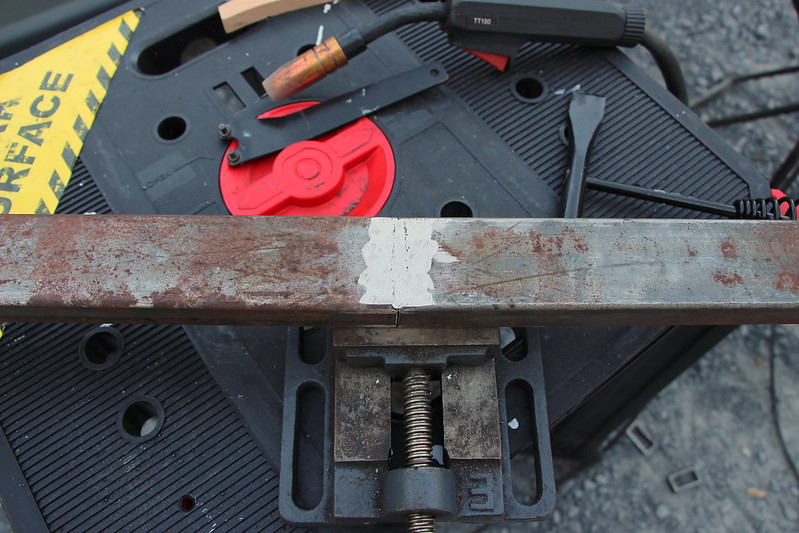
Ground down all nice purddy. I got good penetration. Then I cut it down to fit into the doorway.
Clamped up and ready to weld.
I'm getting the hang of this welding.
|
|
|
|
|
09-06-2013, 08:02 PM
|
#274
|
|
Bus Nut
Join Date: Jun 2013
Location: West Lafayette, IN
Posts: 832
Year: 1999
Coachwork: Thomas
Engine: 3126
Rated Cap: 72
|
Re: The Journey Visvi 1999 Thomas MVP ER
Also my new toilet came in today. To use it all I need is to run 12 volts and attach the vet hose.
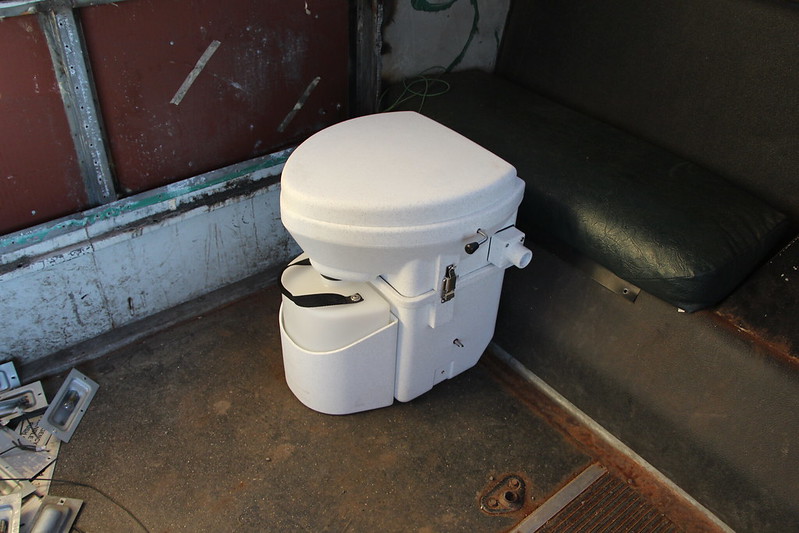
A couple full timing can go four weeks before changing out the holding tank. The urine bottle is 2.5 gallons. This one has a door that seals and allows you to use it standing up. Most composting toilets, you can't do this.
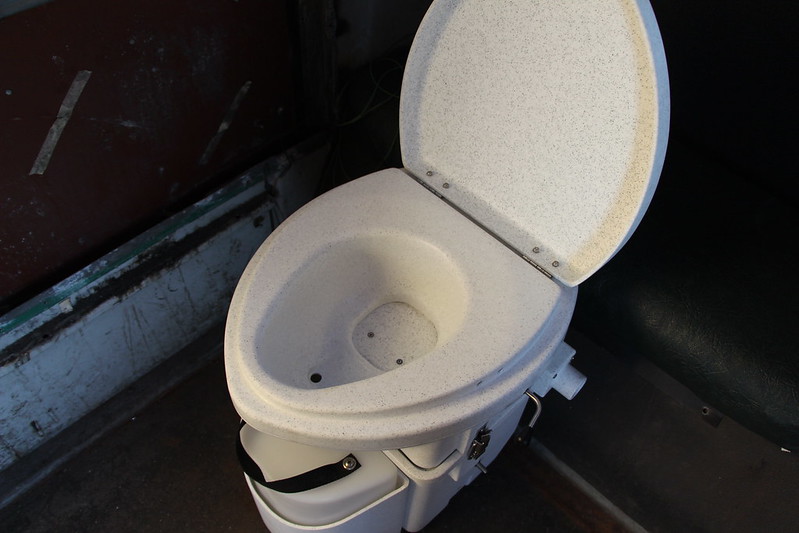
A number one.
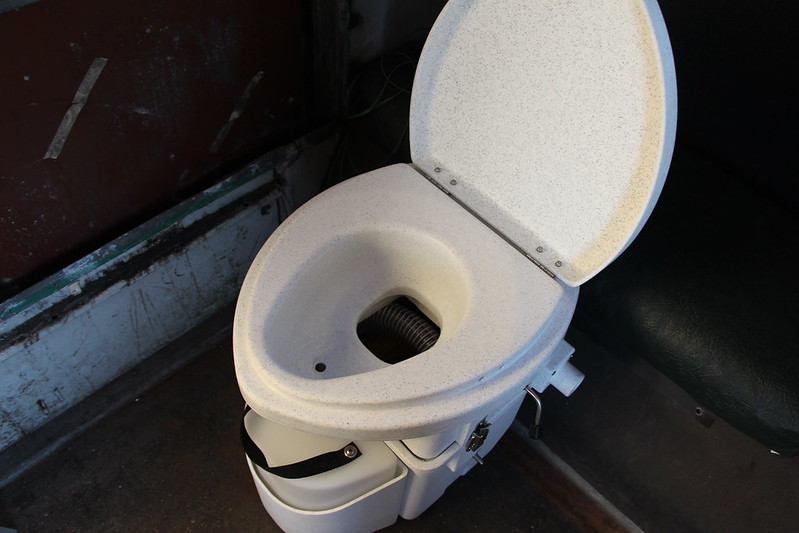
Flip lever for a number two.
This thing is solid, not flimsy at all.
|
|
|
|
|
09-08-2013, 07:05 PM
|
#275
|
|
Bus Nut
Join Date: Jun 2013
Location: West Lafayette, IN
Posts: 832
Year: 1999
Coachwork: Thomas
Engine: 3126
Rated Cap: 72
|
Re: The Journey Visvi 1999 Thomas MVP ER
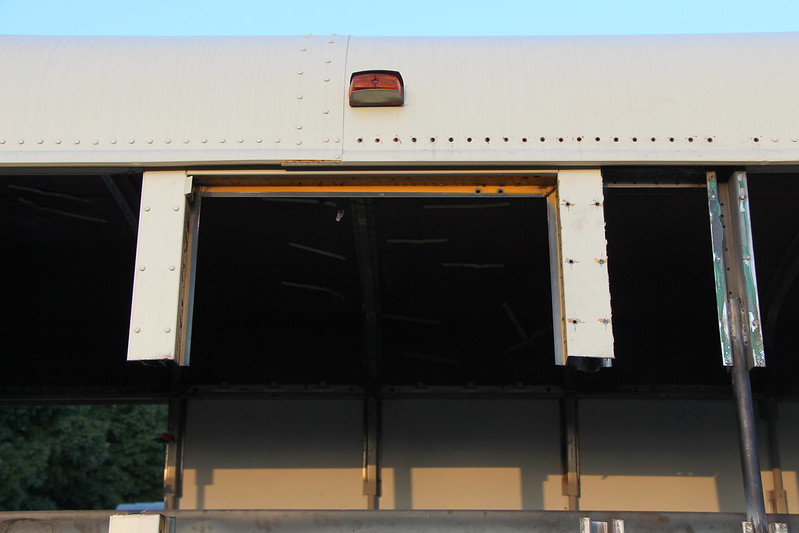
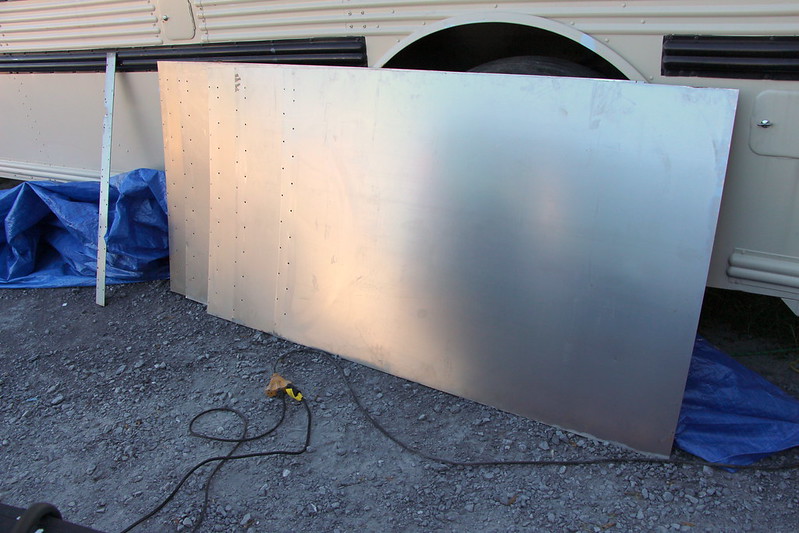
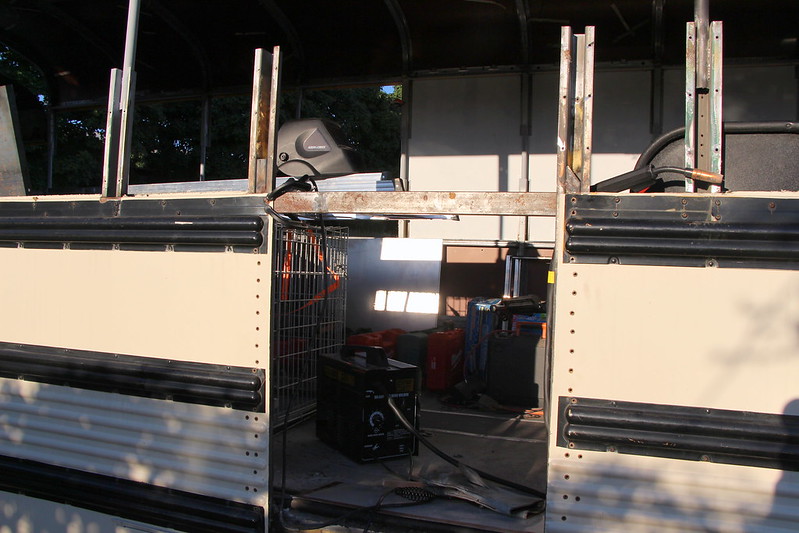
I got all the large panels cleaned and painted, ready to be put on. I need to cover the old emergency door before I can put on the next piece. The steel I have for the small front area is the correct width, but 3" to short.
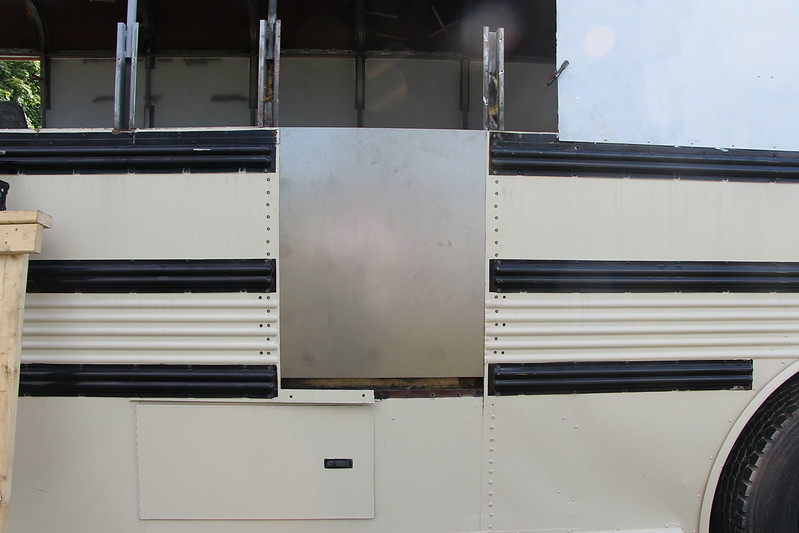
I have piece of scrap from the bus that will work. Just need to cut it down to size.
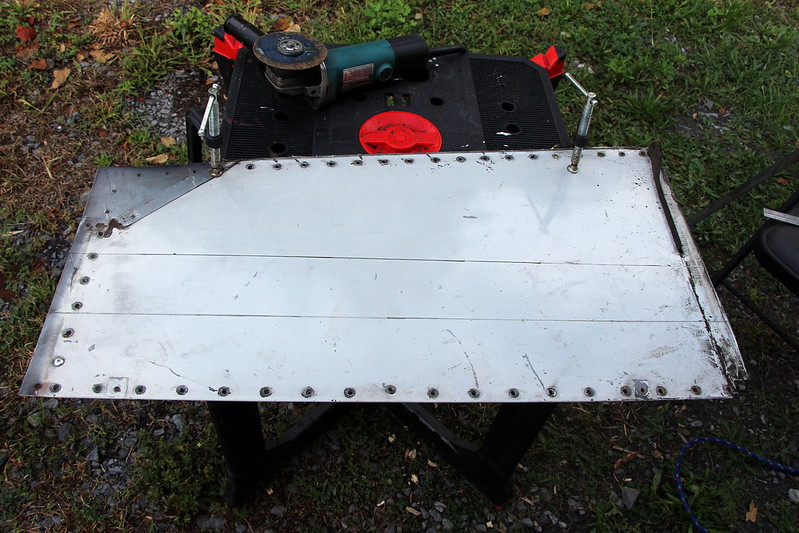
Clamp it to weld. This will be my first time welding 18ga together.
First few where ugly, but I got the hang of it.
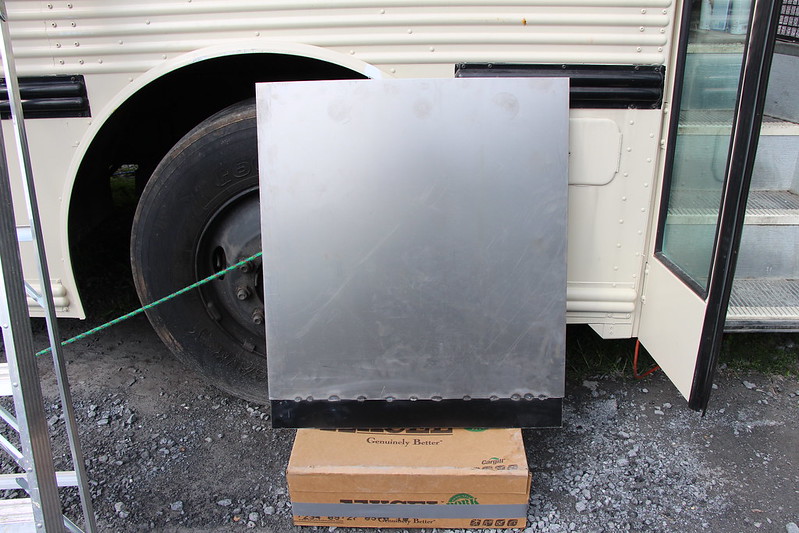
Fits nicely. Now time to start riveting.
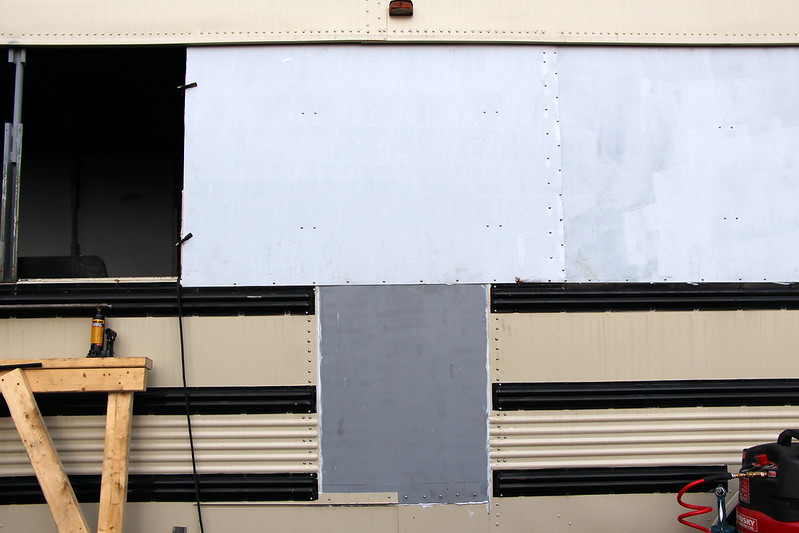
All riveted and the next panel up. I got five panels on this weekend, only one large panel left. I still have the two small front ones, but now I have to reorder one.
|
|
|
|
|
09-08-2013, 09:18 PM
|
#276
|
|
Bus Crazy
Join Date: Feb 2009
Location: Austin, TX
Posts: 1,489
Year: 1996
Coachwork: Thomas
Chassis: International
Engine: DT466/AT545
|
Re: The Journey Visvi 1999 Thomas MVP ER
It's starting to solidify! You're gonna be so psyched when you finally button that whole thing up. Are you going to try to find rub rail pieces to make the emergency door area blend in better?
|
|
|
|
|
09-08-2013, 09:45 PM
|
#277
|
|
Bus Nut
Join Date: Jun 2013
Location: West Lafayette, IN
Posts: 832
Year: 1999
Coachwork: Thomas
Engine: 3126
Rated Cap: 72
|
Re: The Journey Visvi 1999 Thomas MVP ER
Quote:
|
Originally Posted by Diesel Dan
It's starting to solidify! You're gonna be so psyched when you finally button that whole thing up. Are you going to try to find rub rail pieces to make the emergency door area blend in better?
|
We don't have salvage yards in Maryland, I will have to look out of state, but yes I want blend it in with rub rails.
|
|
|
|
|
09-09-2013, 05:48 AM
|
#278
|
|
Bus Geek
Join Date: Nov 2011
Location: MNT CITY TN
Posts: 5,158
|
Re: The Journey Visvi 1999 Thomas MVP ER
looking good!
__________________
Our build La Tortuga
Accept the challenges so that you can feel the exhilaration of victory.
George S. Patton
|
|
|
|
|
09-12-2013, 06:10 AM
|
#279
|
|
Skoolie
Join Date: Sep 2012
Location: Massachusetts.
Posts: 196
Year: 1999
Coachwork: Thomas
Chassis: Saf-t-liner
Engine: Cat 3126 - MD 3060
Rated Cap: 72
|
Re: The Journey Visvi 1999 Thomas MVP ER
Not keeping the side door I guess... I'm going to move mine 10 inches to the back and make stairs and extend it so you aren't crouching to get out. I guess we are all crazy.
|
|
|
|
|
09-12-2013, 09:14 AM
|
#280
|
|
Bus Nut
Join Date: Jun 2013
Location: West Lafayette, IN
Posts: 832
Year: 1999
Coachwork: Thomas
Engine: 3126
Rated Cap: 72
|
Re: The Journey Visvi 1999 Thomas MVP ER
Quote:
|
Originally Posted by ThePimentals
Not keeping the side door I guess... I'm going to move mine 10 inches to the back and make stairs and extend it so you aren't crouching to get out. I guess we are all crazy.
|
I'm keeping the rear as an emergency exit. The side door would be in the middle of my bed. When I think about it I will post a drawing on my layout. I'm leaning toward putting the bathroom in the back. The advantage of a composting toilet.
|
|
|
|
|
|
 Posting Rules
|
You may not post new threads
You may not post replies
You may not post attachments
You may not edit your posts
HTML code is Off
|
|
|
|
 » Recent Threads
 |
|
|
|
|
|
|
|
|
|
|
|
|
|
|
|
|
|
|
|
|
|
|
|
|
|
|
|
|
|
|
|
|
|
|
|
|
|


 Linear Mode

