 |
|
 04-21-2014, 09:49 AM
|
#721
|
|
Bus Nut
Join Date: Jul 2013
Location: Maryland / Boulder
Posts: 347
Year: 1999
Coachwork: Thomas Built
Chassis: Saf-T-Liner MVP ER
Engine: CAT 3126b Rotella-Chugger
Rated Cap: 72
|
Re: The Journey Visvi 1999 Thomas MVP ER
Quote:
|
Originally Posted by Redbear
I was kidding, of course. I expect they paid for a lot more for your troubles.
I used to be a "Chrysler guy" back in the slant six days when there were "GM guys" and "Ford guys." Each line had its own weaknesses. If I recall correctly, with Chrysler Corp. it was failing alternators and rust on the torsion bar front suspensions. I think the quality is down in the last 20 years. My brand-new '96 work van did not seem to have the quality I remembered from past eras.
|
Chrysler has had issues with quality ever since the mid 80's. They have had known design flaws that they refuse to fix (minivan transmissions, neutral safety switch, seat belt buckles, ball joints, tie rod ends, 2.7L v6 sludge issues) and have a history of not honoring valid warranty claims. We had a 1996 Dodge minivan; the trans went in 1999, numerous electrical issues with locks and lights, and it is the only vehicle me or my parents have bought in the last 22 years that has broken down; it was literally and figuratively falling apart by 120k miles. We have 4 cars now (Chevy, Hondas and BMWs) with 150k+ miles on them now with no breakdowns and just regular maintenance (except mine cause its 27 years old). Not trying to rag on American stuff but damn if the quality isn't disappointing. I hope it is better today what with the post-bailout "recovery" mentality but time will tell.
Every automaker has its problems but it seems like Chrysler LLC has more than others.
|

|

|
|
04-21-2014, 07:52 PM
|
#722
|
|
Bus Crazy
Join Date: Sep 2013
Location: Vacaville, Ca
Posts: 1,634
Year: 1988
Coachwork: Crown / Pusher
Engine: 8.3 Cummins
|
Re: The Journey Visvi 1999 Thomas MVP ER
Going back over your build did you use 16ga to skin over your window? if so now that it's done are you satisfied that you went that heavy or if you were to do it again would you go lighter?
Stuart
|
|
|
|
|
04-30-2014, 08:16 AM
|
#723
|
|
Bus Nut
Join Date: Jun 2013
Location: West Lafayette, IN
Posts: 832
Year: 1999
Coachwork: Thomas
Engine: 3126
Rated Cap: 72
|
Re: The Journey Visvi 1999 Thomas MVP ER
Quote:
|
Originally Posted by allwthrrider
Going back over your build did you use 16ga to skin over your window? if so now that it's done are you satisfied that you went that heavy or if you were to do it again would you go lighter?
Stuart
|
Hey Stuart,
Sorry for the delay, I have been away for a while. I used the same gauge that the bus used 18GA on the sides, 16GA on the roof.
So far so good, we will see how it does in the summer heat.
|
|
|
|
|
05-08-2014, 08:54 AM
|
#724
|
|
Bus Nut
Join Date: Jun 2013
Location: West Lafayette, IN
Posts: 832
Year: 1999
Coachwork: Thomas
Engine: 3126
Rated Cap: 72
|
Re: The Journey Visvi 1999 Thomas MVP ER
I was out last weekend. Went to RI with a friend to help him pick up his new $80.000 RV. It is a Big Foot, nice RV, found a few things I might use in my bus and a few I wont do.
I finally got back to the bus yesterday only to discover that I had left the light on for the past week. The batteries are way dead. I have a Sure Power 1314 battery separator; it will sense if the bus battery is below 12 VDC and connect the house battery to help when you turn on the start key. Problem is you need at least 5 VDC for it to work.
You can put in a bypass switch. I will need to do this and hook it up to the house batteries.
So I had to jumper that signal from the start key switch to the house battery to get the battery separator to connect the house battery in and the bus started right up. I drove it home and plugged the bus in and let the batteries charge over night. I disconnected the bus and let it set for two hours as I got ready and the bus batteries still were able to start the bus.
|
|
|
|
|
05-20-2014, 08:00 AM
|
#725
|
|
Bus Nut
Join Date: Jun 2013
Location: West Lafayette, IN
Posts: 832
Year: 1999
Coachwork: Thomas
Engine: 3126
Rated Cap: 72
|
Re: The Journey Visvi 1999 Thomas MVP ER
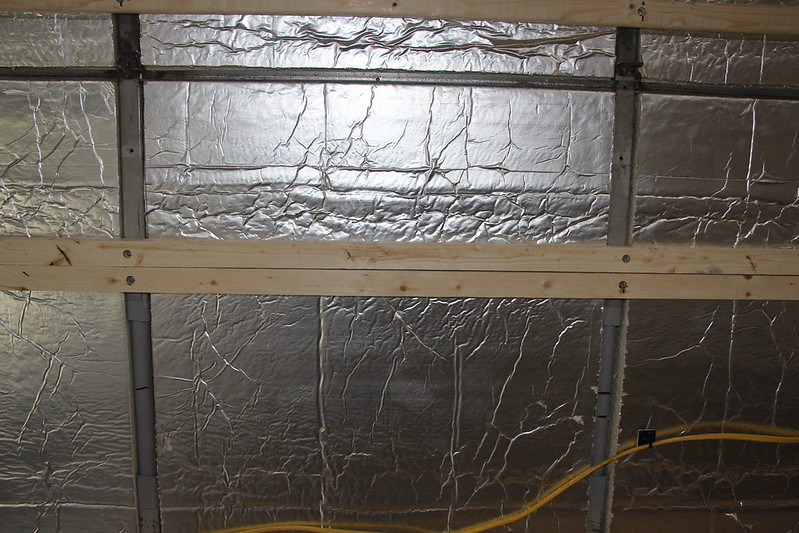
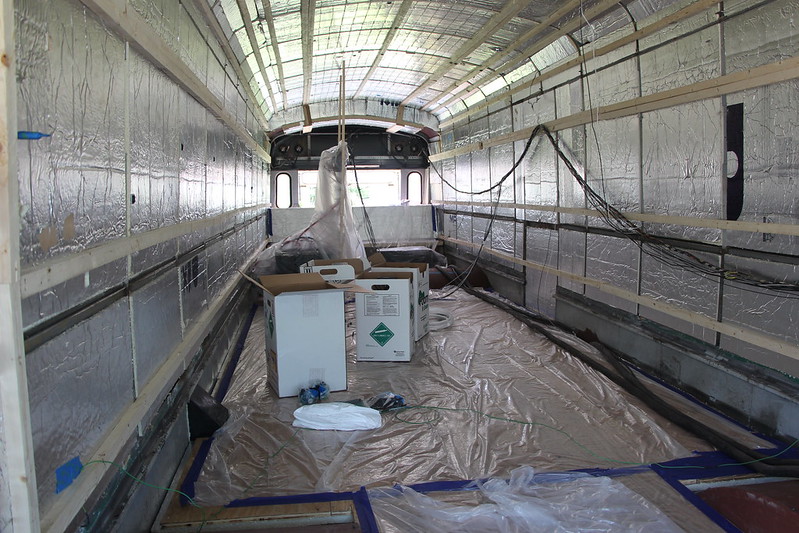
This past month I have been working to finish the insulation. I had to pull up the floor to add 2 x4 cut down to 2" and screwed to the steel floor. Then re-cut the 2" of foam board to fit between.

Then lay another 1" of fowm board down and screw the sub floor into the cut down 2 x 4's.

Then slowly worked my way to the front of the bus.

I got it all done but the last 2 ft. Then I started cutting down 2 x4's to 1". I used these to run the lenght of the bus, screwing into the steel support with self-tapping #10 screws. Anything I attach to the walls or ceiling will be sturdy. I will sray foam up to them and attach the 1/4 plywood for the walls and ceiling to them.
I have more photo's I need to get off my camera. I'm almost done, only have 5 boards left to go. I ordered the spray foam kits and have a three day weekend to get'er done.
This will give me R-18 on the floor and R-20 on the walls and ceiling.
|
|
|
|
|
05-20-2014, 09:01 AM
|
#726
|
|
Bus Nut
Join Date: Jul 2012
Location: Olympia, Washington
Posts: 557
Year: 87
Coachwork: Wayne
Chassis: International s1700
Engine: 6.9 internatiional
Rated Cap: 65
|
Re: The Journey Visvi 1999 Thomas MVP ER
your bus looks very well insulated, i like it
|
|
|
|
|
05-20-2014, 09:08 AM
|
#727
|
|
Bus Crazy
Join Date: Feb 2009
Location: Austin, TX
Posts: 1,489
Year: 1996
Coachwork: Thomas
Chassis: International
Engine: DT466/AT545
|
Re: The Journey Visvi 1999 Thomas MVP ER
Impressive insulation job there! I suppose that is the way to go, especially if you are full-timing off-grid. Rock on! 
|
|
|
|
|
05-21-2014, 09:02 AM
|
#728
|
|
Bus Nut
Join Date: Jun 2013
Location: West Lafayette, IN
Posts: 832
Year: 1999
Coachwork: Thomas
Engine: 3126
Rated Cap: 72
|
Re: The Journey Visvi 1999 Thomas MVP ER
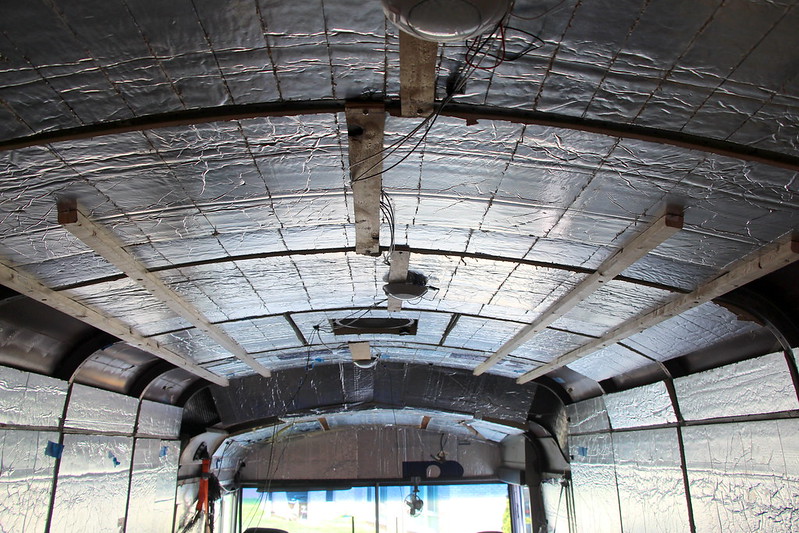
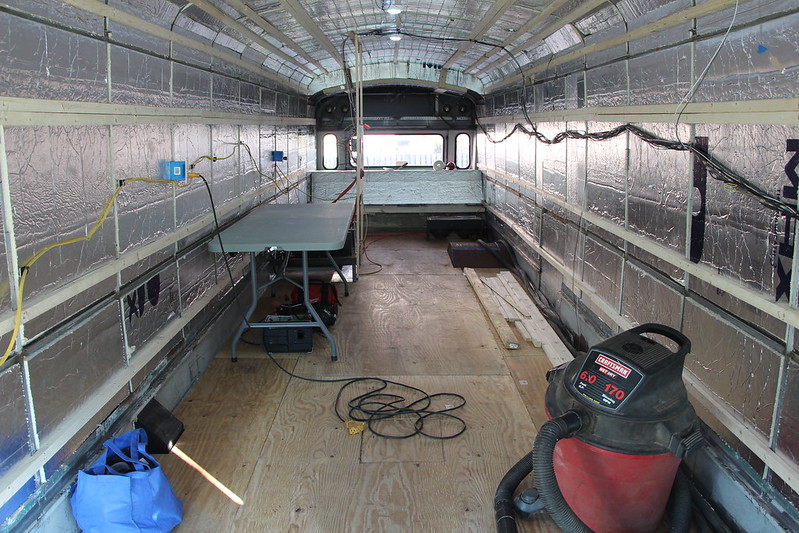
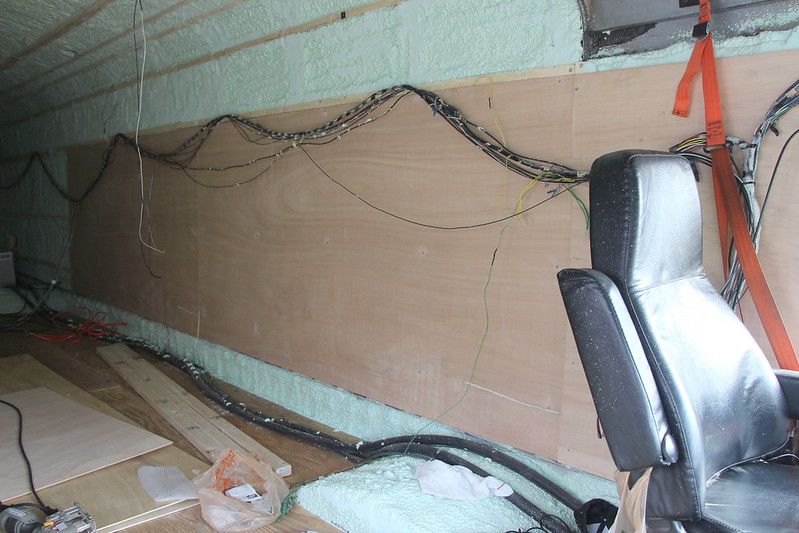
Here is a better photo of the ceiling and walls.
I have the 1" strips setup so I can put one full size 4 x 8 1/4" plywood down the center and from the floor up. That leaves a 46" 4 x 8 on each side where the curve is.
I drilled and counter sunk the holes for the #10 1.5" self tapping screws.

I screwed them in at each support.
When I screw the plywood to them, anything I attach, I hope, should hold.
|
|
|
|
|
05-21-2014, 04:44 PM
|
#729
|
|
Bus Nut
Join Date: May 2012
Location: Kelso, WA
Posts: 253
Year: 1989
Coachwork: Carpenter
Chassis: International 3800
Engine: DT360
Rated Cap: 72
|
Re: The Journey Visvi 1999 Thomas MVP ER
Way to go, that's gonna be a cozy home.
__________________
"That's,. like,.. your opinion, man...." - the Dude.
|
|
|
|
|
05-21-2014, 06:16 PM
|
#730
|
|
Bus Nut
Join Date: Jul 2013
Location: Maryland / Boulder
Posts: 347
Year: 1999
Coachwork: Thomas Built
Chassis: Saf-T-Liner MVP ER
Engine: CAT 3126b Rotella-Chugger
Rated Cap: 72
|
Re: The Journey Visvi 1999 Thomas MVP ER
This is pretty much how I did the plywood walls in mine, you should be good. I did 1" (actual) thick 1x3s horizontally across the walls every 18" and used the same self-tapping #10 screws. Once ply was on it it feels sturdy as a brick wall.
Looks real good. Mine is a bit more slapped together because I had a deadline / no money, but yours should be top-notch when done!
Also I still have your riveter. Let me know when you want it back 
|
|
|
|
|
05-23-2014, 08:23 PM
|
#731
|
|
Bus Nut
Join Date: Jun 2013
Location: West Lafayette, IN
Posts: 832
Year: 1999
Coachwork: Thomas
Engine: 3126
Rated Cap: 72
|
Re: The Journey Visvi 1999 Thomas MVP ER
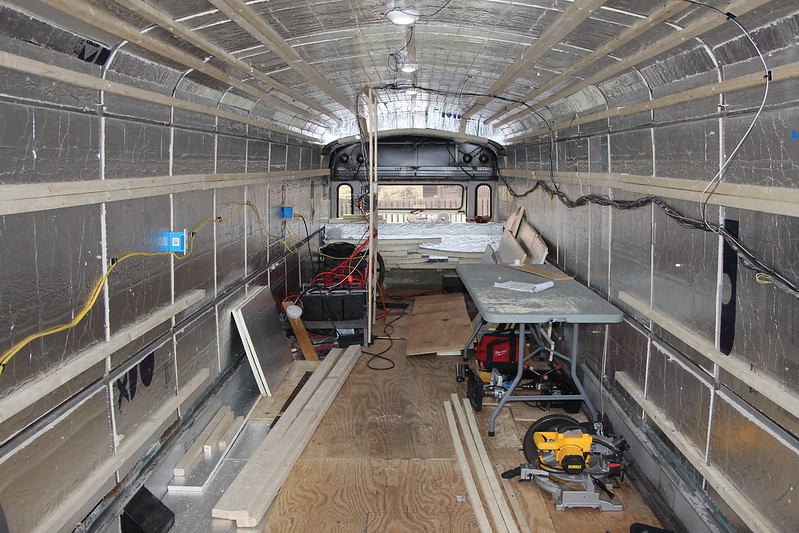
Got the last of the things done so I can start spray foam tomorrow.
I still had to finish out the last two feet of the floor. I had to work around the passenger seat support.
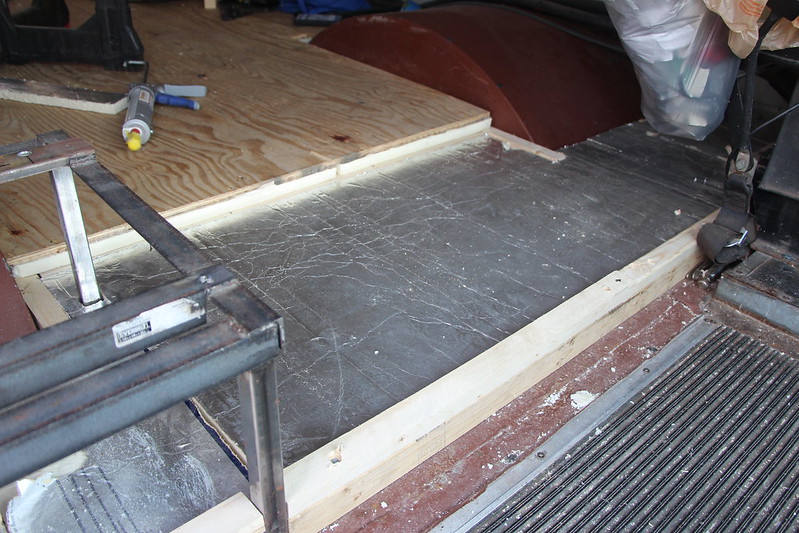
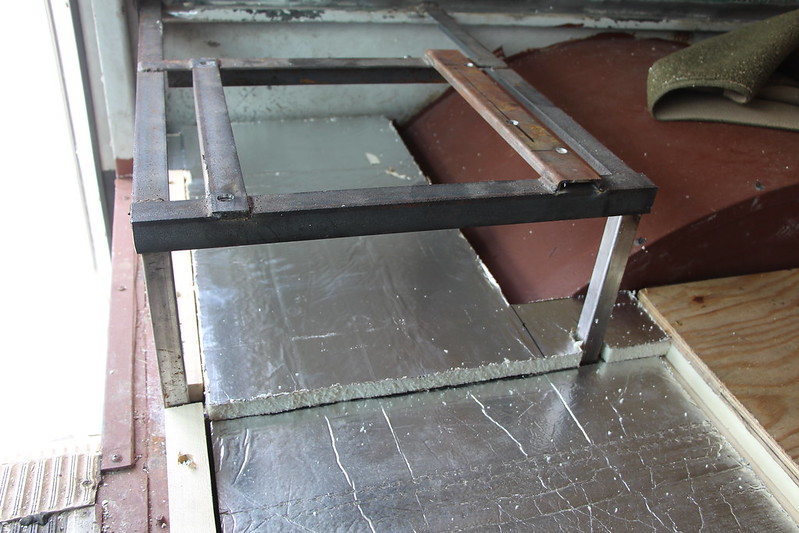
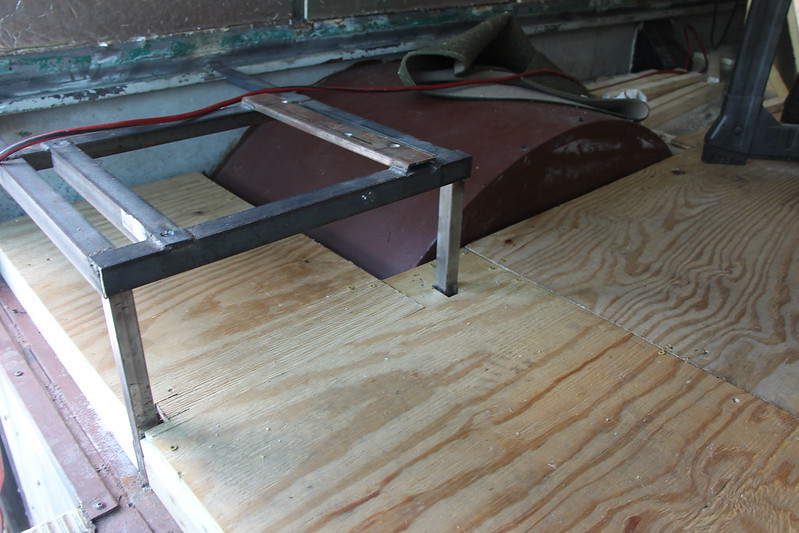
Now the sub floor is complete with 3" ig isulation.
I also finished up the last of the framing on the walls and ceiling.
Looks like I have good weather to get'r done tomorrow. In case you are wondering about the wheel wells, I'm going to spray foam over them. I could not figure a way to get the foam board to curve around them, so I use the keep it simple stupid method, or kiss.
|
|
|
|
|
05-26-2014, 06:39 PM
|
#732
|
|
Bus Nut
Join Date: Jun 2013
Location: West Lafayette, IN
Posts: 832
Year: 1999
Coachwork: Thomas
Engine: 3126
Rated Cap: 72
|
Re: The Journey Visvi 1999 Thomas MVP ER
Got a lot done and made a few mistakes a long the way.
Saturday, I started out by finishing the framing where my front windows will go. I ran the framing vertically so it would not be in the way of cutting out the window.
The rest of the morning was spent covering everything I did not wont spray foamed.
Now time to suit up and spray. The Foam It Green 600 sq ft kit http://www.sprayfoamkit.com/land/kit_602.html comes with a suit, gloves, goggles and shoe covers. The only other thing I needed was a respirator, which I have, just needed to get the required filters.
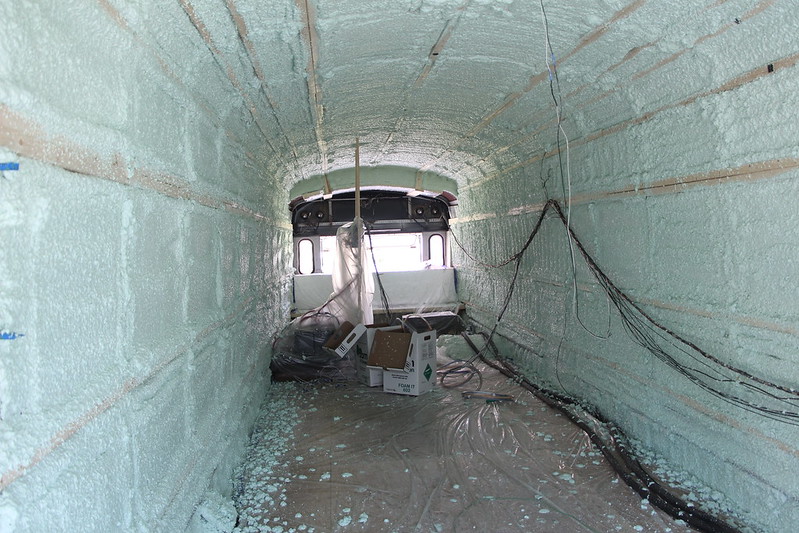
They have you start on the ceiling first while you have the most pressure, then the walls. I just had enough to finish. It took about 2.5 hours to spray 600 sq ft. The first hour was the hardest, until I got use to it.
Sunday, I spent cutting down the foam that was over sprayed. I tried every blade I had for my Reciprocating Saw, none of them would work. I had read somewhere where someone had used an angle grinder with a wire wheel. This worked well and fast, just very messy. I was covered in foam dust about an inch thick and when I took a shower later found foam dust in places it should not be. it took about an hour and three shop vac fulls to get the bus clean again. I started to hang the 1/4 ply wood on my walls. and up from where the windows will go.
It is fitting nice. I can get three sheets of 4 x 8 plywood right up to the self of the engine.
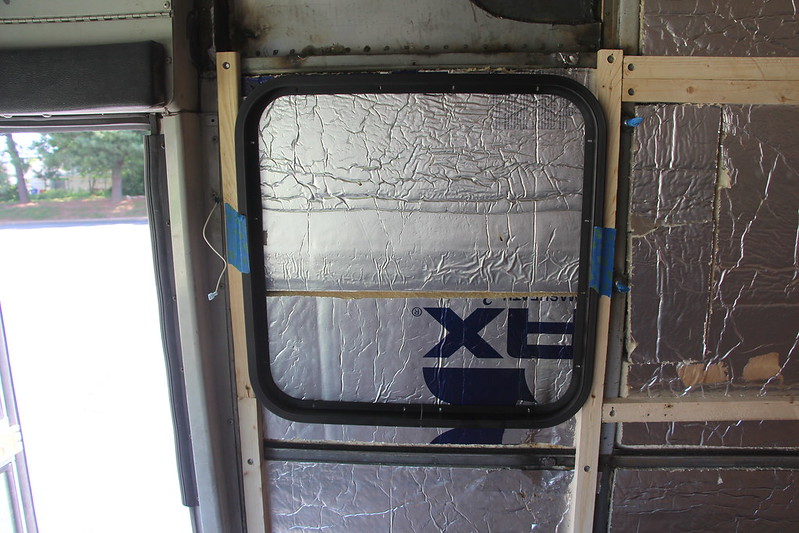
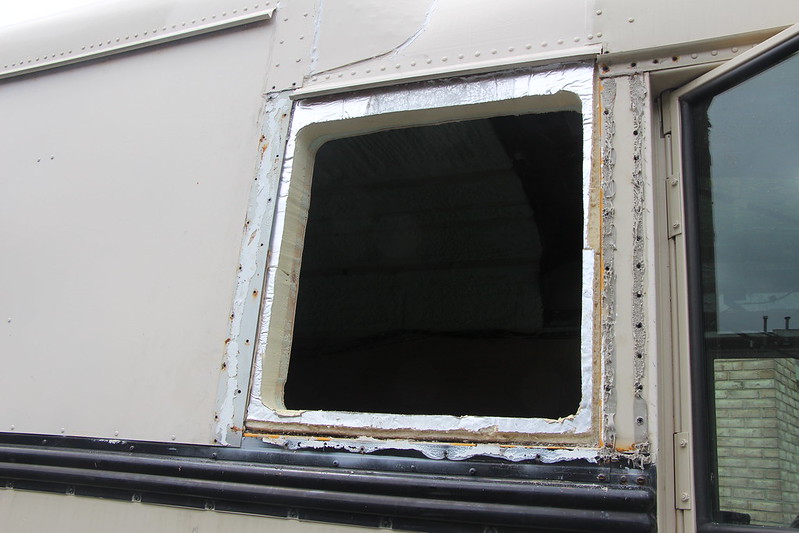
Monday, I decided to put my windows in.  this is where things did not work out as planned.
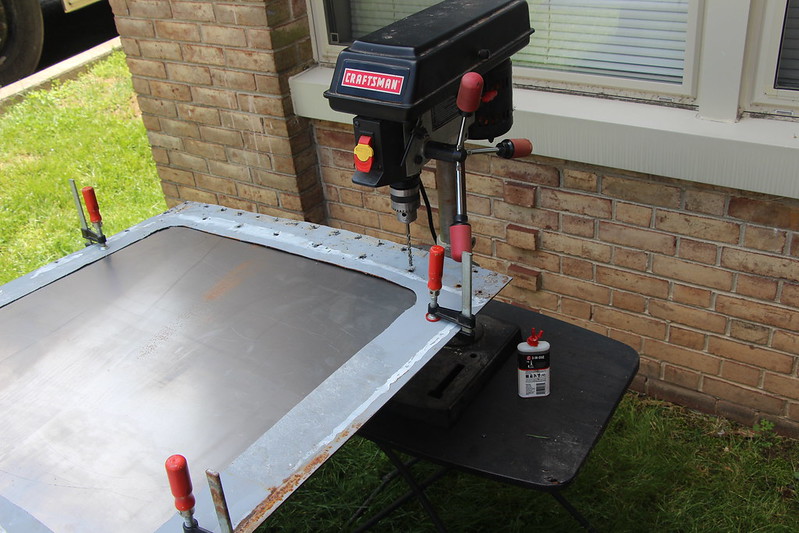
I asked the guy who made my windows how big to cut the holes for the corners. He said 3" radius. No problem I have a 3" hole saw. I ran some tape and marked the outline of the window. Measured where the pilot drill bit will go and was off drilling out my window.
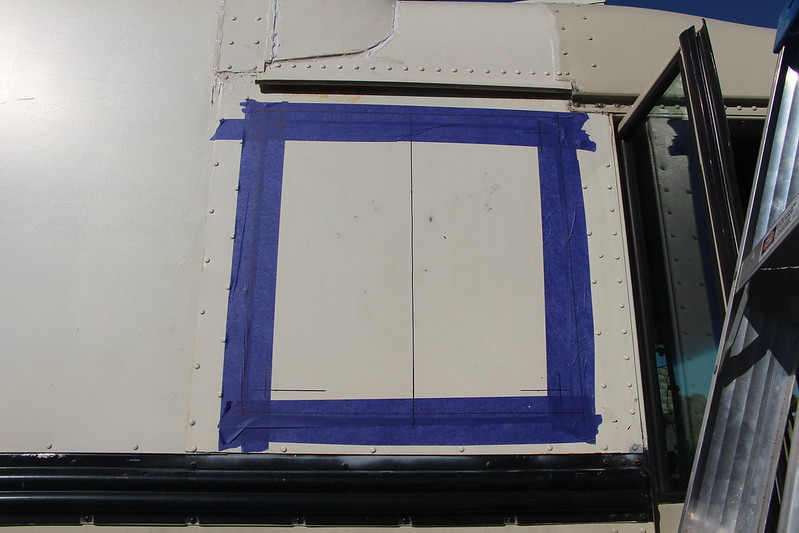
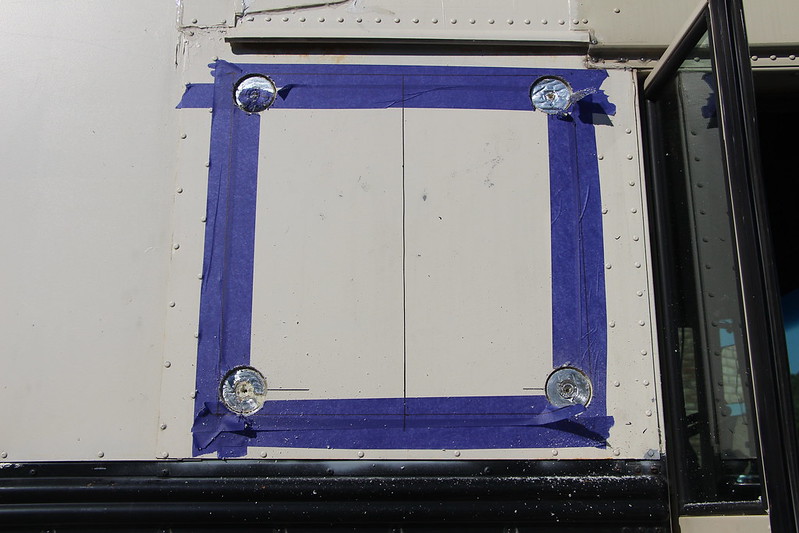
Used a 1/4 bit and drilled all the way through so I could use the hole saw on the inside.
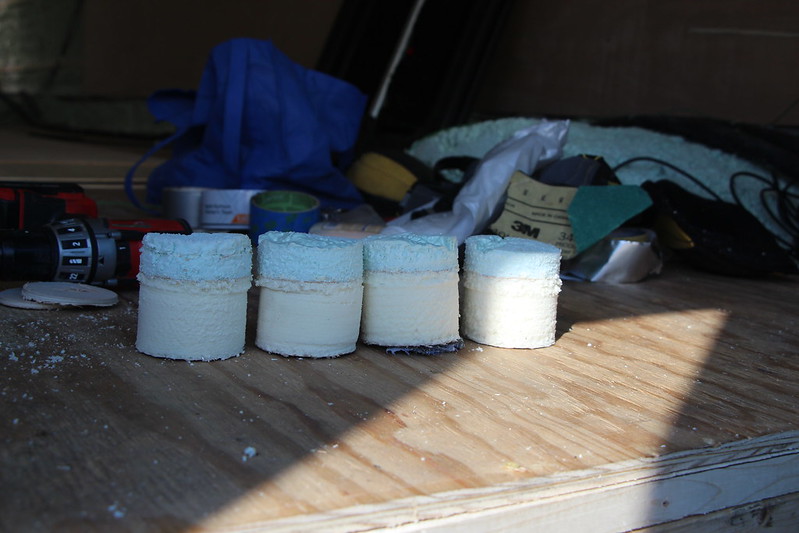
My deep drilling core samples
Easy peasy, just connect the dots with the Reciprocating Saw.
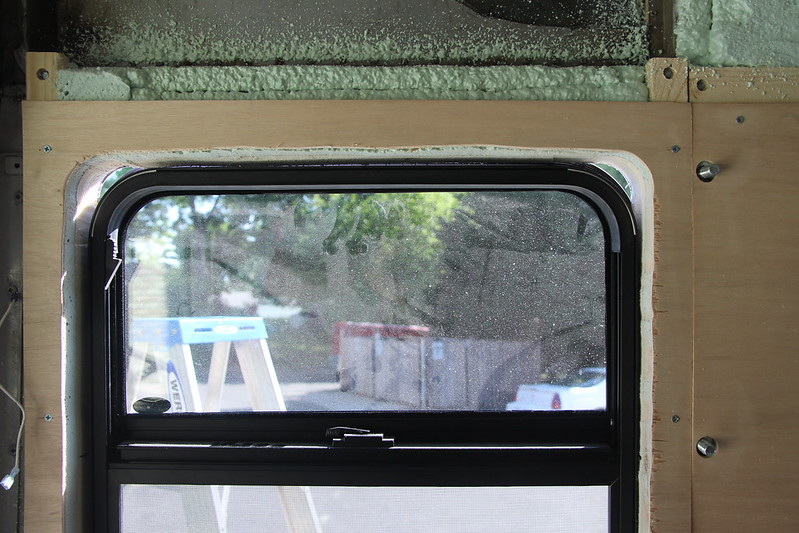
What, wait the window does not fit. $#@%&*@ He said 3" radius.Oh know *&($#@ that is a 6" hole. Lucky for me this is all within one of the small sheets of steel I hung after raising the roof. I can order the exact same size and use this sheet as a template to pre-drill then re-attach. I also have left over 1/4 plywood from the sheet I cut this section out to re-cover the inside. I can pre-cut the window re-attach and fill in the space with a can of the spray foam from Home Depot. Once I get this window all worked out the rest should go a little better. I also had to order a 6" hole saw blade. Next time I'm using my jig saw instead of the Reciprocating Saw. It is hard to make straight line cuts with it.
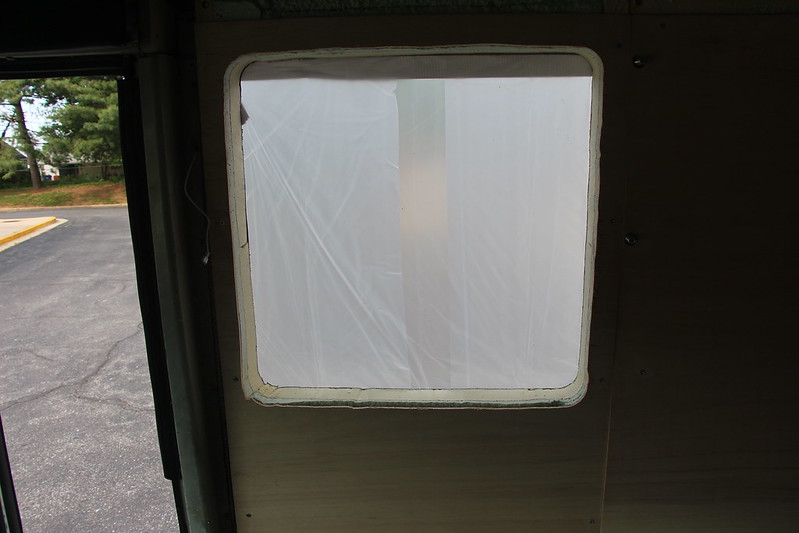
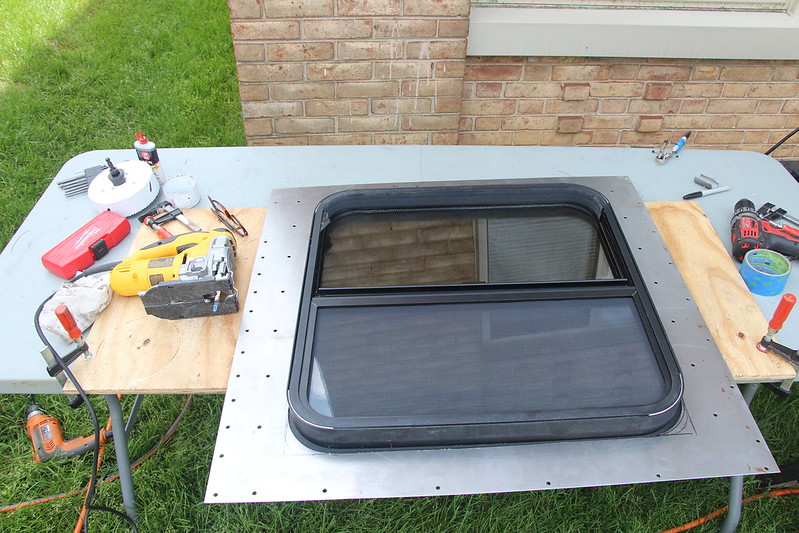
All that work and this is what I have now.
I spent the rest of the afternoon figuring out how to put a window AC unit in the back to run while parked.
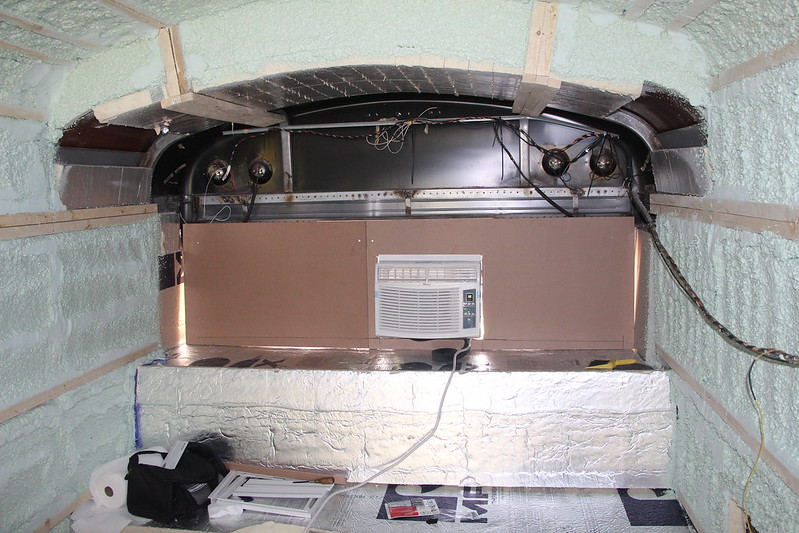
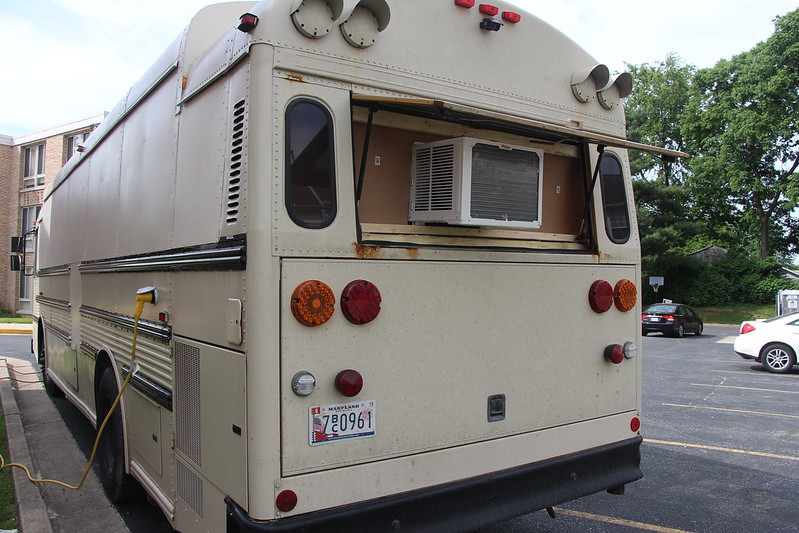
I got it installed by 3:00 PM, it was 92 outside, 88 inside, after running an hour it was 72 inside. Works nice and is quite.
That is enough damage for one weekend Hopefully I can get the hole saw by this weekend and do the window right.
|
|
|
|
|
05-26-2014, 09:55 PM
|
#733
|
|
Bus Geek
Join Date: Mar 2011
Location: Houston, Texas
Posts: 8,462
Year: 1946
Coachwork: Chevrolet/Wayne
Chassis: 1- 1/2 ton
Engine: Cummins 4BT
Rated Cap: 15
|
Re: The Journey Visvi 1999 Thomas MVP ER
Outstanding job on the insulation --- Should be about as temperature stable inside as a skoolie can be. Might oughta' re-name the "Cooler".
|
|
|
|
|
05-27-2014, 06:11 PM
|
#734
|
|
Bus Nut
Join Date: Jun 2013
Location: West Lafayette, IN
Posts: 832
Year: 1999
Coachwork: Thomas
Engine: 3126
Rated Cap: 72
|
Re: The Journey Visvi 1999 Thomas MVP ER
I have been trying to decide how I want to do the interior. I have a layout, but I don't know what colors I want to use. Until I came upon this website.
http://www.majesticbus.co.uk/majestic-bus.html
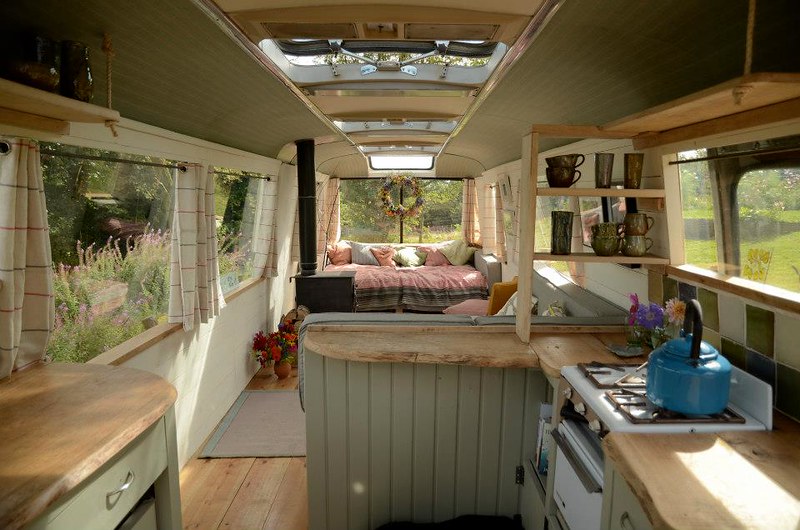
They have fabric on the ceiling that the pattern looks like bead board. I want to use bead board. I like the cream on the walls and green on the ceiling and cabinets, with the wood counter tops. I even like the tile on the back splash. I wont have this many windows, but I like how it looks. I might even change the cream to a very light shade of the same green used on the cabinets.
|
|
|
|
|
05-29-2014, 08:48 PM
|
#735
|
|
Bus Nut
Join Date: May 2012
Location: Kelso, WA
Posts: 253
Year: 1989
Coachwork: Carpenter
Chassis: International 3800
Engine: DT360
Rated Cap: 72
|
Re: The Journey Visvi 1999 Thomas MVP ER
Can't go wrong there, beautifully balanced with the wood and color. The windows in that thing are huge!
__________________
"That's,. like,.. your opinion, man...." - the Dude.
|
|
|
|
|
05-30-2014, 08:40 AM
|
#736
|
|
Bus Crazy
Join Date: Feb 2009
Location: Austin, TX
Posts: 1,489
Year: 1996
Coachwork: Thomas
Chassis: International
Engine: DT466/AT545
|
Re: The Journey Visvi 1999 Thomas MVP ER
I like those colors a lot!
|
|
|
|
|
05-30-2014, 09:01 AM
|
#737
|
|
Bus Nut
Join Date: Jun 2013
Location: West Lafayette, IN
Posts: 832
Year: 1999
Coachwork: Thomas
Engine: 3126
Rated Cap: 72
|
Re: The Journey Visvi 1999 Thomas MVP ER
I wish I could keep my bus as open as this floor plan, but I will need storage.
Oh and a bathroom
|
|
|
|
|
05-31-2014, 03:08 PM
|
#738
|
|
Bus Crazy
Join Date: Apr 2008
Location: Bakersfield, California
Posts: 1,013
Year: 1976
Coachwork: Crown
Chassis: Supercoach
Engine: Detroit 6-71 Mid-Ship Mounted
Rated Cap: 79 at Birth
|
Re: The Journey Visvi 1999 Thomas MVP ER
Great job on the insulation...everything looks super!
|
|
|
|
|
06-02-2014, 09:19 AM
|
#739
|
|
Bus Nut
Join Date: Jun 2013
Location: West Lafayette, IN
Posts: 832
Year: 1999
Coachwork: Thomas
Engine: 3126
Rated Cap: 72
|
Re: The Journey Visvi 1999 Thomas MVP ER
Got the new steel to replace the one I cut wrong for the window. I even got my riveter back from porkchop. Nice meeting up with him again. We have been talking about how hard would it be to add an AC unit from like an old suburban to our bus.
Here we are, back to drilling out rivets, one of my favorite things to do. This panel had about 46 of them holding it in.
The silicone caulk I used to seal behind the steel work good. I had a heck of a time getting it to break lose to get the old steel off. I bent the steel getting it off, so I had to straighten it back out so I can use it as a template to drill the new.
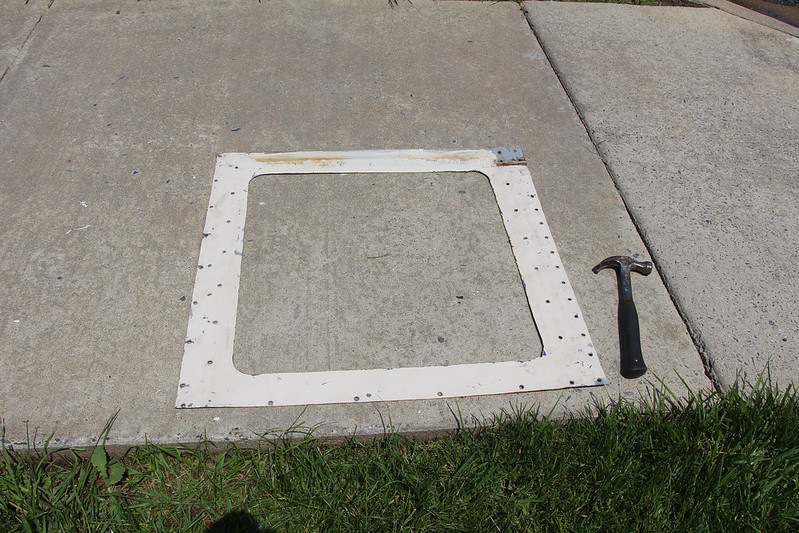
I was able to use my razor scraper to get all the goop off.
All cleaned up.
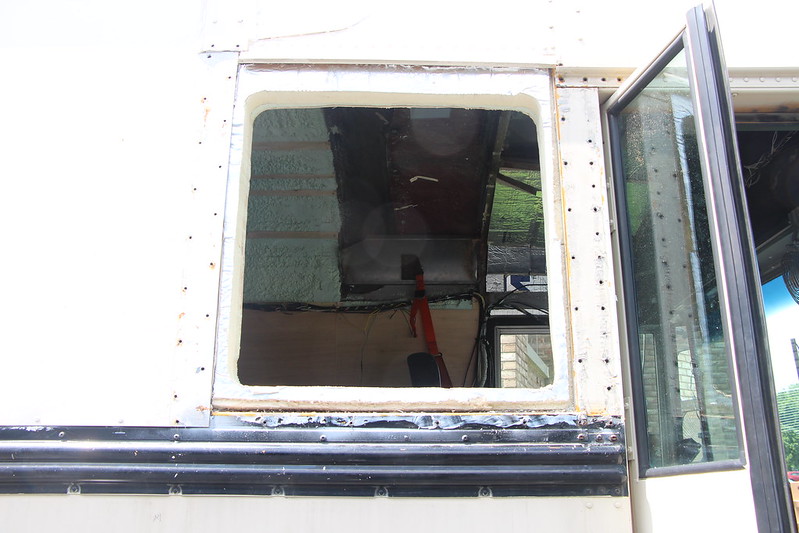
Then I drilled the new steel. Now time to cut the new hole for the window. I tried to use the 6 hole saw, but it would not cut the steel.
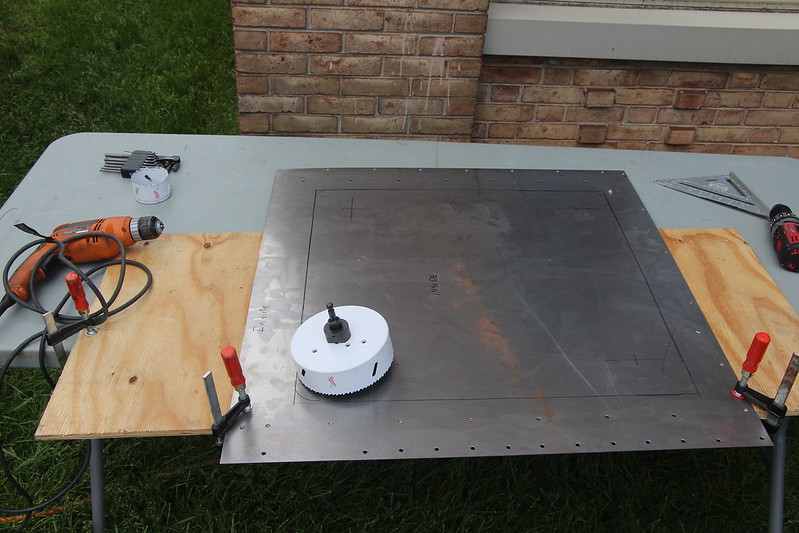
So on to plan two, using my jig saw.
Worked like a champ, and the window fits perfectly. I had to put back together the "Re-Skinning Steel Raising Machine" to get the steel back up and aligned. Now we have a successfull window install.

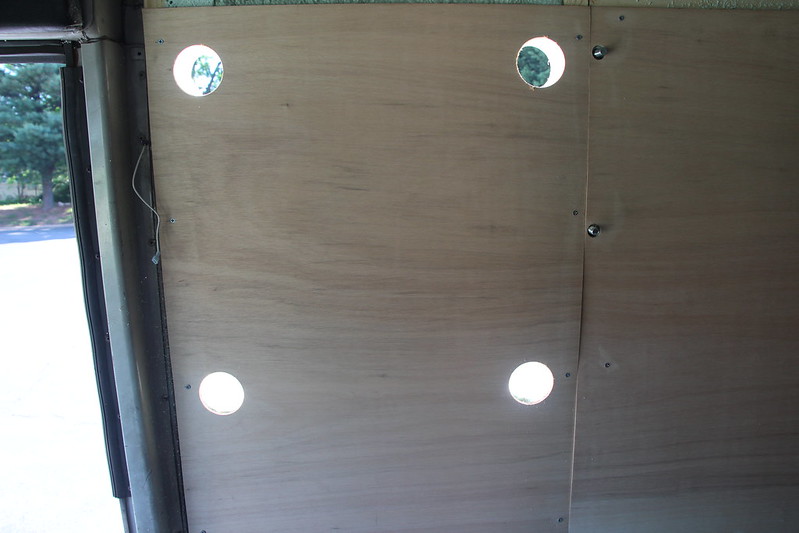
I taped amd marked the drivers side, then drilled through where the center points for the corners are. This is used to align the inside to the outside.

Then it was just a matter of cutting the outside and then the inside with the jigsaw. I did use my 6 hole saw on the inside corners. It will cut through ¼ plywood.

|
|
|
|
|
06-02-2014, 09:32 AM
|
#740
|
|
Bus Nut
Join Date: Jun 2013
Location: West Lafayette, IN
Posts: 832
Year: 1999
Coachwork: Thomas
Engine: 3126
Rated Cap: 72
|
Re: The Journey Visvi 1999 Thomas MVP ER
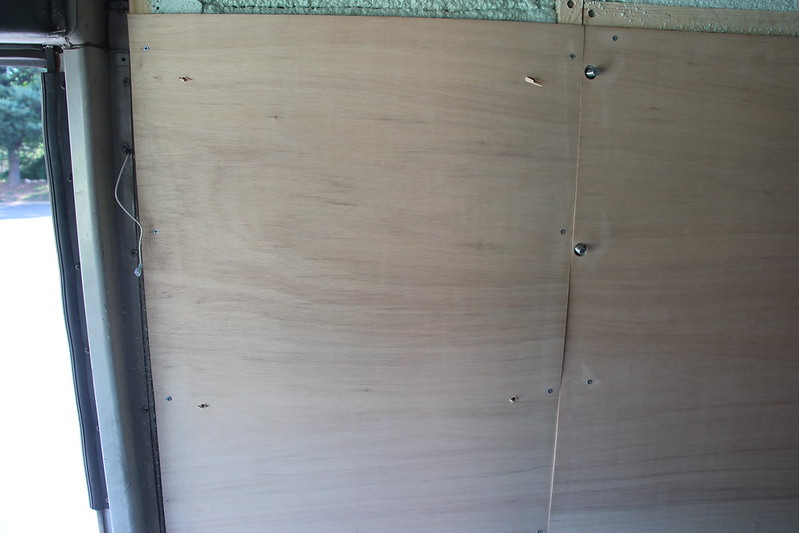
I spent the rest of the weekend putting up the walls and ceiling.
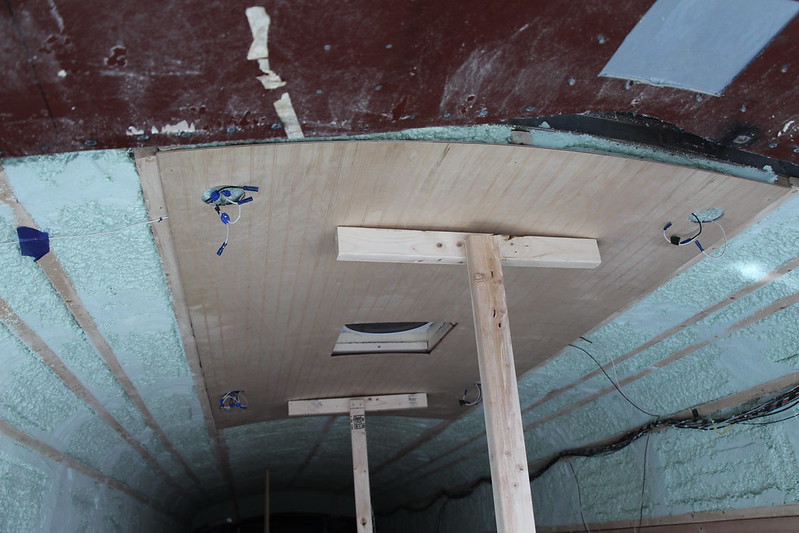
I came up with an easy tool to help hold the ceiling 4 x 8 bead board up. These are an inch shy of the peak of the ceiling.
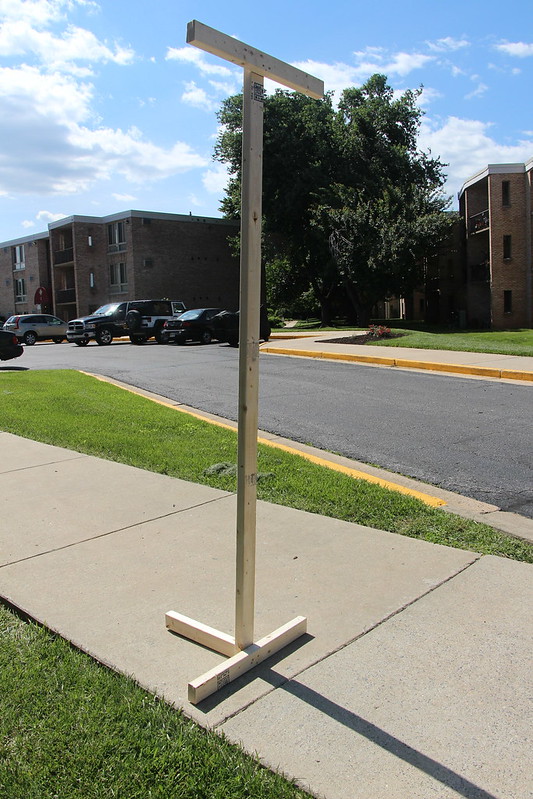
I was able to stand one up and lift the bead board up and onto it. Then I had to use my foot to pick up the second support and wedge it at the other end. Then it was matter of aligning it and screwing it in, simple.
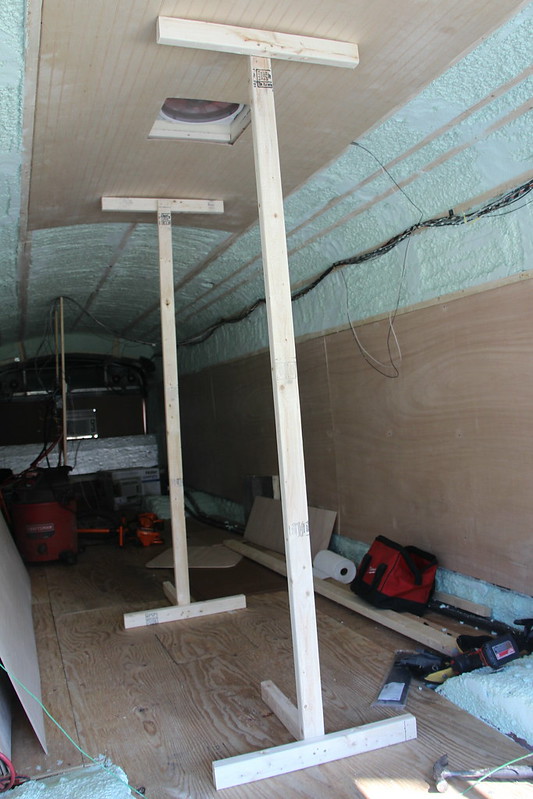
Shoot, I still have to figure out where my lights are going to go. Then run the electrical for them and mark the bead board and cut the holes and whew! A lot I forgot. I figured this was going really easy.
This slowed progress. I got all but the bedroom area done.
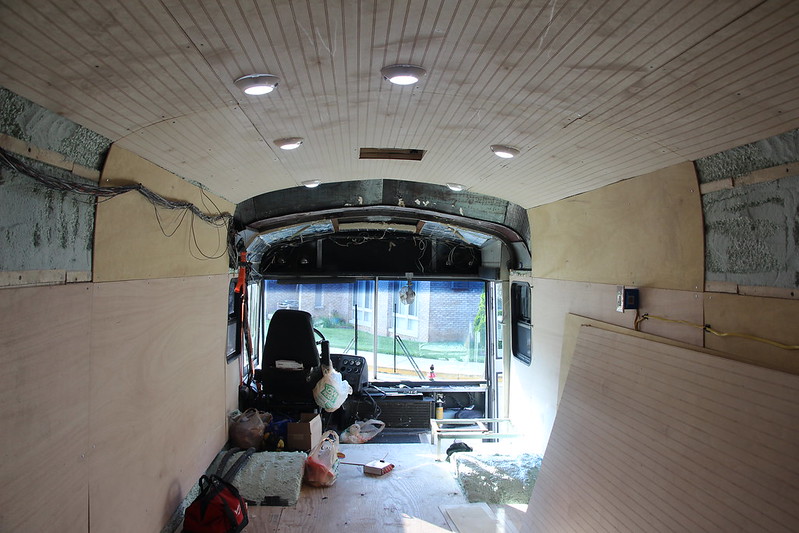
This is how it looks from the back. I could not get the ¼ boards to bend to the curve, so I cut then and screwed them as is. I will have to come up with some kind of molding to cover where they meet.
|
|
|
|
|
|
 Posting Rules
|
You may not post new threads
You may not post replies
You may not post attachments
You may not edit your posts
HTML code is Off
|
|
|
|
 » Recent Threads
 |
|
|
|
|
|
|
|
|
|
|
|
|
|
|
|
|
|
|
|
|
|
|
|
|
|
|
|
|
|
|
|
|
|
|
|
|
|


 Linear Mode

