|
|
 05-03-2017, 02:32 PM
|
#81
|
|
Bus Geek
Join Date: Sep 2014
Location: Eustis FLORIDA
Posts: 23,764
Year: 1999
Coachwork: Thomas
Chassis: Freighliner FS65
Engine: Cat 3126
Rated Cap: 15
|
Quote:
Originally Posted by mysty

Oh boy, I kind of stumped the local sheet metal fabricators...
I called about some metal for the front end of the bus, but they aren't able to fold the top of the metal around the curve of the roofline without it buckling. They said they can probably do a hammerlock seam to connect a strip of metal at a 90 degree angle to the edge, and then solder it together, but that's going to take some hours of labor and will end up costing around $300.
They suggested we might be able to spot weld a strip to the edge and then weld the seam up? I'm not sure how pretty that would be, and they don't do welding.
I'm still wondering if my diy idea would work - cut the sheet a little bigger than we need, then make cuts into the curve to create tabs and fold them down into a flange. Then I could cover them with fiberglass to smooth the corners and make it all watertight.
Any thoughts?  |
Take a look at my build thread- you can do it. We used 3 pieces cut to size, then laid them over the bus and stitch welded them in place. A little sealant and they're good to go.
The metal will curve perfectly, all you have to do is be patient and trim it carefully.
Any folding or tabs or any of that you do is gonna make wrinkles and buckle it in places.
If my thread doesn't show you what you need to know watch MuddaEarth's video on his roof cap section.
|

|

|
|
05-03-2017, 02:57 PM
|
#82
|
|
Bus Crazy
Join Date: Feb 2012
Location: Salt Lake City Utah
Posts: 1,635
Year: 2000
Chassis: Blue Bird
Engine: ISC 8.3
|
Quote:
Originally Posted by mysty
I'm still wondering if my diy idea would work - cut the sheet a little bigger than we need, then make cuts into the curve to create tabs and fold them down into a flange. Then I could cover them with fiberglass to smooth the corners and make it all watertight.
|
You're talking about something to cover the vertical space between where the roof used to sit and where it now sits above the windshield, right? In other words, the gap above the 8-way flashers panel shown in this picture I scraped from one of your earlier posts:
Quote:
Originally Posted by mysty
|
Since that body panel already fits the roof curve nicely, you could cut across the middle of it so that the nicely-formed part goes up to the roof, the bottom stays down at the windshield, and you have only to insert flat sheet metal to fill the space between.
Failing that, it's possible to create a panel by hand with compound curves like what I think you're envisioning. The beginning is just like the diy idea you proposed: cut a flat sheet a little bigger than you need. But instead of notching and creating tabs, you'd start slowly bending it over with a mallet. As the bend progresses you have to cause the metal to shrink to take up the slack (otherwise you get buckling). There's definitely an art to it, and though I've watched it done on Youtube I haven't actually tried it myself yet. I'm just putting the idea out there in case it sounds like a fun challenge to learn to do.
|
|
|
|
|
05-03-2017, 10:41 PM
|
#83
|
|
Mini-Skoolie
Join Date: Dec 2014
Location: Raleigh NC
Posts: 33
Year: 2001
Coachwork: Blue Bird
Chassis: 3800
Engine: DT466E
|
Quote:
Originally Posted by mysty
Lesson of the day - don't forget ear protection! I am trying to get the exterior stripped, sanded, and prepped for priming, so I'm spending lots of quality time with a grinder and wheel brush plus a sander/polisher. The sander is actually not so bad, but the grinder vibrates like crazy and is really, really loud. So now I've been sitting inside for about 15 minutes and my hands are STILL buzzing and my ears are STILL ringing. (Not sure what to do for my hands, but I should have really known better than to grind without ear protection!) 
Anyway, we're making progress, but it feels so slow! Does everyone else just paint over the yellow? I was worried my paint job would look bad if I didn't strip the old paint first - you can still see old lettering under the paint, so they must have repainted the bus at least once before, and I didn't want two sets of lettering showing through my new paint job. (The top layer was vinyl, which I pulled off, but I'm pretty sure the older lettering was stenciled on with paint.)
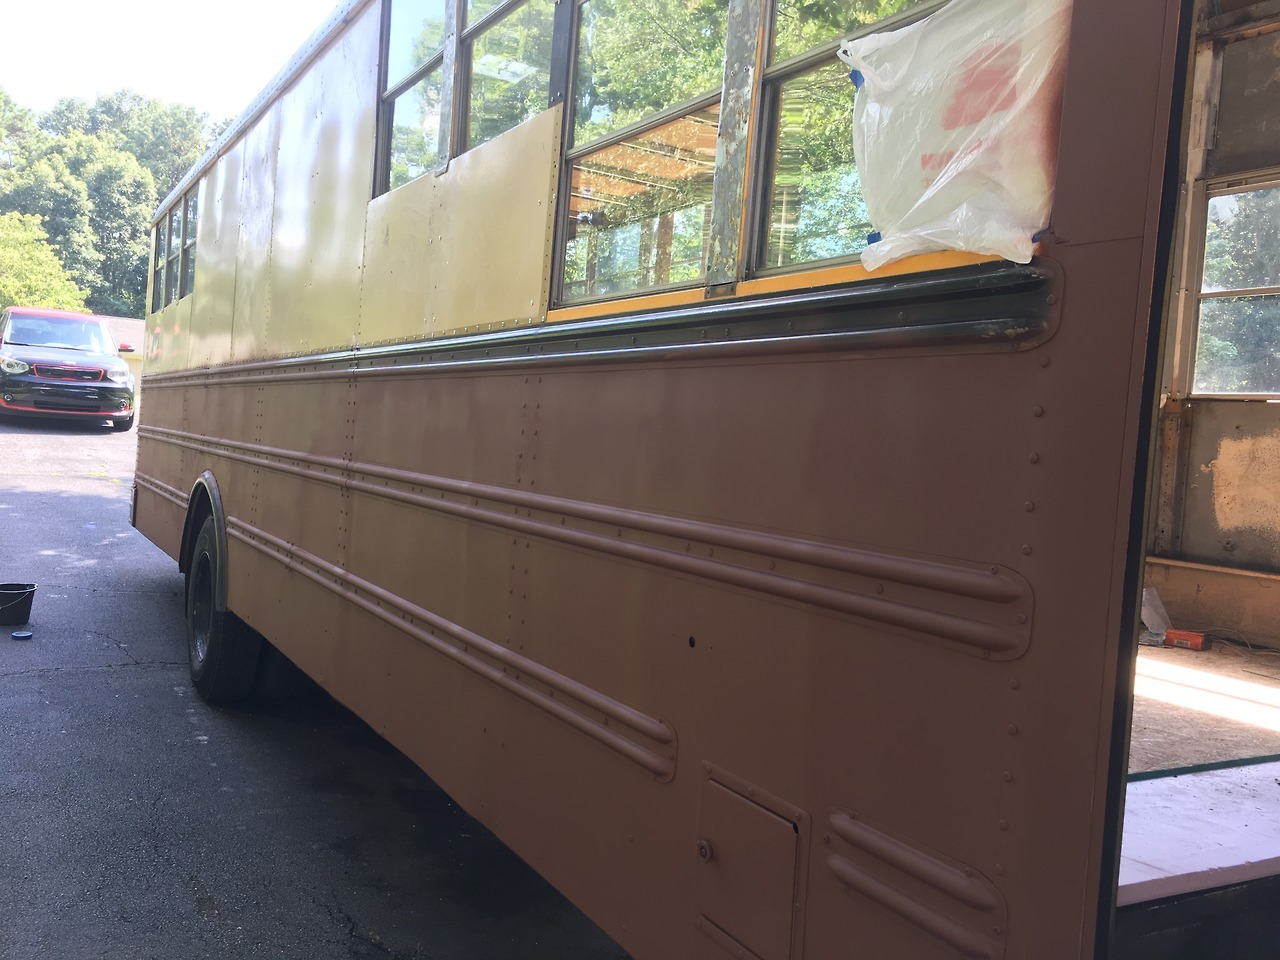
Also, I want to go ahead and prime the bus now to protect the metal and to get it looking less "school bus" and more "rv-ish" (someone finally called the county on us, and while I'm not technically violating the no commercial vehicle code, the officer said it still looks like a school bus, so that's an issue...), but I don't want to do the final paint job until I figure out where my access panels are going for things I plan to put under the bus. Is it ok to leave it simply primed for a few weeks? |
Hey for me the grinder wheel vibrating the hell out of you can be fixed by loosening the handle that tightens on the side. Just give it little turn to loosen it so it's not on perfectly tight and its much much smoother to work with.
|
|
|
|
|
05-04-2017, 01:20 AM
|
#84
|
|
Skoolie
Join Date: Apr 2016
Location: Marietta, GA
Posts: 192
|
Quote:
Originally Posted by family wagon
Failing that, it's possible to create a panel by hand with compound curves like what I think you're envisioning.
|
Yeah, hammering is certainly one way to go. In order to get that rounded corner on the rear end of the bus, I hammered the steel over a plank of wood clamped to a table. The wood had just enough give to not create sharp corners. There was definitely some trial and error with it.
I did buy a body and fender set with several hammers including one that's labeled a "shrinking hammer," but I'm really not sure how it's supposed to work. I haven't found a good tutorial video yet.
|
|
|
|
|
05-04-2017, 01:24 AM
|
#85
|
|
Skoolie
Join Date: Apr 2016
Location: Marietta, GA
Posts: 192
|
Quote:
Originally Posted by djthe3rd
Hey for me the grinder wheel vibrating the hell out of you can be fixed by loosening the handle that tightens on the side. Just give it little turn to loosen it so it's not on perfectly tight and its much much smoother to work with.
|
I tried not using the handle at all, and just grabbing the body of the grinder itself, but it still made my hands buzz like crazy. I switched to another grinder with a different wire wheel on it, and that one was much smoother, for whatever reason. It's still coming along, but wow, is there a lot of surface on a bus!
|
|
|
|
|
05-04-2017, 09:07 AM
|
#86
|
|
Bus Crazy
Join Date: Feb 2012
Location: Salt Lake City Utah
Posts: 1,635
Year: 2000
Chassis: Blue Bird
Engine: ISC 8.3
|
Quote:
Originally Posted by mysty
I did buy a body and fender set with several hammers including one that's labeled a "shrinking hammer," but I'm really not sure how it's supposed to work. I haven't found a good tutorial video yet.
|
I've enjoyed watching Youtube videos "Metal Shaping with Lazze" and clips from Ron Covell as well. They do amazing things with sheet.
As I understand it, the waffle-grid shrinking hammer is supposed to take a flat sheet and make a whole bunch of tiny corrugations. That makes the metal effectively thicker and narrower. How one gets rid of the waffle-grid print in the metal I'm not sure.. planishing hammer maybe, but with light strokes so that the metal doesn't spread back out again?
Wood mallets seem to be popular for shrinking too. I just found this little Youtube clip. This person transforms a disc into a bowl; it seems like the same basic operation with the difference being they do it along a circular path whereas you'd do it along an arc, almost a straight line in comparison to this small-diameter circle.
|
|
|
|
|
05-11-2017, 01:33 PM
|
#87
|
|
Skoolie
Join Date: Apr 2016
Location: Marietta, GA
Posts: 192
|
Quote:
Originally Posted by family wagon
Since that body panel already fits the roof curve nicely, you could cut across the middle of it so that the nicely-formed part goes up to the roof, the bottom stays down at the windshield, and you have only to insert flat sheet metal to fill the space between.
|
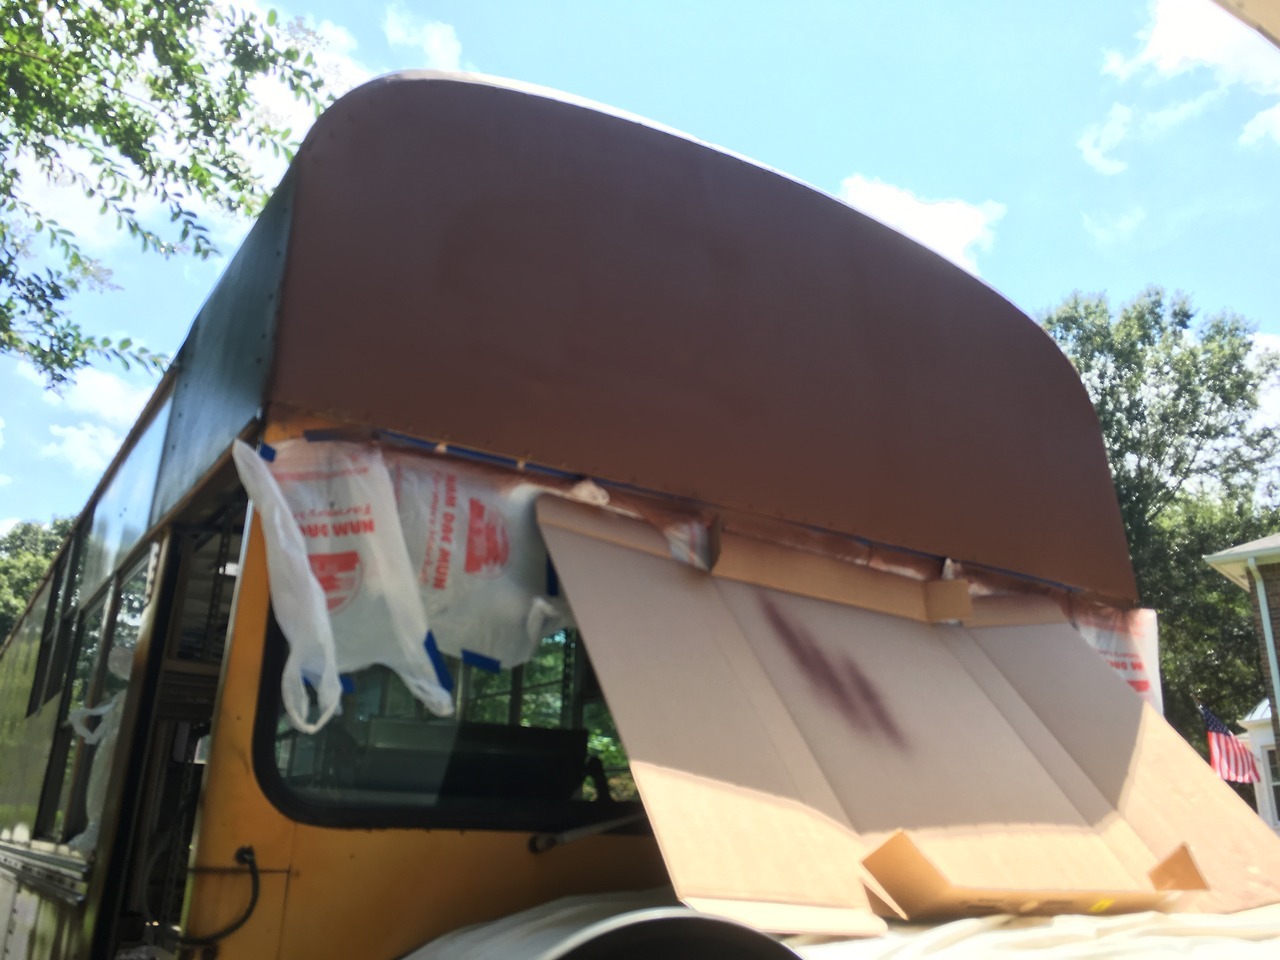
This is closer to what we ended up doing. We removed the rivets from the bottom to detach the existing panel and overlapped it with the roofline (where I had cut it originally). We were able to screw it down into the hat channel at the very front of the bus, so it's set back a couple of inches from where it was, but otherwise pretty much the same as it was before. We then got a large sheet of steel and overlaid it so that the top edge follows the outline of the curve, and the bottom is a straight edge that we can attach just above the windshield. I almost finished getting everything up on Tuesday, but I ran out of sharp drill bits and couldn't get that last panel done. It's tacked up in a few places, so hopefully I can finish it up by myself once I pick up some more bits.
Also, I got another visit from my friendly neighborhood code enforcement officer. He said that they got another call about the bus, but there is no trash and debris around it, our supplies are contained within the garage, the shade pavilion was moved to the backyard, and we are obviously not using the vehicle for any purpose other than an RV, so as far as he's concerned, we are not violating any code and he is closing the investigation. YAY! He said it looks like a cool project and he'd like to see how it turns out, so I invited him to stop by again in a month or two.  
|
|
|
|
|
07-02-2017, 07:01 PM
|
#88
|
|
Skoolie
Join Date: Apr 2016
Location: Marietta, GA
Posts: 192
|
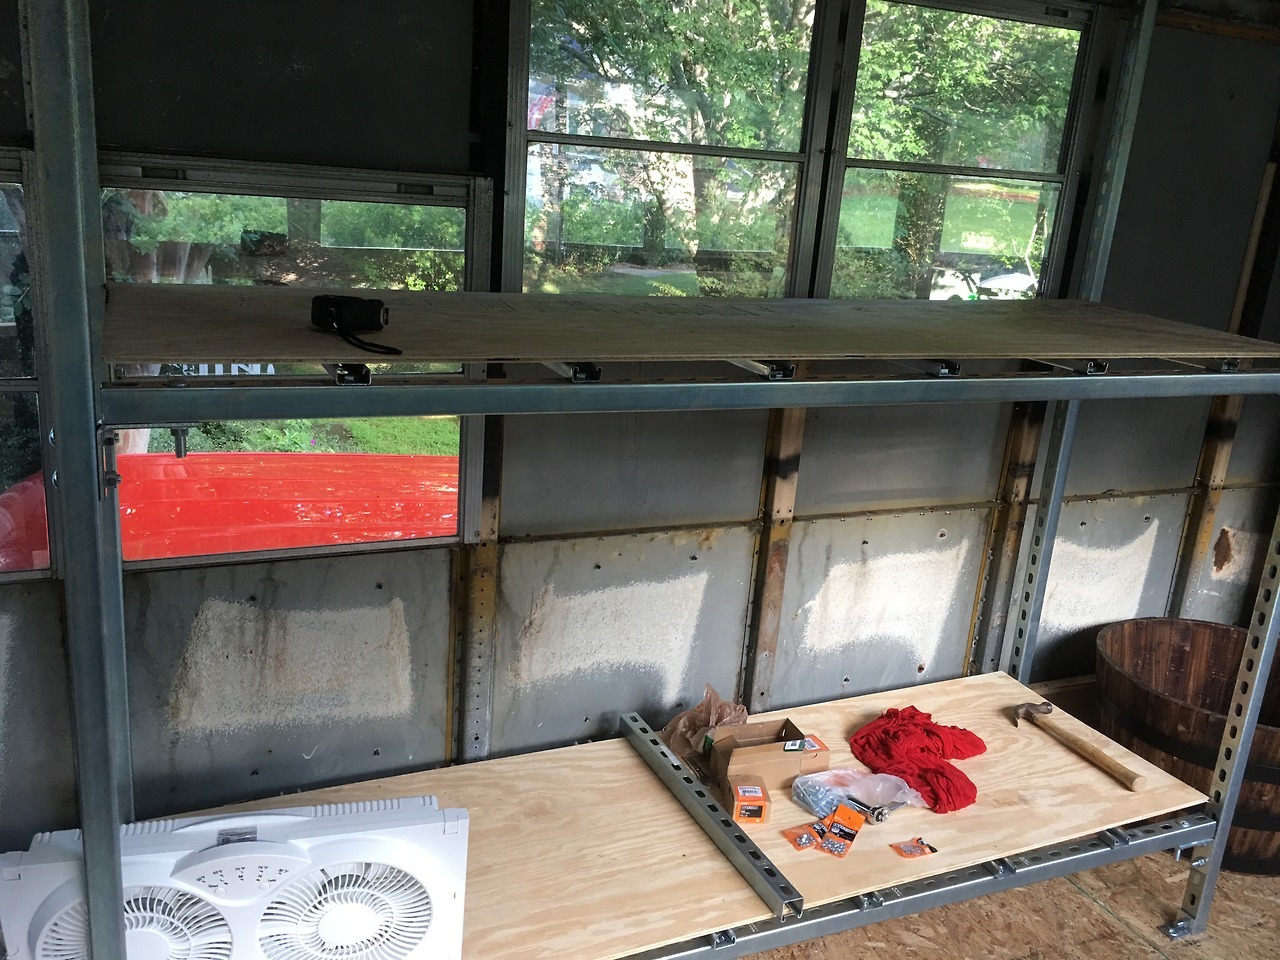
Jonathan and I have been busy laying the subfloor and framing up the bus this week! Check it out:
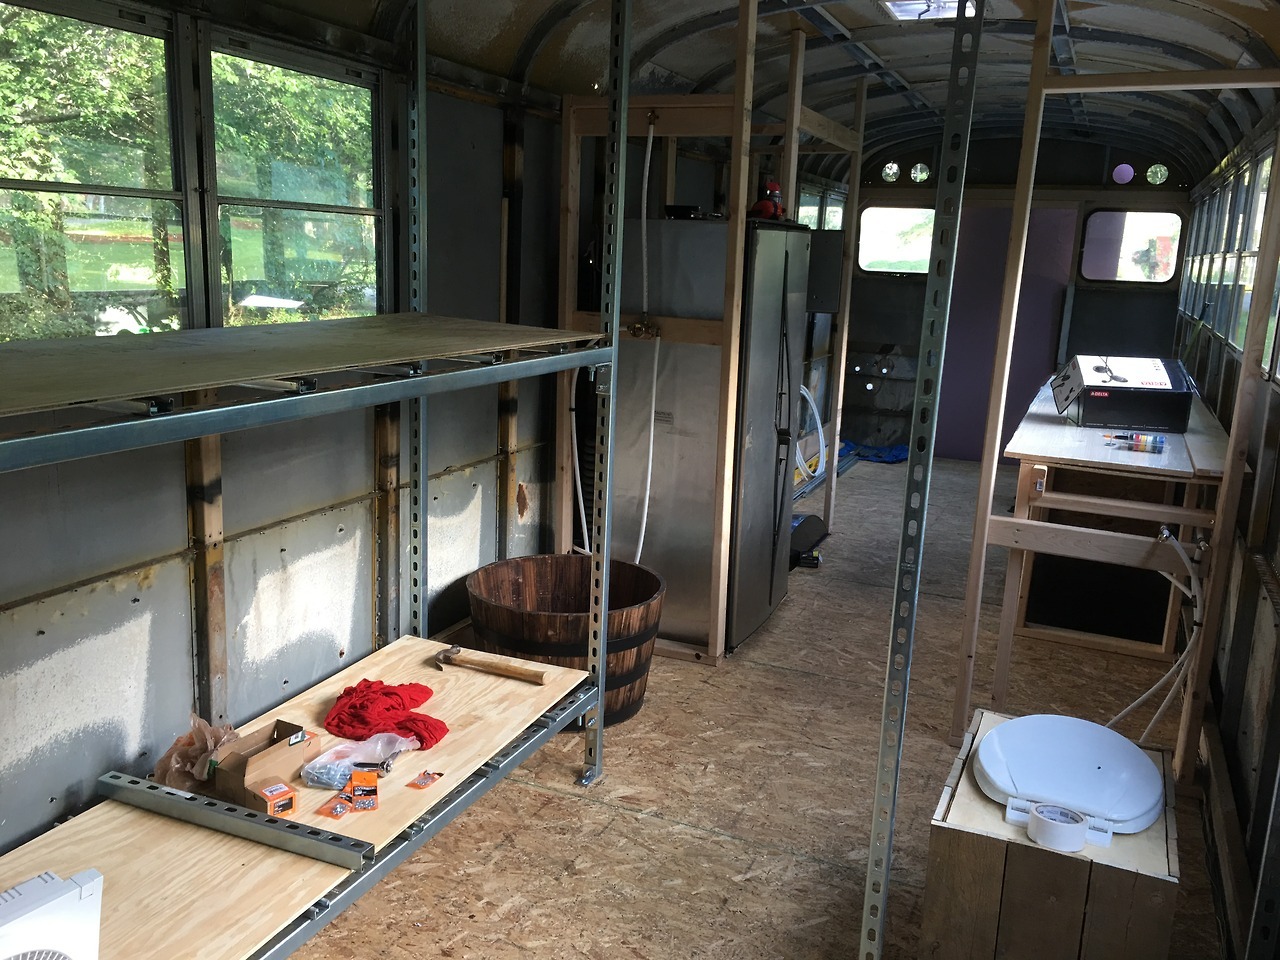
We built the bunk beds out of steel strut to make them extra sturdy. To test out their strength, 4 adults sat on the bunks (2 on top and 2 on the bottom) and bounced as much as we could. It must have looked ridiculous, but those bunks aren't going anywhere! I'll finish them up with some pretty wood so they won't look quite so "industrial." My daughter joked that they currently look like the shelving in the warehouse part of Ikea. :P They are a bit narrower than a twin bed at only 28", but the girls assured me that they have plenty of room. The height is actually very comfortable, as you can sit up in either bunk with a few inches of head room to spare, and they are 82" long, which means there is plenty of space for some bookshelves on one end. We also left 9" under the bottom bunk for storage.
As you can see, we offset the windows so that both bunks will get some sunlight. In retrospect, it may have been better to put two windows in the lower bunk, since it is darker and more closed off to start with, but after the older girls take off for college, I plan on removing the lower bunk altogether and creating a reading nook/play area down there for my younger daughter instead.
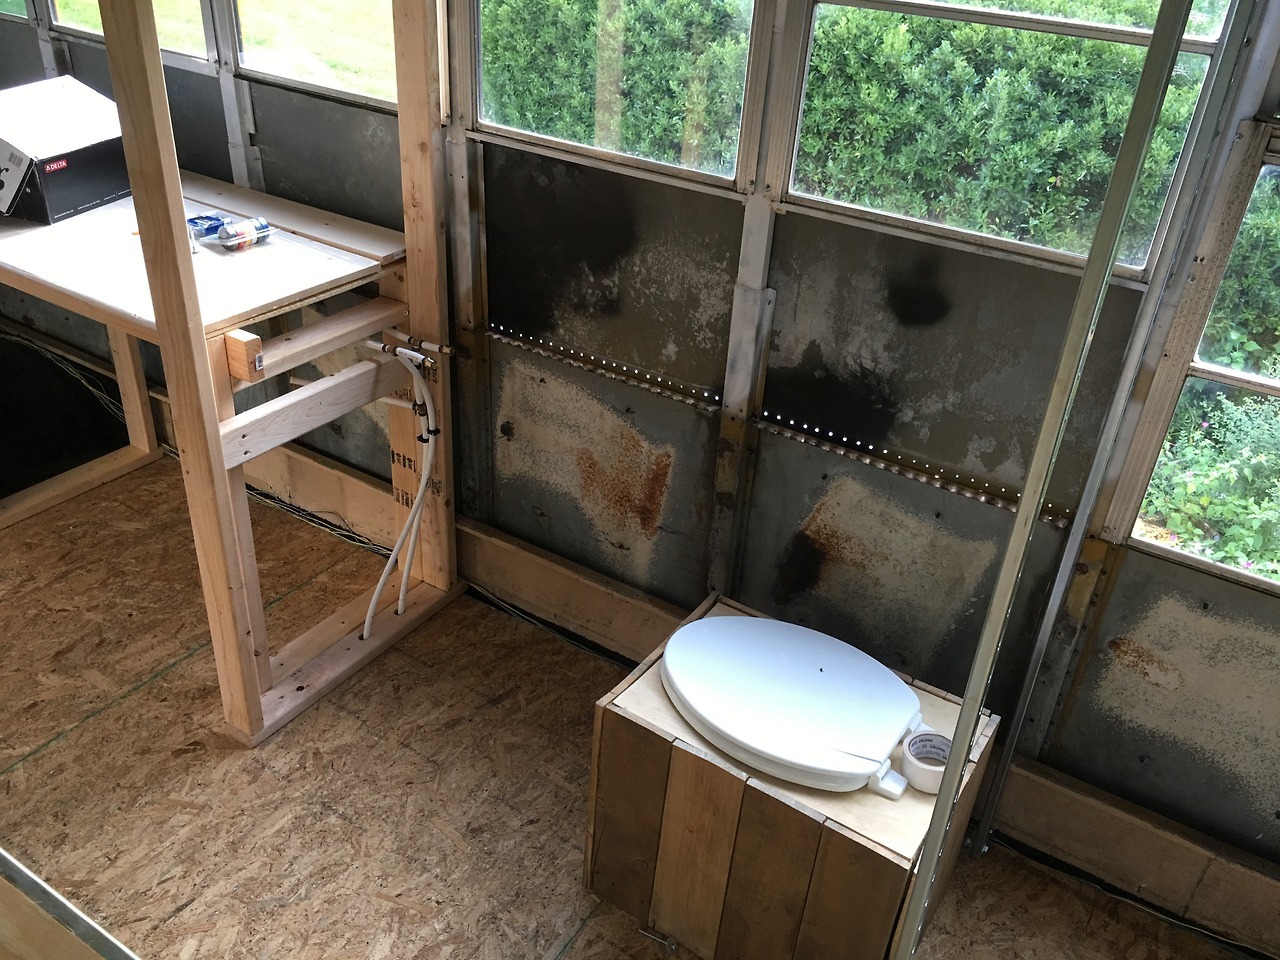
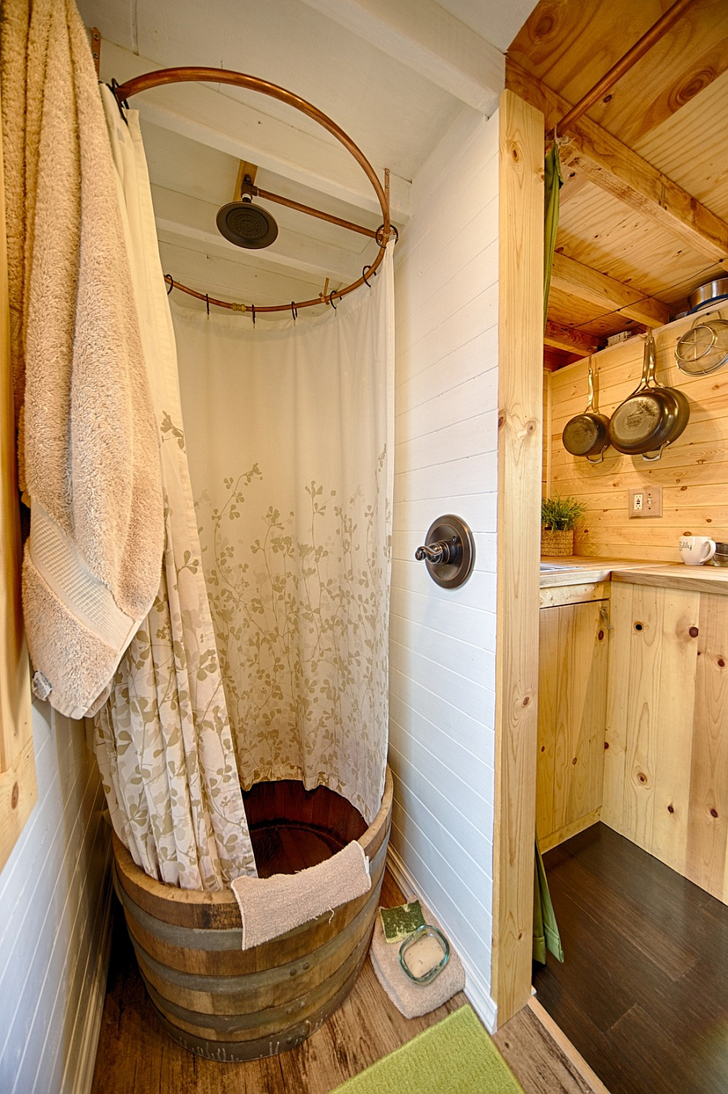
Here's the bathroom, with a composting toilet for now, although we plan to plumb it with water and a black water tank in case we decide to switch to a traditional RV toilet in the future. We also ran plumbing for the bathroom sink and the kitchen sink in the 2x4 wall. The other wall is framed up with strut to give us as much floorspace as possible.
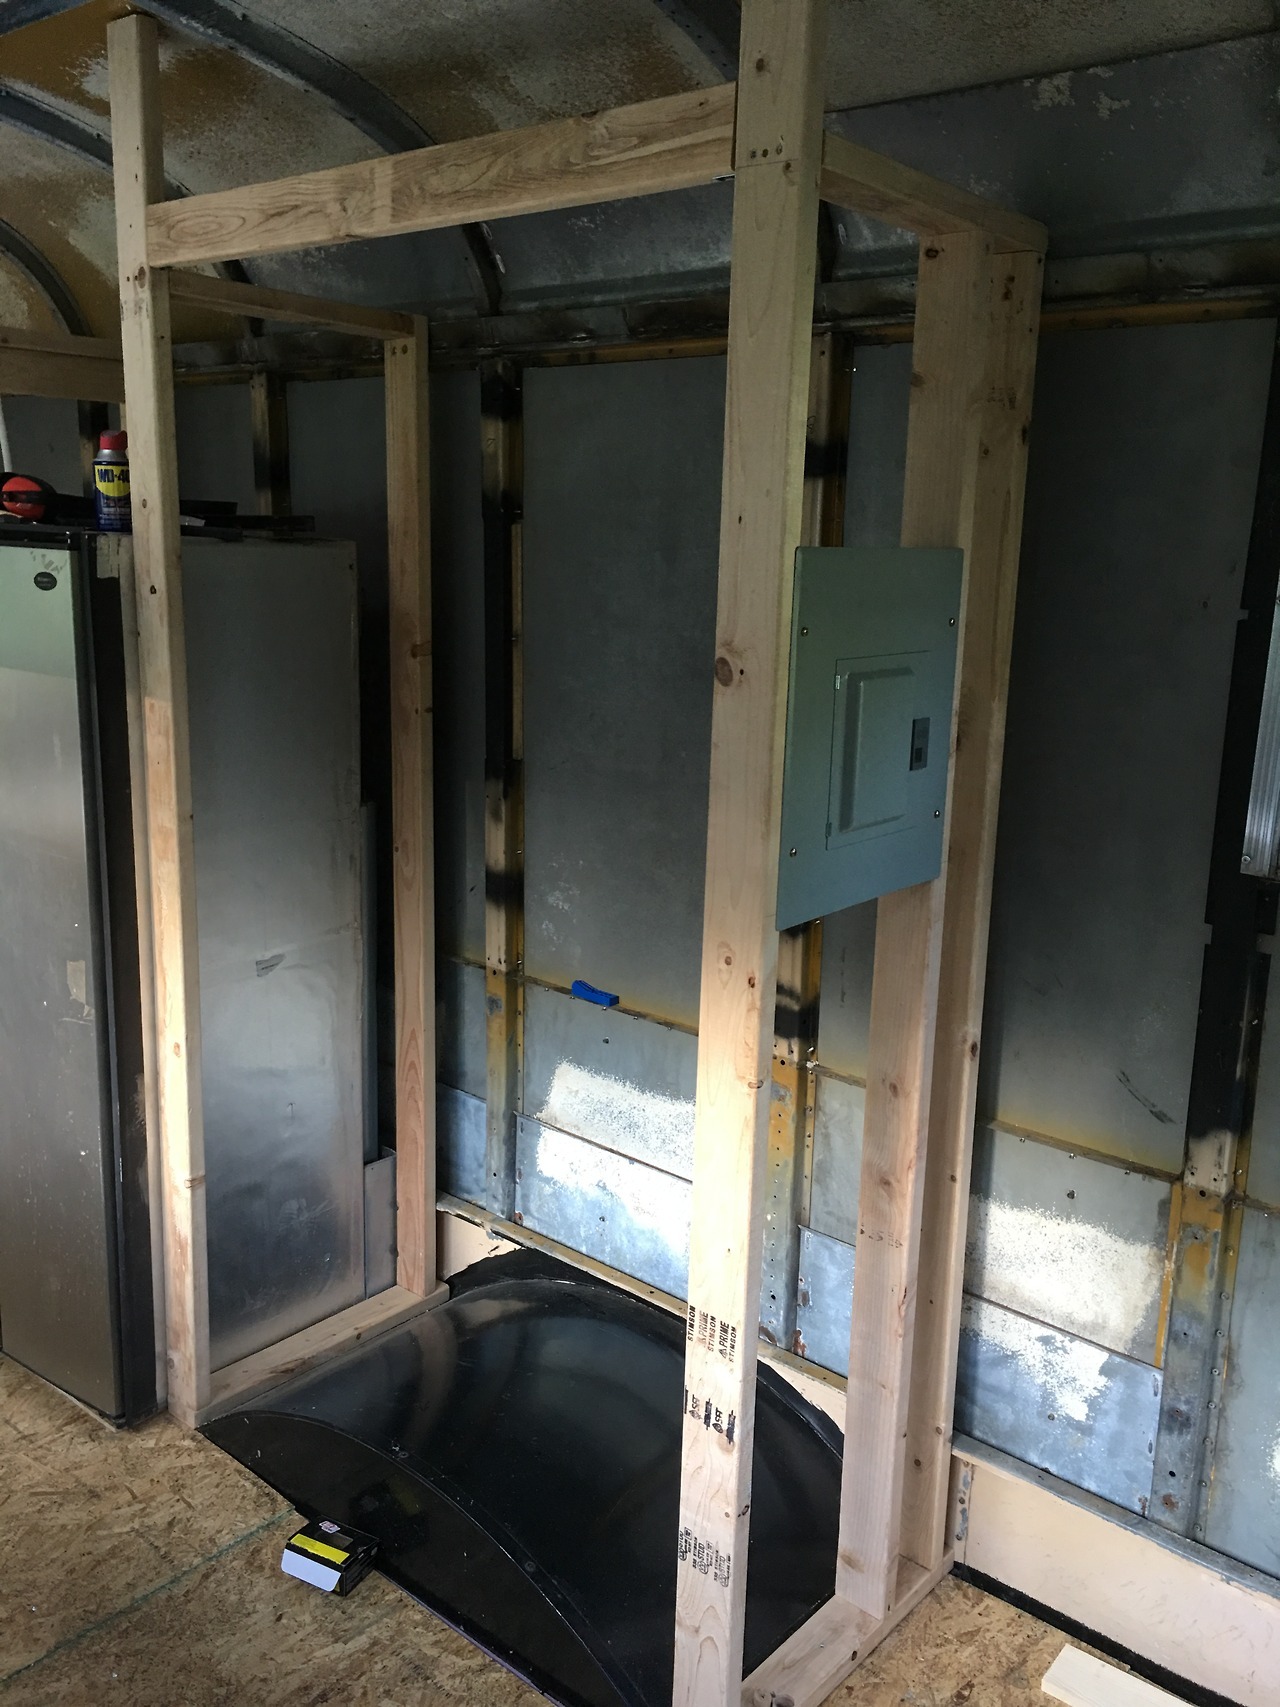
On the other side of the bus, we framed up a pretty decent sized shower. You can see the plumbing for that, as well as a line going to the back of the fridge for the ice maker.
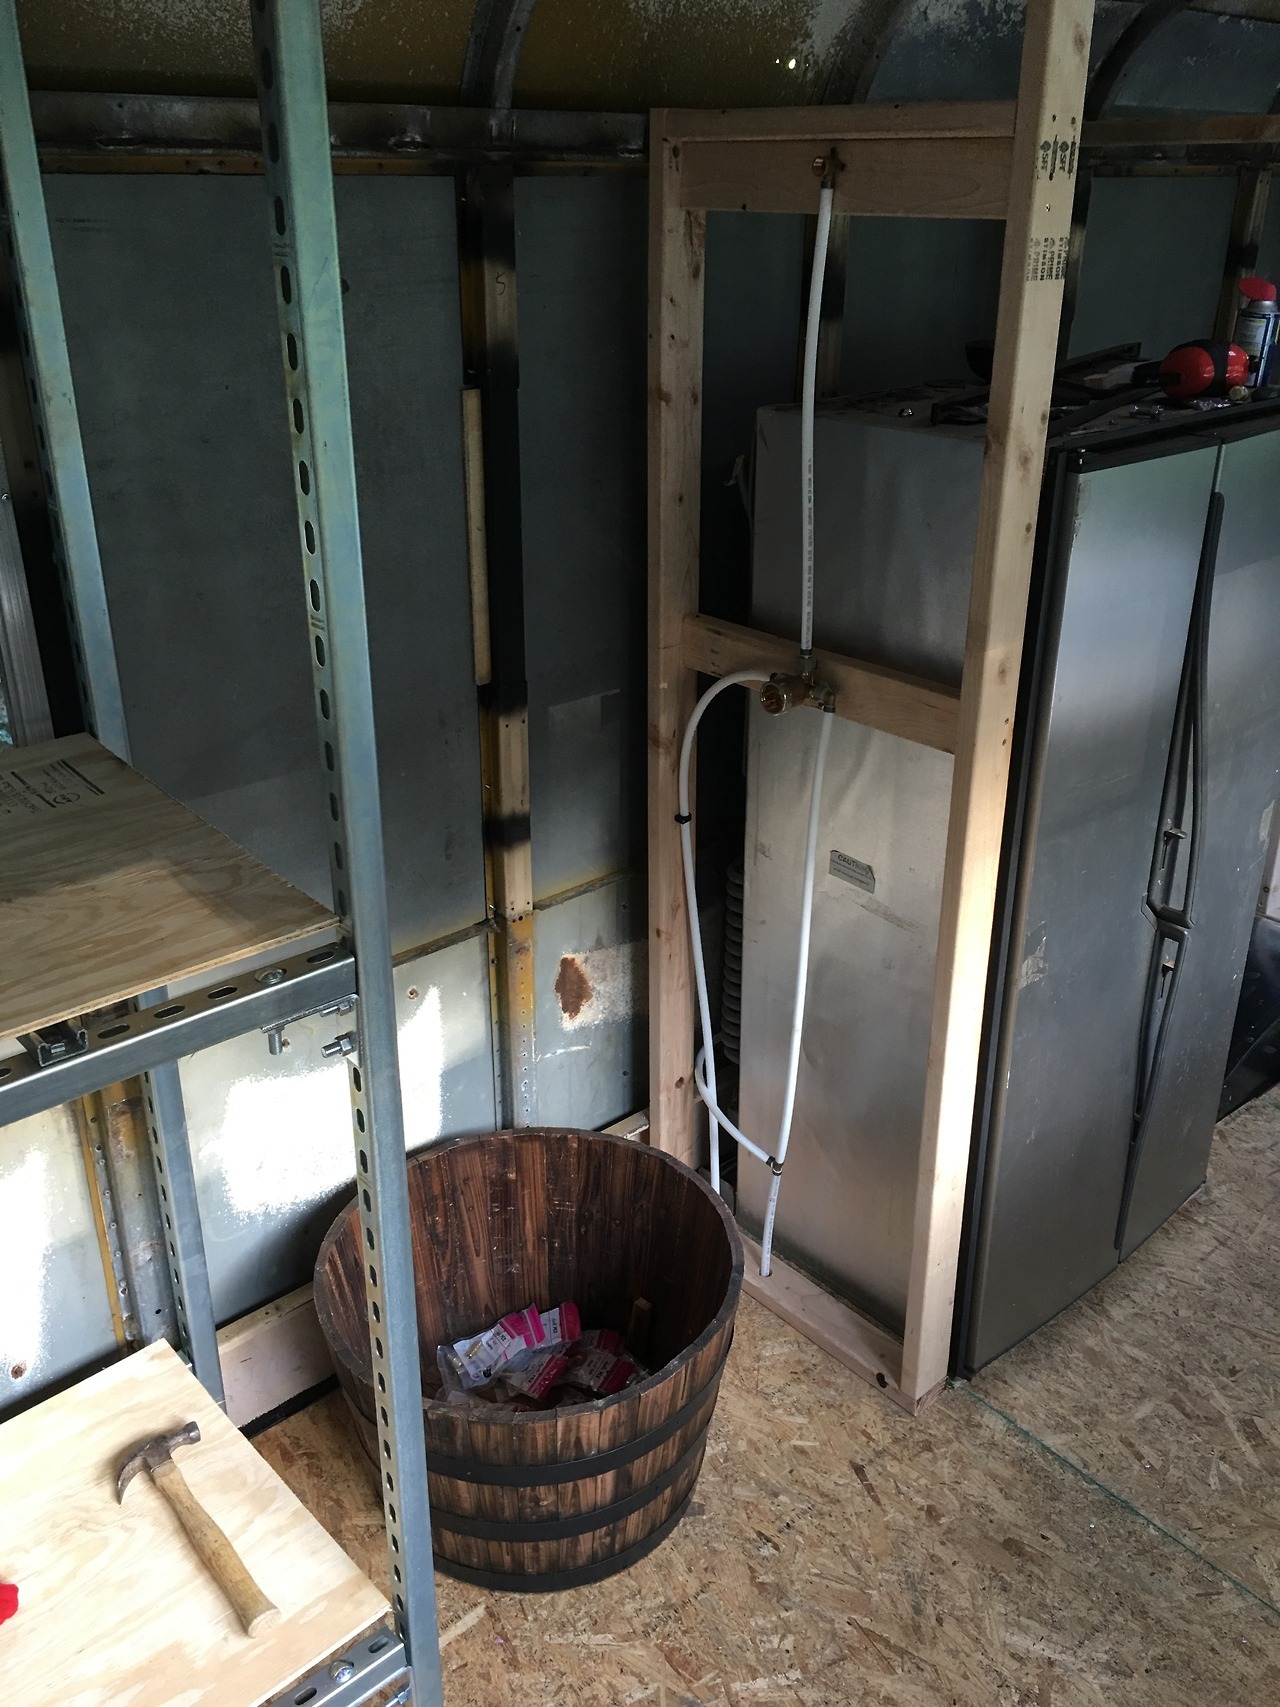
On the other side of the fridge, we framed up a large closet over the wheel well, and put in the electrical panel. We should be able to start wiring everything next time Jonathan comes over in a week or so. Again we used 2x4s to accommodate the depth of the panel.
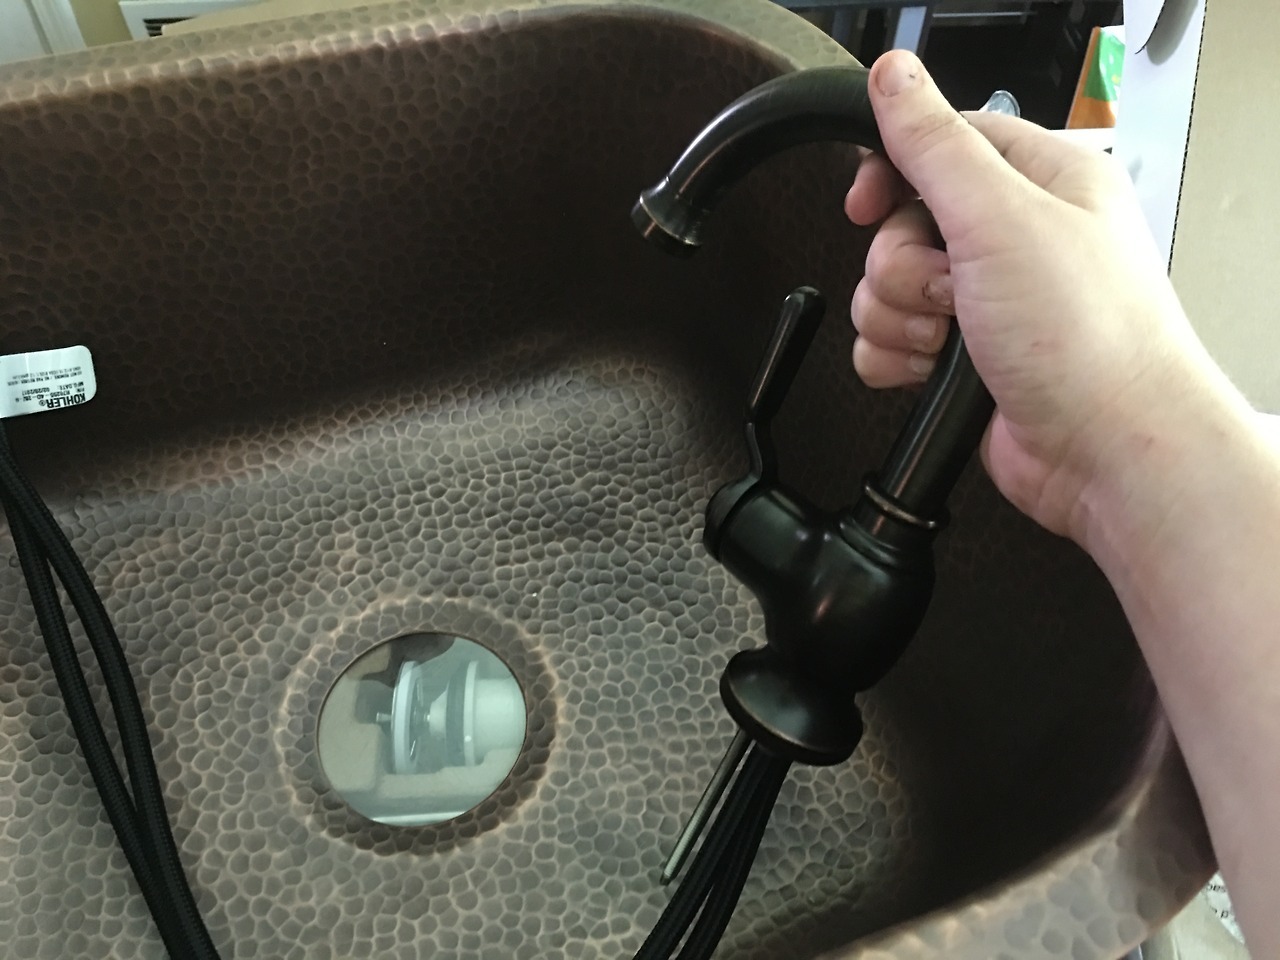
Meanwhile, across from the fridge is the kitchen counter. This is 8 feet long and 2 feet deep, which is actually a surprisingly large working space. I've ordered a 17.5" copper sink that should arrive tomorrow.
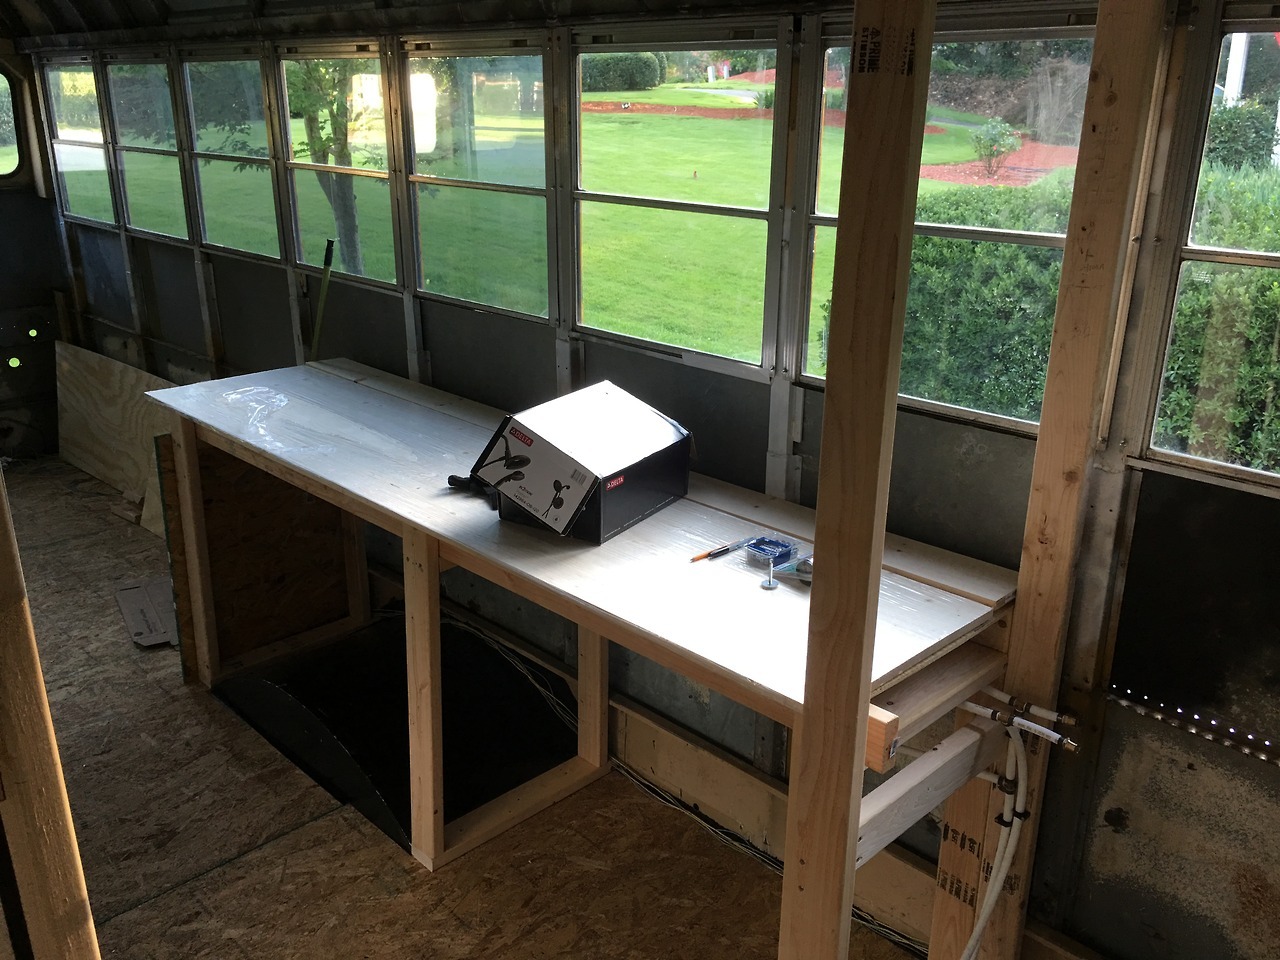
It is really exciting to see the interior starting to come together! I definitely have a better feel for the space now, and I'm much more confident about my design.
|
|
|
|
|
07-02-2017, 07:28 PM
|
#89
|
|
Bus Nut
Join Date: Oct 2014
Location: Kent, WA (Seattle)
Posts: 414
Year: 1987
Engine: 6.9L Diesel
|
That's looking great! I can only fantasize about how nice it is to have that extra headspace too!
Two questions:
1. What inspired you to use the strut for some of the framing? (It looks good)
2. Respectfully: What brings you guys to frame before insulating?
|
|
|
|
|
07-02-2017, 07:52 PM
|
#90
|
|
Skoolie
Join Date: Apr 2016
Location: Marietta, GA
Posts: 192
|
Quote:
Originally Posted by TAOLIK
That's looking great! I can only fantasize about how nice it is to have that extra headspace too!
Two questions:
1. What inspired you to use the strut for some of the framing? (It looks good)
2. Respectfully: What brings you guys to frame before insulating?
|
The extra headspace is REALLY nice. 
To answer your questions,
1. We had used strut to add support to the front of the bus when we did the roof raise, and it was a really easy to work with material. It's designed to run electrical wiring through, so that makes it perfect if we need to run any wires inside the wall. It's made of steel, so it's strong and light weight, which is ideal for a skoolie. It's pretty simple to bolt together - just like working with an oversized erector set  , and it takes up very little space.
For the bunks specifically, my daughter requested something that won't creak like her current wooden bunk bed does (it's just a basic pine bunk from Ikea), and the strut fit the bill.
2. This one is all on Jonathan. I wanted to insulate while it was still really easy to get to everything, but he wants to get the plumbing and electrical in first, and said he couldn't do that until we framed. We debated the merits of both, but since he is the professional electrician with real world construction experience, I let him have the final say. I'm hoping it won't be TOO hard to spray around what we've framed. I did convince him to hold off on the dinette and storage sofa/bed until after we insulate. I also asked him not to screw down the plywood on the kitchen counters yet so I can get inside the frame to spray the insulation. I'll be sure to let you know how it goes! 
|
|
|
|
|
07-02-2017, 08:47 PM
|
#91
|
|
Mini-Skoolie
Join Date: Feb 2017
Location: Waco, Texas
Posts: 64
Year: 2003
Chassis: 2003 International CE; 2 A/C Units; PS; Air Brakes
Engine: T444E 7.3L Diesel Engine
Rated Cap: 72 Passengers
|
Curve in the new roof line
Here is a link to an antique airstream. We are thinking that we will try this type of curve on our roof lift. If the photo doesn't load, it is from this website: Rare 1966 Newell Airstream Silver Streak Motorhome
__________________
Redheadraptor
|
|
|
|
|
07-02-2017, 09:04 PM
|
#92
|
|
Bus Crazy
Join Date: Jan 2017
Location: Massachusetts
Posts: 1,497
Year: 2002
Coachwork: Bluebird
Chassis: Bluebird
Engine: 5.9 Cummins 24v
Rated Cap: 72 pax
|
That would look really cool.
Sent from my XT1254 using Tapatalk
|
|
|
|
|
07-02-2017, 10:29 PM
|
#93
|
|
Skoolie
Join Date: Apr 2016
Location: Marietta, GA
Posts: 192
|
Quote:
Originally Posted by CCurran88
We are thinking that we will try this type of curve on our roof lift.
|
That would be sweet! Are you thinking of doing the back like that? Or the front? Or both? I would love to see pics when you do it. 
|
|
|
|
|
07-02-2017, 10:50 PM
|
#94
|
|
Bus Nut
Join Date: Oct 2014
Location: Kent, WA (Seattle)
Posts: 414
Year: 1987
Engine: 6.9L Diesel
|
Awesome, and thank you for the fast and detailed response! You guys are moving fast! keep up the good work!
|
|
|
|
|
07-03-2017, 10:21 AM
|
#95
|
|
Bus Geek
Join Date: May 2009
Location: Columbus Ohio
Posts: 18,830
Year: 1991
Coachwork: Carpenter
Chassis: International 3800
Engine: DTA360 / MT643
Rated Cap: 7 Row Handicap
|
your bus is really taking shape!! i like your use of metal framing.. I like metal rather than wood frame just because it can flex a little more than wood can..
is that bucket your shower pan or just there as a guide?
-Christopher
|
|
|
|
|
07-03-2017, 11:04 AM
|
#96
|
|
Skoolie
Join Date: Apr 2016
Location: Marietta, GA
Posts: 192
|
I love the look of this shower, so I'm replicating it. I'm a little worried about water getting out everywhere, so I'm trying to figure out if I should build a pan that covers the whole stall and then just have the barrel for aesthetics, or if I'm just overthinking it.
|
|
|
|
|
07-03-2017, 04:09 PM
|
#97
|
|
Skoolie
Join Date: Apr 2016
Location: Marietta, GA
Posts: 192
|
|
|
|
|
|
07-04-2017, 02:32 PM
|
#98
|
|
Bus Crazy
Join Date: Sep 2016
Location: SE Florida
Posts: 1,108
Year: 2003
Coachwork: International
Engine: T444E
Rated Cap: 65 pax
|
Looking great!!
Sent from my iPhone using Tapatalk
|
|
|
|
|
07-04-2017, 02:35 PM
|
#99
|
|
Bus Crazy
Join Date: Sep 2016
Location: SE Florida
Posts: 1,108
Year: 2003
Coachwork: International
Engine: T444E
Rated Cap: 65 pax
|
That shower curtain circle is what I want to do!
Sent from my iPhone using Tapatalk
|
|
|
|
|
07-04-2017, 05:05 PM
|
#100
|
|
Bus Crazy
Join Date: Jan 2017
Location: Massachusetts
Posts: 1,497
Year: 2002
Coachwork: Bluebird
Chassis: Bluebird
Engine: 5.9 Cummins 24v
Rated Cap: 72 pax
|
I would think the barrel would work as well as a pan, so long as you have a good shower curtain. My kids still flood the bathroom in my house... And that's a full sized tub lol
Sent from my XT1254 using Tapatalk
|
|
|
|
|
|
| Thread Tools |
|
|
| Display Modes |
 Linear Mode Linear Mode
|
 Posting Rules
|
You may not post new threads
You may not post replies
You may not post attachments
You may not edit your posts
HTML code is Off
|
|
|
|
 » Recent Threads
 |
|
|
|
|
|
|
|
|
|
|
|
|
|
|
|
|
|
|
|
|
|
|
|
|
|
|
|
|
|
|
|
|
|
|
|
|
|