Journey with Confidence RV GPS App RV Trip Planner RV LIFE Campground Reviews RV Maintenance Take a Speed Test Free 7 Day Trial ×


Reply
 
Thread Tools Display Modes
 
Old 12-23-2015, 03:12 PM   #1
New Member
 
Join Date: Dec 2015
Posts: 4
88 bluebird 'unnamed'

(Questions at the bottom of the post)

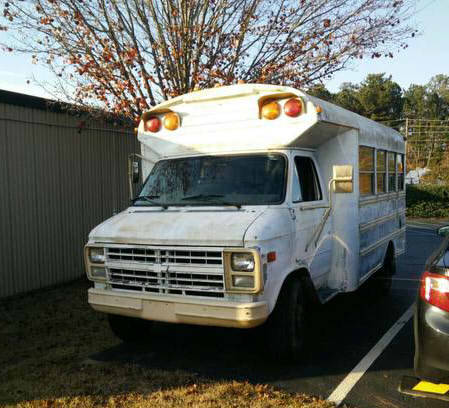
So about 5 days ago I finally went for it and bought a 1988 Bluebird Chevy short bus to convert into a tiny home. Been planning a tiny home for about 7 years now but I'm a complete newbie when it comes to actually building... but I'm excited nonetheless! I graduated college about a year ago so it's probably the perfect time to get this project going and learn some new skills.

So she looks like a piece of junk (the previous owner covered her in spray paint of all things...) but the engine looks great and after she gets an oil change and a couple parts worked on, she'll be good as new!


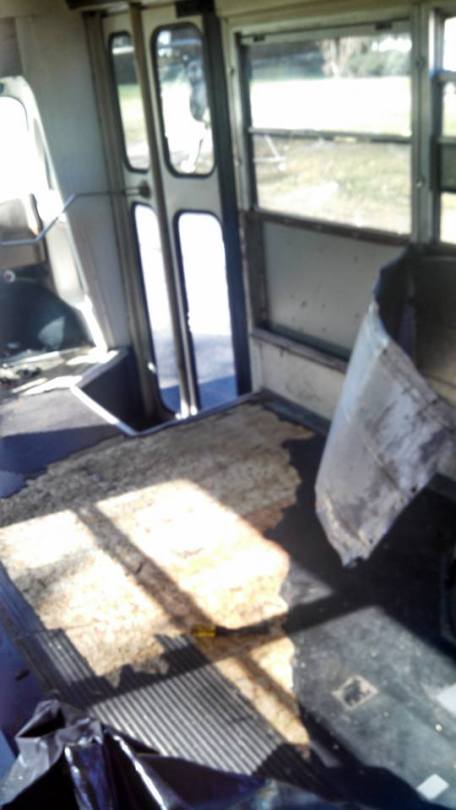
The first day, the boyfriend and I cleared out all the stuff the previous owner had put into the bus. The inside had 'bunks' the last owner used for tailgating but all of them were made from really low quality wood and weren't bolted down (luckily), so we salvaged what we could and dumped the rest.
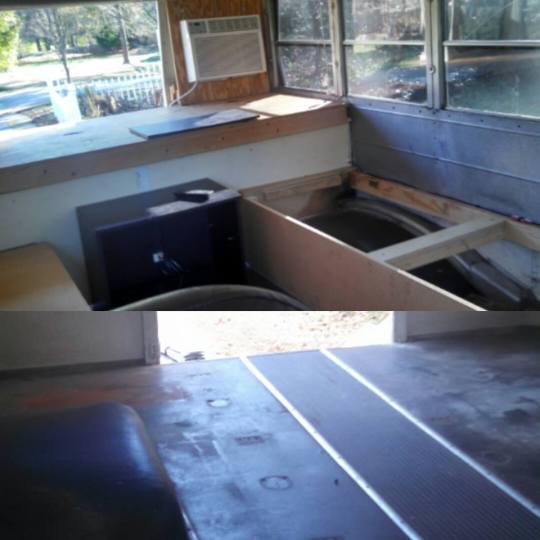
Before and After


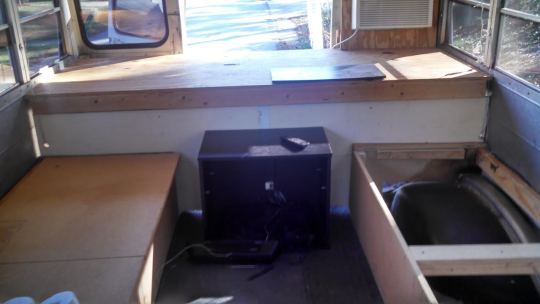
We also tore out the only metal seat left in the bus
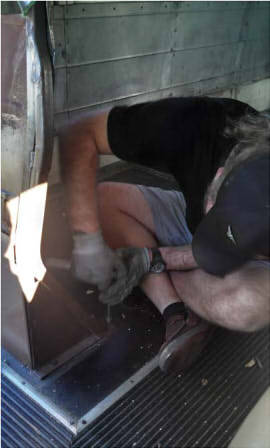
(photo below is showing the boyfriend wrenching out the top screws while I'm under the bus wrenching out the lower bolts)


Day 2-3

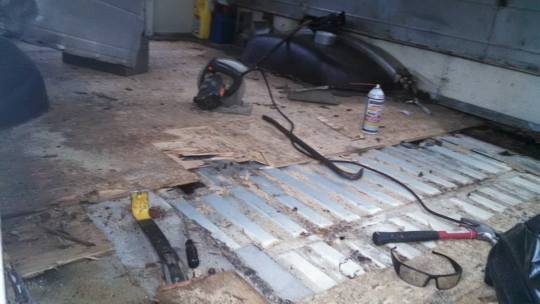
We started digging out rivets. I couldn't find a power tool so we've been hitting them with a metal wedge and hammer to cut them in half and digging them out of the wall. It's pretty labor intensive, but we got the technique down so its going by faster than expected. Should have a power tool soon to get the other wall done more easily. Also started digging up the linoleum to expose the plywood.


Day 4

All the linoleum is up and I'm starting to saw through the plywood floor. There are a couple of bad leaks that have rotted out the wood in a couple of spots (you can see one on the far right of the picture), which makes me worried about rust, but otherwise the rest of the floor is looking great!
Once I get all of the old plywood up, I'll check for rust damage, sand spots down and repair, then slap on some rustoleum.


Questions:

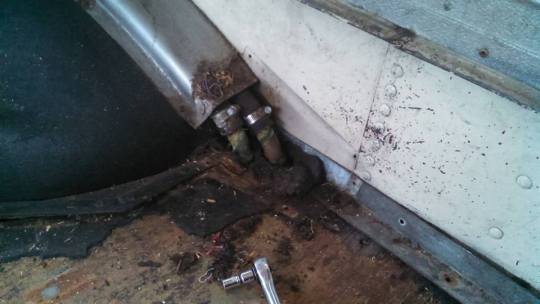
I'm having a little bit of trouble figuring out how to get around the gas line. Unfortunately it's inside the bus, not running underneath, and the metal that secures the plywood to the floor on the wall of the bus and around the wheel hump runs underneath it. Any ideas on how to dig out the metal? I need to pry it out in order to dig up the rotting plywood more easily.


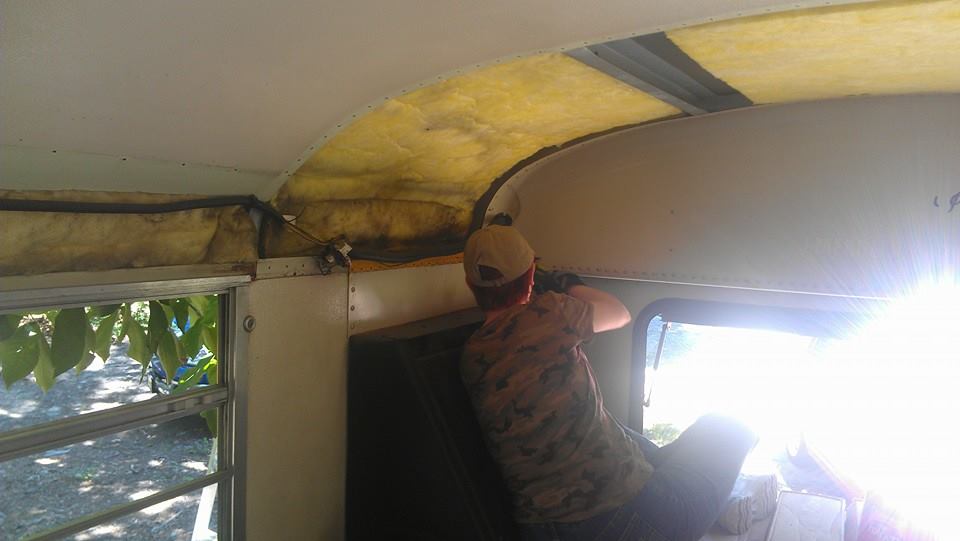
Is it possible/a good idea for me to keep the original roof?

When installing the insulation and wood planks in the sub floor, could you glue them down to the floor or should they be free floating since the bus moves?

Jiiri is offline   Reply With Quote
Old 12-23-2015, 05:34 PM   #2
Bus Crazy
 
sdwarf36's Avatar
 
Join Date: Oct 2009
Location: Moodus, Ct.
Posts: 1,062
Year: 1996
Coachwork: Champion
Chassis: Ford e-450
Engine: 7.3 Powerstroke
Rated Cap: 14
Those aren't fuel lines-thats water hoses for your rear heater.
To get out rivets, all you need is a drill + a 1/8" or 3/16" drill bit.
No reason to change the roof-just seal up the leaks.
__________________
Don't make a fuss-just get on the bus!

my bus build https://www.skoolie.net/gallery/Skoolies/Sped
sdwarf36 is offline   Reply With Quote
Old 12-23-2015, 06:13 PM   #3
New Member
 
Join Date: Dec 2015
Posts: 4
Quote:
Originally Posted by sdwarf36 View Post
Those aren't fuel lines-thats water hoses for your rear heater.
To get out rivets, all you need is a drill + a 1/8" or 3/16" drill bit.
No reason to change the roof-just seal up the leaks.
Ah, ok. Still working on learning about my bus. I assumed such since one of the hoses looks like it connects to the filling entry where the gas is pumped.

We tried that and it broke our drill bits! So far the method we're doing for rivets has worked well enough, though a neighbor is offering up a more powerful drill for us to use sometime after the holidays so we'll see how that works out.

So far, there haven't been any leaks in the roof, just condensation issues around where the individual sheets of metal overlap. I planned on sealing it, just needed to figure out if removing the ceiling was really necessary.
Jiiri is offline   Reply With Quote
Old 12-23-2015, 06:18 PM   #4
Bus Crazy
 
Scooternj's Avatar
 
Join Date: Apr 2014
Location: EHT New Jersey
Posts: 1,134
Year: 2003
Coachwork: AmTran
Chassis: International 3000RE
Engine: T444E/AT545
Rated Cap: 75
Quote:
Originally Posted by Jiiri View Post
So far, there haven't been any leaks in the roof, just condensation issues around where the individual sheets of metal overlap. I planned on sealing it, just needed to figure out if removing the ceiling was really necessary.
If you plan on turning it into a tiny home, then pull ALL the interior steel. This allows you to get rid of the moisture trap that is the original fiberglass batting, find and seal any leaks, re-insulate with spray or rigid foam, and eliminate the potential of thermal breaks.

My bus is a year newer (and a lot bigger), but there was mold growth in the back half of the bus.


As for painting it, spray bombs work well; but unless you're going to be using a dark color, prime the yellow with a neutral color like grey
__________________
Hey! That's not an RV, that's a school bus.
Well thank you for noticing, Captain Obvious

Captain Obvious on deviantArt
Scooternj is offline   Reply With Quote
Old 12-23-2015, 06:30 PM   #5
New Member
 
Join Date: Dec 2015
Posts: 4
Quote:
Originally Posted by Scooternj View Post
If you plan on turning it into a tiny home, then pull ALL the interior steel. This allows you to get rid of the moisture trap that is the original fiberglass batting, find and seal any leaks, re-insulate with spray or rigid foam, and eliminate the potential of thermal breaks.

My bus is a year newer (and a lot bigger), but there was mold growth in the back half of the bus.


As for painting it, spray bombs work well; but unless you're going to be using a dark color, prime the yellow with a neutral color like grey
Bleh, that's what I was afraid of! I know the fiberglass insulation I've pulled so far has been pretty grody... I'm just not too sure how I would rebuild the ceiling. Re-insulating is no problem, but putting a cover layer back over that curved ceiling is~ What's a good way to go about it?
Jiiri is offline   Reply With Quote
Reply

Tags
short bus


Posting Rules
You may not post new threads
You may not post replies
You may not post attachments
You may not edit your posts

BB code is On
Smilies are On
[IMG] code is On
HTML code is Off
Trackbacks are Off
Pingbacks are Off
Refbacks are Off


» Featured Campgrounds

Reviews provided by

Powered by vBadvanced CMPS v3.2.3

All times are GMT -5. The time now is 11:43 PM.


Powered by vBulletin® Version 3.8.8 Beta 4
Copyright ©2000 - 2024, vBulletin Solutions, Inc.