 |
|
 02-07-2018, 10:14 PM
|
#121
|
|
Bus Nut
Join Date: Jul 2017
Posts: 819
Year: 1993
Chassis: IH 3800
Engine: DT360
Rated Cap: 66
|
Quote:
Originally Posted by PNW_Steve

I have done a boatload of soldering in my life but never on anything remotely close to that large.
Can you give us a nickle tour of your assembly process? Tools & materials?
Thanks.
S.
|
Well... I can describe what I do but I'm not exactly certain that it is the right way to do it. It works for me though.
First off, I don't rely on the solder for the mechanical connection. The only thing I'm using solder for is to back fill the connectors to help prevent corrosion.
Basically, I trim the sheath back to fit the fitting. Double crimp the fitting in place using large crimpers. I drape the wire over something allowing the open side of the fitting faces up. I heat the fitting with a propane torch until it becomes hot enough to melt the solder on its own. I back fill the fitting until full. Allow the fitting and wire to cool on it's own... then heat shrink. I've never had a failure using this method. I have had fittings fail (typically the cheap copper "crushed tubing" fittings).. so use quality components. When working with this big stuff... keep in mind it can/will carry a LOT of current. Don't cheap out on the cable or fittings. The cable I use is US made Flex-a-prene. The fittings are different brands (such as T&B) but I make sure they are thick and made in the USA. I've had the cheap/thin copper terminals snap off.. makes for an interesting show when it finds something grounded.
Anyways... I'm sure there are better/proper ways.. that's just how I do it. Before I got the crimpers, I used a modified C-Clamp and before that, I used a 4# hammer and center punch. Just make sure the fittings are tight and use quality heat shrink. I found 3m adhesive lined heat shrink on ebay for cheap. I got 4' sticks of 3/4" for $3.50 a stick (NOS).
Now if you want solder only joints on these big cables... youtube has some decent videos showing the process. It is fairly similar minus the crimping. With the enclosed lugs, guys fill the fittings with solder first.. then place the wire into the filled lug while heated. Hold it in place while the solder cools and wicks into the cable. On open end lugs, you just slip the lug onto the wire and fill the wire/lug slowly from the open end. Just make sure that the wire pulls the solder in instead of just laying solder on the surface. I find that small diameter solder works best.
|

|

|
|
02-08-2018, 09:34 AM
|
#122
|
|
Bus Geek
Join Date: May 2016
Location: Eastern WA
Posts: 6,401
Year: 2002
Coachwork: Bluebird
Chassis: All American RE (A3RE)
Engine: Cummins ISC (8.3)
Rated Cap: 72
|
Great explanation.
Thank you!
|
|
|
|
|
02-08-2018, 01:30 PM
|
#123
|
|
Bus Nut
Join Date: Jul 2017
Posts: 819
Year: 1993
Chassis: IH 3800
Engine: DT360
Rated Cap: 66
|
No problem bud!
|
|
|
|
|
02-12-2018, 09:25 AM
|
#124
|
|
Bus Nut
Join Date: Jul 2017
Posts: 819
Year: 1993
Chassis: IH 3800
Engine: DT360
Rated Cap: 66
|
Ordered all the parts for the front brake rebuild. New master cylinder, all rubber lines, pads, rotors, inner and outer wheel bearings, and wheel seals. Also ordered a copper/nickel tubing kit as I've got some hard line to replace. Probably going to order caliper rebuild kits while I'm at it.
Everything will be here sometime this week. After that, I think all I'll have left is the drive shaft. May have it rebuilt. I'll have to check it out first but all things considered, may just go on and have it done. I've got a local driveline shop that is dirt cheap and only uses Spicer parts. Last time I had one done (new joints, carrier), it was just over $100 out the door.
Anyways... getting close to rolling again!
|
|
|
|
|
02-13-2018, 11:04 PM
|
#125
|
|
Bus Nut
Join Date: Jul 2017
Posts: 819
Year: 1993
Chassis: IH 3800
Engine: DT360
Rated Cap: 66
|
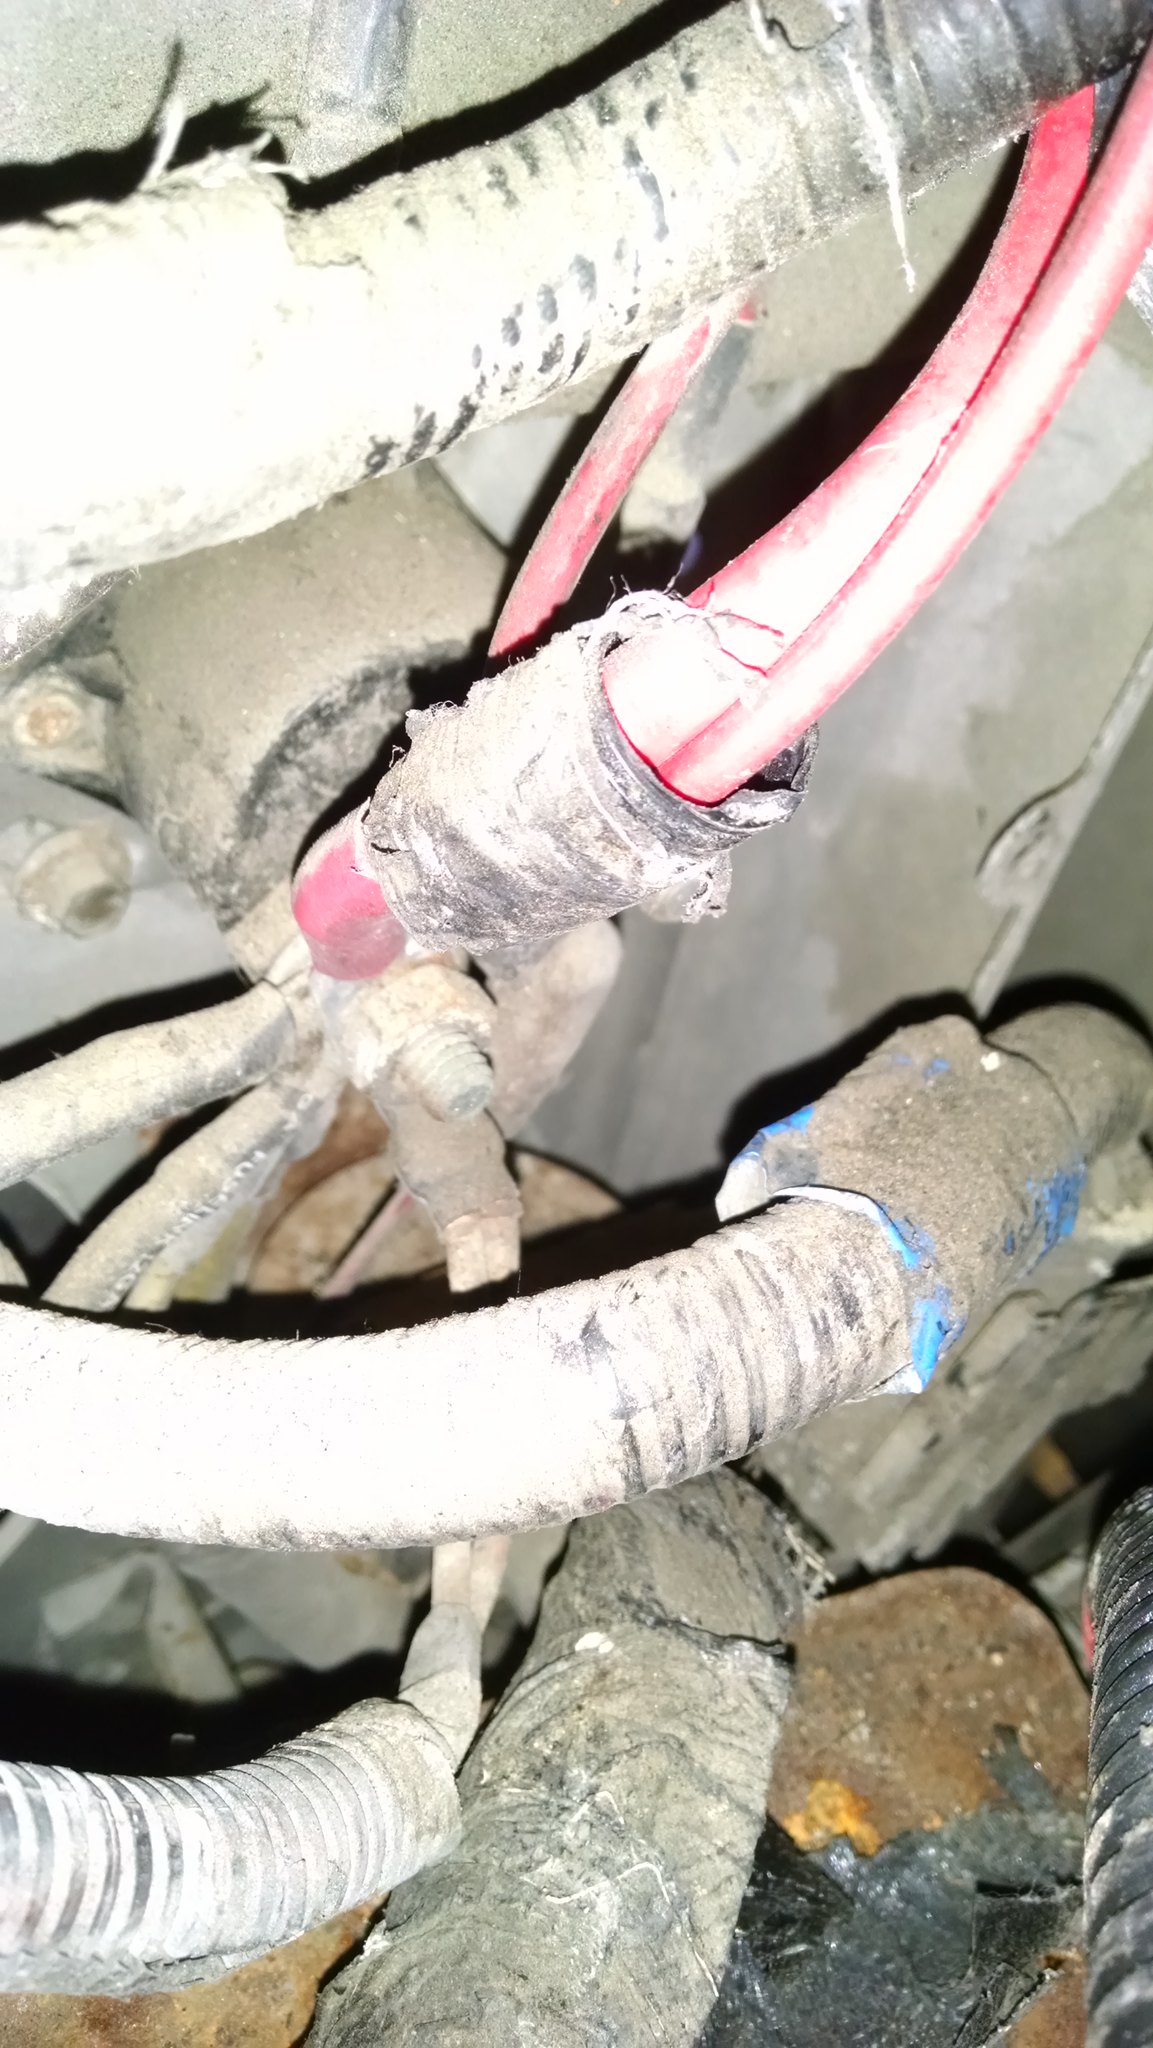
Got my power cables routed finally.
Last cable made..
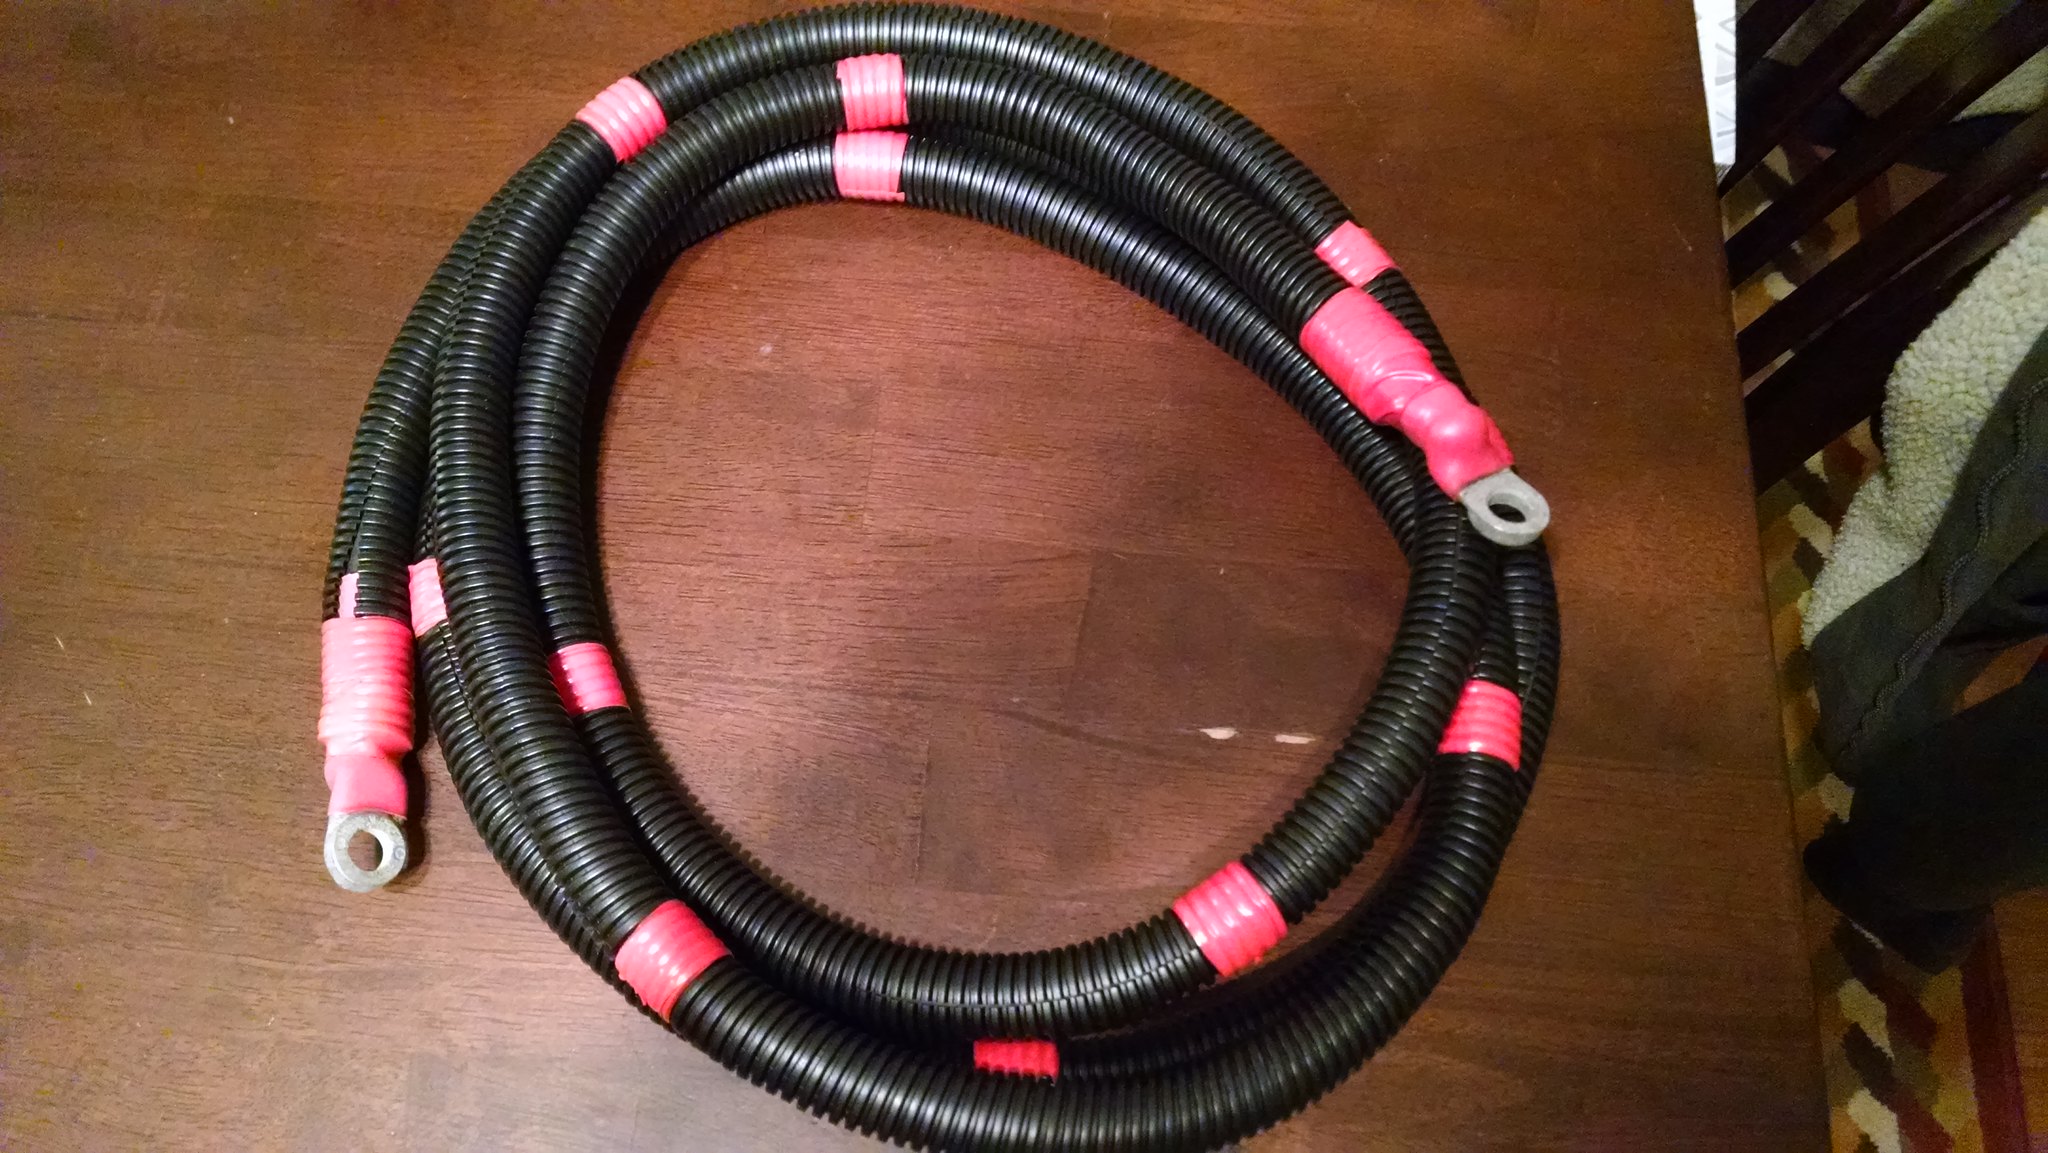 IMG_20180209_184233741 IMG_20180209_184233741 by acidburn02zts, on Flickr
Fuse holder for engine bay power stud..
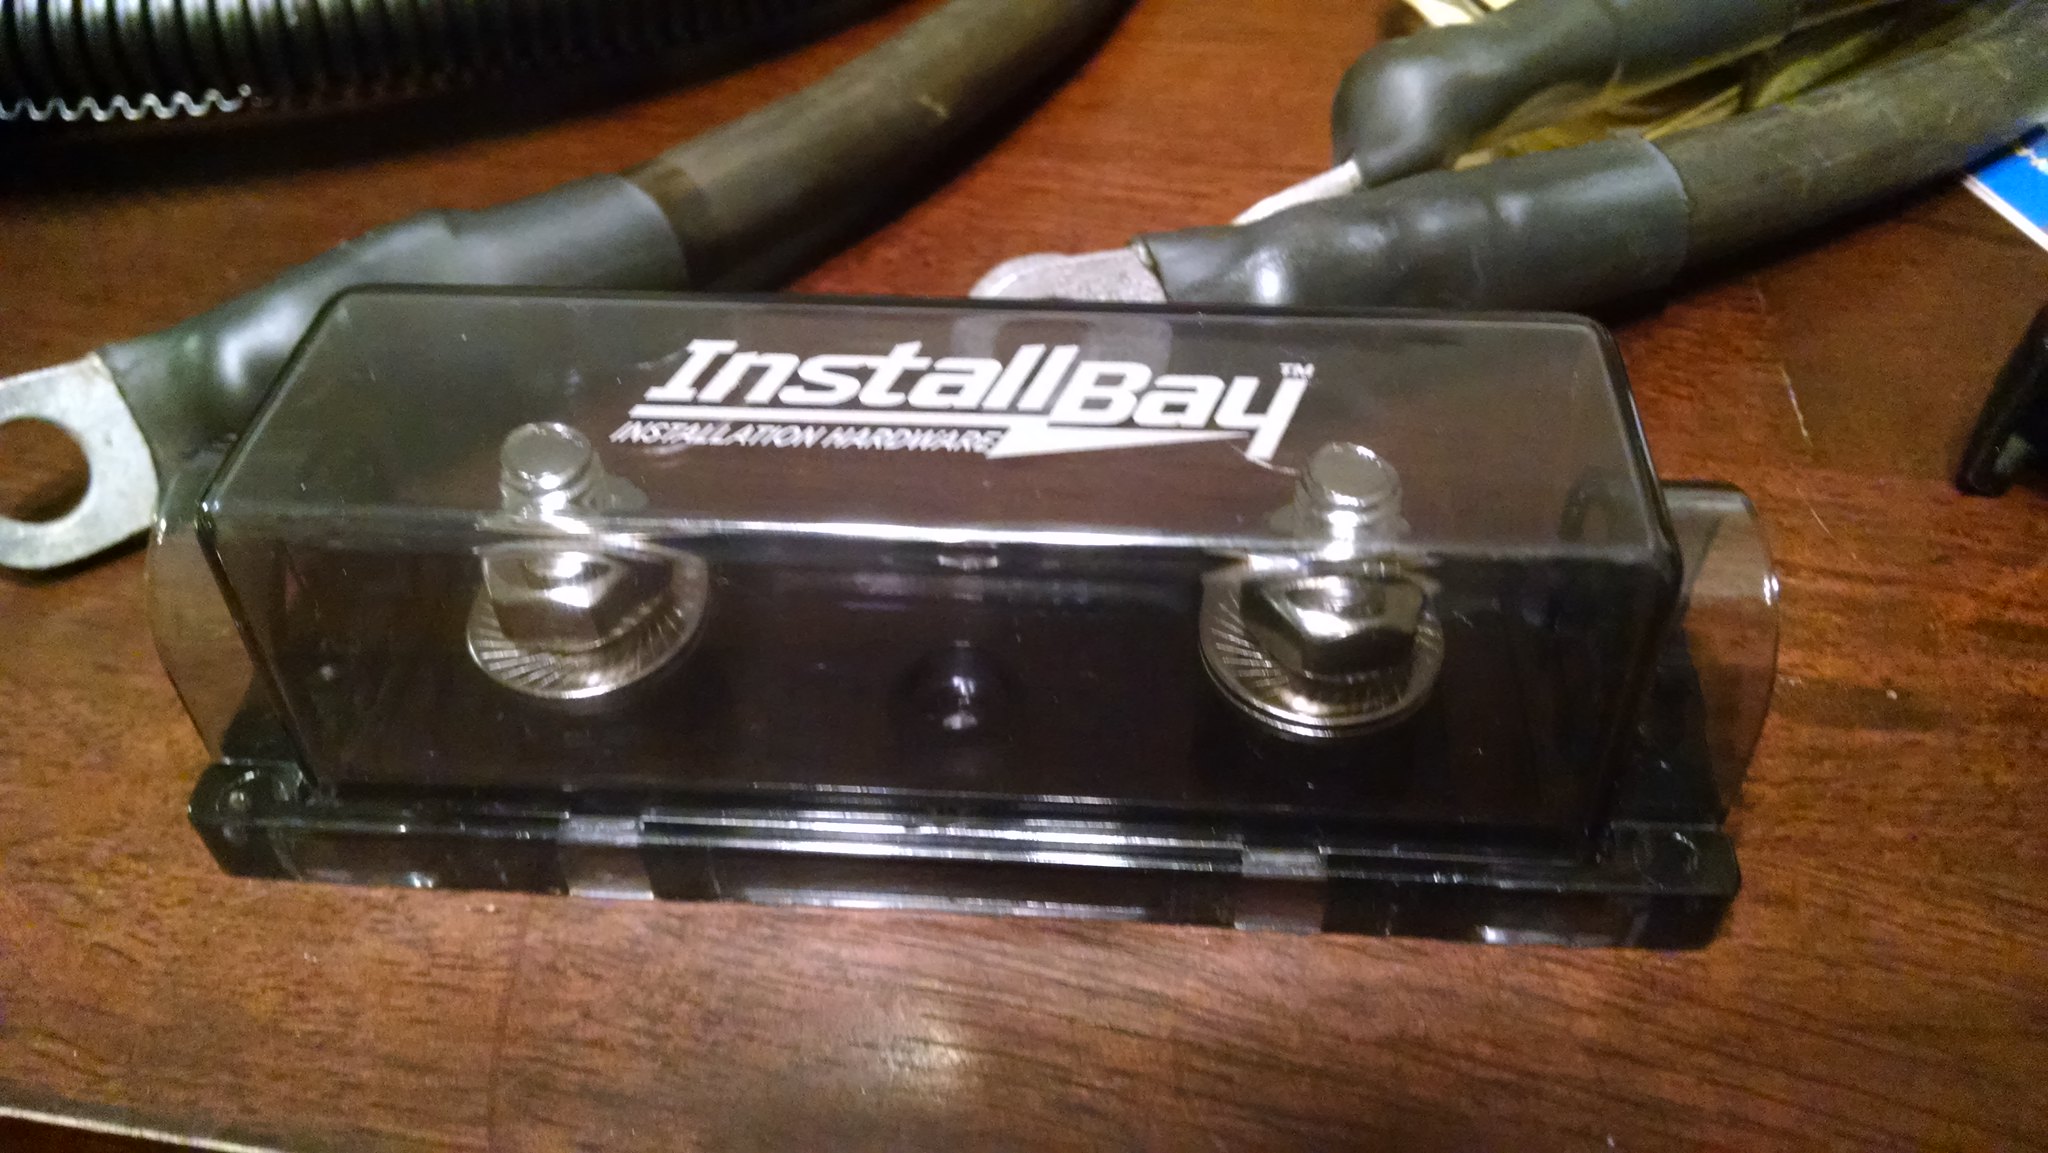 IMG_20180209_175830259 IMG_20180209_175830259 by acidburn02zts, on Flickr
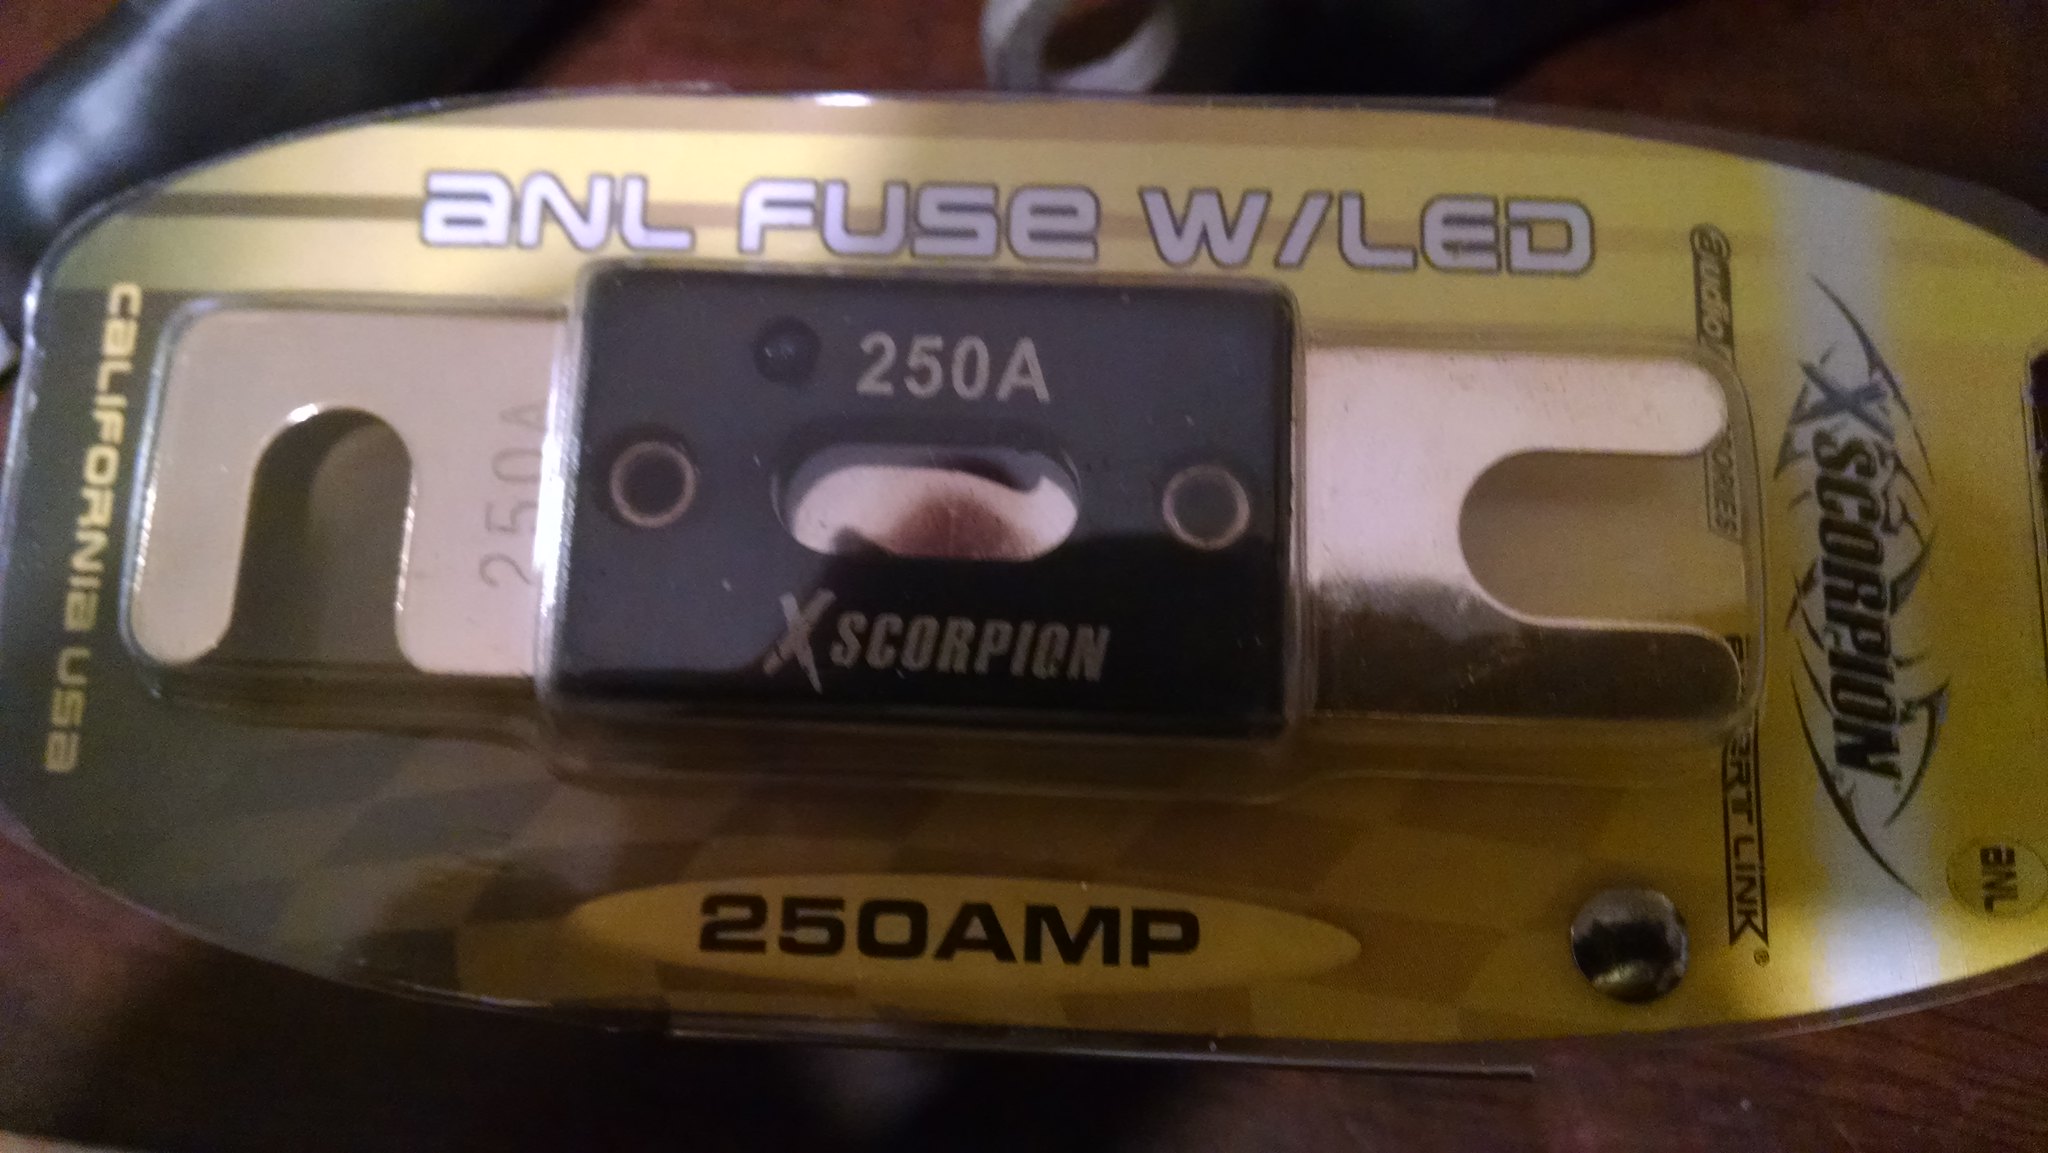 IMG_20180209_175839507 IMG_20180209_175839507 by acidburn02zts, on Flickr
Cables ran..
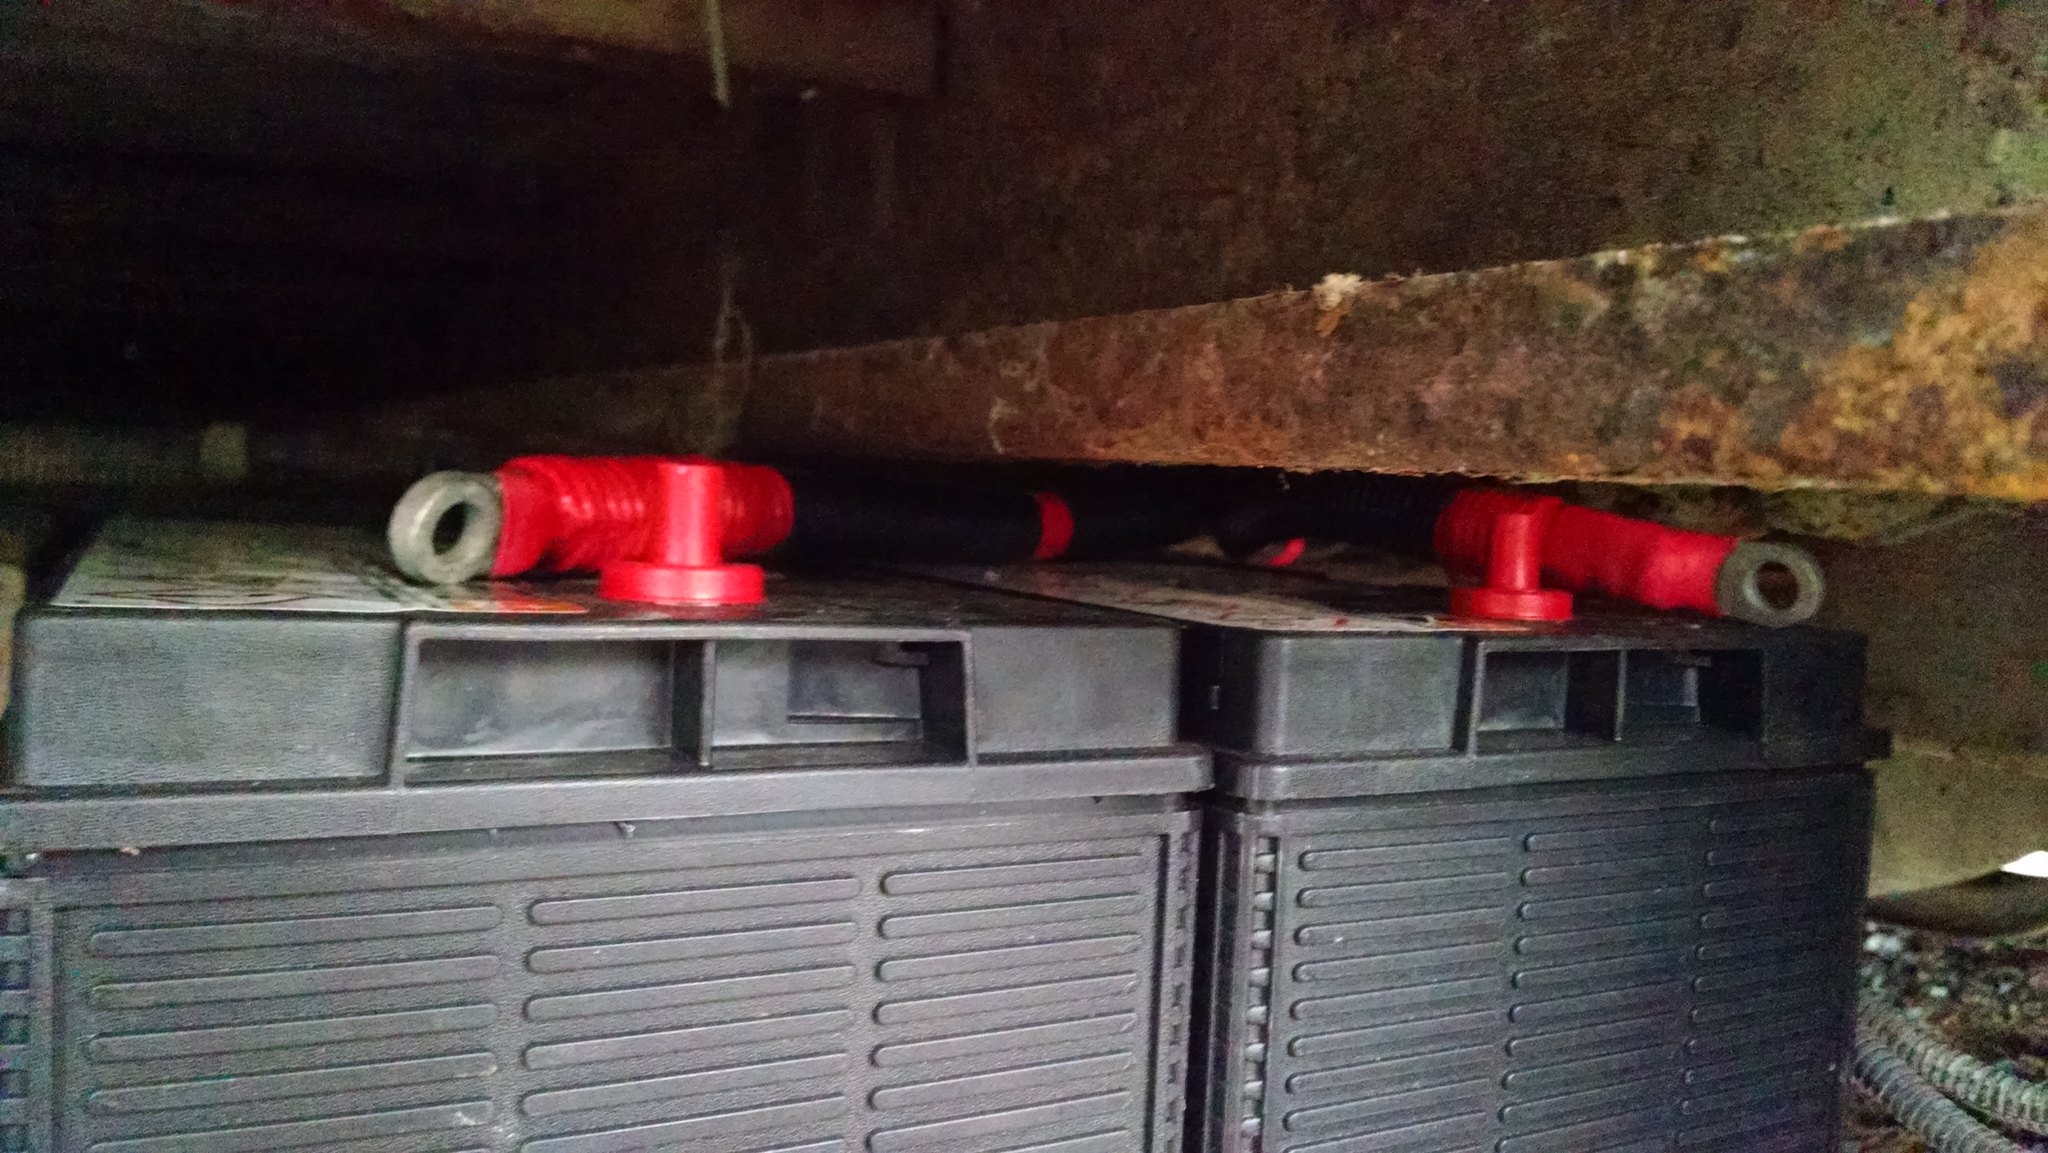 IMG_20180213_170217885 IMG_20180213_170217885 by acidburn02zts, on Flickr
 IMG_20180213_170232811 IMG_20180213_170232811 by acidburn02zts, on Flickr
No good way of bolting it in.. but ties should be fine.
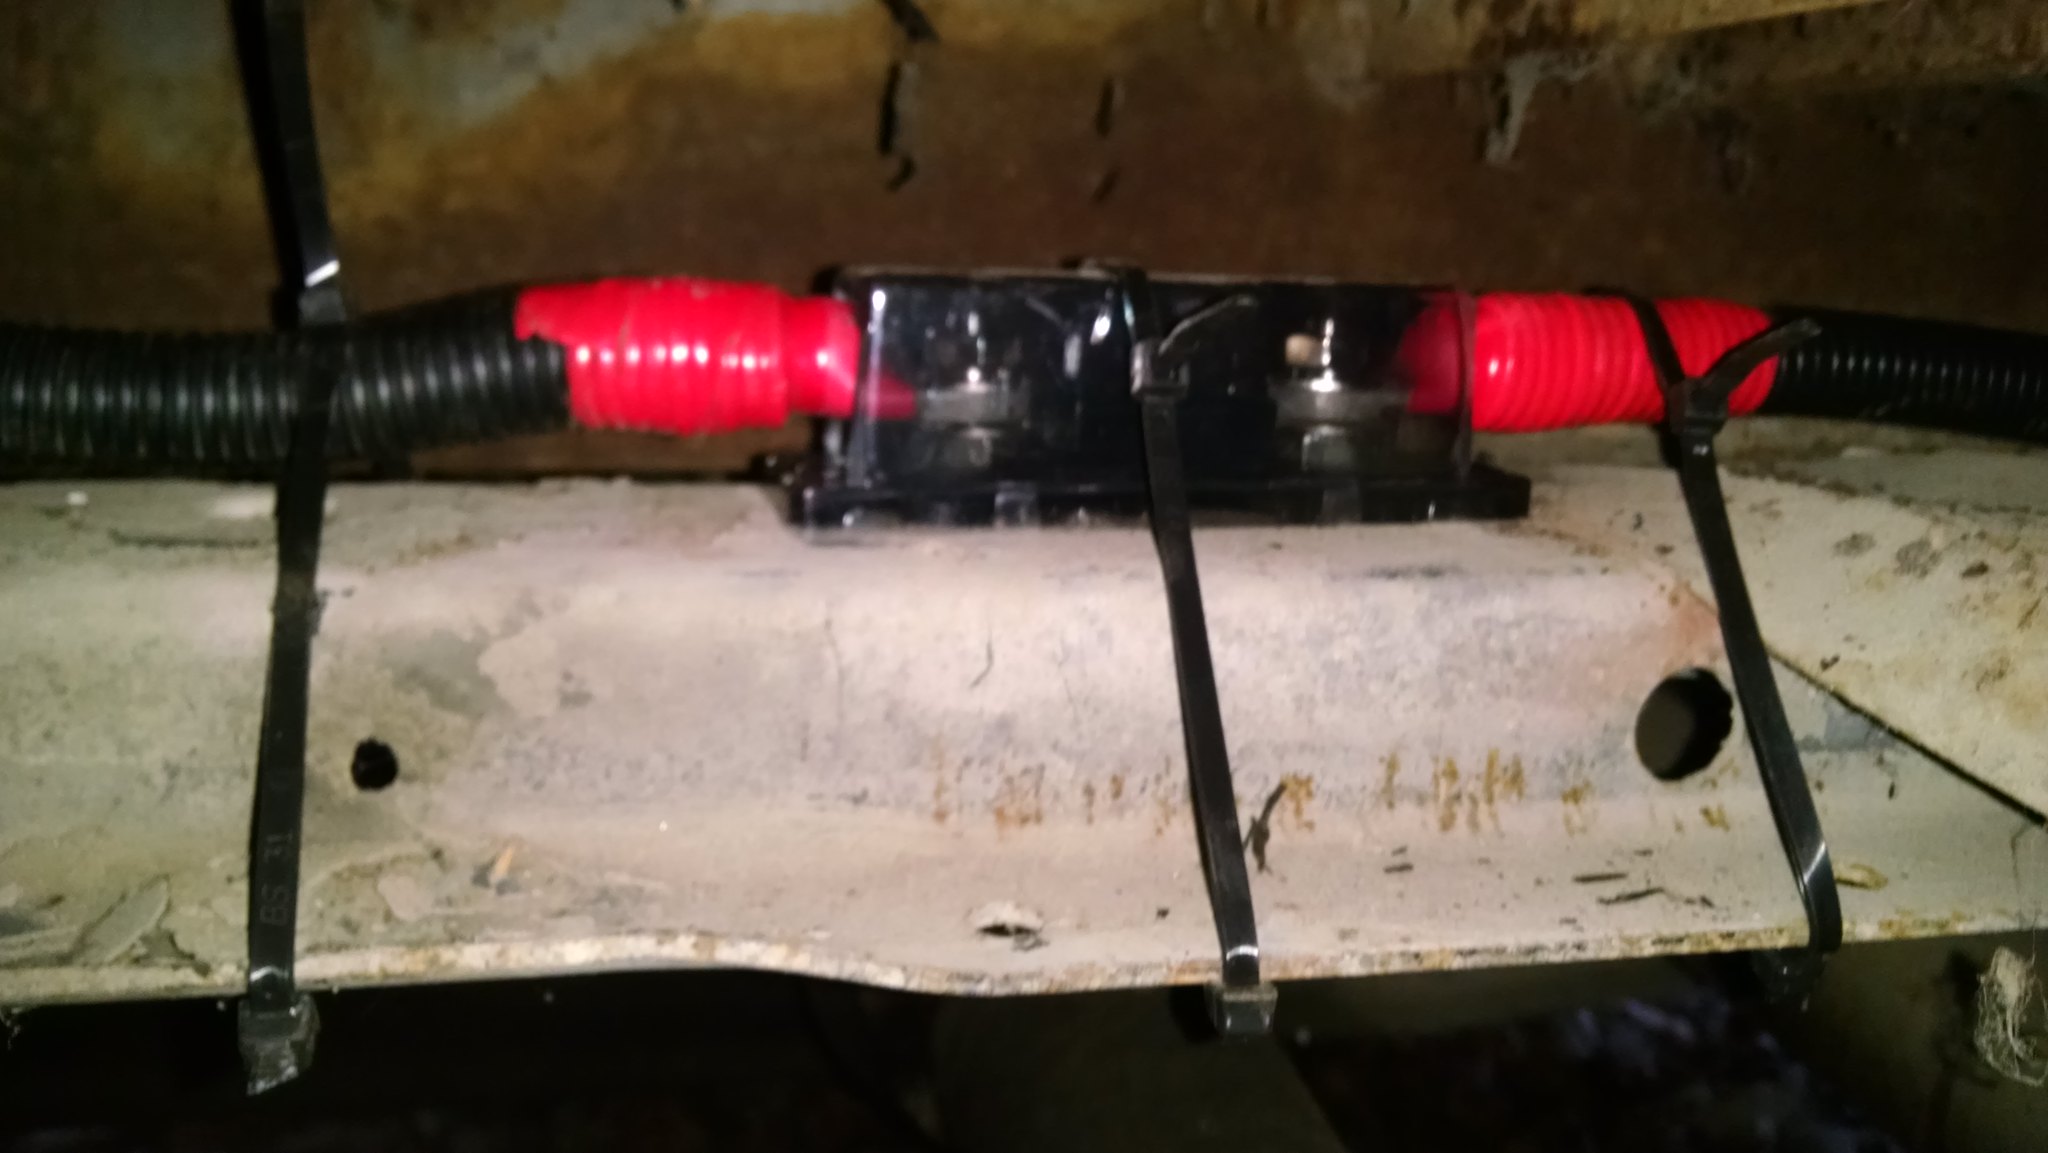 IMG_20180213_170307448 IMG_20180213_170307448 by acidburn02zts, on Flickr
What will be the main power stud for the engine bay..
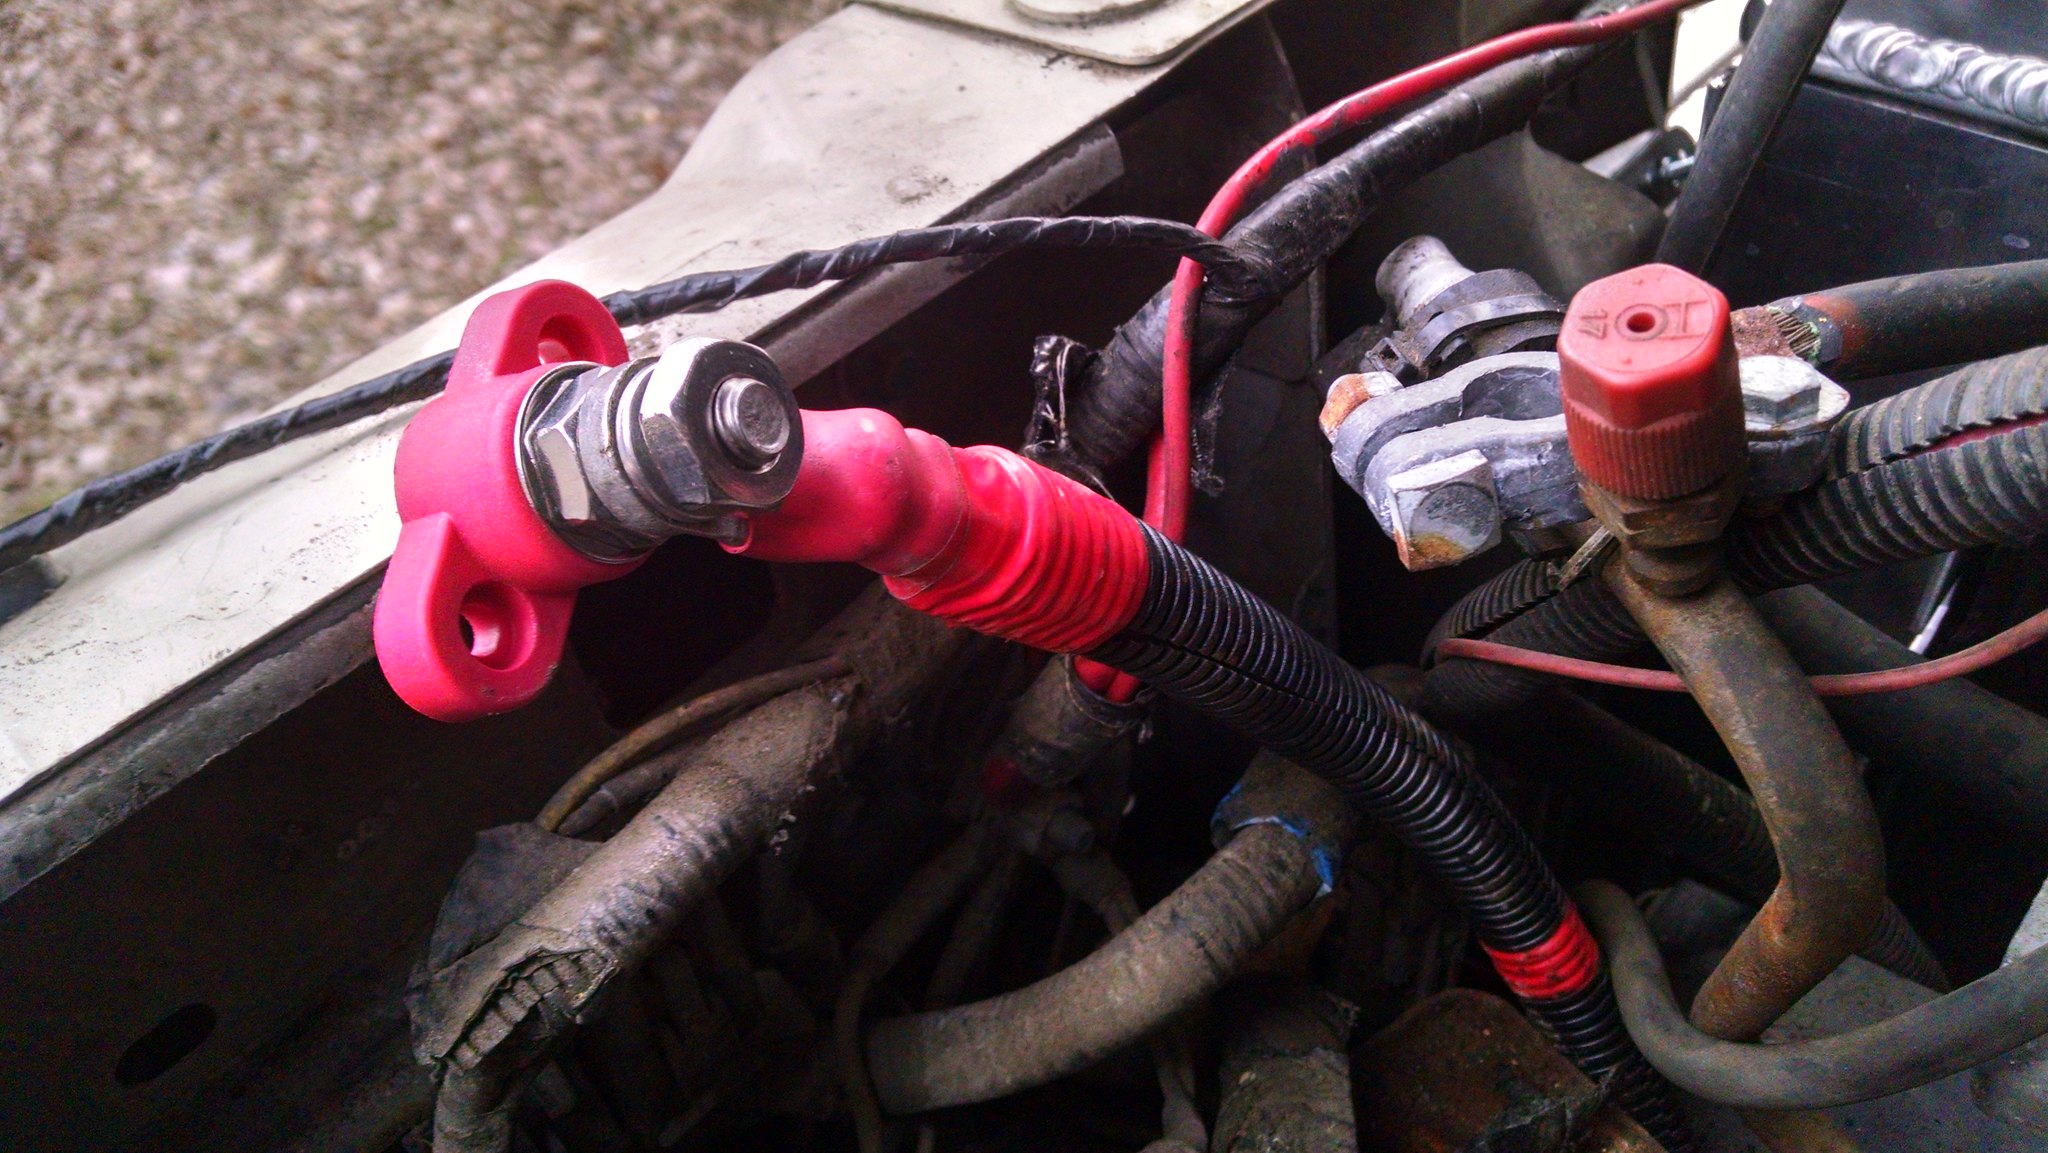 IMG_20180213_170517335_HDR IMG_20180213_170517335_HDR by acidburn02zts, on Flickr
Which will replace this "extra" solenoid ford likes to use. It functions like a power stud except it has one wire on the other side that when triggered, sends power to the trigger wire for the starter solenoid. Its somewhat pointless. I'll be replacing it with a standard bosch style relay to send power to the starter solenoid trigger. The stud will be the main which will have the power for the underhood junction block, power for the bus body, and the main charge feed for the alternator.
 IMG_20180213_170543087 IMG_20180213_170543087 by acidburn02zts, on Flickr
All that is left is to hook up the grounds. Waiting to button up some small stuff before putting power to the whole system and turning it over for the first time after all the work.
Brake parts will be in by Friday. Looks like we are ahead of schedule for once.
|
|
|
|
|
02-13-2018, 11:18 PM
|
#126
|
|
Bus Geek
Join Date: Feb 2016
Location: Willamina, Oregon
Posts: 6,409
Coachwork: 97 Bluebird TC1000 5.9
|
I think you've replaced or gone through everything possible on that Goshen. Impressive, and in record time.
__________________
Robin
Nobody's Business
|
|
|
|
|
02-19-2018, 02:23 PM
|
#127
|
|
Bus Nut
Join Date: Jul 2017
Posts: 819
Year: 1993
Chassis: IH 3800
Engine: DT360
Rated Cap: 66
|
This oil cooler is the bane of my existence. Got the electrical connections buttoned up yesterday and fired the bus for the first time after all the work.
Oil pressure came up quick.. 40psi at idle. Belt drive was running true... no odd noises.. no leaks from the water pump. At this point, it had been running for roughly 30 seconds. Then I remembered that there are 2 parts to the oil cooler and I only knew the gaskets weren't leaking.
Glance under the bus and oil is going everywhere... a stream roughly the diameter of my pinky @40psi coming from one of the oil cooler o-rings. Ran around and shut it down.. still registering 40psi on the gauge at that point.
Dip stick is now dry... roughly 1.5-2 gallons of oil on the ground @$26 a gallon.
Cooling system is drained again... waiting on another set of o-rings and gaskets.
On a good note, everything else seemed to be doing good. Lol
|
|
|
|
|
02-19-2018, 05:35 PM
|
#128
|
|
Bus Geek
Join Date: Dec 2015
Location: pa
Posts: 2,506
Year: 98
Coachwork: 1. Corbeil & 2. Thomas
Chassis: 1 ford 1998 e350 4x4 7.3 2 mercedes 2004
Engine: 7.3 powerstroke & MBE906
|
Man oh man, that sucks.  After this it should be smooth sailing.
good luck. later j
|
|
|
|
|
02-20-2018, 12:01 AM
|
#129
|
|
Bus Nut
Join Date: Jul 2017
Posts: 819
Year: 1993
Chassis: IH 3800
Engine: DT360
Rated Cap: 66
|
Quote:
Originally Posted by joeblack5
Man oh man, that sucks. After this it should be smooth sailing.
good luck. later j |
I certainly hope so. Lol
Well, while waiting on gaskets/seals to get here... figured I'd finish up some little crap.
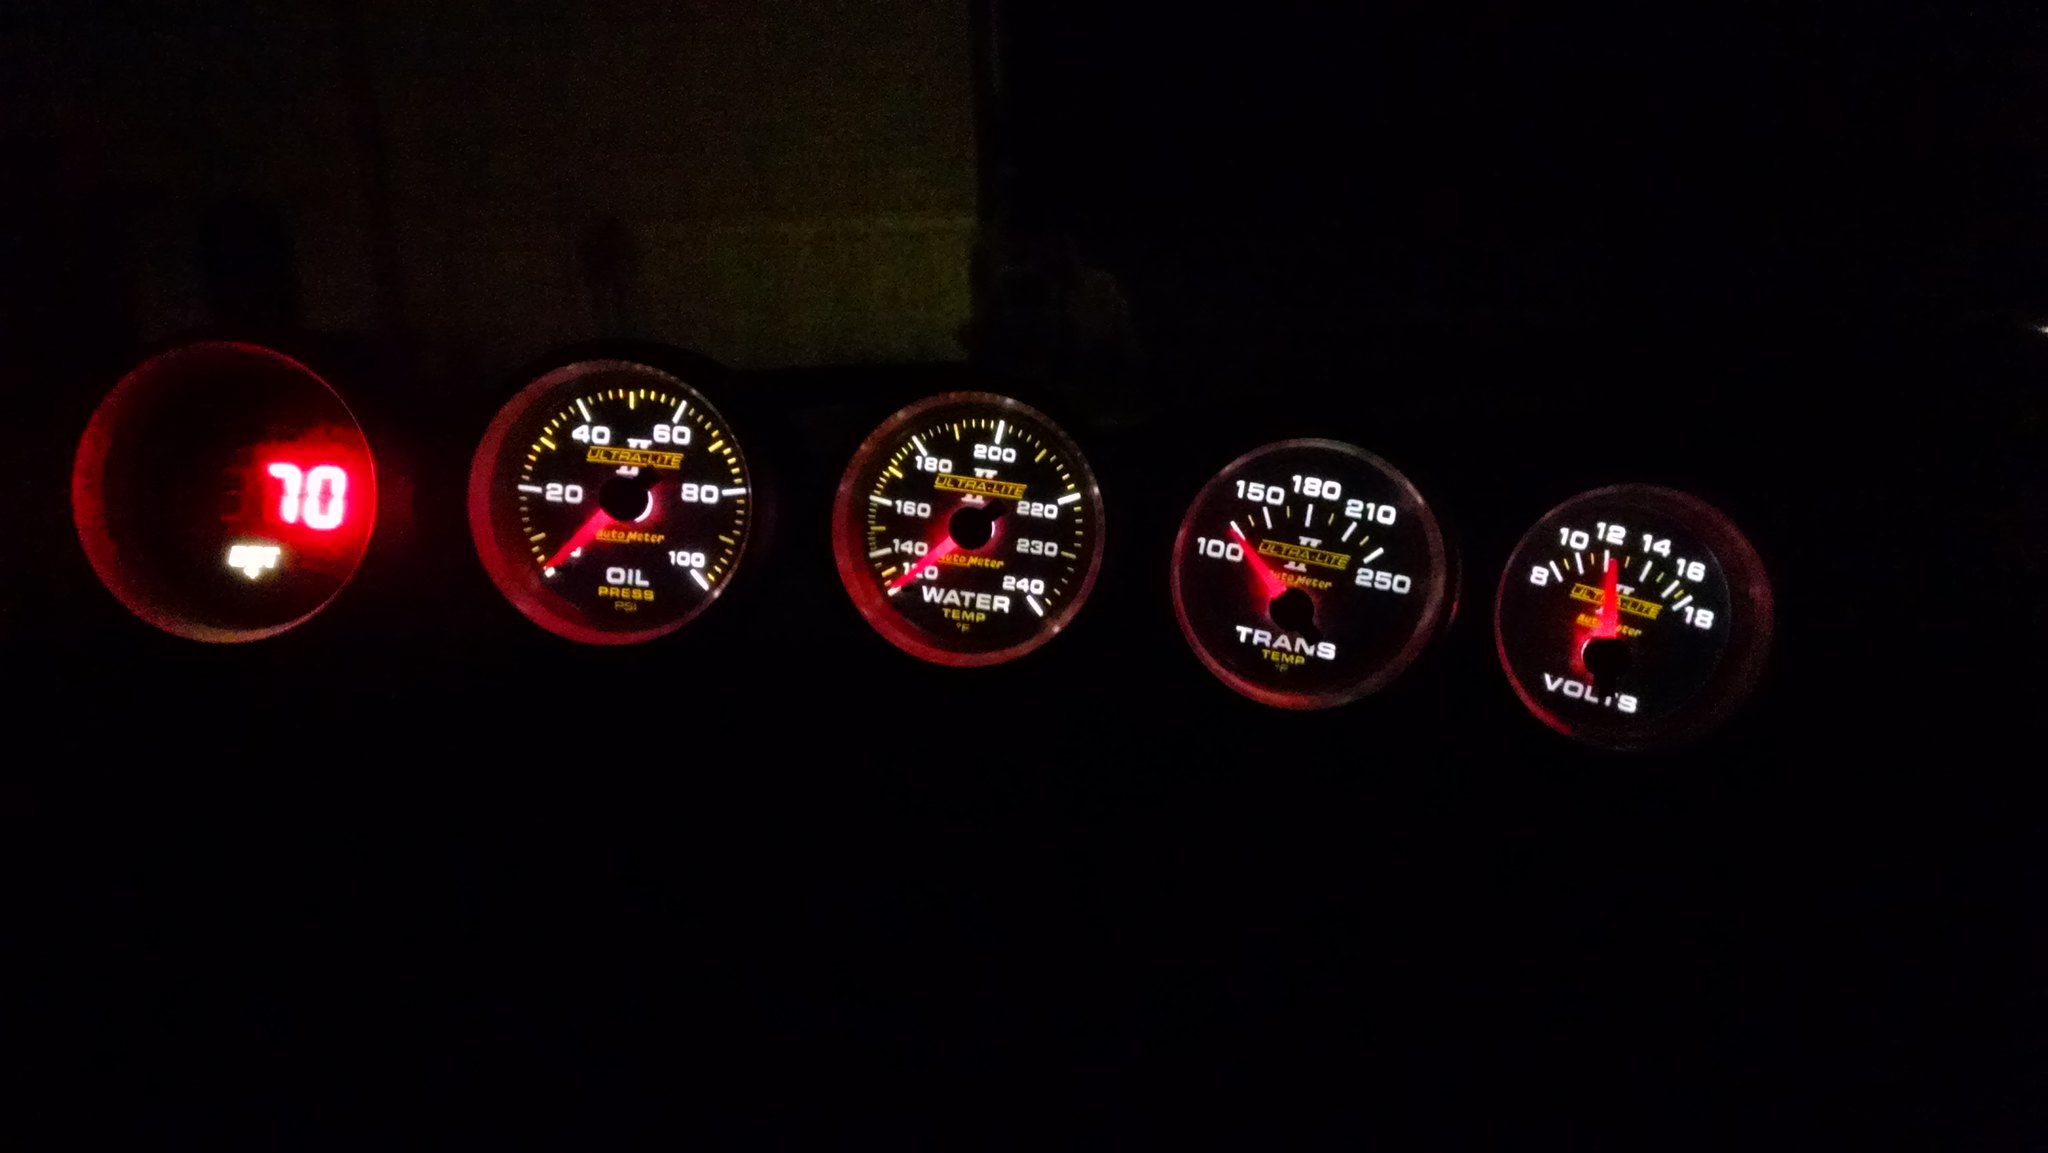
Finished wiring up the gauges and such..
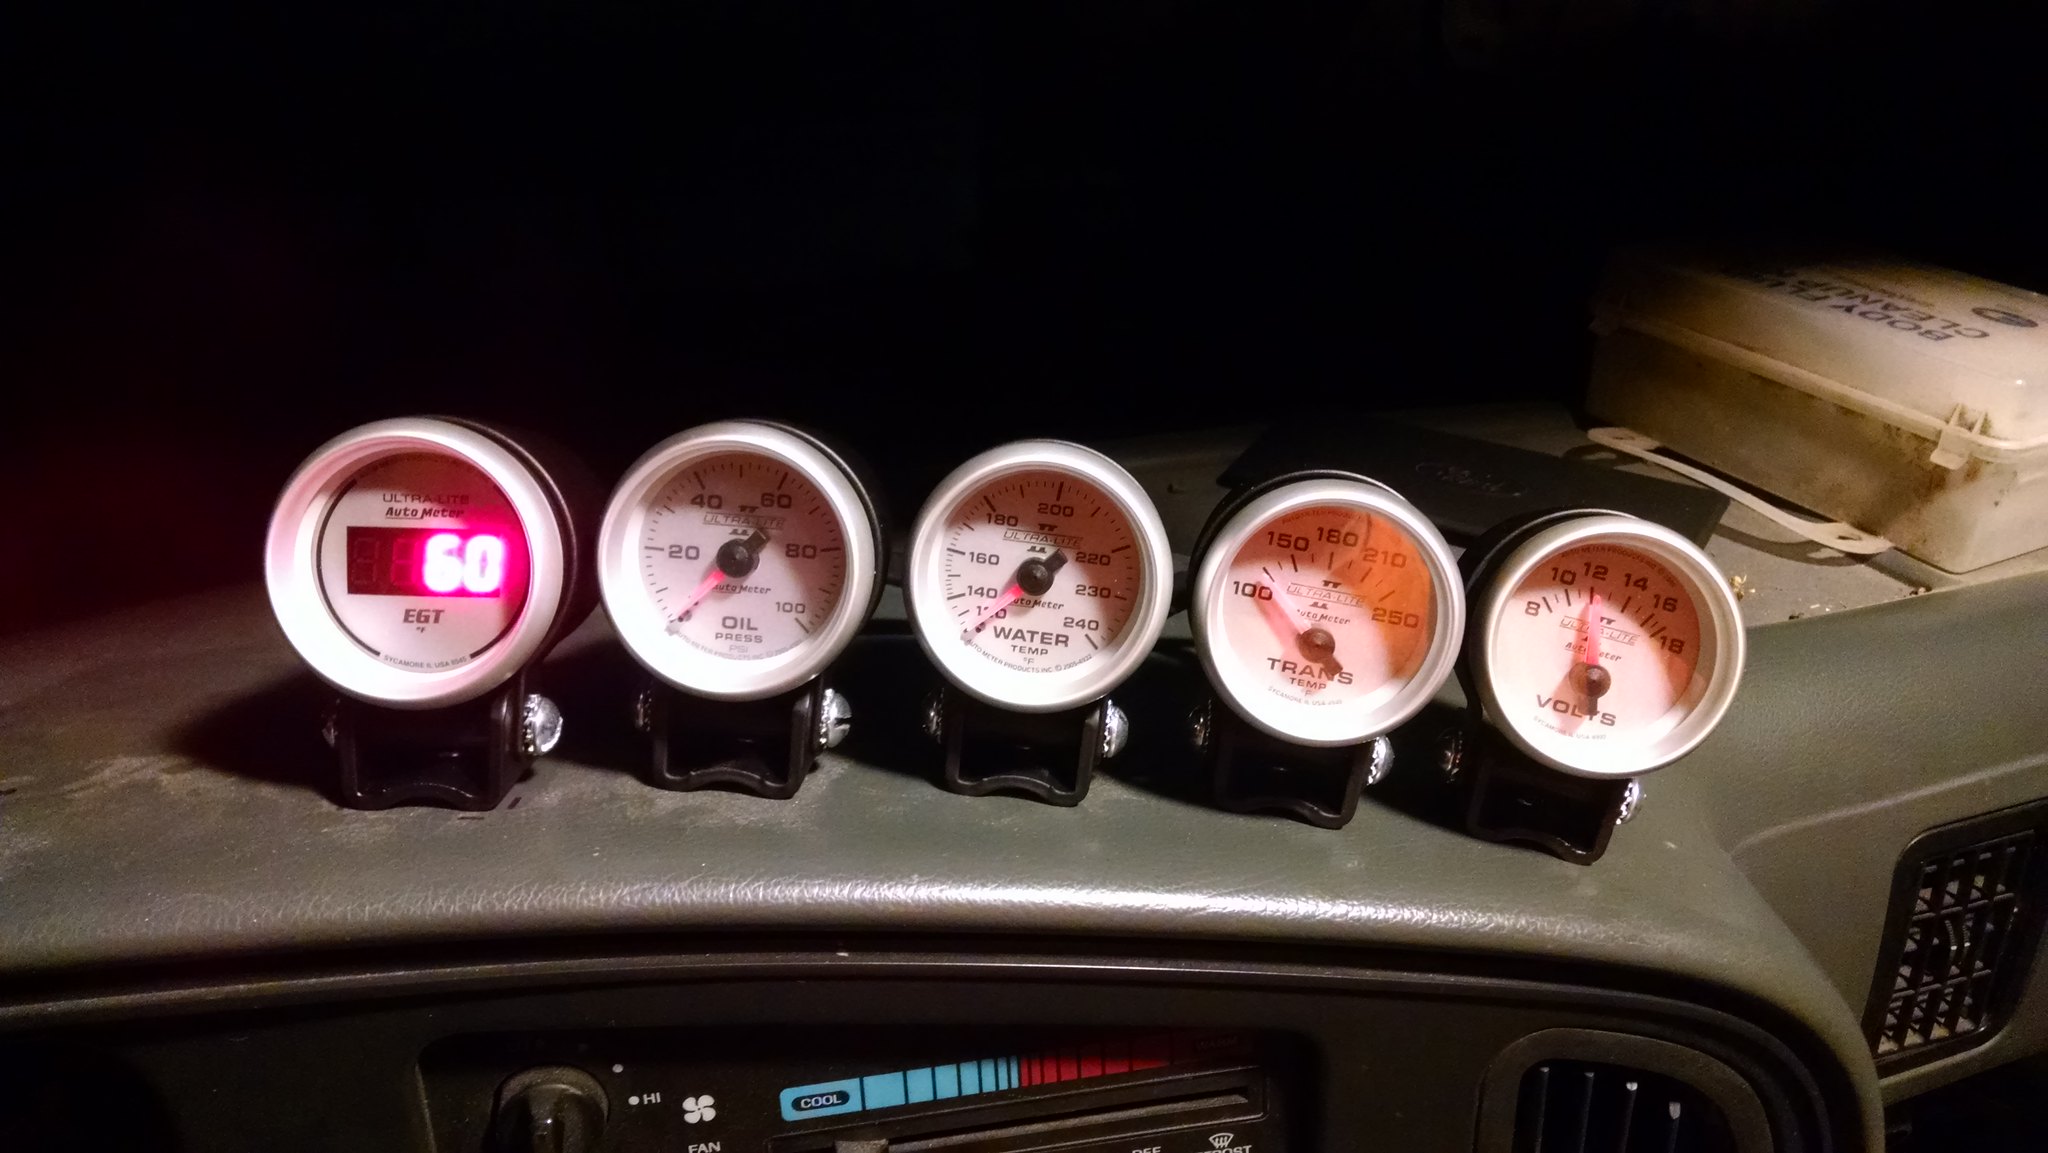 IMG_20180219_222032379 IMG_20180219_222032379 by acidburn02zts, on Flickr
I really like the lighting... and they dim with the switch which I wasn't expecting.
 IMG_20180219_222108310 IMG_20180219_222108310 by acidburn02zts, on Flickr
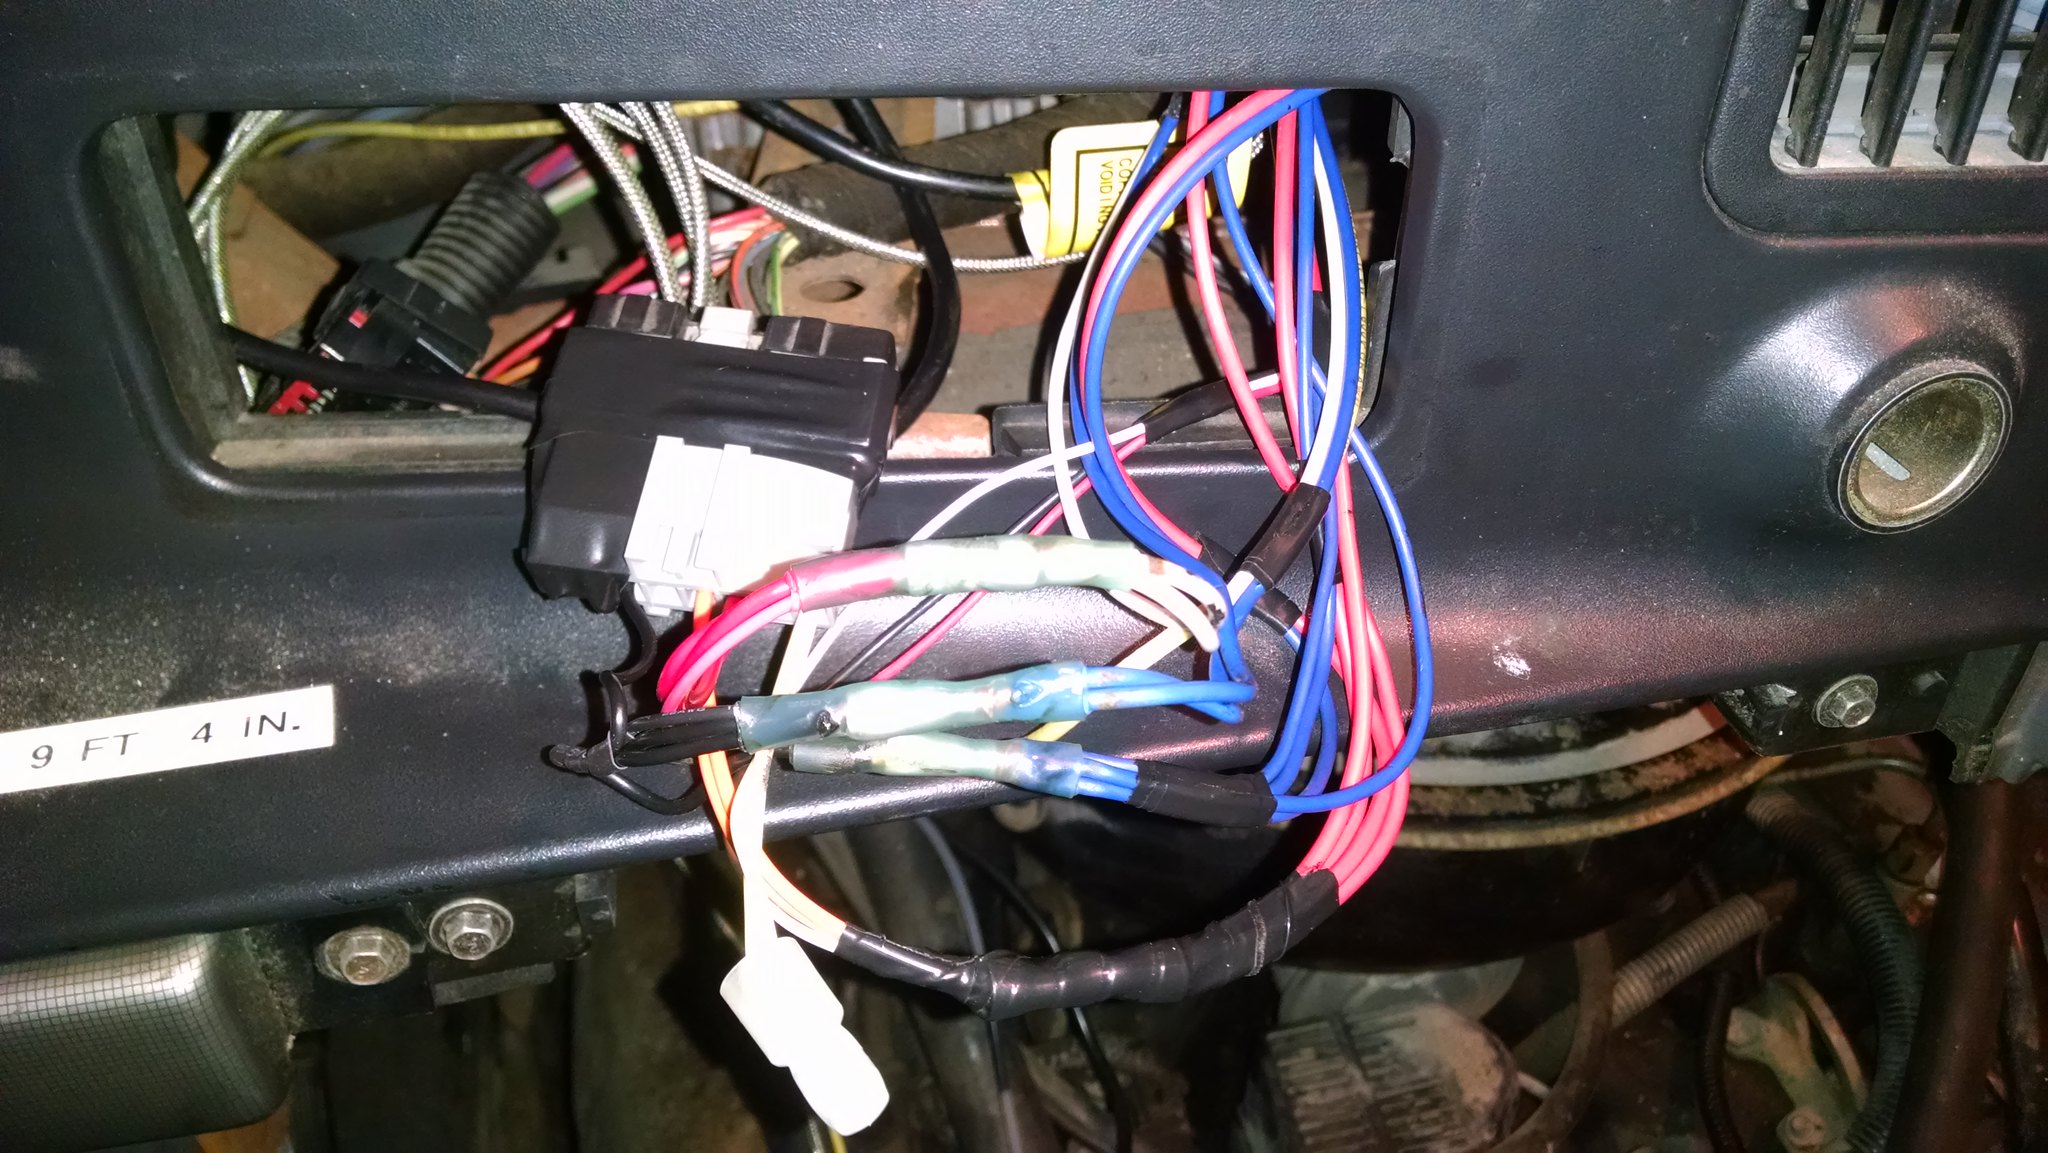
Since there isn't a factory radio in dash.. I used a radio harness to wire in the gauges. Worked out great and since they are LED back lit, no worries on power draw. Everything is now tied up and tucked back in the dash with the cover plate back in place. Can't even tell. I will be putting in a simple radio but it'll go over head.
 IMG_20180219_221824624 IMG_20180219_221824624 by acidburn02zts, on Flickr
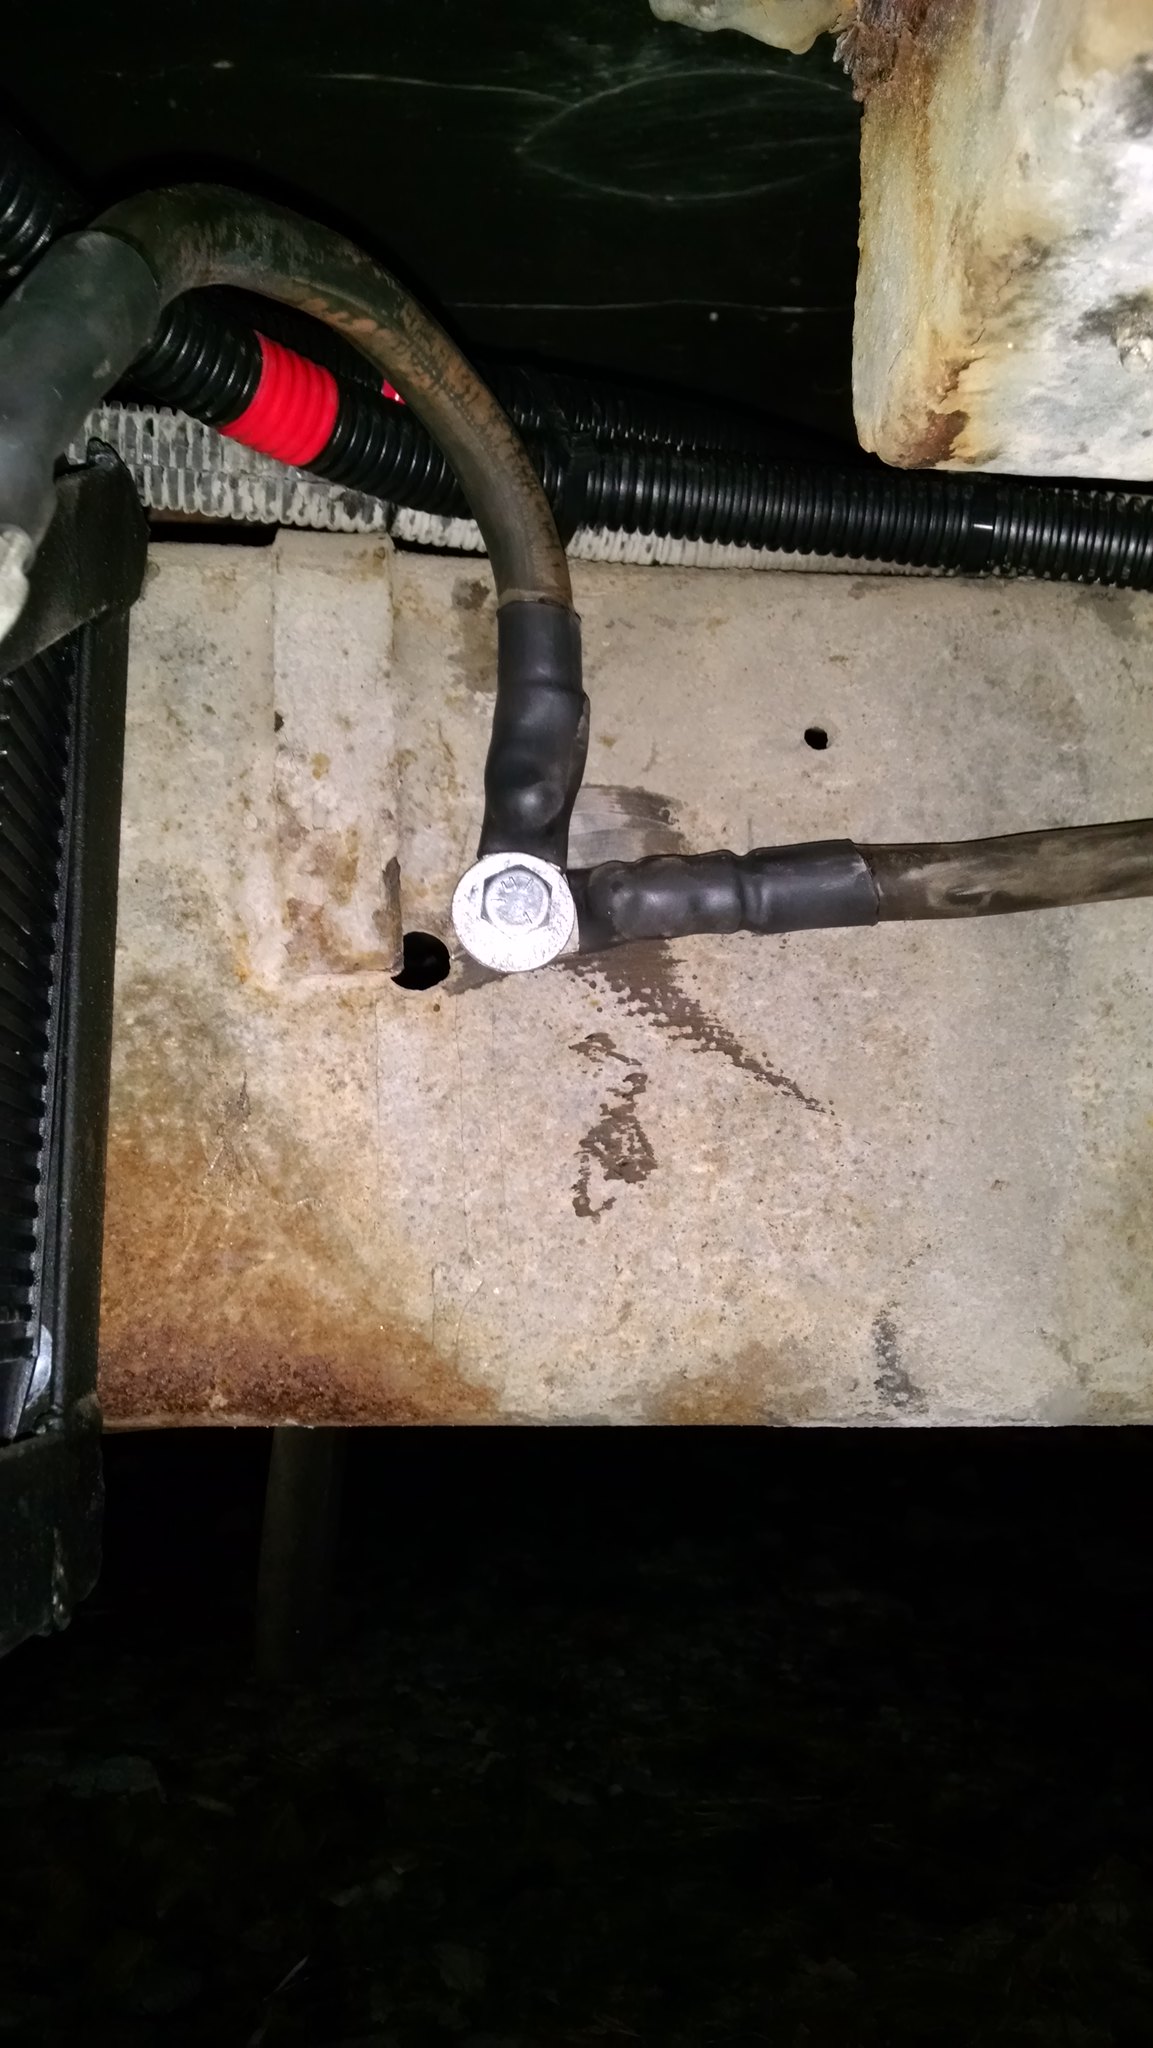
After buttoning that up, I decided to run an additional engine ground back to the batteries. The block has 2 grounds coming off of it from the factory. Both used to go to each battery. Now one of them goes to the body.. one to the frame. While cranking the engine over the other night, it didn't seem to spin as fast as I thought it would with the fancy starter so I figure it is due to grounding. I decided to run another run of 2/0 from the back of the passenger cylinder head to the battery frame ground. Should fix it if it was an issue. Don't get me wrong.. it started great.. just didn't sound as fast as others I've heard with the same starter.
 IMG_20180219_233116370 IMG_20180219_233116370 by acidburn02zts, on Flickr
 IMG_20180219_233129398 IMG_20180219_233129398 by acidburn02zts, on Flickr
Well.. thats the end of progress for this 70F evening. Maybe more tomorrow if rain holds out. I've got all of the front brake parts now along with wheel bearings and some hard line to replace.. we'll see what happens.
|
|
|
|
|
02-21-2018, 12:27 AM
|
#130
|
|
Bus Nut
Join Date: Jul 2017
Posts: 819
Year: 1993
Chassis: IH 3800
Engine: DT360
Rated Cap: 66
|
Another nice evening so out in the drive again.. Rain is about to set in for the remainder of the week but I managed to get a little done.
Decided to start on the brakes... got the driver's side pulled apart.
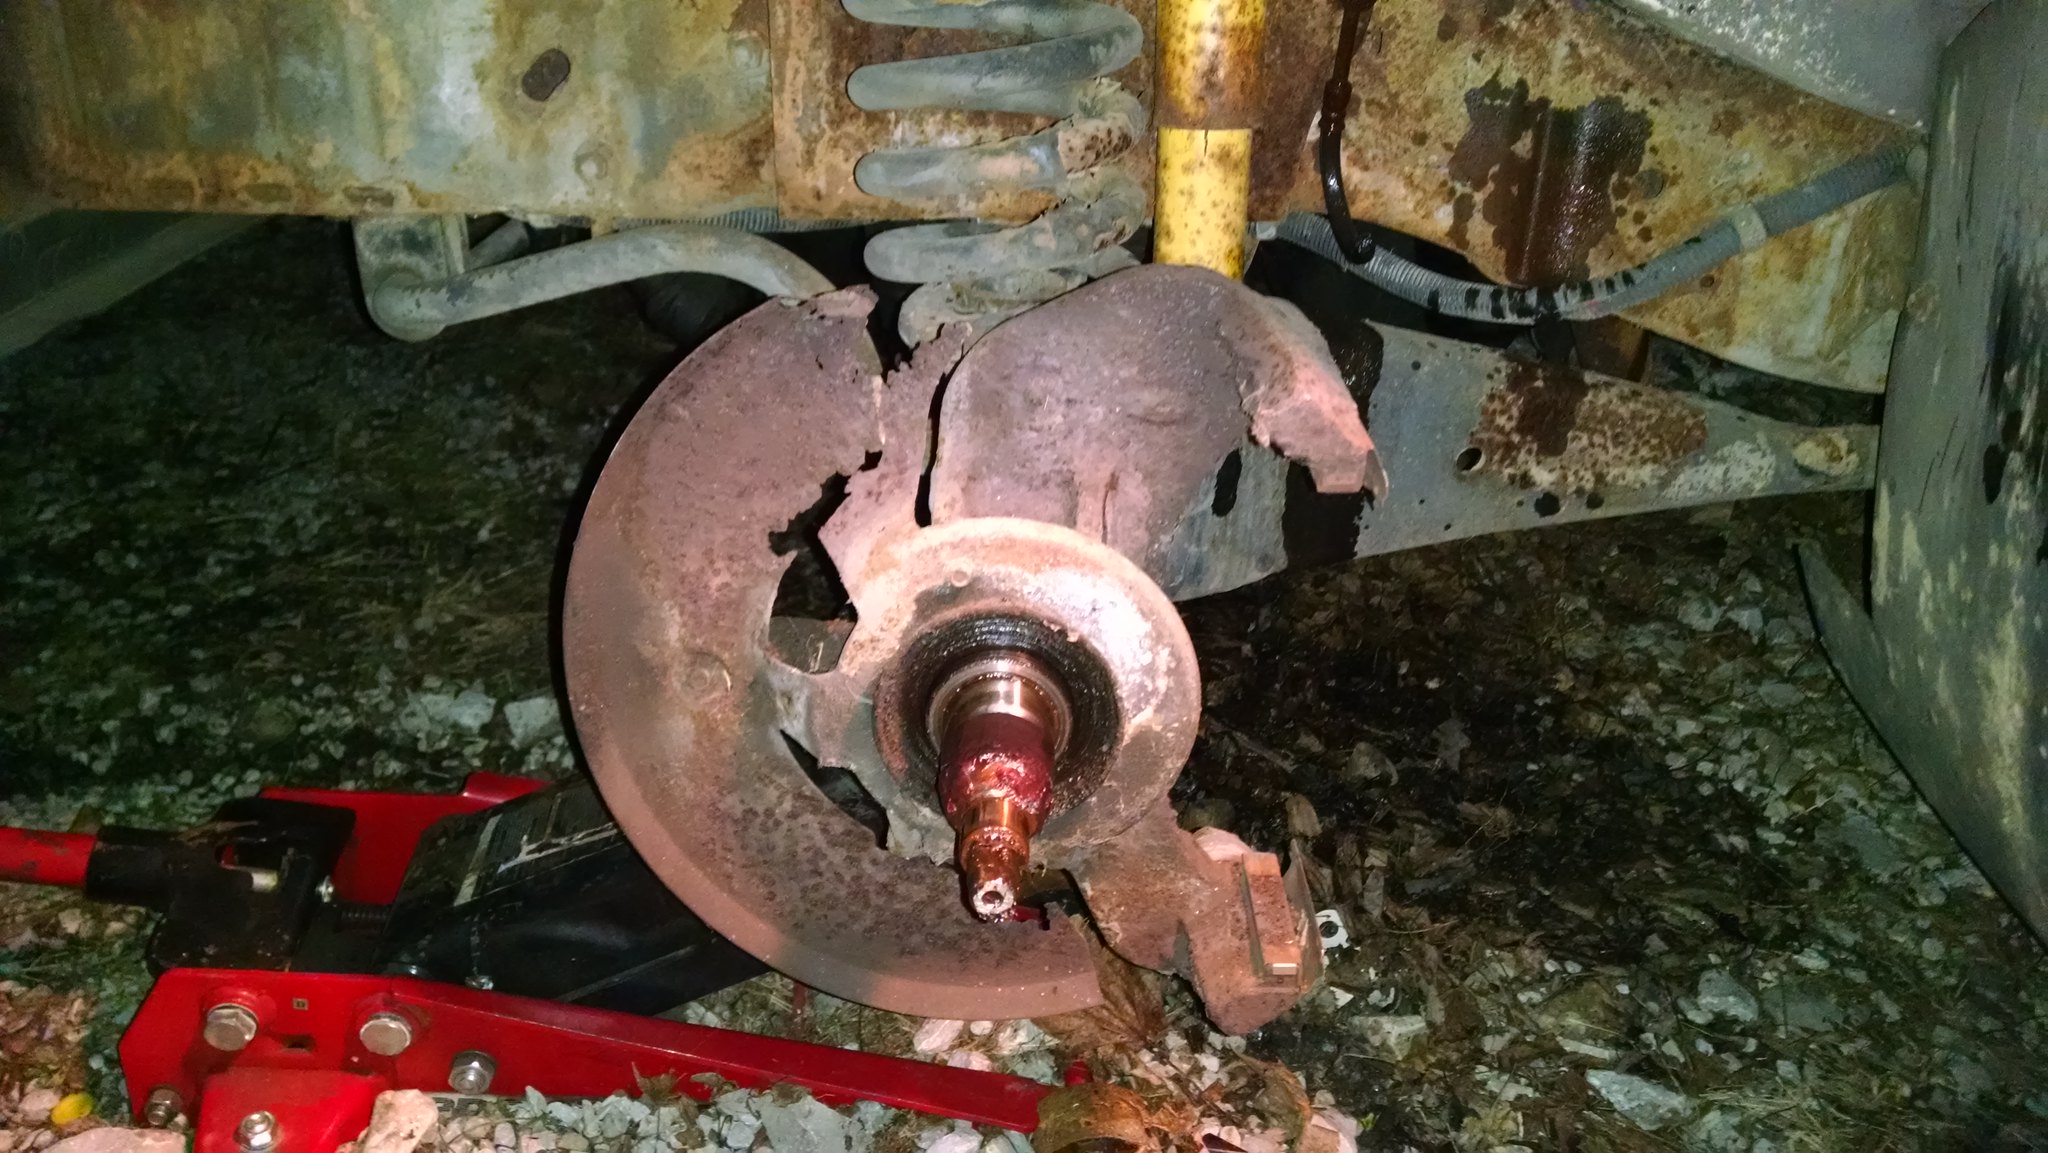 IMG_20180220_221233174 IMG_20180220_221233174 by acidburn02zts, on Flickr
Old rotor/hub assembly..
 IMG_20180220_221238889 IMG_20180220_221238889 by acidburn02zts, on Flickr
Unbolted the rotor from the back side of the hub and separated...
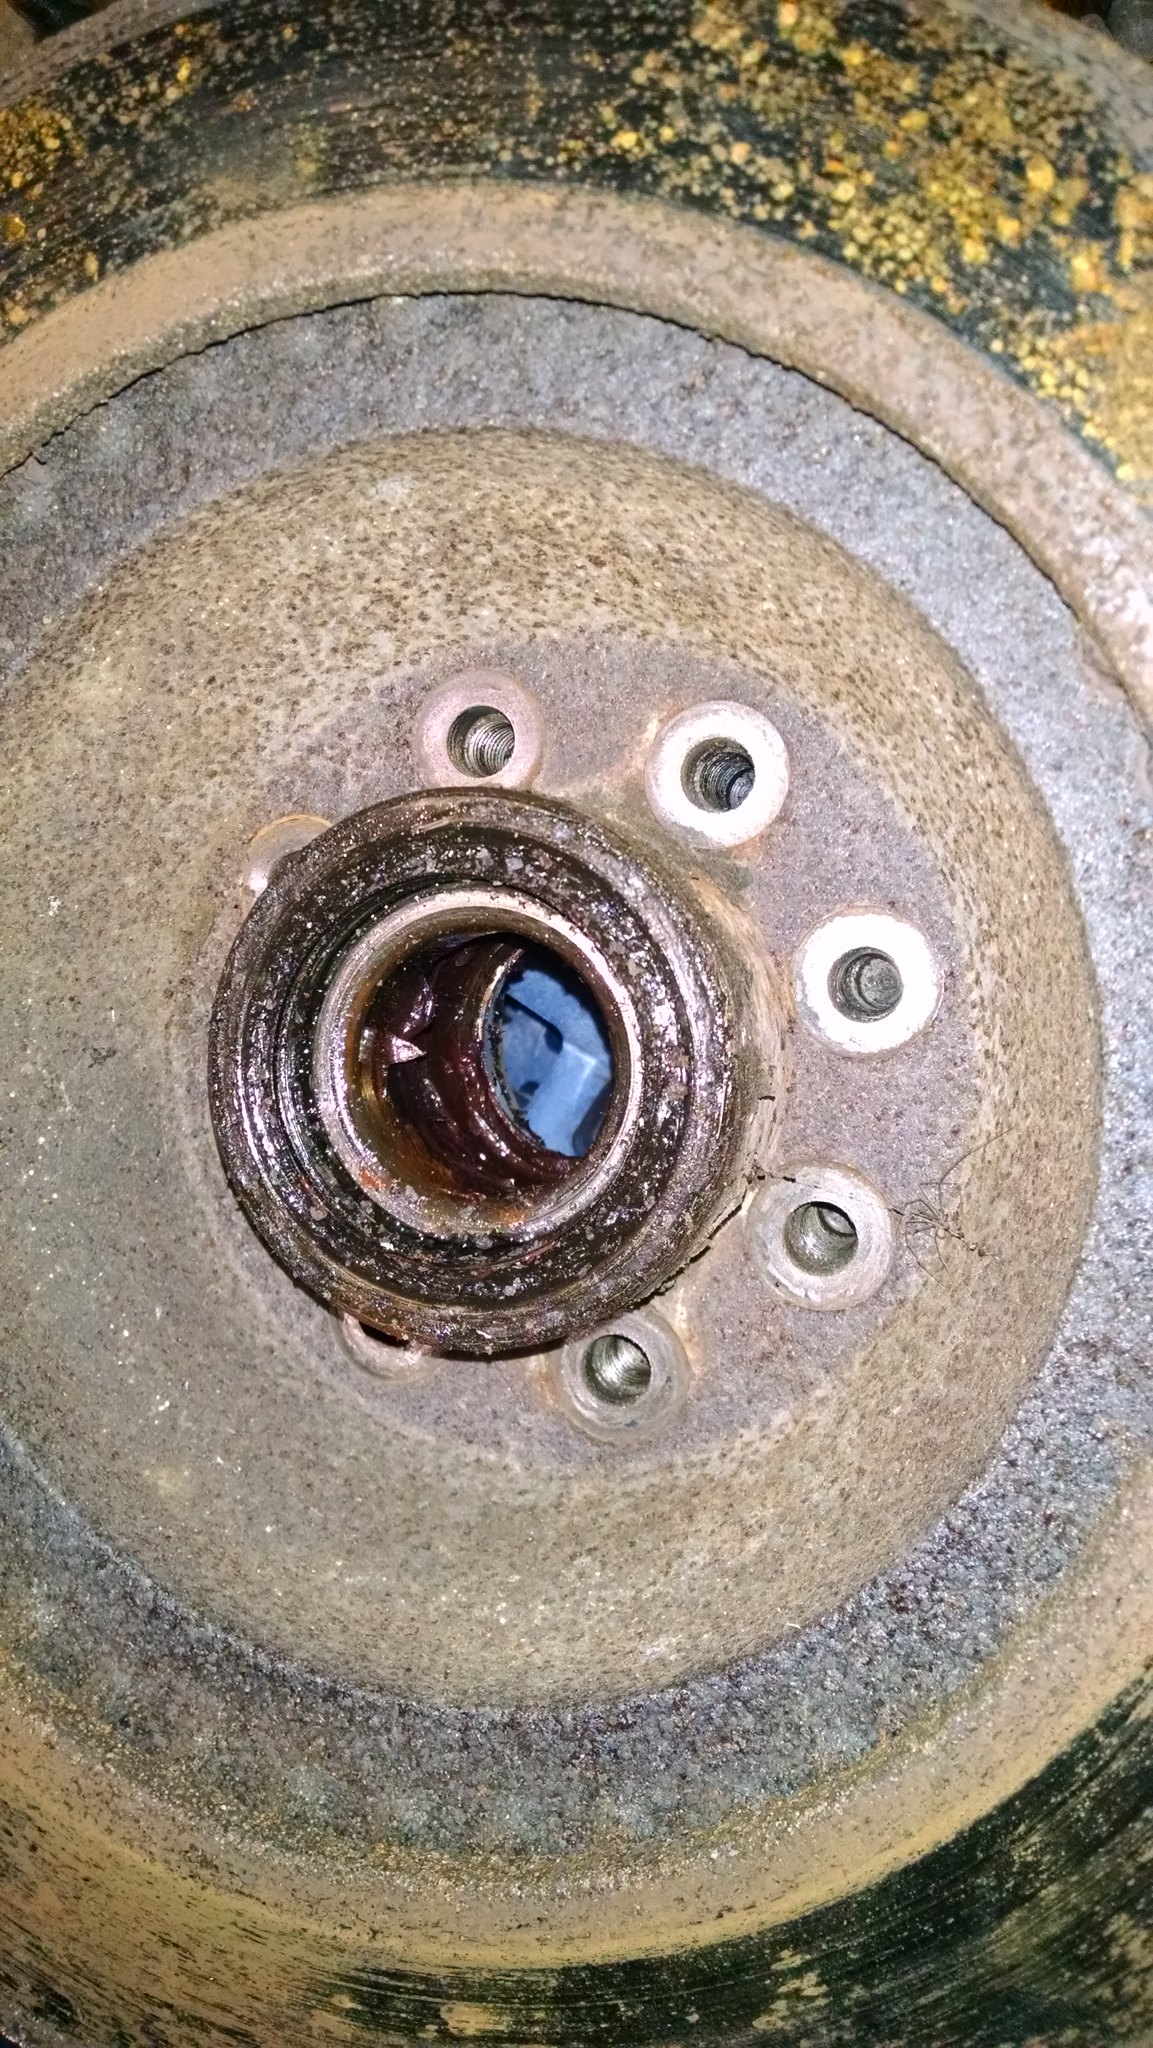 IMG_20180220_222215943 IMG_20180220_222215943 by acidburn02zts, on Flickr
 IMG_20180220_222327454 IMG_20180220_222327454 by acidburn02zts, on Flickr
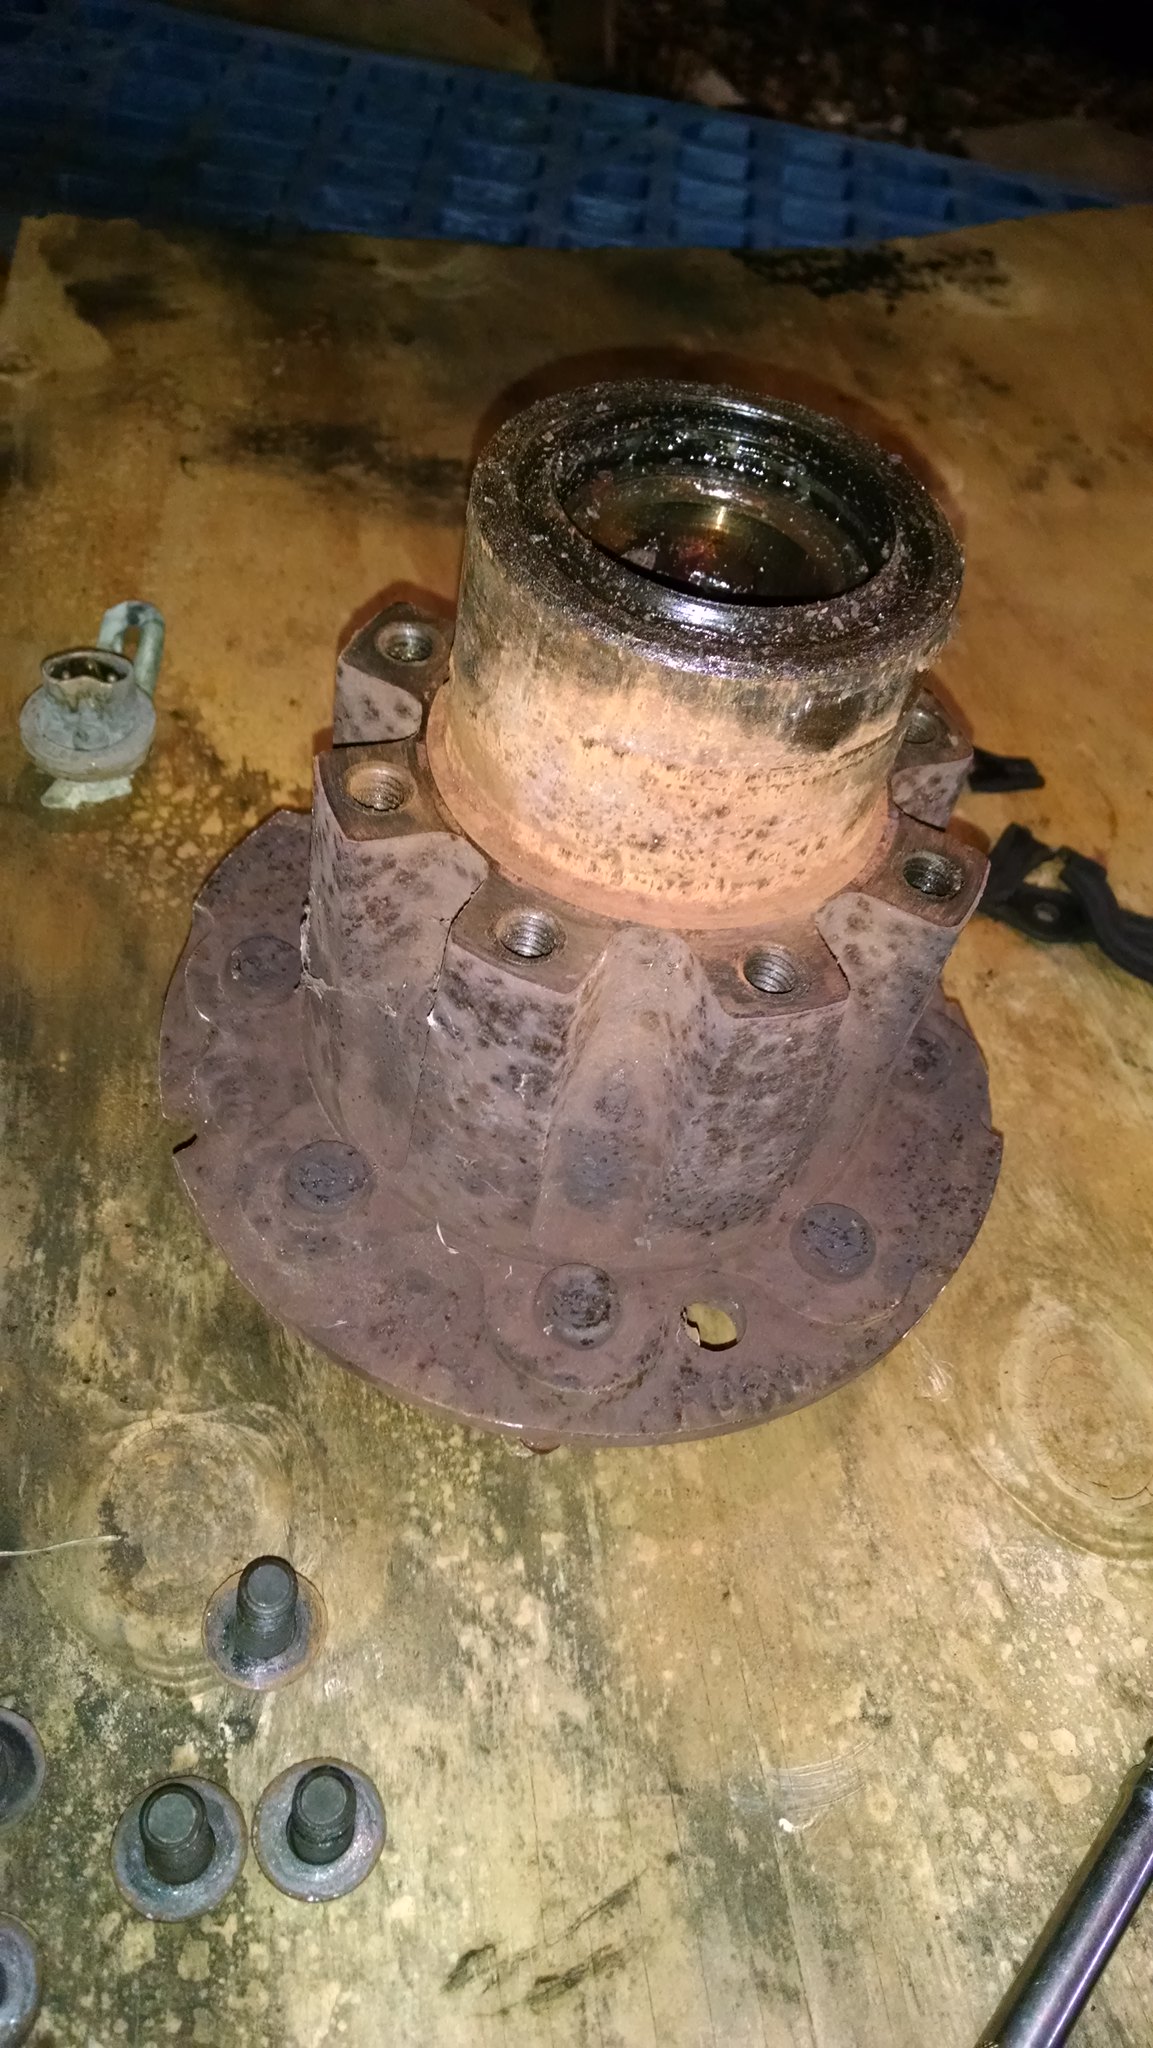
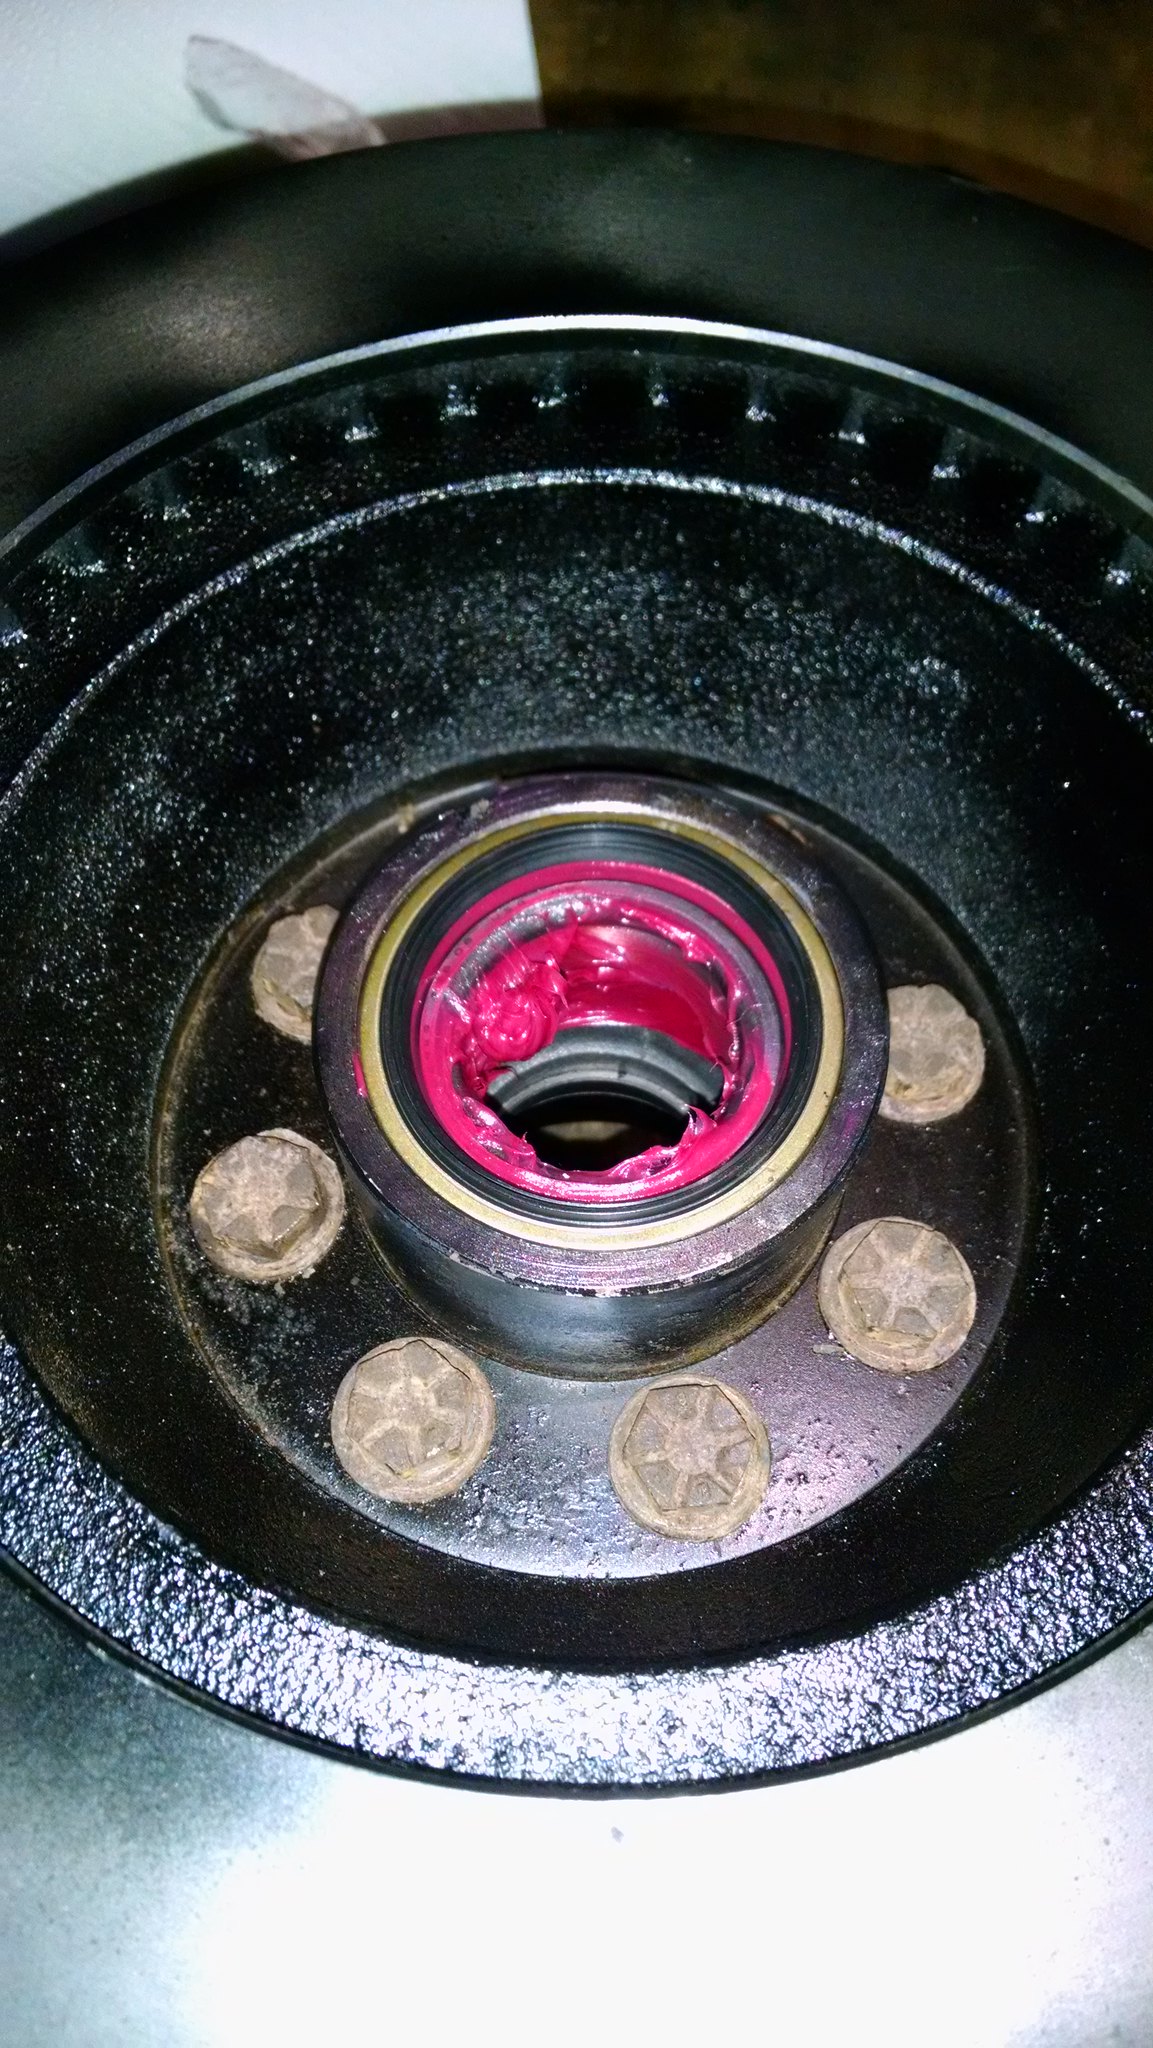
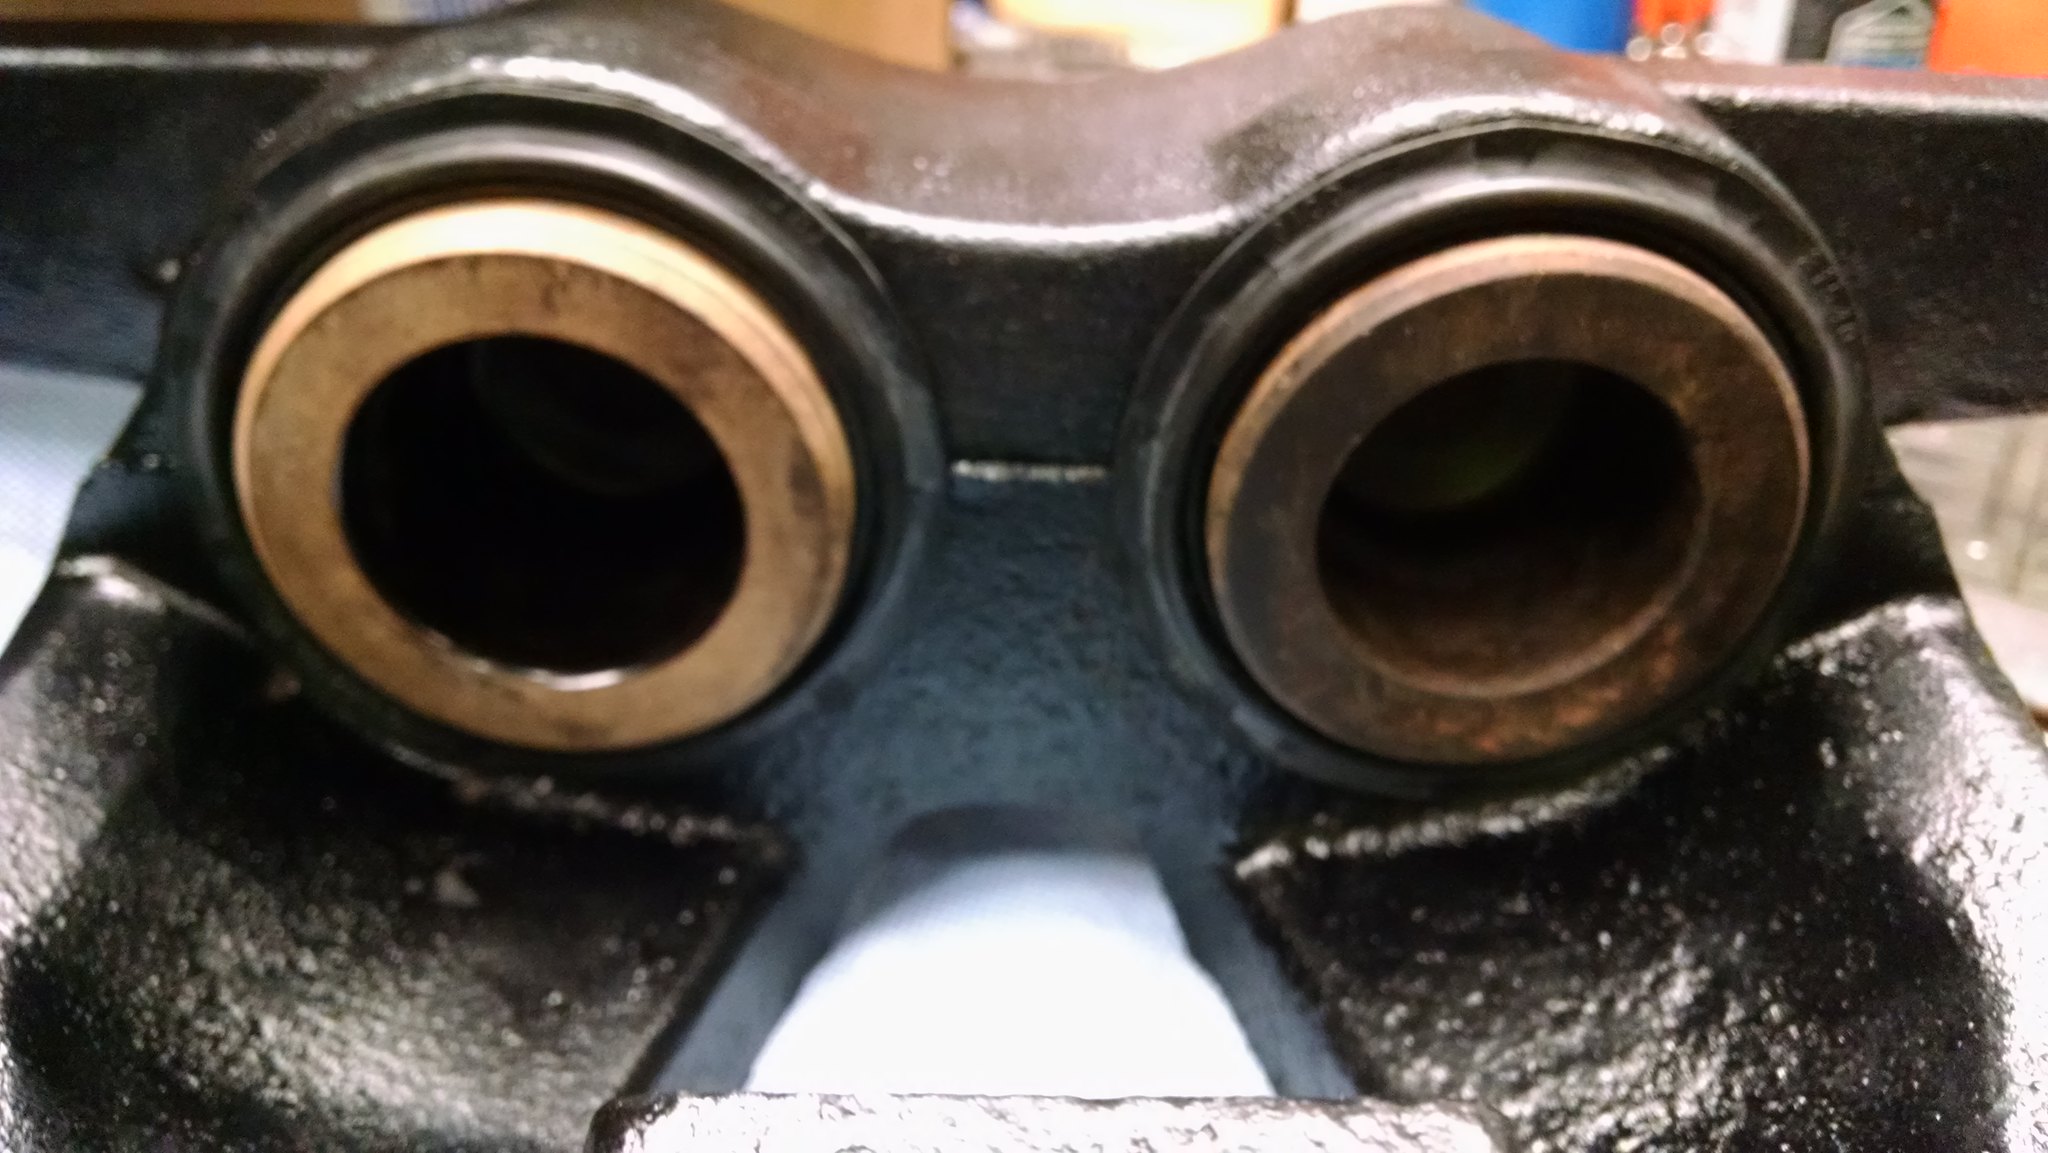
Stripped the hub and prepped it for new bearings and grease seal.
 IMG_20180220_223204186 IMG_20180220_223204186 by acidburn02zts, on Flickr
No cheap crap here...
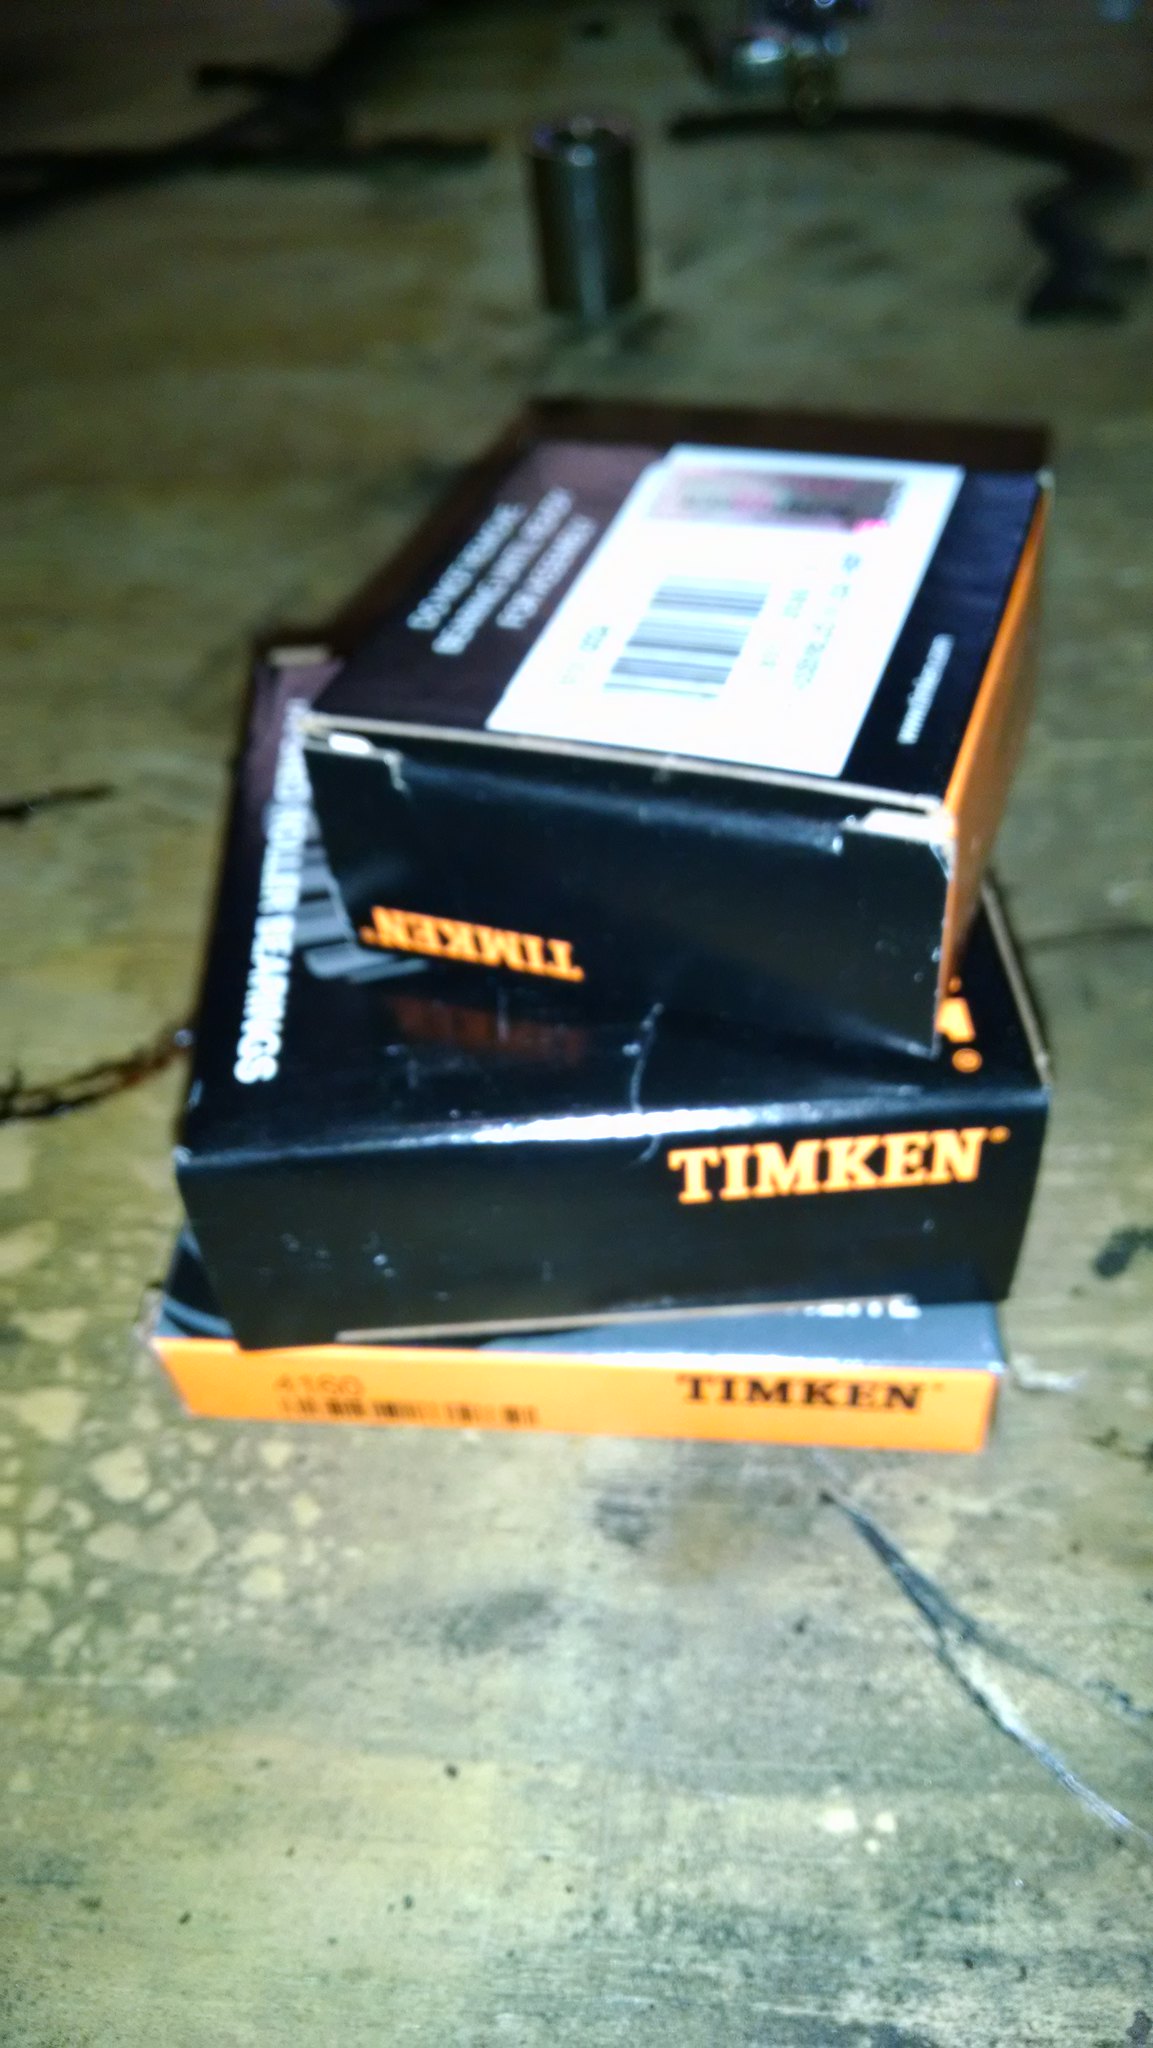 IMG_20180220_224629091 IMG_20180220_224629091 by acidburn02zts, on Flickr
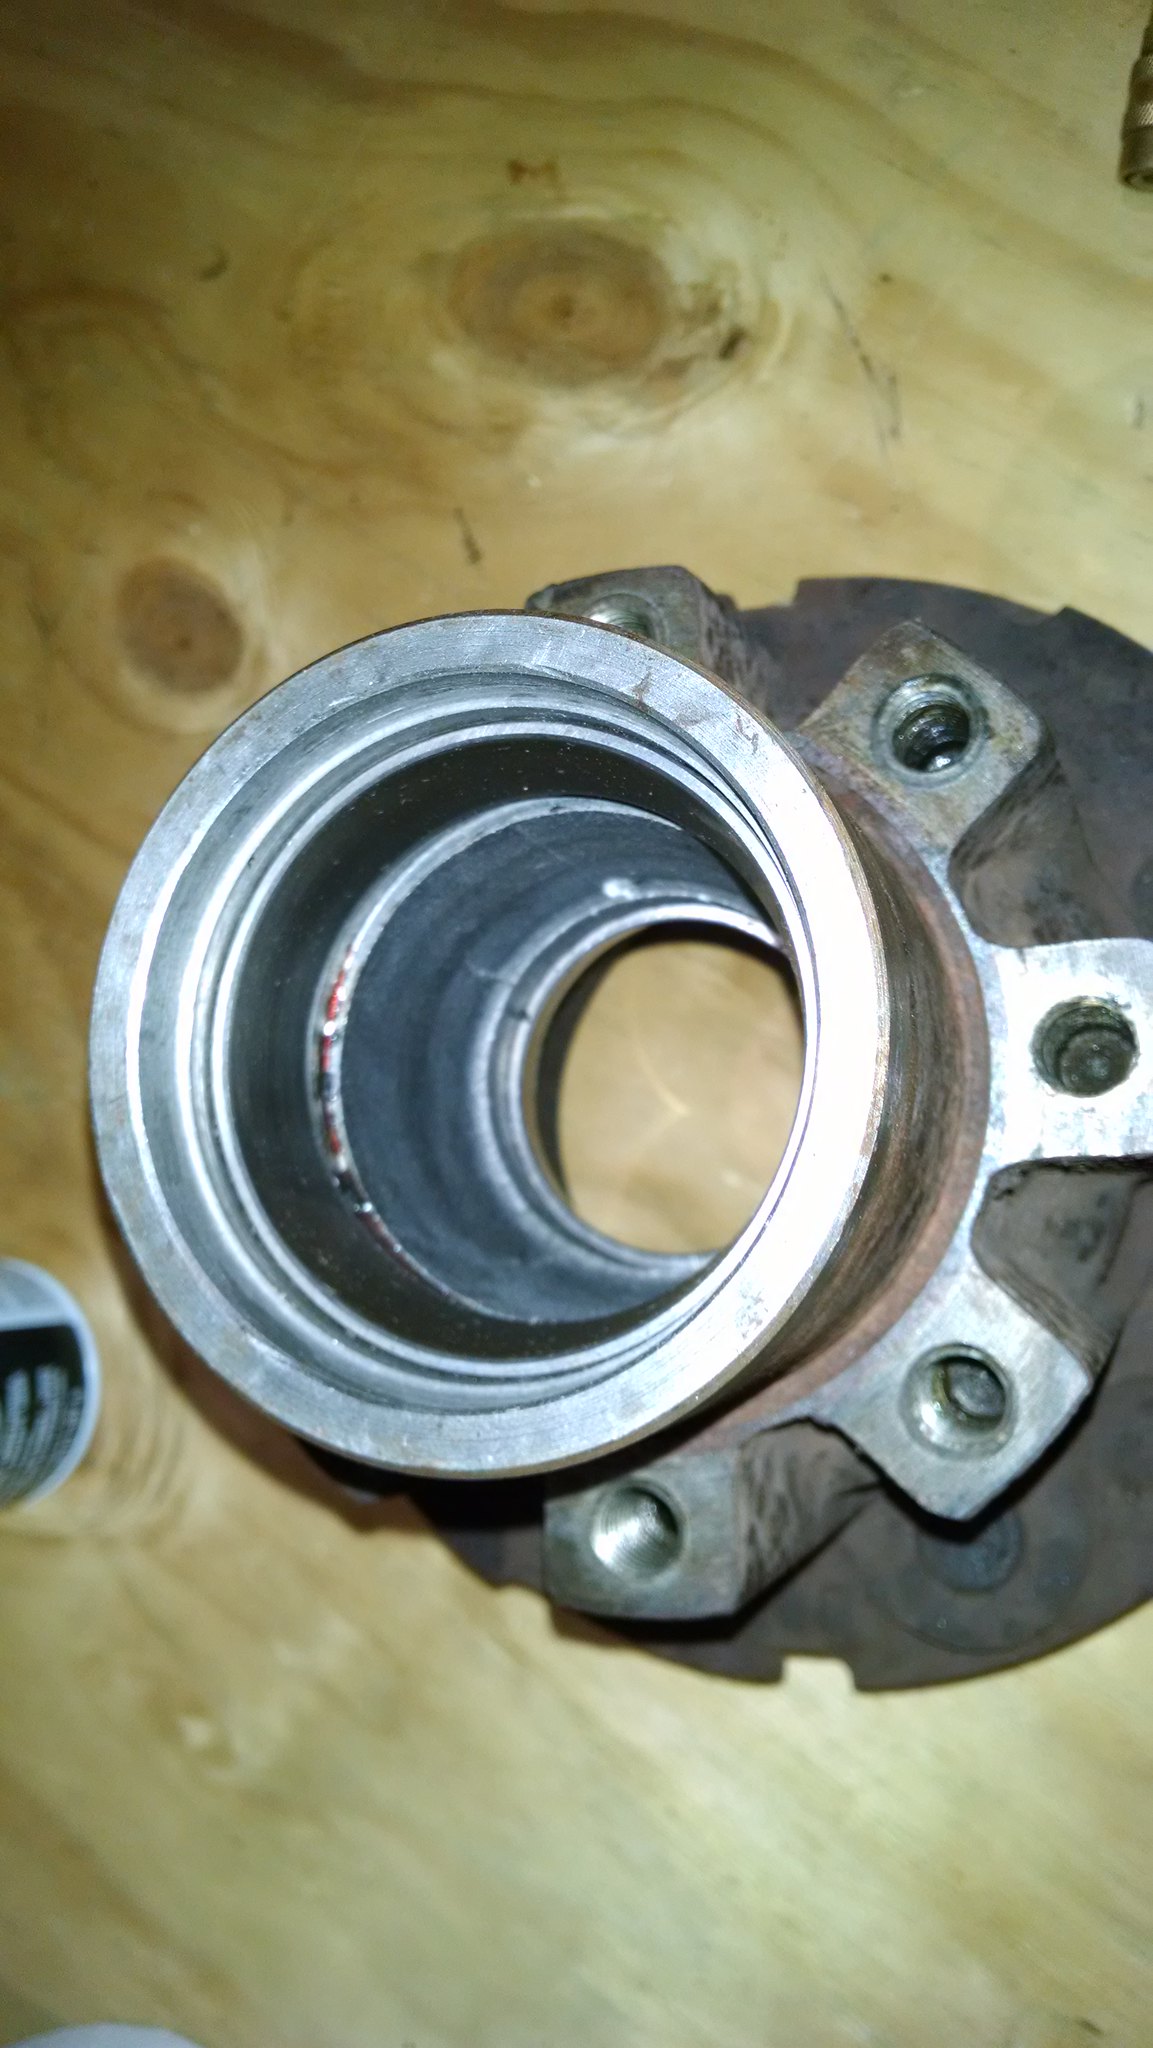
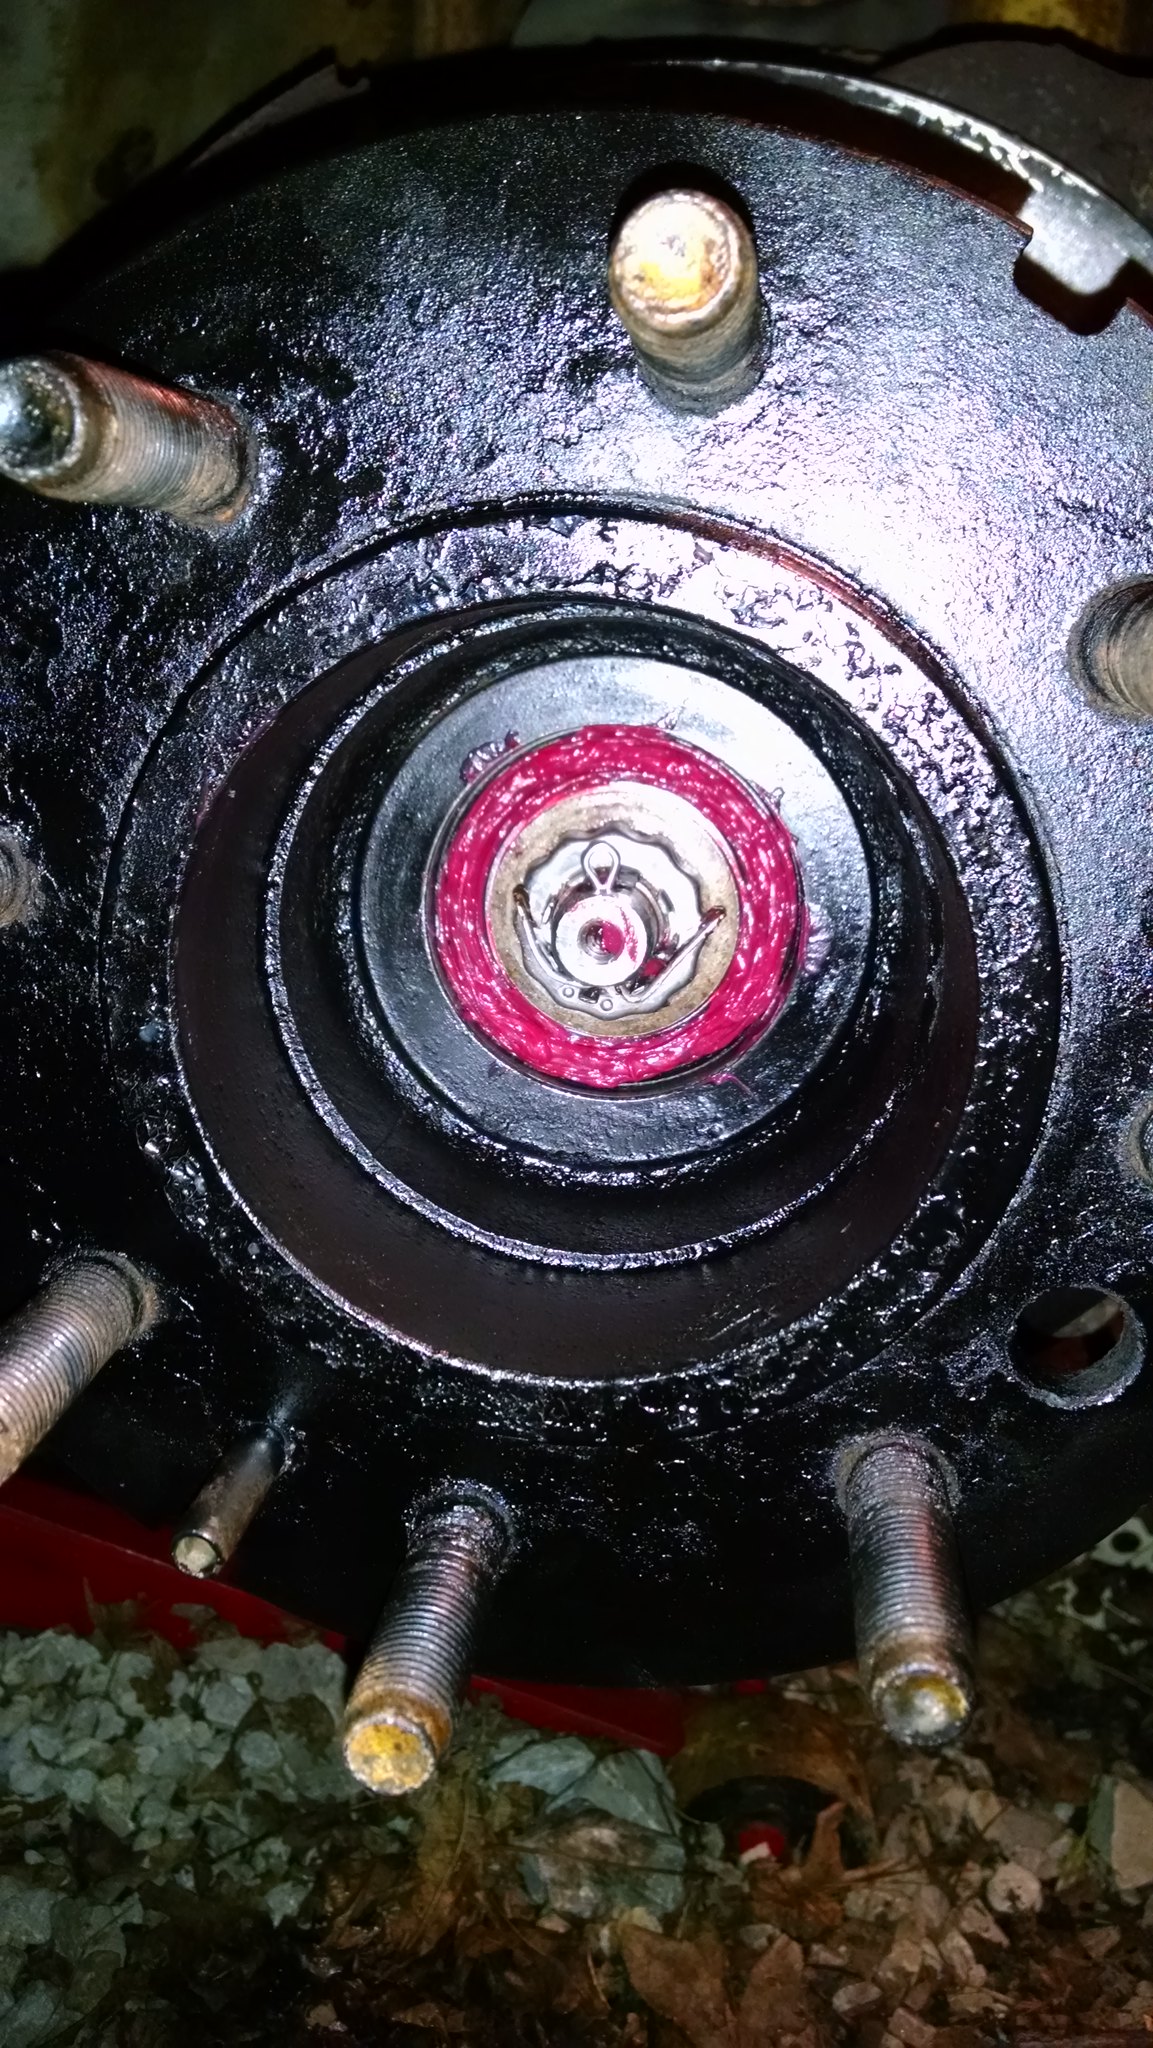
New rotor on... new bearing packed with fresh full synthetic grease and new grease seal installed...
 IMG_20180220_225327269 IMG_20180220_225327269 by acidburn02zts, on Flickr
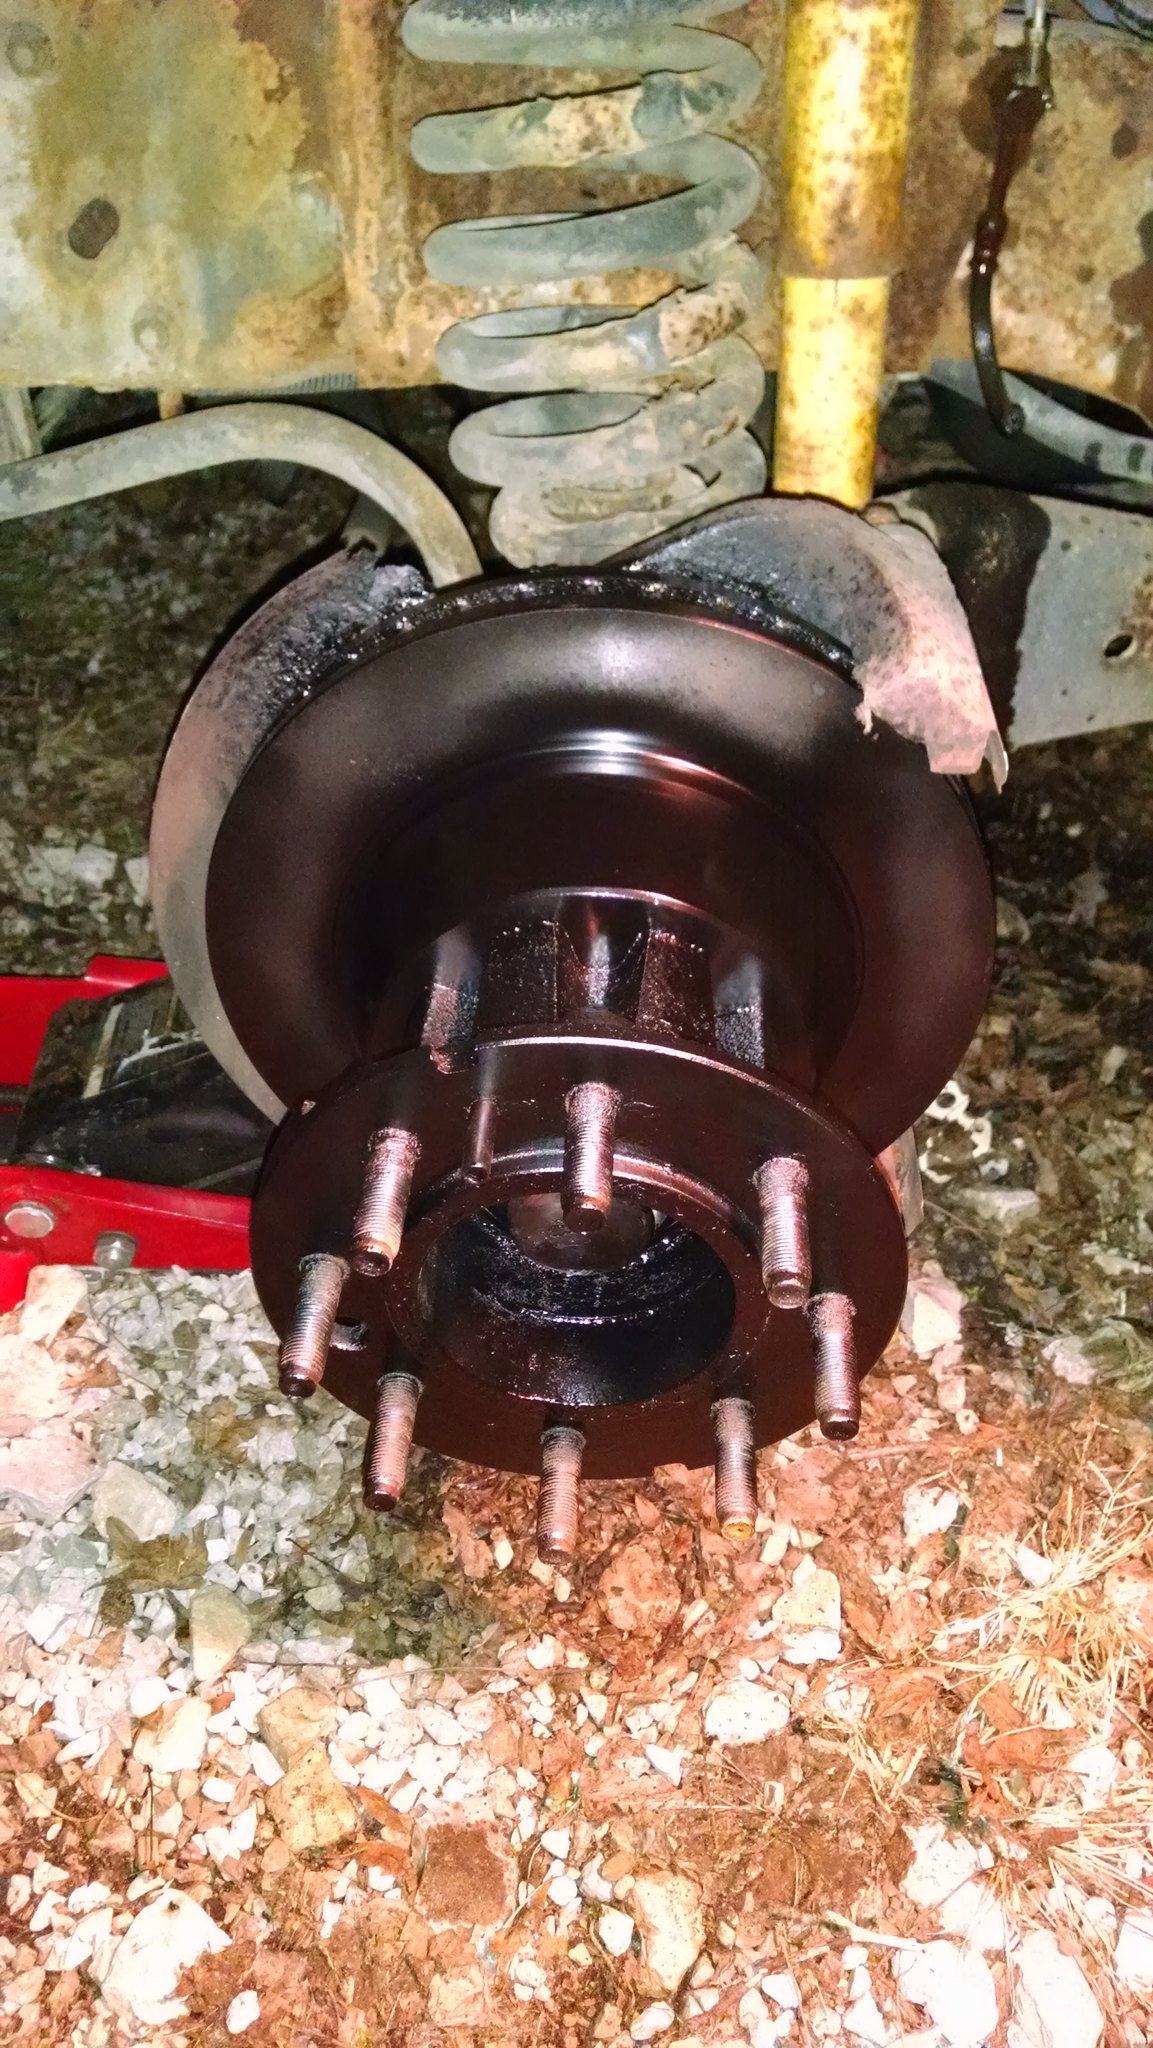
New outer bearing packed and pre-load set.
 IMG_20180220_231623197 IMG_20180220_231623197 by acidburn02zts, on Flickr
All exposed surfaces cleaned and painted with satin black caliper paint.
 IMG_20180220_232303838 IMG_20180220_232303838 by acidburn02zts, on Flickr
Didn't want to get rained on.. so I slid the wheel back on and a couple nuts... cleaned up the mess and called it a night. Taking the caliper to work with me tomorrow so I can rebuild it. All that is left on this side is to re-install the rebuilt caliper with fresh pads and a new brake hose.
More to come.
|
|
|
|
|
02-21-2018, 09:12 AM
|
#131
|
|
Bus Geek
Join Date: Mar 2011
Location: Houston, Texas
Posts: 8,462
Year: 1946
Coachwork: Chevrolet/Wayne
Chassis: 1- 1/2 ton
Engine: Cummins 4BT
Rated Cap: 15
|
Don't forget the most important part...painting the calipers Ferrari red!
|
|
|
|
|
02-21-2018, 01:21 PM
|
#132
|
|
Bus Nut
Join Date: Jul 2017
Posts: 819
Year: 1993
Chassis: IH 3800
Engine: DT360
Rated Cap: 66
|
Quote:
Originally Posted by Tango
Don't forget the most important part...painting the calipers Ferrari red!
|
Lol... too late. Already black. I'm not into the flashy caliper colors unless it is on something worth showing off. If you've got a set of 6 piston brembos.. perhaps.
|
|
|
|
|
02-23-2018, 02:41 PM
|
#133
|
|
Bus Nut
Join Date: Jul 2017
Posts: 819
Year: 1993
Chassis: IH 3800
Engine: DT360
Rated Cap: 66
|
One fresh caliper with new seals, boots, one new piston, and fresh paint.
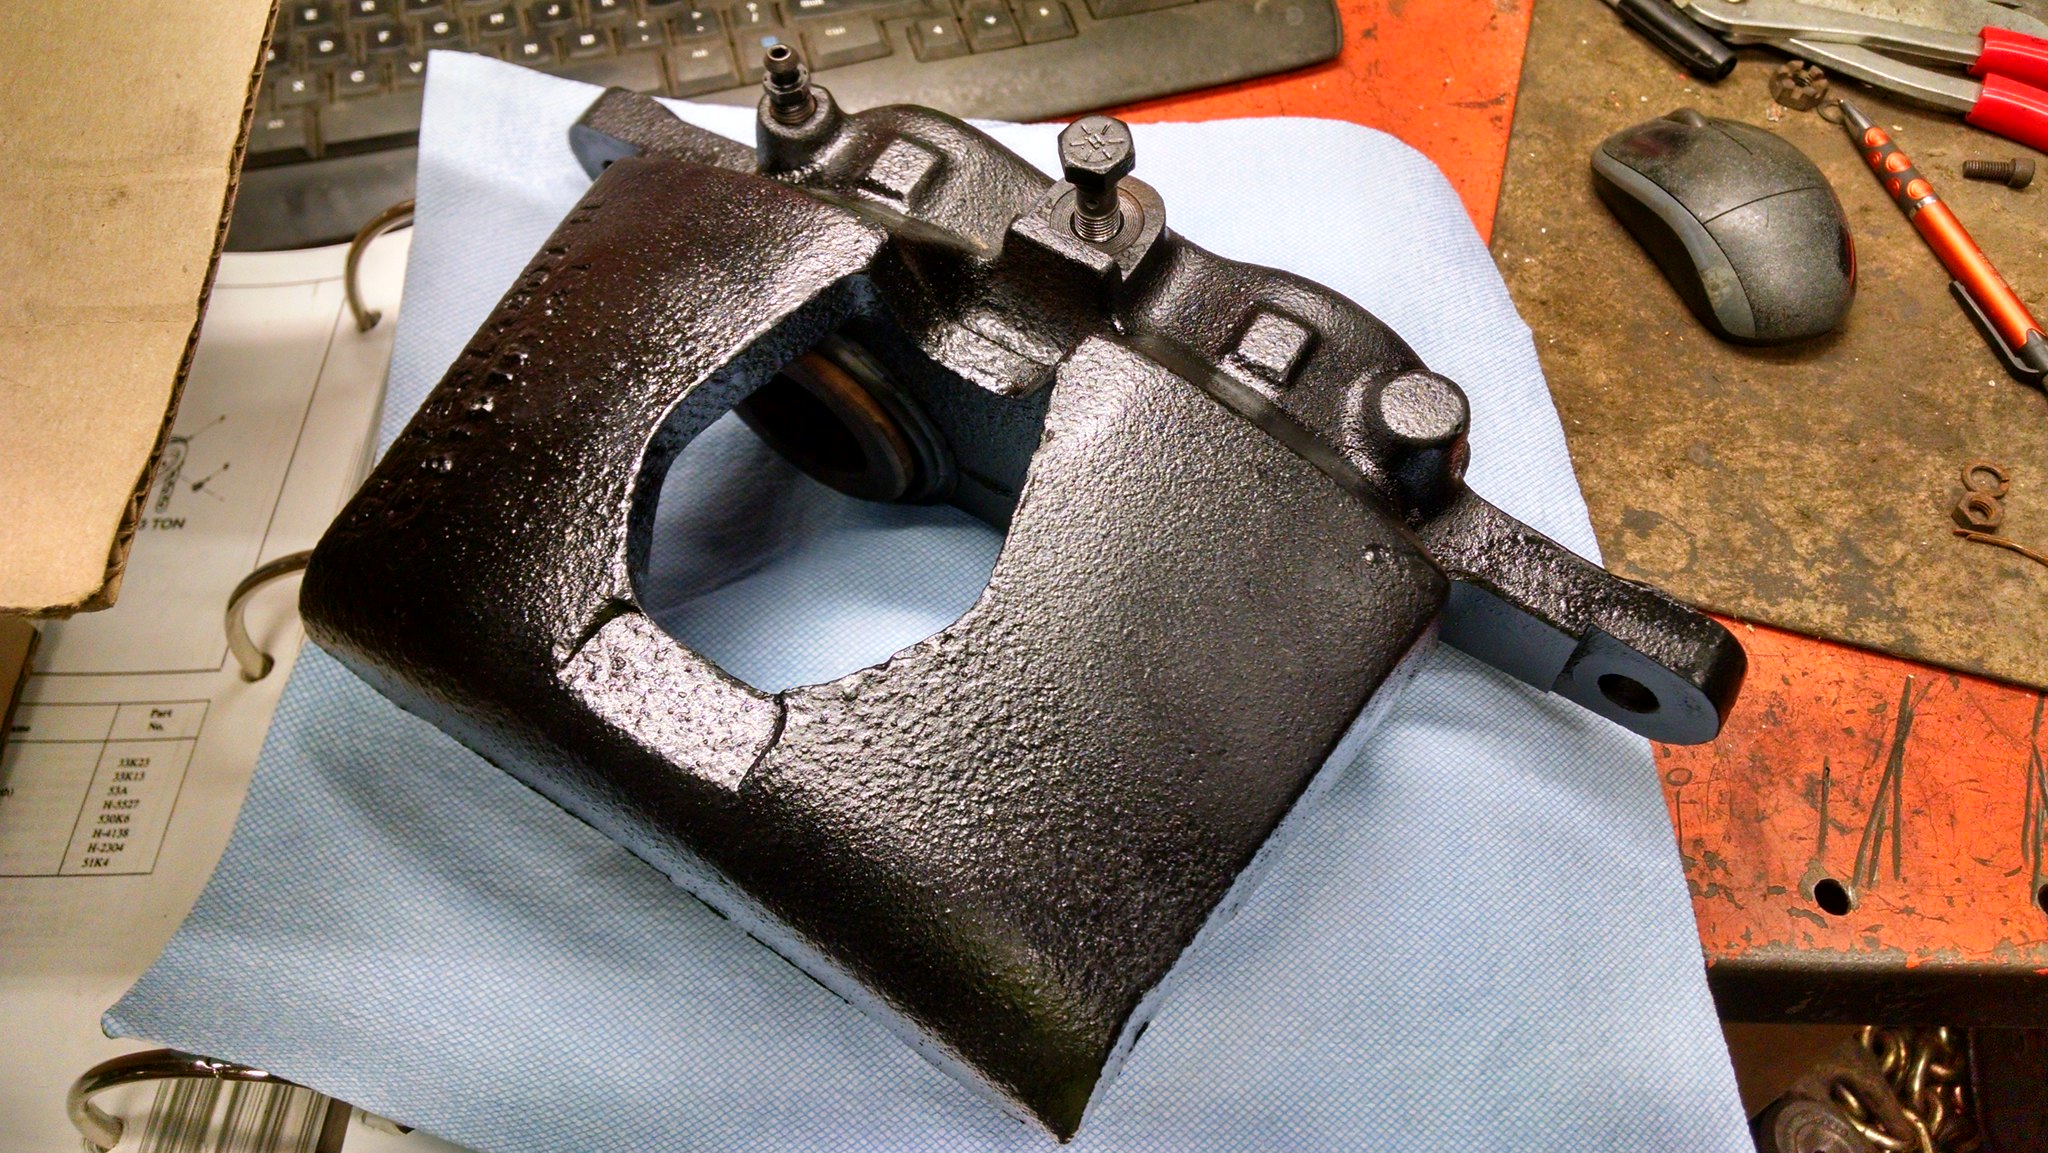 IMG_20180223_142642325_HDR IMG_20180223_142642325_HDR by acidburn02zts, on Flickr
 IMG_20180223_142657579 IMG_20180223_142657579 by acidburn02zts, on Flickr
Hopefully will get the other side done over the weekend. We've basically had non stop rain for the last 3 days.. more rain coming tomorrow... so we'll see.
|
|
|
|
|
02-27-2018, 11:45 PM
|
#134
|
|
Bus Nut
Join Date: Jul 2017
Posts: 819
Year: 1993
Chassis: IH 3800
Engine: DT360
Rated Cap: 66
|
Driver's side brakes are done... oil cooler is back together and on (no leaks this time!!)... and was finally able to let it run for a bit and warm up. All the new gauges seem to be working great and no leaks so far.
Plan is to button up the brakes this weekend so it will be driveable again.
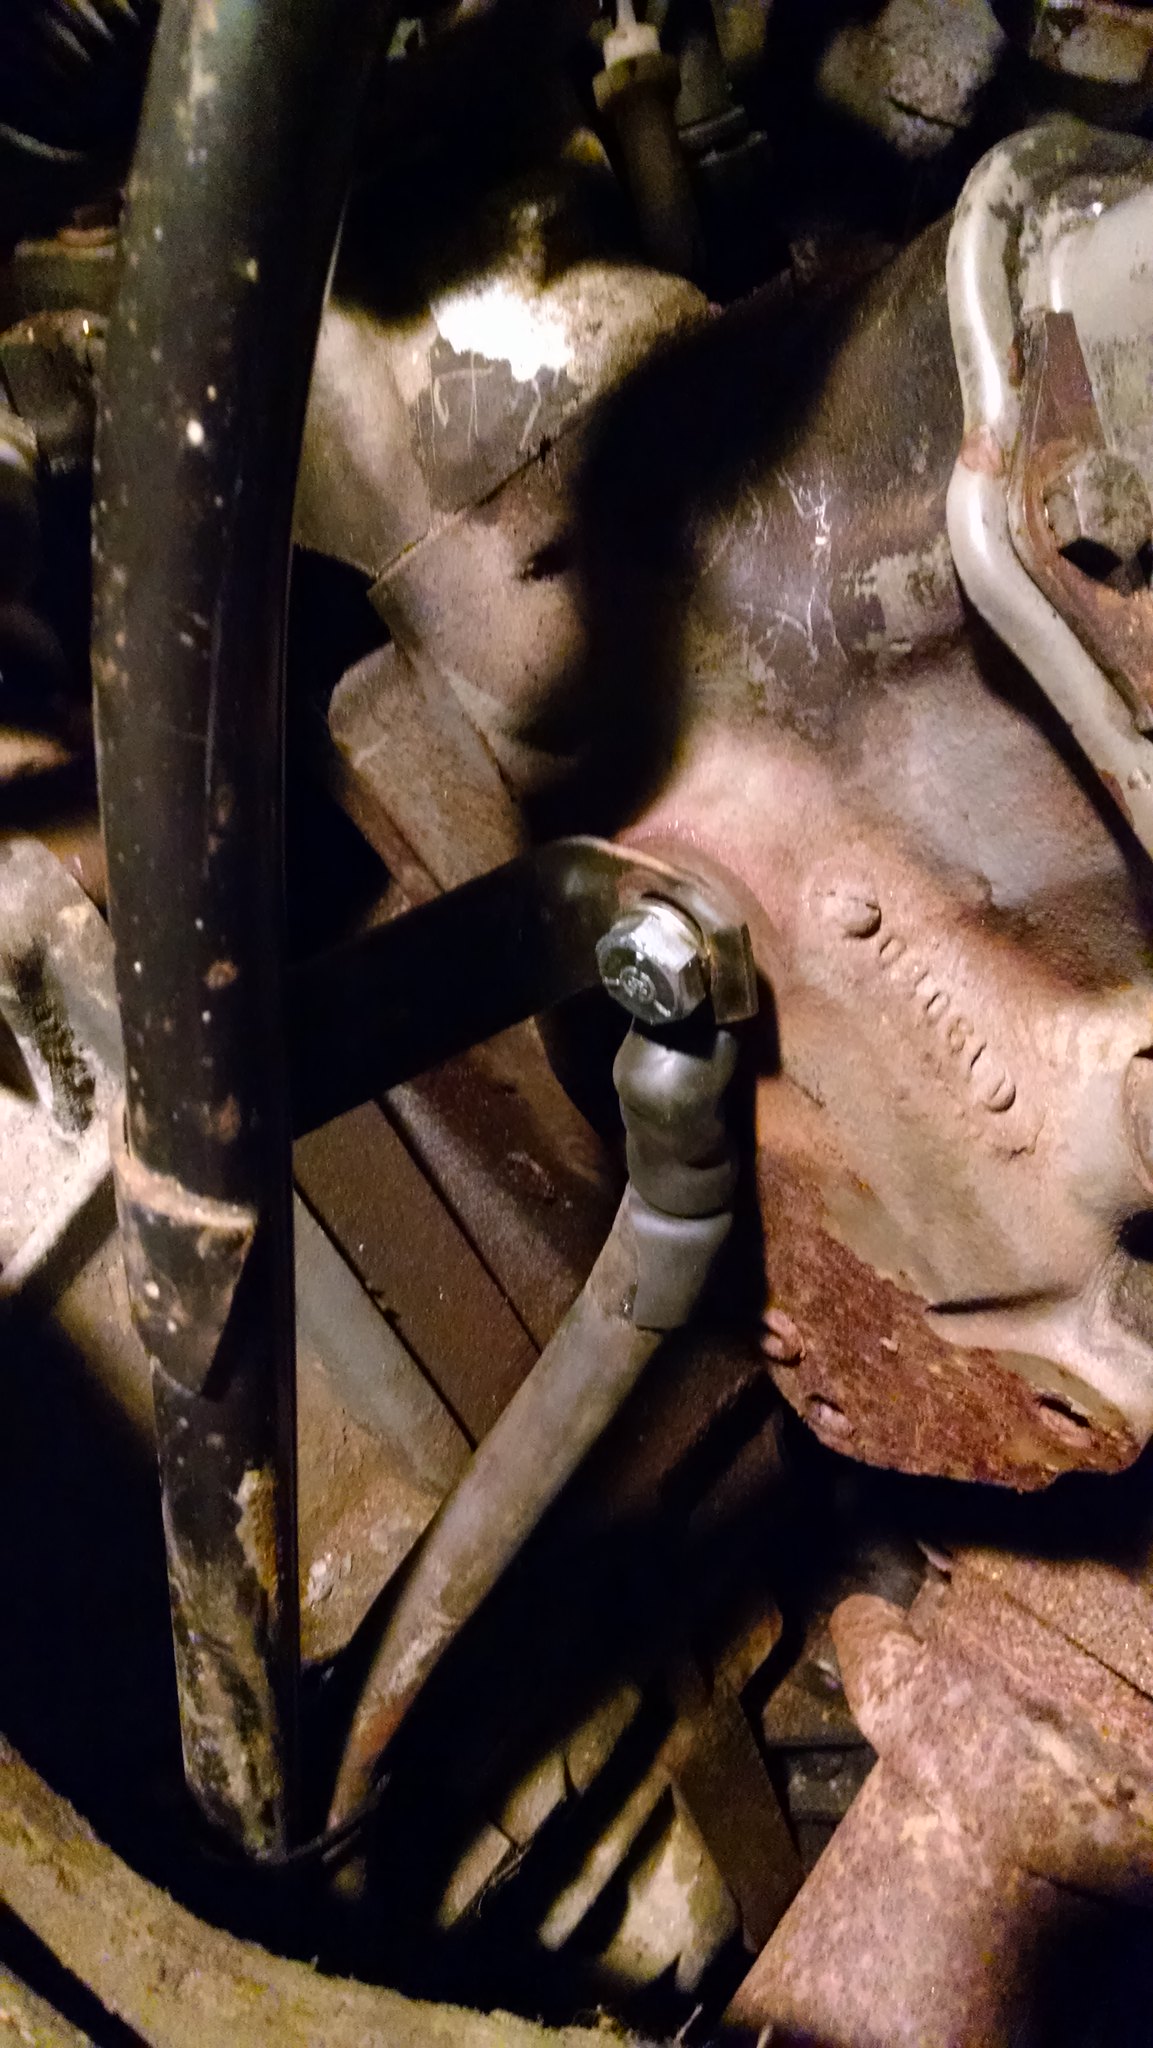
With that said... while I had the front end off the ground, I found that the tie rods have a bit of play in them. I'd say they are runable for a little bit... but they'll be getting replaced soon. While I have it all apart, will probably go on and put in ball joints and replace the steering stabilizer. I may take it on its first trip before going through all that mess though. Would like to give it a shake down run to find any other bugs that may need attention before any long trips.
Anyways... more to come.
|
|
|
|
|
02-28-2018, 09:37 AM
|
#135
|
|
Bus Geek
Join Date: Mar 2011
Location: Houston, Texas
Posts: 8,462
Year: 1946
Coachwork: Chevrolet/Wayne
Chassis: 1- 1/2 ton
Engine: Cummins 4BT
Rated Cap: 15
|
While you have it off the ground, be sure to check for play in the kingpins. Seems to be a high wear item on lots of buses (and heavier vehicles).
|
|
|
|
|
02-28-2018, 10:13 AM
|
#136
|
|
Bus Nut
Join Date: Jul 2017
Posts: 819
Year: 1993
Chassis: IH 3800
Engine: DT360
Rated Cap: 66
|
Quote:
Originally Posted by Tango
While you have it off the ground, be sure to check for play in the kingpins. Seems to be a high wear item on lots of buses (and heavier vehicles).
|
No king pins on this one. It's a ball joint style TTB front axle.
One of these days, it'll get a super duty Dana 60 swap.
|
|
|
|
|
03-04-2018, 08:47 AM
|
#137
|
|
Bus Nut
Join Date: Jul 2017
Posts: 819
Year: 1993
Chassis: IH 3800
Engine: DT360
Rated Cap: 66
|
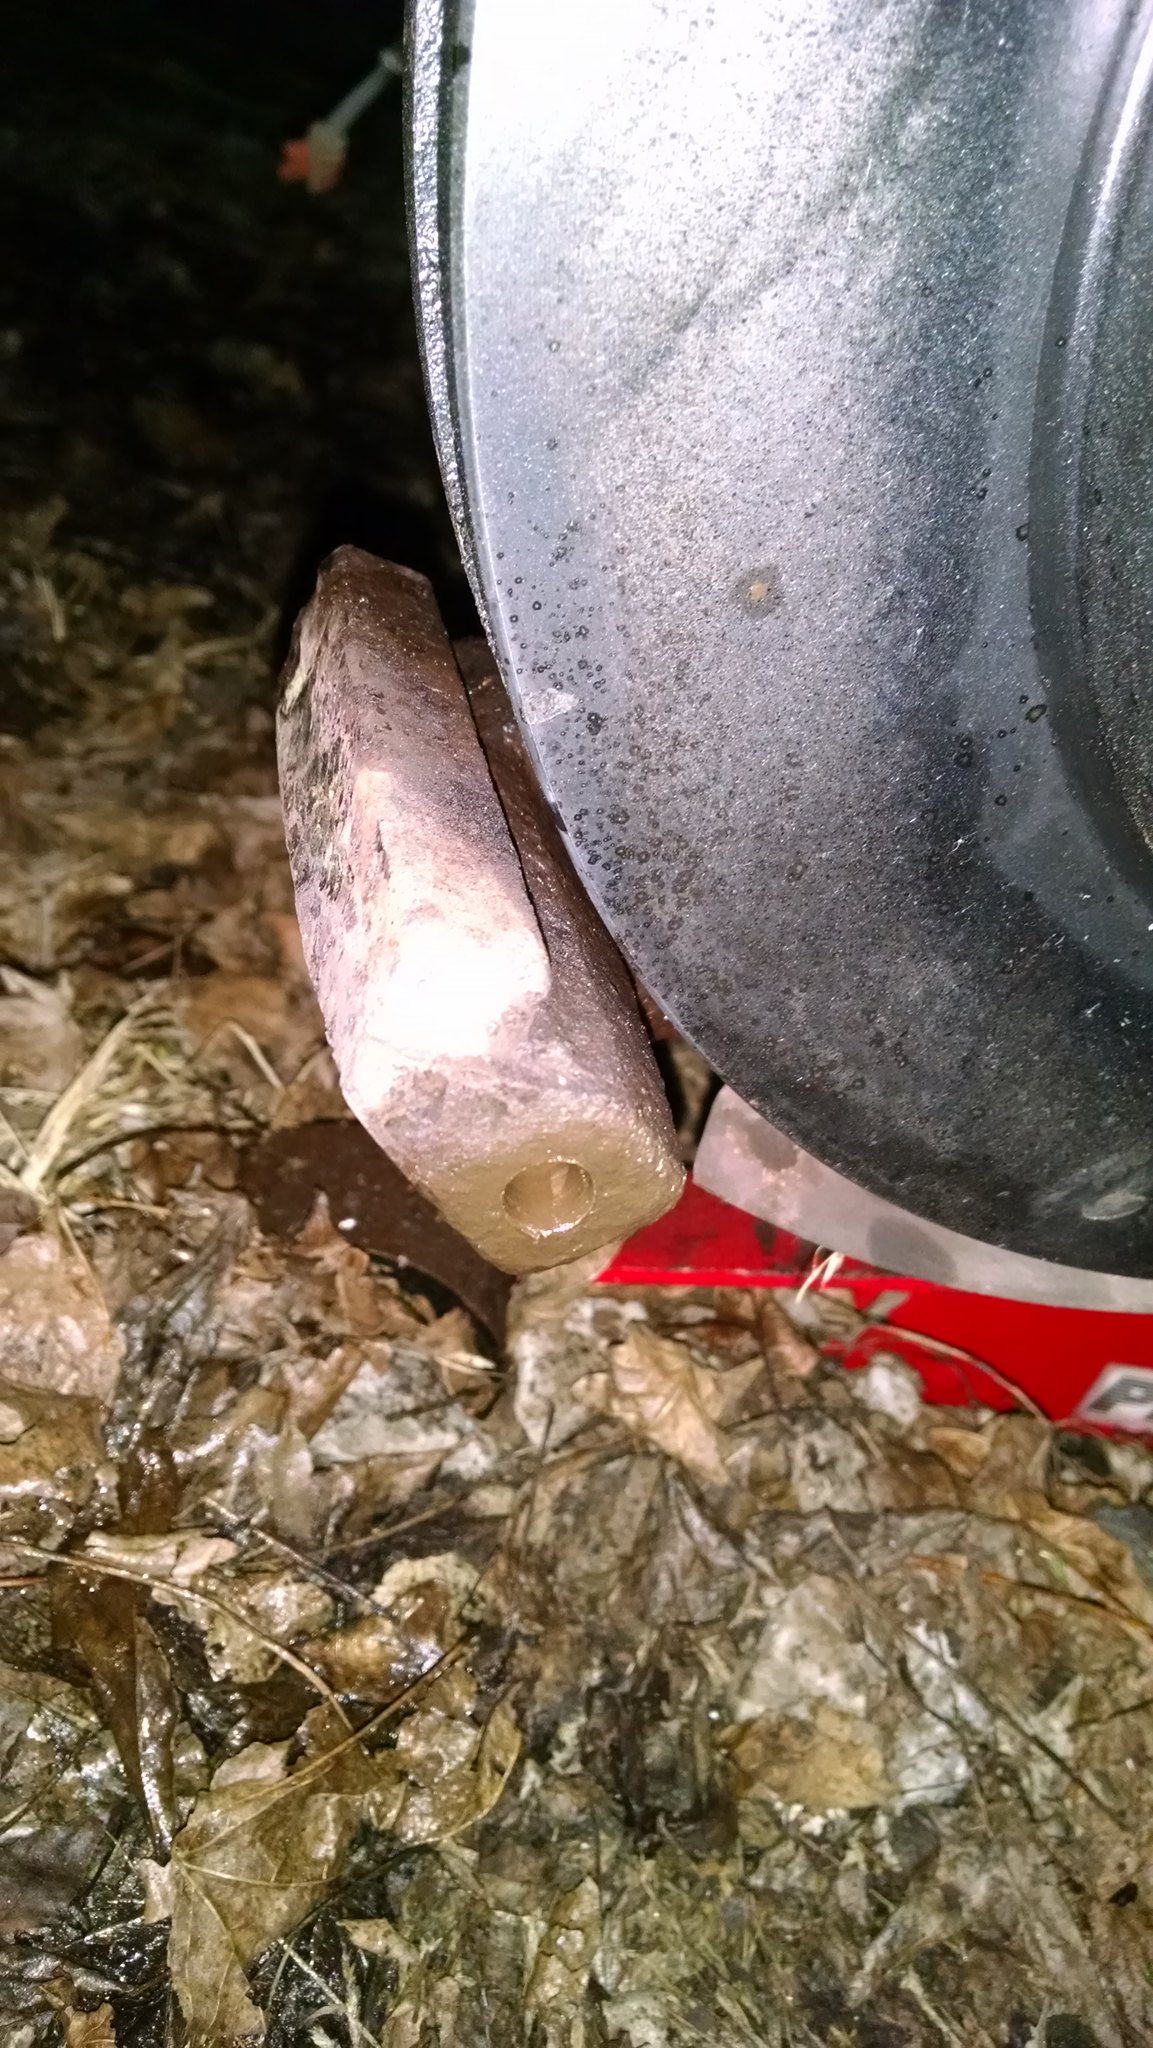
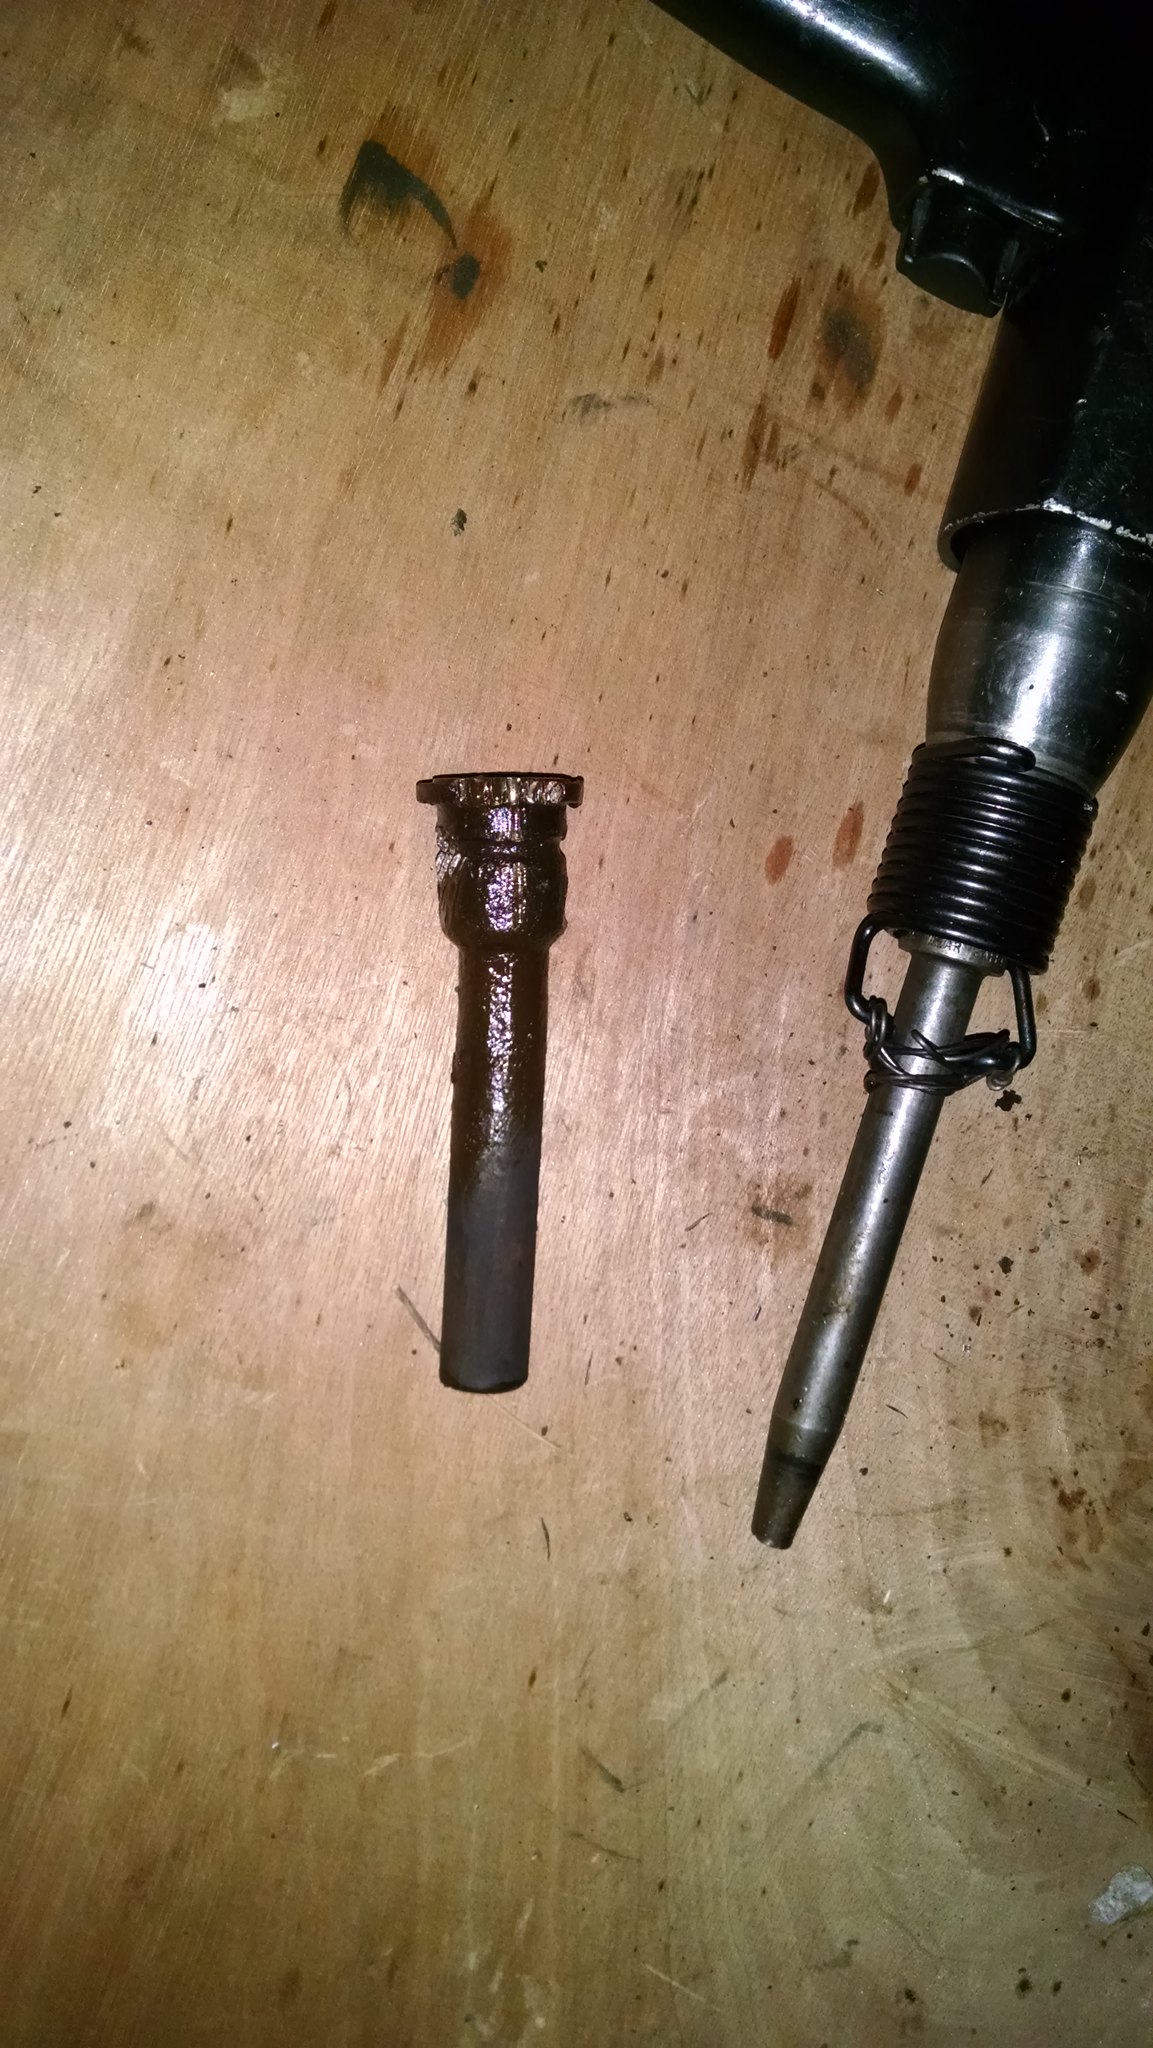
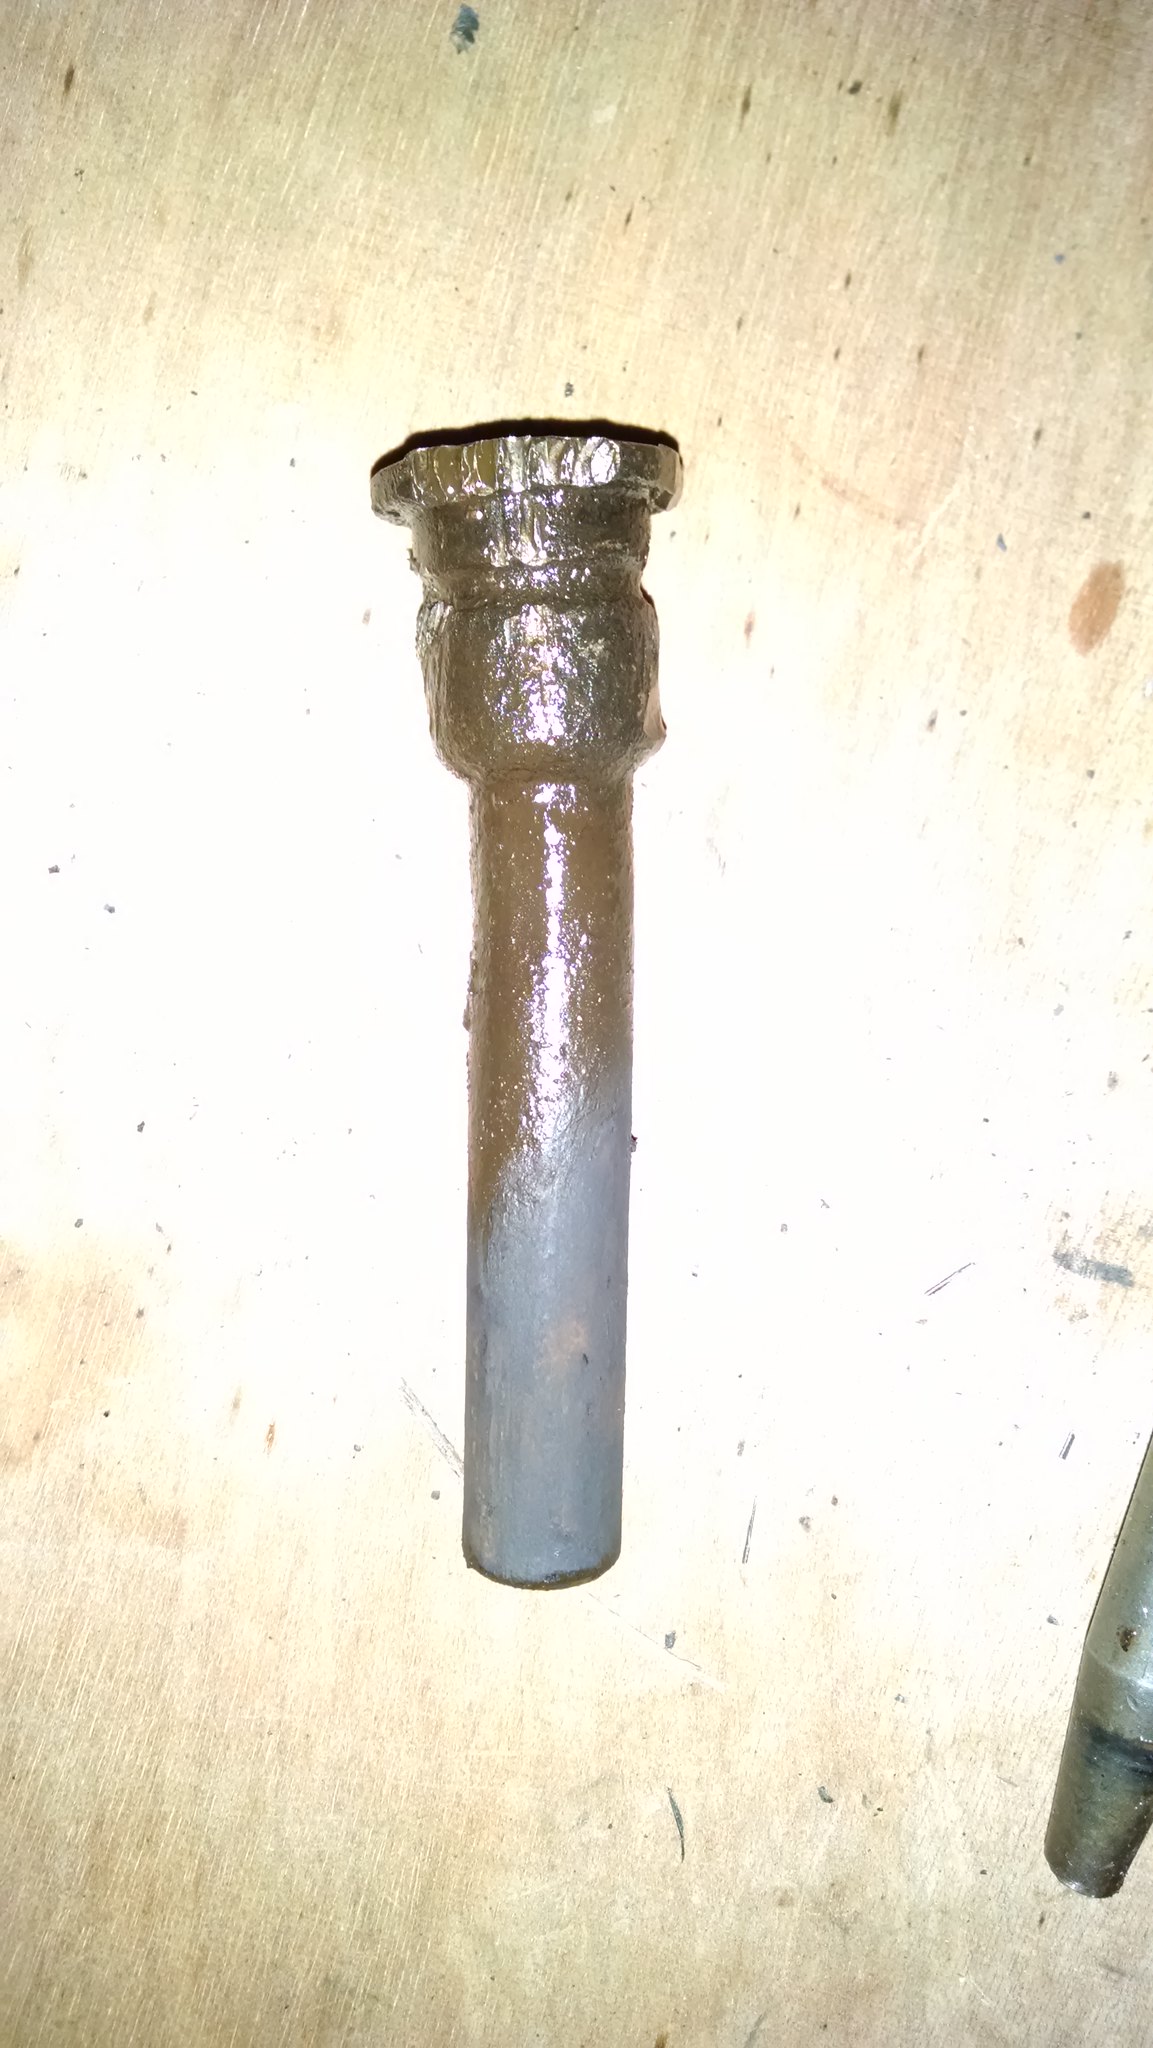
Hmm... these last couple days have been a pain! Spent 3 days fighting a caliper guide pin. Thats right.. a $10 part set me back 3 days. Thanks to the 92-93 design, the caliper bracket is a cast part of the knuckle/spindle and is not replaceable unless you replace the whole knuckle. Being as they only made it this was for 2 years, they aren't easy to find for a reasonable price.
Anyways.. I FINALLY got the pin out last night. 3 days of beating on it... heating it up... beating on it more... cooling it down... soaking it in Kroil. I even drilled the front of the bracket (pin goes in a blind hole) so I could drive it out from the front side.
Ended up taking a torch, a 4# hammer, an air hammer, a can of Kroil... and more patience then I had. Lol
 IMG_20180303_191622761 IMG_20180303_191622761 by acidburn02zts, on Flickr
 IMG_20180303_191605719 IMG_20180303_191605719 by acidburn02zts, on Flickr
 IMG_20180303_191613542 IMG_20180303_191613542 by acidburn02zts, on Flickr
Yeah.. that's a hardened 5/8" pin that I managed to bend while removing it. Ended up having to drive it into the bracket further using the air hammer... then tap it back out from the front with the 4#. Back and forth for an hour until it finally was able to come all the way out (after 2 days of prior oiling, heating, beating). Of coarse, no local parts house keeps the pins in stock so I've got them ordered but they won't be here til mid next week.
On another note, I scored a nice tool set to keep on the bus. Sears is going out of business and they've had all of their Craftsman line on sale. I ordered a 274pc kit with a polymer 3 drawer box online shipped free. Ended up getting it for ~$130 after a couple coupons on top of their 50% off. Lowes and Ace Hardware will be carrying them soon if they aren't already, so warranty won't be an issue.
|
|
|
|
|
03-04-2018, 10:21 AM
|
#138
|
|
Bus Nut
Join Date: Jan 2018
Location: Upstate, SC
Posts: 278
|
If you ever want to change to the newer style spindle, there is info out there on making the upgrade with used Ford parts. It's not expensive for what has to be changed. The TTB has to be swapped. It's not that hard. I've done it on several trucks, not to get rid on that sh!!ty spindle design tho.
|
|
|
|
|
03-04-2018, 02:15 PM
|
#139
|
|
Bus Nut
Join Date: Jul 2017
Posts: 819
Year: 1993
Chassis: IH 3800
Engine: DT360
Rated Cap: 66
|
The plan is to do a 4wd conversion on it when the transmission fails. I've got a core 4x4 e4od and transfer case to go through... Then a superduty front axle with lockouts.
That's way down the road though.
|
|
|
|
|
03-05-2018, 09:15 AM
|
#140
|
|
Bus Nut
Join Date: Jan 2018
Location: Upstate, SC
Posts: 278
|
Quote:
Originally Posted by Mr4btTahoe
The plan is to do a 4wd conversion on it when the transmission fails. I've got a core 4x4 e4od and transfer case to go through... Then a superduty front axle with lockouts.
That's way down the road though.
|

....
|
|
|
|
|
|
 Posting Rules
|
You may not post new threads
You may not post replies
You may not post attachments
You may not edit your posts
HTML code is Off
|
|
|
|
 » Recent Threads
 |
|
|
|
|
|
|
|
|
|
|
|
|
|
|
|
|
|
|
|
|
|
|
|
|
|
|
|
|
|
|
|
|
|
|
|
|
|


 Linear Mode

