 |
|
 02-11-2015, 09:48 AM
|
#81
|
|
Bus Geek
Join Date: Aug 2011
Location: Stony Plain Alberta Canada
Posts: 2,937
Year: 1992
Coachwork: Bluebird
Chassis: TC2000 FE
Engine: 190hp 5.9 Cummins
Rated Cap: 72
|
I love it all, you do great work.
Did you build that sweet little stove? I love it too.
I miss the excitement before the big trip. Nothing like it.
To answer your question you sent me in the privet message about coal.
Yest your little stove can burn coal. As long as you have fire bricks in the bottom, and sides to protect the metal from the extreme heat.
In your stove, I would take a old cast iron frying pan around 8 to 10 inches in diameter. Drill 6 or so 3/4 inch holes in it. Bolt 4 legs made of some small pipe to the bottom around 2 inches or so high. This would become your burning grate.
To get coal started burning, I start with dry wood. After the fire is established, I start with smaller pieces of coal so it catches quickly, increasing the heat of the fire. After the small chunks start glowing good, your ready to add the big chunks.
Coal burns hot and long. A fist size chunk will burn for 2 to 4 hours depending on the amount of air given. Larger chunks twice that size will still be there glowing 8 hours latter when you wake up.
In the morning, all I do is settle the ashes, and smack the glowing chunk. It will break open, and start glowing hotter. Now I add a few smaller pieces 2 inches square, and close the door. The small pieces start burning right away. After 20 min or so, you can add the bigger chunks again to hold the fire for a longer period of time.
Coal needs to burn hot. A air starved coal fire will stink out a entire neighborhood. To achieve this, I add or decrease the number of chunks depending on the amount of heat needed, but keep the air open as much as possible without overheating yourself.
Just a heads up, coal has 4 times the ashes of wood.
Nat
__________________
"Don't argue with stupid people. They will just drag you down to their level, and beat you up with experience."
Patently waiting for the apocalypses to level the playing field in this physiological game of life commonly known as Civilization
|

|

|
|
03-06-2015, 03:10 PM
|
#82
|
|
Bus Crazy
Join Date: Nov 2011
Location: Sault Ste. Marie, Ontario
Posts: 1,793
Year: 1997
Coachwork: Thomas
Chassis: B3800 Short bus
Engine: T444E
Rated Cap: 36
|
We're still on the road. Here's a bit of a photo journal for those who may be interested: https://instagram.com/felixx.77/
|
|
|
|
|
03-06-2015, 03:17 PM
|
#83
|
|
Bus Geek
Join Date: Sep 2014
Location: Eustis FLORIDA
Posts: 23,764
Year: 1999
Coachwork: Thomas
Chassis: Freighliner FS65
Engine: Cat 3126
Rated Cap: 15
|
It looks like a great trip!
Pictures like that make me want to get my bus done and get out there too.
|
|
|
|
|
03-11-2015, 04:03 PM
|
#84
|
|
Bus Crazy
Join Date: Nov 2011
Location: Sault Ste. Marie, Ontario
Posts: 1,793
Year: 1997
Coachwork: Thomas
Chassis: B3800 Short bus
Engine: T444E
Rated Cap: 36
|
Just a quick update.
Our trip is coming to a close. Real life beckons. Soon we'll be heading east which we're actually quite happy with, seeing as the beautiful spring temperatures are starting to reach Sault Ste Marie.
Currently we're in Denver, CO hanging out with some friends and enjoying the town. Cities are always the most difficult to deal with when it comes to parking this ugly duckling, but we managed to find a Pilot Travel Center fairly close to downtown; a quick Uber ride away.
Side note: I just used Uber for the first time last night. I wish I had thought of it sooner! It's such a crazy convenient way to get from the outskirt parking areas to downtown. Once you set up the app with a credit card all you have to do is select a ride through the app and the whole transaction is dealt with automatically. No additional tipping, fumbling around with change, trips to the ATM, failed mobile credit card devices..
I don't feel much like talking about the trip itself (though it has been fantastic), but I'd like to talk skoolie a bit.
First off, mechanically we've had very few issues. Right out of the gate I could tell that a brake was dragging, but we waited until getting across the US border before dealing with it since we expected the crossing to take hours of inspection and interrogating. It wasn't bad, though. The border agent hopped aboard, looked around briefly, asked us where the LSD was hidden, then let us go. 10 minutes tops!
Anyway, back to the brake. The rear right caliper was rubbing. From sitting for so long it had rusted to the mount. I was able to get it moving with a bit of penetrating lube, my partner pumping the brakes and my trusty breaker bar pushing the opposite direction. Everyone should have a 3/4" drive breaker bar in the bus! I get a lot of use out of it. I picked mine up at Princess Auto: 3/4" drive by 36" breaker bar
Unfortunately, the rubbing had already generated enough heat to warp the rotor a bit. I'll get that smoothed out when I get home.
Another issue is that the glow plug relay stopped working. I just picked up a new one yesterday and will install it this afternoon. Also not a big deal, though, to be without. When it's been a cold night I've been jumping the relay contacts with a wrench. Works like a charm!
Breaker bar to the rescue! I side swiped a curb harder than I should have with the front-right tire and pushed it a bit out of alignment. I didn't notice it until hitting about 55mph, but once I felt that shimmy I knew exactly what it was. Luckily I brought my bottle jack and the breaker bar. 15 minutes and I had it straightened back out again. I know a lot of people don't like the Dayton style wheels, but I love 'em! Why, you may ask? Because I can actually torque them properly with a medium sized breaker bar and a torque wrench. The lug nuts for a Dayton style wheel should be tightened to 250ft/lb. Disc wheels should be torqued to 500ft/lb. The Daytons aren't all that difficult to align, either. Once you get the wheel loosely aligned continue to tighten the nuts evenly in a star pattern and it should come out just fine.
The other two big mechanical jobs for when we get home are the sloppy kingpins and radiator fan. The clutch for the engine mounted fan isn't working well. If I can find a suitable electric fan at a junk yard then I'll go that route like Nat did. I want to be able to have more control over the fan and the electric clutches are way too expensive.
As for the interior: the wood stove has been a life saver; the sawdust toilet has been working wonderfully; I NEED to get the shower and sink plumbed in (pain in the ass not to have them working).. pretty happy with things overall.
Especially the solar system.. It has been working fantastically! We have not once come even close to running out of power in the evenings. The panels are enough to have the battery bank charged before noon then all the daily electrical needs are run directly off of the panels; even when it's overcast. In the evenings we've been bringing the batteries down to about 75% max. Of course, our electrical needs are minimal. The 12v fridge is always on, but otherwise it's just lights, laptops, phone chargers, stereo, stove fan, blender, Dewalt 20v battery charger... Anyway, it's good to know we have plenty of power to work with.
Alright, now I must get back to work. I've been getting a couple small contracts here and there to work on during the trip. It's nice to keep replenishing the funds this way. It's also nice to have a mobile office! The scenery can be quite stunning.
|
|
|
|
|
03-11-2015, 04:11 PM
|
#85
|
|
Bus Crazy
Join Date: Nov 2011
Location: Sault Ste. Marie, Ontario
Posts: 1,793
Year: 1997
Coachwork: Thomas
Chassis: B3800 Short bus
Engine: T444E
Rated Cap: 36
|
Quote:
Originally Posted by EastCoastCB

It looks like a great trip!
Pictures like that make me want to get my bus done and get out there too.
|
Haha.. well, ours is far from done, but it's put together enough to get us moving! I had the mindset of "finishing the job" before doing much moving about, but both the cold winter and my lady pushed me to simply get the important things operable and not worry about the rest. I'm sure glad I did! We've been having a great time, even without running water. 
|
|
|
|
|
03-11-2015, 04:14 PM
|
#86
|
|
Bus Geek
Join Date: Aug 2011
Location: Stony Plain Alberta Canada
Posts: 2,937
Year: 1992
Coachwork: Bluebird
Chassis: TC2000 FE
Engine: 190hp 5.9 Cummins
Rated Cap: 72
|
Glad to hear the trip went smooth without to many, or to big of bumps. You were able to fix things along the trail.
Take care and be safe.
Nat
__________________
"Don't argue with stupid people. They will just drag you down to their level, and beat you up with experience."
Patently waiting for the apocalypses to level the playing field in this physiological game of life commonly known as Civilization
|
|
|
|
|
03-11-2015, 04:40 PM
|
#87
|
|
Bus Crazy
Join Date: Nov 2011
Location: Sault Ste. Marie, Ontario
Posts: 1,793
Year: 1997
Coachwork: Thomas
Chassis: B3800 Short bus
Engine: T444E
Rated Cap: 36
|
Quote:
Originally Posted by nat_ster
I love it all, you do great work.
Did you build that sweet little stove? I love it too.
|
No, I caved and purchased it. GrayStove.com - GRAY STOVE. I had aspirations of building my own, but I just didn't have the time. It was more money than I wanted to spend, but I had a fat pay cheque in hand and a couple drinks in the belly so I went for it. Overall, I'm very satisfied with it, though. The only issue is that the paint job was scuffed up pretty badly during shipping, but the manufacturer said he'd work with me to figure something out once we're back home.
The idea of powder coating it came up in a conversation with my "father in-law", as well. I'll have to do some research to see if it would stand up to the heat, but I think some folks powder coat turbos and up-pipes and such, so perhaps it'll happily take the heat.
Quote:
Originally Posted by nat_ster
I miss the excitement before the big trip. Nothing like it.
|
No kidding! Excitement, concern, second guessing.. Especially since our first day of driving was a nasty snow storm all the way from Sault Ste Marie to Lansing, Michigan. I mean, this 10000km journey was the buses first trip in 6 months. I was ever watchful and alert for the first two days of travelling. Stopping every 200kms to do an overall inspection of fluids, belt, brakes, bearings, wheel nut torque, propane tank mount, solar panel mount, etc. My partner.. well, she was getting pretty damn annoyed with me, but I needed to do it to ease my mind. Now I'm down to doing full inspections at the beginning or end of the day. much less anal.
Thanks for the info on coal, by the way. I haven't had a chance to use any this trip, but we've been having real good luck finding nice, dry, oak pallets. I brought all the Dewalt 20v tools along, including the circular saw, so I've been using that to cut up the pallets into manageable sizes. One oak pallet lasts us about 5 days and if we get a good, hot burn going then stock the stove to the tits before going to bed it'll still be radiating heat in the early morning. I usually end up putting a bit more in then going to bed a bit longer, which I really don't mind. I've had to do the same thing in several houses throughout my life. It's a perfect opportunity to take a piss and grab a glass of water.
|
|
|
|
|
03-11-2015, 04:42 PM
|
#88
|
|
Bus Crazy
Join Date: Nov 2011
Location: Sault Ste. Marie, Ontario
Posts: 1,793
Year: 1997
Coachwork: Thomas
Chassis: B3800 Short bus
Engine: T444E
Rated Cap: 36
|
Back to the tools, here is my list of MUST HAVE tools that I brought along for anyone who's interested. I brought way more tools than this (more than necessary), but these are the ones that I wouldn't want to do without.
- Battery operated grinder
- Battery operated circular saw (because we have a small wood stove)
- Battery operated drill (Dewalt 20v tools have been awesome)
- 3/4" drive breaker bar
- Bottle jack
- Socket set
- Wrench set
- Grease gun
- Vise grips
- Hammer
|
|
|
|
|
03-11-2015, 04:57 PM
|
#89
|
|
Bus Crazy
Join Date: Nov 2011
Location: Sault Ste. Marie, Ontario
Posts: 1,793
Year: 1997
Coachwork: Thomas
Chassis: B3800 Short bus
Engine: T444E
Rated Cap: 36
|
Ok, one more note.
I've been changing the shocks as we've been going along. What a difference! By the end I'll have been able to feel the bus in almost every conceivable possible shock setup.
Of course, I started with 4 shitty, rusty shocks. Somewhere in New Mexico I decided to take off one front and one rear shock so I could take it into an auto parts store to get replaced and be sure the new ones were proper matches. I used a grinder with a cut-off wheel to do the job since it was so much easier than fighting the rust. Anyway, we ended up driving about 150kms with only two shocks, both on the right side. It was like the bus was bouncing on a trampoline!
I managed to find two front shocks at a Fleetpride in Las Cruces, NM and two rear shocks at a Napa just down the road. $45 each.. Not bad.
I quickly stopped and popped in the left shocks, since the old ones were already removed. It was easy. Now we're up to 2 good shocks on the left and 2 shitty ones on the right. Much better ride! HUGE improvement!
Meandered our way over a couple days to an empty, free campground about 500kms away. A perfect opportunity to pull out the grinder and do the other side. I managed to get the front right shock off with no problem, but the rear one is held in place with a 5/8" grade 8 fine thread bolt with was rusted in place and giving me heck. Whatever. Now we have 3 good shocks and no shock on the rear right.
I finally managed to get the bolt out some days later, but it's ruined and I haven't found a replacement yet. Hopefully I'll find one this afternoon to get that 4th shock in place.
Whatever. 3 shocks out of 4. What's that? 75%? a C grade? Still a pass, right?
Can't wait to see what it's like with 4 new shocks, though
|
|
|
|
|
03-11-2015, 05:04 PM
|
#90
|
|
Bus Geek
Join Date: Sep 2014
Location: Eustis FLORIDA
Posts: 23,764
Year: 1999
Coachwork: Thomas
Chassis: Freighliner FS65
Engine: Cat 3126
Rated Cap: 15
|
Quote:
Originally Posted by jazty
No, I caved and purchased it. GrayStove.com - GRAY STOVE. I had aspirations of building my own, but I just didn't have the time. It was more money than I wanted to spend, but I had a fat pay cheque in hand and a couple drinks in the belly so I went for it. Overall, I'm very satisfied with it, though. The only issue is that the paint job was scuffed up pretty badly during shipping, but the manufacturer said he'd work with me to figure something out once we're back home.
The idea of powder coating it came up in a conversation with my "father in-law", as well. I'll have to do some research to see if it would stand up to the heat, but I think some folks powder coat turbos and up-pipes and such, so perhaps it'll happily take the heat.
No kidding! Excitement, concern, second guessing.. Especially since our first day of driving was a nasty snow storm all the way from Sault Ste Marie to Lansing, Michigan. I mean, this 10000km journey was the buses first trip in 6 months. I was ever watchful and alert for the first two days of travelling. Stopping every 200kms to do an overall inspection of fluids, belt, brakes, bearings, wheel nut torque, propane tank mount, solar panel mount, etc. My partner.. well, she was getting pretty damn annoyed with me, but I needed to do it to ease my mind. Now I'm down to doing full inspections at the beginning or end of the day. much less anal.
Thanks for the info on coal, by the way. I haven't had a chance to use any this trip, but we've been having real good luck finding nice, dry, oak pallets. I brought all the Dewalt 20v tools along, including the circular saw, so I've been using that to cut up the pallets into manageable sizes. One oak pallet lasts us about 5 days and if we get a good, hot burn going then stock the stove to the tits before going to bed it'll still be radiating heat in the early morning. I usually end up putting a bit more in then going to bed a bit longer, which I really don't mind. I've had to do the same thing in several houses throughout my life. It's a perfect opportunity to take a piss and grab a glass of water. |
I wouldn't powdercoat anything that gets as hot as that. Especially for indoor use.
If you head this far east give me a shout and we will have some beers or Florida whiskey.
|
|
|
|
|
03-11-2015, 05:31 PM
|
#91
|
|
Bus Nut
Join Date: Feb 2015
Posts: 258
|
Quote:
Originally Posted by jazty
|
Would love a few words on how this stove is burning for you. We were dead-set on using it until I changed my mind and decided to do a diesel boiler and radiant in-floor. But we loved the look and price and were still thinking of getting one at some point.
Quote:
Originally Posted by jazty
The idea of powder coating it came up in a conversation with my "father in-law", as well. I'll have to do some research to see if it would stand up to the heat, but I think some folks powder coat turbos and up-pipes and such, so perhaps it'll happily take the heat.
|
The powder-coating is easy - getting a high-temp-resistant paint is harder. For engines, anyway - the exhaust side of a turbo can hit 2200F, sometimes even 2350F like in a Mazda Rotary pulling hard. A wood stove is going to be in the 300F-800F range and then you're overheating it. Lots of paints are compatible with that range. Look for something with a service rating up to 1200F or so. There's a company that make one just for stoves - Stove Light? Stove Bright? Something like that.
Any place that deals with a lot of auto parts can almost certainly do it.
|
|
|
|
|
03-11-2015, 05:52 PM
|
#92
|
|
Bus Geek
Join Date: Aug 2011
Location: Stony Plain Alberta Canada
Posts: 2,937
Year: 1992
Coachwork: Bluebird
Chassis: TC2000 FE
Engine: 190hp 5.9 Cummins
Rated Cap: 72
|
Tankswap
And other fellow skoolies anywhere that freezes at night.
I fully recommend getting a wood stove if you have the space and money. They are a great fall back system if everything else fails. There is always something around to burn.
The human body loves radiant heat. That's why the sun feels so good coming through a window in winter. This is built into our human DNA from years of evaluation.
Wood and other solid fuel stoves replicate this radiant heat. So do radiant hot water heat systems.
Forced air heating systems do not replicate this radiant heat. Air has no mass to store the heat to radiate. This is why forced air heating systems are so inefficient.
Nat
__________________
"Don't argue with stupid people. They will just drag you down to their level, and beat you up with experience."
Patently waiting for the apocalypses to level the playing field in this physiological game of life commonly known as Civilization
|
|
|
|
|
03-21-2015, 10:35 PM
|
#93
|
|
Skoolie
Join Date: Jul 2013
Location: Georgia
Posts: 164
Year: 1993
Coachwork: blue bird
Chassis: International, 3000, Blue Bird
Engine: Dt360
Rated Cap: 25000
|
Man I like that wood stove it looks great, in fact I have one in my bus, 
__________________
Looking for that happy place, I've got a home on wheels and I'm going to find it.
|
|
|
|
|
03-27-2015, 10:26 AM
|
#94
|
|
Bus Crazy
Join Date: Nov 2011
Location: Sault Ste. Marie, Ontario
Posts: 1,793
Year: 1997
Coachwork: Thomas
Chassis: B3800 Short bus
Engine: T444E
Rated Cap: 36
|
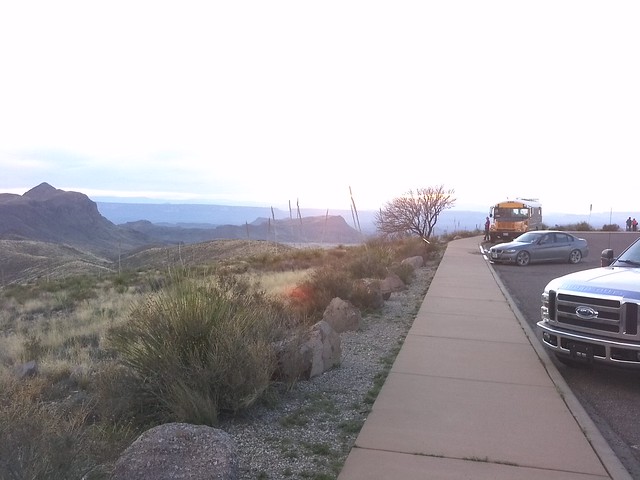
A shot of us parked for supper at the top of a pass in Big Bend National Park. Really cool park.. not pet friendly, unfortunately.
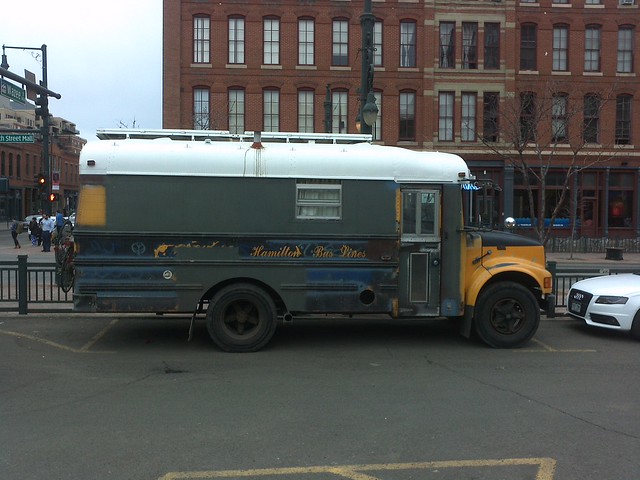
Here's a fun photo. We just fit inside the lines in a parking lot in downtown Denver. We paid for overnight parking and "camped" here.
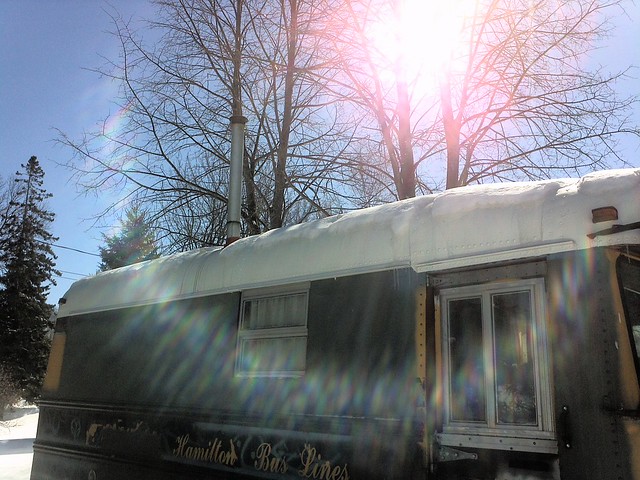
The brown streaks are creosote. I was still tinkering with the settings on the stove and let it smoulder too much overnight. The chimney cap was on at the time. The creosote condensed on the cap and dribbled on the roof.
|
|
|
|
|
03-27-2015, 11:46 AM
|
#95
|
|
Skoolie
Join Date: Jul 2013
Location: Georgia
Posts: 164
Year: 1993
Coachwork: blue bird
Chassis: International, 3000, Blue Bird
Engine: Dt360
Rated Cap: 25000
|
Hi, I have a question about the wood stove. I have small amounts of smoke coming out from around the door, it looks as if the fire retardant rope does not touch the stove. Have you had any problems like this.
Thanks John
__________________
Looking for that happy place, I've got a home on wheels and I'm going to find it.
|
|
|
|
|
03-27-2015, 12:01 PM
|
#96
|
|
Bus Crazy
Join Date: Nov 2011
Location: Sault Ste. Marie, Ontario
Posts: 1,793
Year: 1997
Coachwork: Thomas
Chassis: B3800 Short bus
Engine: T444E
Rated Cap: 36
|
Quote:
Originally Posted by Better Tomorrows
Hi, I have a question about the wood stove. I have small amounts of smoke coming out from around the door, it looks as if the fire retardant rope does not touch the stove. Have you had any problems like this.
Thanks John
|
It sounds like a draft problem. How tall is your chimney? It has to be well above the roof line, otherwise when the wind is blowing right (wrong?) it can create a high pressure zone, which results in a chimney back-draft.
My primary chimney section only extends about 10" above the roof. I've used it like that on the road here-and-there, but it sometimes creates a draft problem. When I'm more stationary or it is required because of wind I use a chimney extension to raise the chimney well above the height of all other roof-top items. It's tall enough to extend above the solar panels when they are in an upright position and easy to remove for driving.
I used double-walled wood pellet chimney pipe which locks into place when twisted. That's another thing: you need to keep the exhaust hot to create enough draft. Use double-wall, triple-wall or, preferably, insulated chimney pipe.
|
|
|
|
|
03-27-2015, 01:34 PM
|
#97
|
|
Skoolie
Join Date: Jul 2013
Location: Georgia
Posts: 164
Year: 1993
Coachwork: blue bird
Chassis: International, 3000, Blue Bird
Engine: Dt360
Rated Cap: 25000
|
Okay, my pellet pipe is 60 inches long of which 12 inches is above the highest point of the roof line. I'll go buy more pipe, 3 foot should do it? Thanks for the insight.
__________________
Looking for that happy place, I've got a home on wheels and I'm going to find it.
|
|
|
|
|
03-27-2015, 01:43 PM
|
#98
|
|
Bus Crazy
Join Date: Nov 2011
Location: Sault Ste. Marie, Ontario
Posts: 1,793
Year: 1997
Coachwork: Thomas
Chassis: B3800 Short bus
Engine: T444E
Rated Cap: 36
|
Quote:
Originally Posted by Better Tomorrows
Okay, my pellet pipe is 60 inches long of which 12 inches is above the highest point of the roof line. I'll go buy more pipe, 3 foot should do it? Thanks for the insight.
|
Hmm.. that actually sounds like a decent run. My entire chimney from the top of the stove to the cap is only about 6 feet tall. It looks taller from the outside, but the fireplace is raised about 2.5' above the floor. I would expect being a foot above the highest point would work just fine for a schoolie, though for residential installations it's recommended to be 2' above the highest point.
I suppose it's worth trying a 3' segment, but that stuff can be damn expensive! Perhaps it'd be worth experimenting with something cheaper...
|
|
|
|
|
03-27-2015, 02:00 PM
|
#99
|
|
Bus Nut
Join Date: Feb 2015
Posts: 258
|
What diameter is it?
What you want to do is get (or make, but they're cheap) yourself a good manometer that can measure in w/c. This is the one the folks on Arboristsite.com are always recommending:
http://www.amazon.com/Dwyer-25-Manom...3C8/ref=sr_1_6
n.b.: I don't own this one - I have an older, uglier unit my dad gave me - but people seem to like this one, and the price is right. Amazon has a great return policy if you don't like it.
This will probably confirm that you have a weak draft. Chimney length is a major contributor to draft, and it's hard to get much in a school bus. You kind of have to have a removable extension piece if you're going to be traveling. Insulation helps a LOT, though. You can either use double/triple-walled pipe, or if that cost makes you choke, you can get an insulation kit from a place like this:
Chimney Liner Flue Pipe Blanket Wrap Insulation Kits - Pour-Down Insulation | Rockford Chimney Supply
This is a stiff insulating blanket that you wrap around the flue. It's really meant for in-chimney installations when installing liners, but it works great, is pretty cheap, and doesn't look too terrible with its foil facing. IMO, the rigid liner insulation product on that page looks good enough to stand on its own in a home, but it's a bit more expensive. Your call.
Getting the right chimney cap helps a LOT too. A flat cap with a mesh screen can hurt a weak draft a lot, and also enables the kinds of wind-induced downdrafts others mentioned above. Vacu-stacks are popular although overpriced IMO:
Vacu-Stack Wind Resistant Chimney Cap | WoodlandDirect.com: Chimney Caps & Accessories, Improved Consumer Products
I'm a fan of concentric shrouds, which you can totally DIY out of one piece of 2" or so wider diameter straight flue pipe - you make that the one that's your extension. I have all kinds of pics saved on this somewhere but can't find them. This page has one thumbnail that's basically the idea:
Wood Smoke - Leichhardt Municipal Council
These create a "venturi effect" that increases draft. Note that there is no top cap on this. Rain never falls STRAIGHT down, so if the extension is at least a few feet, it hits the sides and drips out the bottom rather than into your stove. Sounds weird but it works.
Make sure you have enough make-up air coming in. Not usually a problem in a bus, but...
So much to go through, but the summary: a taller, better insulated chimney is a huge helper for solving draft problems.
|
|
|
|
|
03-27-2015, 02:15 PM
|
#100
|
|
Bus Crazy
Join Date: Nov 2011
Location: Sault Ste. Marie, Ontario
Posts: 1,793
Year: 1997
Coachwork: Thomas
Chassis: B3800 Short bus
Engine: T444E
Rated Cap: 36
|
Nice write up, taskswap! I'm intrigued by that pour-down chimney insulation. I might try something similar to convert my double wall exterior chimney into an insulated one.
|
|
|
|
|
|
 Posting Rules
|
You may not post new threads
You may not post replies
You may not post attachments
You may not edit your posts
HTML code is Off
|
|
|
|
 » Recent Threads
 |
|
|
|
|
|
|
|
|
|
|
|
|
|
|
|
|
|
|
|
|
|
|
|
|
|
|
|
|
|
|
|
|
|
|
|
|
|


 Linear Mode

