 |
|
 11-18-2013, 09:57 PM
|
#1
|
|
Bus Crazy
Join Date: Nov 2011
Location: Sault Ste. Marie, Ontario
Posts: 1,793
Year: 1997
Coachwork: Thomas
Chassis: B3800 Short bus
Engine: T444E
Rated Cap: 36
|
Armageddon: the smell of airborne rust
Well, I've been meaning to do this for quite some time and now after 2 years of lurking I'm finally posting a couple pics of my own in-progress conversion. Unfortunately I lost a bunch of the pictures of the process, but I was able to snag a couple from my partner Erin's camera.
Anywho, here are some pictures of the ol' rusty turd!
 1010609_10151597094180886_1037199741_n
 by kahtavajesse, on Flickr
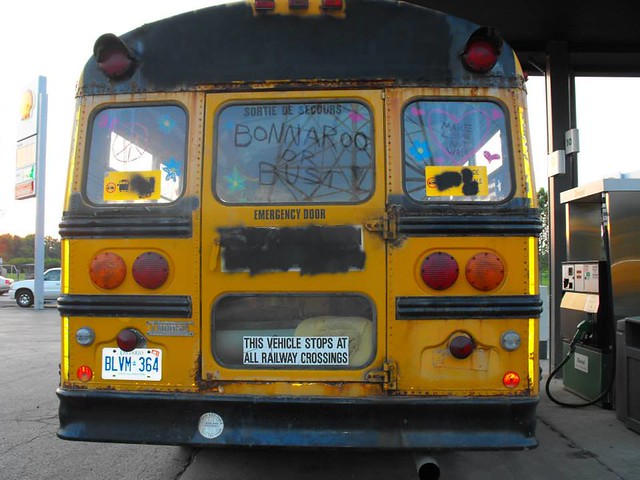
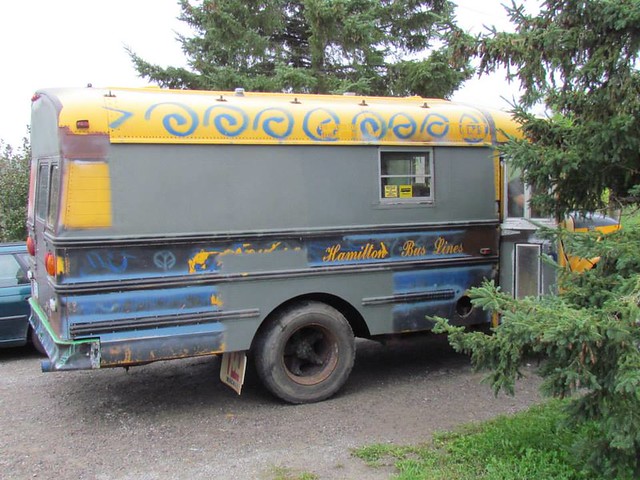
Haven't done a dang useful thing to it yet, aside from making it look less like a school bus. I think my friend and I set a time record with that paint job! Emptied several cans of paint in about 10 minutes. Hard to believe, isn't it?  This was the bus's first real voyage: Bonnaroo bound.
 954782_10151597093045886_1760605151_n
 by kahtavajesse, on Flickr
Nasty, rusty thing
 1012007_10151658113590886_377816377_n
 by kahtavajesse, on Flickr
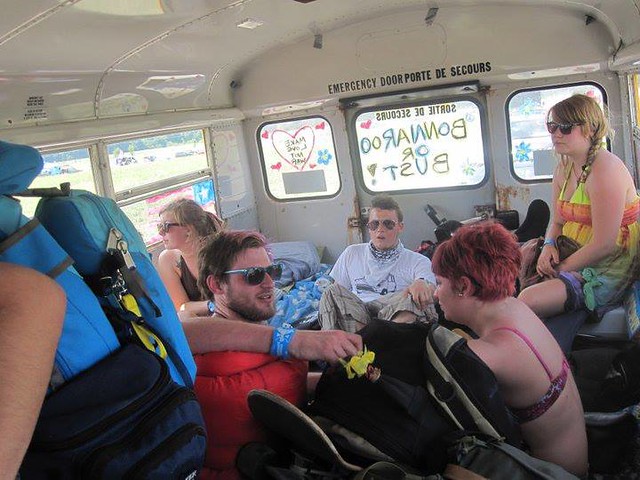
It was feckin' hot. Not all happy campers at this point.
 971783_10151597215310886_607483826_n
 by kahtavajesse, on Flickr
Roof raised a touch. I worked it out so that it would be raised enough for me to be able to walk everywhere without bumping my head after adding 2" of foam insulation, plywood and flooring to the floor and some insulation to the roof. It worked out well. Unfortunately lost a bunch of the pictures showing the roof raise.
 544757_10151597109845886_100538613_n
 by kahtavajesse, on Flickr
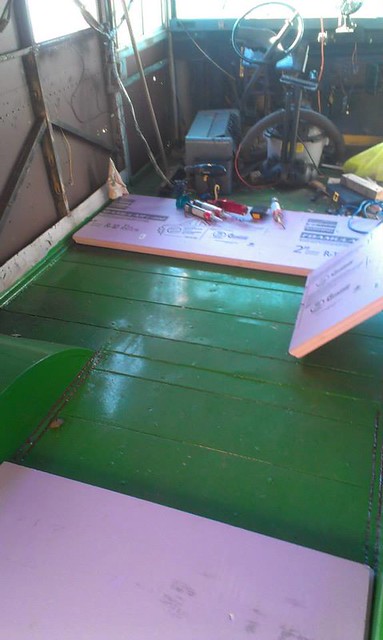
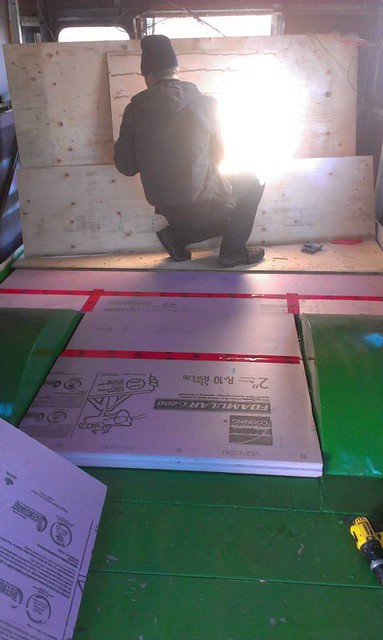
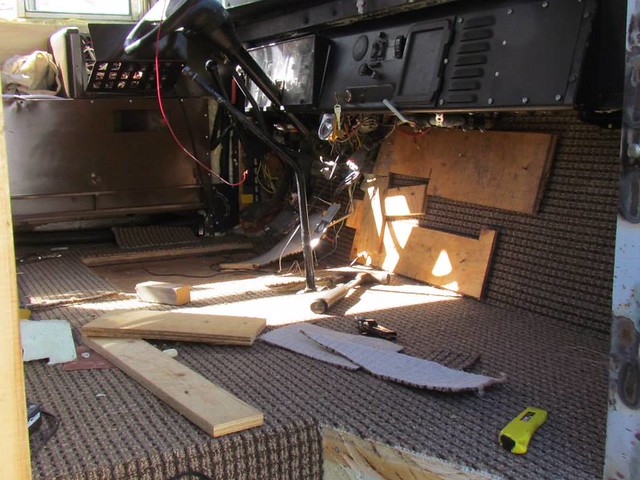
Floor insulation. Obviously.
 531813_10151597152025886_918691860_n
 by kahtavajesse, on Flickr
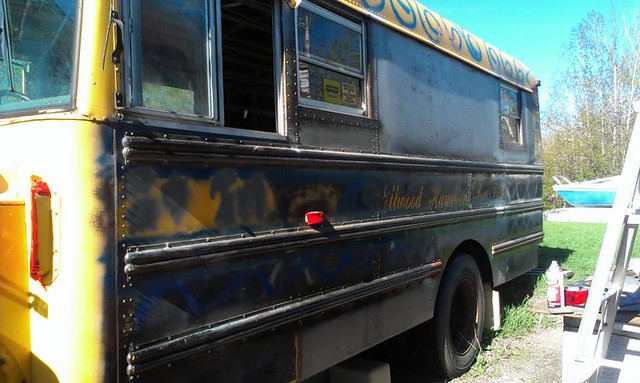
The untamed beast! I beat that son of a gun into submission eventually.
 1098211_10151597103525886_1115817844_n
 by kahtavajesse, on Flickr
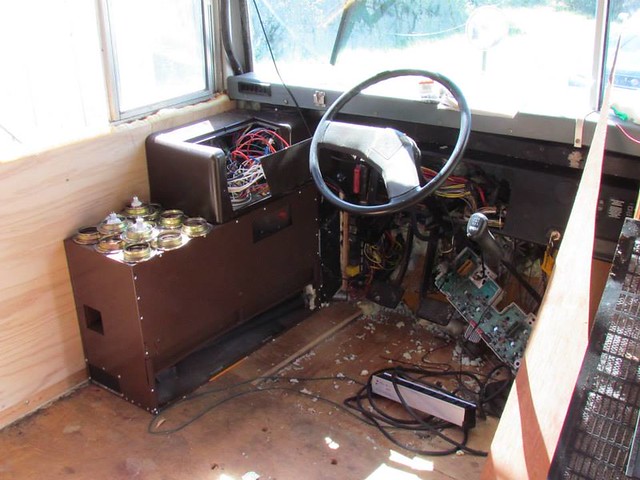
Fixed up the stairs so I could put 3 batteries below them. I want the space on the other side to be used for fuel tanks. I have 'em, just need to install 'em.
 1000019_10151597111535886_1745210912_n
 by kahtavajesse, on Flickr
 1095017_10151597119735886_1523468543_n
 by kahtavajesse, on Flickr
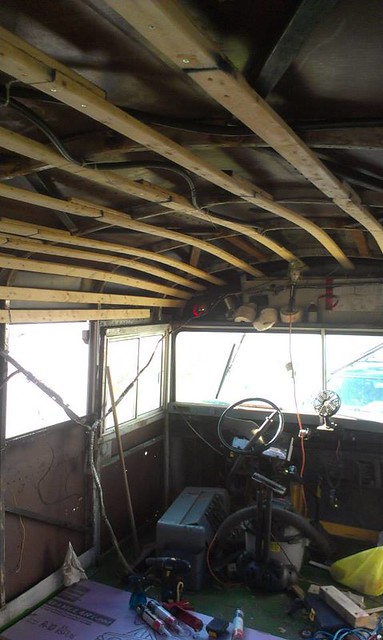
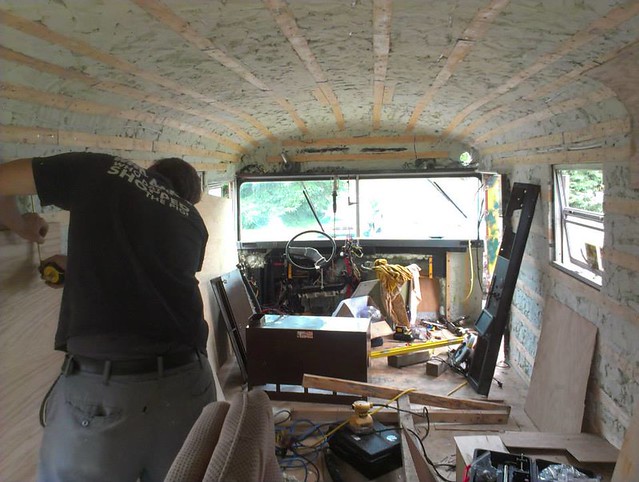
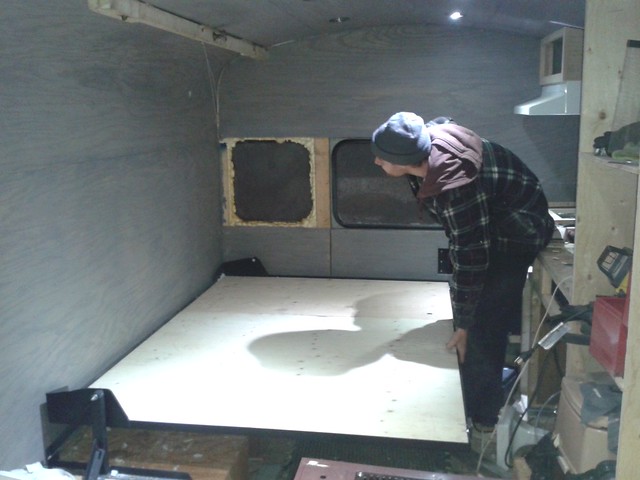
Subfloor is down, time to strap the walls. Getting ready for spray foam insulation.
 1098199_10151597116300886_1253618719_n
 by kahtavajesse, on Flickr
 556713_10151597138410886_1027114073_n
 by kahtavajesse, on Flickr
Tank vents
 998055_10151597121640886_1420499814_n
 by kahtavajesse, on Flickr
Ran pex in the walls and ceiling for wire chases. Works well! That stuff is slick inside.
 544734_10151597119105886_1280709549_n
 by kahtavajesse, on Flickr
 480785_10151597142565886_745212096_n
 by kahtavajesse, on Flickr
 561465_10151597143350886_1768419350_n
 by kahtavajesse, on Flickr
 46918_10151597144305886_626420150_n
 by kahtavajesse, on Flickr
 970143_10151597148730886_616140515_n
 by kahtavajesse, on Flickr
 480776_10151597149530886_2076994746_n
 by kahtavajesse, on Flickr
 524010_10151597150330886_1509419682_n
 by kahtavajesse, on Flickr
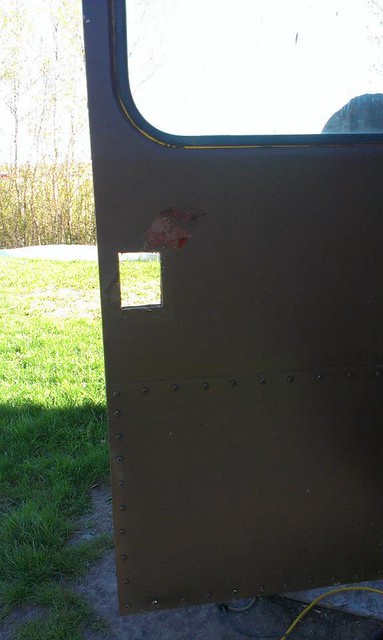
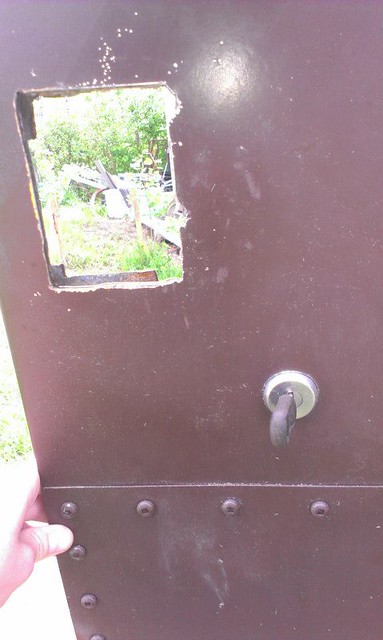
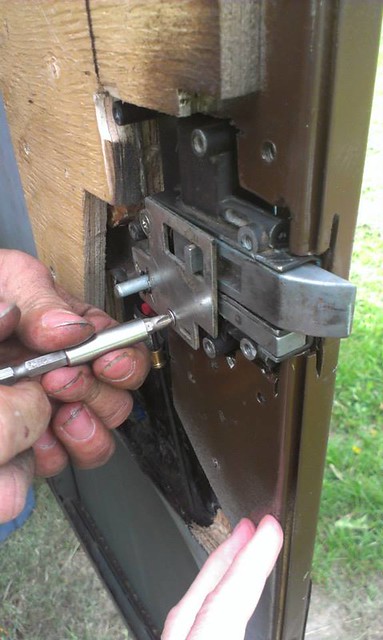
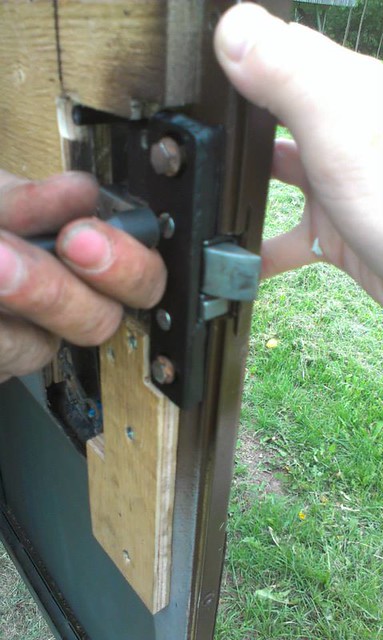
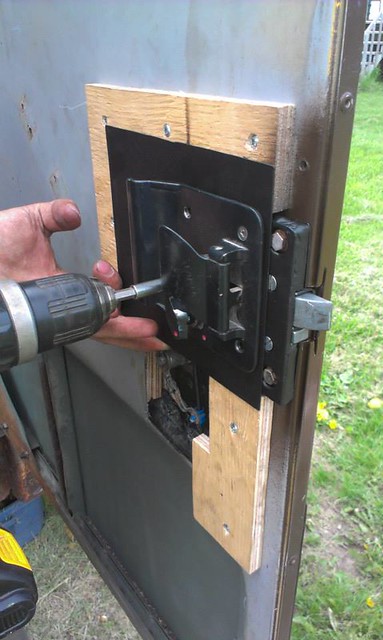
Our landfill is THE best landfill in the world. Let me tell you why: We have a building called "The Share Shed". If there is any use left in an item going to the landfill, it first goes to the share shed. It's like a garage sale every freakin' visit! And the price is right: free. Everything. Always. Anyhow, I digress. I found this nifty RV door latch at the share shed, but it was missing the key. I JB welded the lock mechanism, Bondo-ed the hole over, painted it and rigged up a lock I grabbed from a Sunfire that was on it's way to the scrap yard. Now both front and rear doors have locks with matching keys!
Also, the landfill bears are a good bit of fun
 2013-09-12 14.59.03
 by kahtavajesse, on Flickr
 2013-09-12 14.58.39
 by kahtavajesse, on Flickr
 993639_10151597123755886_1499604610_n
 by kahtavajesse, on Flickr
Framing the wheel wells. I cut a bunch of foam insulation scraps to fit inside the box and sealed them up with a can of spray foam.
 1236923_10151658123100886_550807859_n
 by kahtavajesse, on Flickr
Much better.
 581711_10151597182815886_1181055278_n
 by kahtavajesse, on Flickr
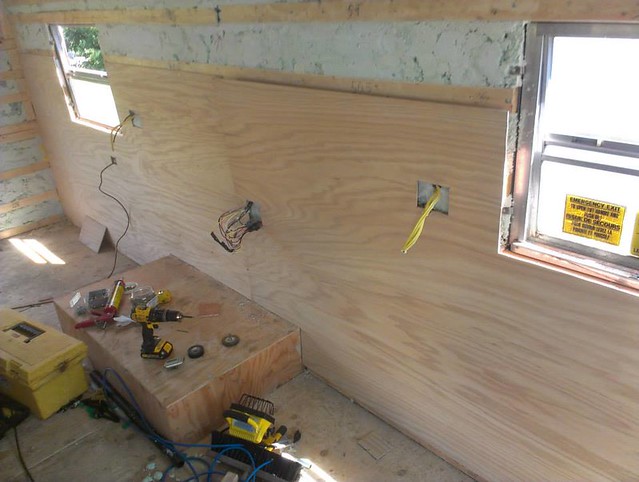
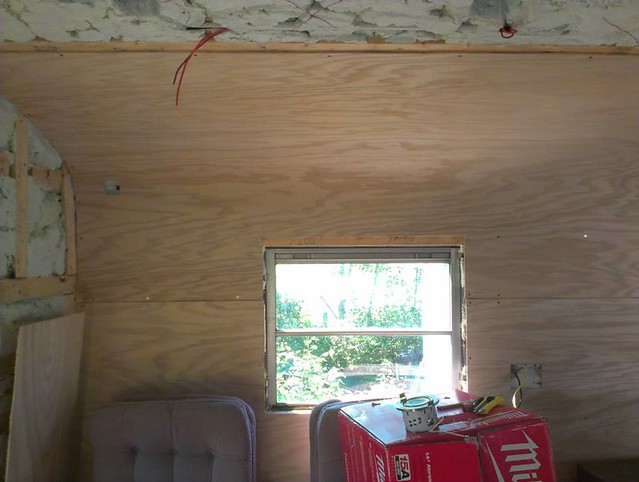
Skip a couple steps... Putting on the wall panels
 999152_10151597186670886_2035732093_n
 by kahtavajesse, on Flickr
 971567_10151597179540886_1784474934_n
 by kahtavajesse, on Flickr
 944765_10151597185010886_1136038122_n
 by kahtavajesse, on Flickr
 970170_10151597195060886_1108180613_n
 by kahtavajesse, on Flickr
 1012995_10151597200465886_1079102108_n
 by kahtavajesse, on Flickr
 1097979_10151597200045886_1281229932_n
 by kahtavajesse, on Flickr
 45258_10151597204470886_920717927_n
 by kahtavajesse, on Flickr
 1012662_10151597202755886_1000808263_n
 by kahtavajesse, on Flickr
 524366_10151597203860886_767198216_n
 by kahtavajesse, on Flickr
 1014286_10151597202185886_608202117_n
 by kahtavajesse, on Flickr
 1006022_10151597202515886_2123435891_n
 by kahtavajesse, on Flickr
 944590_10151597205905886_415620398_n
 by kahtavajesse, on Flickr
My two bus squatters.
 1239887_10151659559300886_587680700_n
 by kahtavajesse, on Flickr
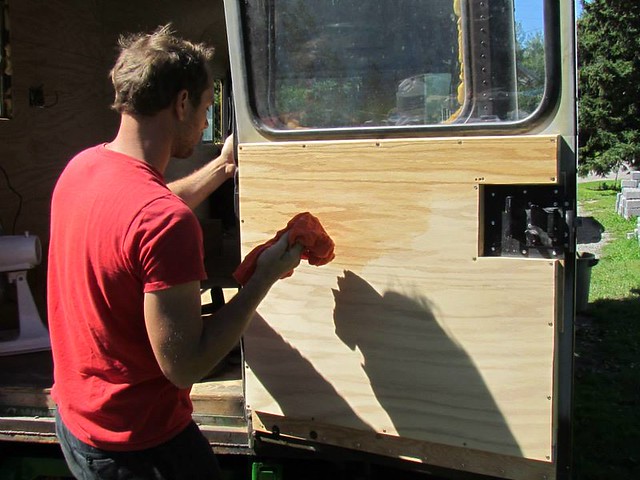
Getting ready to stain the door. The lady at Sherwin Williams recommended wiping down the wood with mineral spirits, which would act as a conditioner, before staining. I'm not sure if it made a difference or not, but we went with it.
 1260891_10151659560180886_1350156065_n
 by kahtavajesse, on Flickr
Staining is REALLY HARD!! We had a hell of a time with it. Lots of frustration.
 1237971_10151679828110886_878611895_n
 by kahtavajesse, on Flickr
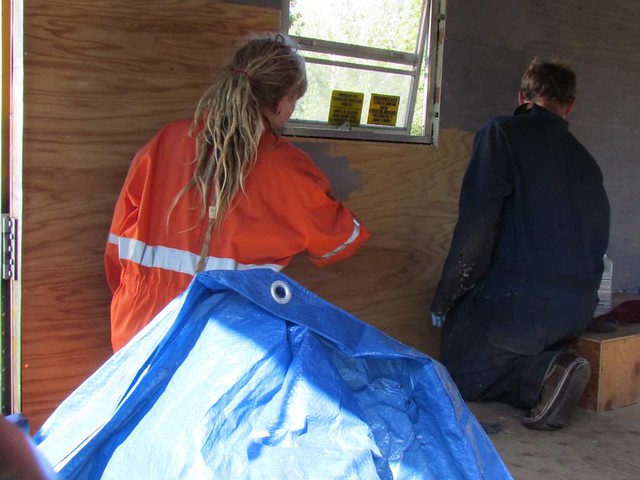
Erin and I working on the walls.
 1240392_10151679822715886_1703413055_n
 by kahtavajesse, on Flickr
 1379669_10151714032995886_553167357_n
 by kahtavajesse, on Flickr
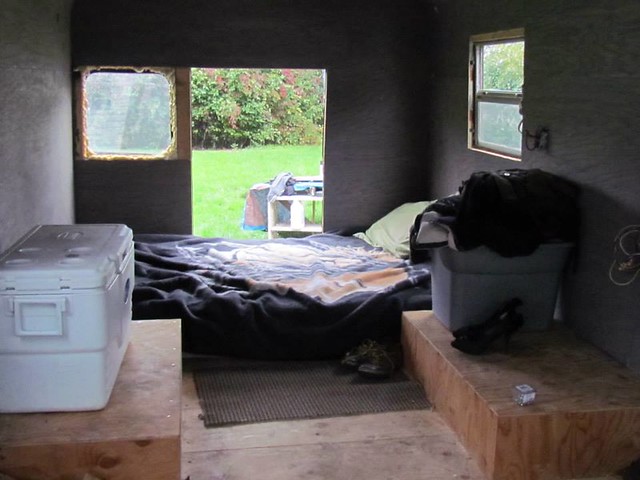
Our little love nest ;)
I've got to say that I'm a bit disappointed at how dark the gray stain came out. I was hoping to get more of a weathered look to the wood and my experiments outdoors (in the bright sun) made me hopeful. Should have brought the samples inside!
 1175284_10151658087570886_1973411884_n
 by kahtavajesse, on Flickr
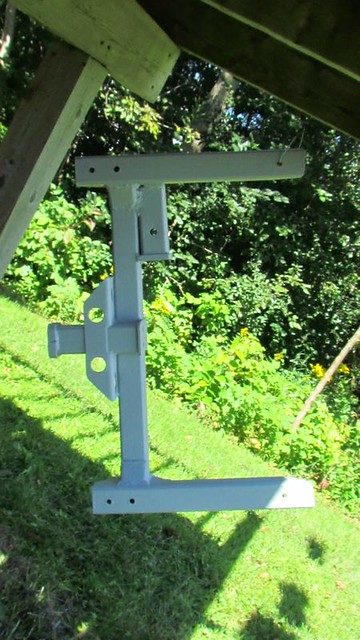
Priming the completed hitch.
 1237127_10151658088490886_1118142732_n
 by kahtavajesse, on Flickr
Priming whatever I could easily get my hands on around the receiver.
 1235165_10151658089405886_2126919651_n
 by kahtavajesse, on Flickr
And painted! I went to town on these parts.. just slathered the paint on there. I put it together while still a bit wet because I didn't feel like waiting 6 weeks for it to dry. I would frequently find hair stuck to that bumper and a green spotted dog not far away.
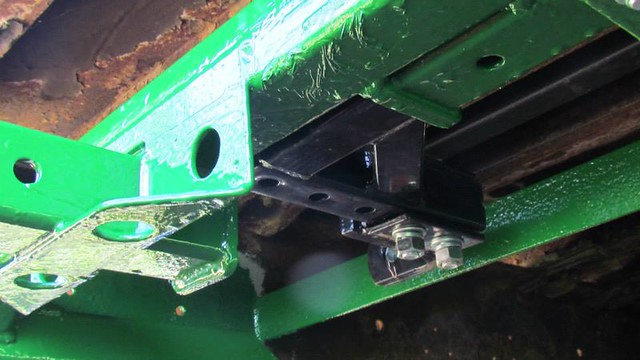 1235971_10151658090225886_253185196_n
 by kahtavajesse, on Flickr
Mmmm... that's some goopy paint
 1170682_10151658091620886_587442964_n
 by kahtavajesse, on Flickr
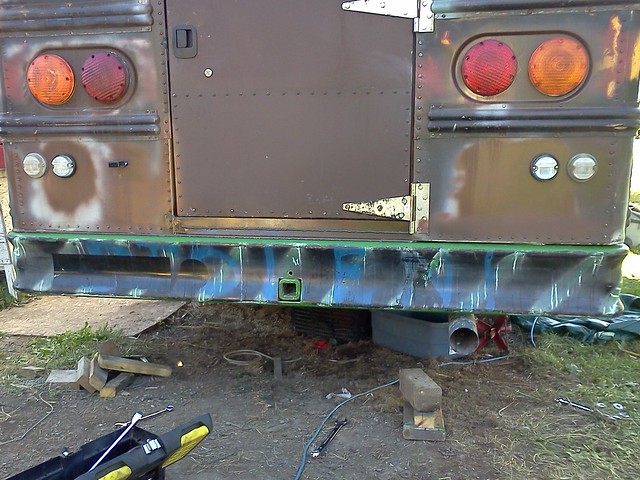 2013-09-17 16.51.39
 by kahtavajesse, on Flickr
There's the receiver. Man, this bus needs a uniform paint job. Any volunteers?
 1234569_10151679812455886_9234262_n
 by kahtavajesse, on Flickr
Carpet going in up front. I sparingly used PL premium to stick it down in case I want to rip it up. It was nice having wood on the back side because I could clamp the carpet by simply nailing boards down on to it. Also used large landscape bricks for the flat spots. Quite happy with how it turned out!
 1174718_10151658096720886_873746220_n
 by kahtavajesse, on Flickr
New lenses. Couldn't see a use for the shades, so took them off. It took a while to get used to the new look, but I like it better now.
 1374135_10151714035710886_1036633101_n
 by kahtavajesse, on Flickr
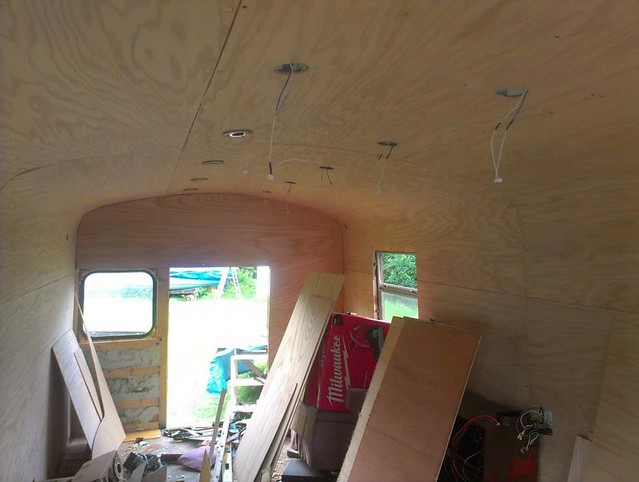
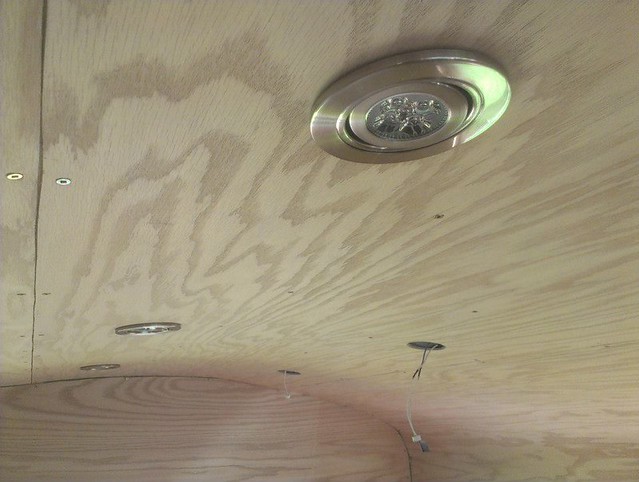
On the move out for a test drive! All went well. You can see the roof mounts/tie downs for future expansion. There is no window on the right side near the rear of the bus since that's where the fold-up bed will be going.
 on road
 by kahtavajesse, on Flickr
That's all for now! Hopefully some of my other pictures will crop up eventually. If they do I'll throw them up here.
|

|

|
|
11-18-2013, 10:29 PM
|
#2
|
|
Bus Geek
Join Date: Apr 2012
Location: So Cal
Posts: 3,231
Year: 1935
Coachwork: Superior
Chassis: Chevy
Engine: 317 ci/tid / Isuzu
|
Re: Armageddon: the smell of airborne rust
Too much fun! Could you elaborate a bit on the spray foam? Next time you are in a hurry to paint just pound a nail in the top of the spray can and take your best aim--its done in 45 seconds flat. I once painted a Corvair that way--I think the dog is still stuck to it.  Jack
|
|
|
|
|
11-18-2013, 10:33 PM
|
#3
|
|
Bus Crazy
Join Date: Nov 2011
Location: Sault Ste. Marie, Ontario
Posts: 1,793
Year: 1997
Coachwork: Thomas
Chassis: B3800 Short bus
Engine: T444E
Rated Cap: 36
|
Re: Armageddon: the smell of airborne rust
Nice! Wish I would have known about that trick. I had an aching thumb from applying pressure for even that 10 minutes..
|
|
|
|
|
11-18-2013, 10:44 PM
|
#4
|
|
Bus Crazy
Join Date: Nov 2011
Location: Sault Ste. Marie, Ontario
Posts: 1,793
Year: 1997
Coachwork: Thomas
Chassis: B3800 Short bus
Engine: T444E
Rated Cap: 36
|
Re: Armageddon: the smell of airborne rust
Oh, right.. and to elaborate on the spray foam:
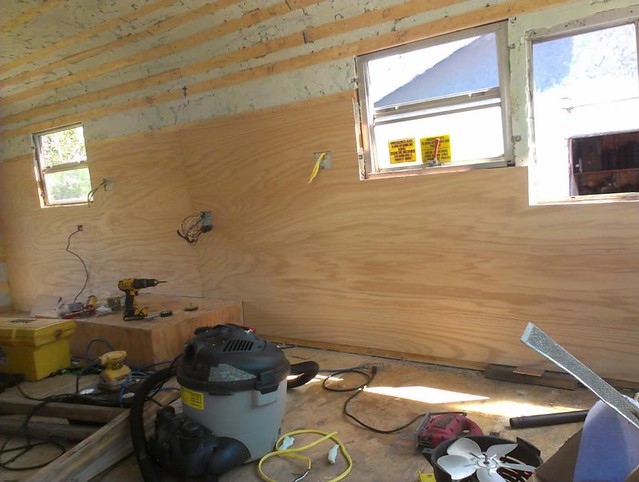
The walls have about 3" spray foam in them. It was a real pain in the *ss to get it evenly sprayed between and under the strapping. There was a lot of waste, which was later trimmed down by a 5amp grinder with a braided wire wheel cup on it. Holy freakin' dang blasted foam dust mess!! But dealing with the clean up was easier than trying to cut it with hack saw blades and the like. Tyvek suit, respirator and eye protection is a must. But really, for anyone who is considering spray foaming anything more than the most trivial wall layouts, heed this advice: PAY SOMEONE ELSE TO DO IT!
It really works wonders, though. My little radiant kerosene heater pulled the bus interior from -3°C to 25°C (26.6°F to 77°F) before I opened more windows (always have one cracked with the kero heater, for those not in the know).
|
|
|
|
|
11-19-2013, 07:18 AM
|
#5
|
|
Bus Geek
Join Date: Nov 2011
Location: MNT CITY TN
Posts: 5,158
|
Re: Armageddon: the smell of airborne rust
great project so far!!!!!
__________________
Our build La Tortuga
Accept the challenges so that you can feel the exhilaration of victory.
George S. Patton
|
|
|
|
|
11-19-2013, 08:29 AM
|
#6
|
|
Bus Nut
Join Date: Jun 2013
Location: West Lafayette, IN
Posts: 832
Year: 1999
Coachwork: Thomas
Engine: 3126
Rated Cap: 72
|
Re: Armageddon: the smell of airborne rust
Love how you scored the wood to allow it to bend to the roof. I'm going to steal that. I plan to spray foam too. I putting 1 of foam board first then coming back with 2 of spray foam to seal everything.
|
|
|
|
|
11-19-2013, 08:38 AM
|
#7
|
|
Bus Crazy
Join Date: Nov 2011
Location: Sault Ste. Marie, Ontario
Posts: 1,793
Year: 1997
Coachwork: Thomas
Chassis: B3800 Short bus
Engine: T444E
Rated Cap: 36
|
Re: Armageddon: the smell of airborne rust
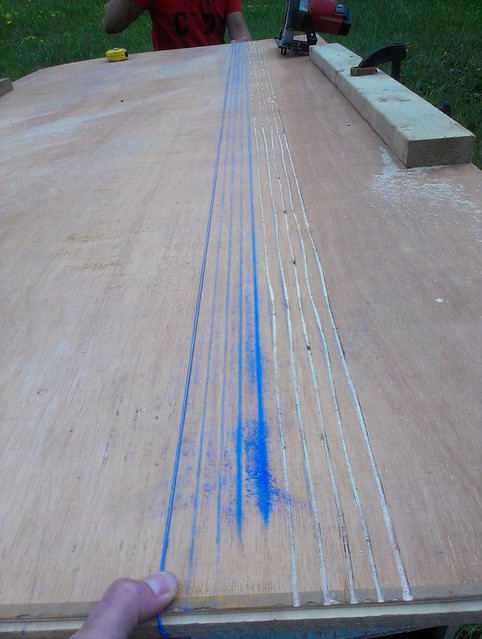
I also put a soggy towel along the kerf lines and let it sit there for 20 minutes or so. The wood bent easier when moist.
|
|
|
|
|
11-19-2013, 08:41 AM
|
#8
|
|
Bus Nut
Join Date: Jun 2013
Location: West Lafayette, IN
Posts: 832
Year: 1999
Coachwork: Thomas
Engine: 3126
Rated Cap: 72
|
Re: Armageddon: the smell of airborne rust
Quote:
|
Originally Posted by jazty
I also put a soggy towel along the kerf lines and let it sit there for 20 minutes or so. The wood bent easier when moist.
|
Thanks, is that 1/4" plywood?
|
|
|
|
|
11-19-2013, 08:58 AM
|
#9
|
|
Bus Crazy
Join Date: Nov 2011
Location: Sault Ste. Marie, Ontario
Posts: 1,793
Year: 1997
Coachwork: Thomas
Chassis: B3800 Short bus
Engine: T444E
Rated Cap: 36
|
Re: Armageddon: the smell of airborne rust
Yep, 1/4". I think I cut the kerfs about 1/3 of the way through the plywood. Pulling them tightly into the curve is quite a challenge. Working with another person is the preferred way to do it. I was alone with this job, though, so I had to be resourceful. I ended up putting the panel up, resting the bottom edge on the wall panel, pushing in to the curve the best I could, then putting a couple screws into the strapping along the top edge. The shape of the screw heads held the panel in place. Then I "walked" the panel in closer by putting a screw at a 45° angle just under the top edge of the panel and tightening and repeating all along the edge. As I tightened the screw, the screws head would catch the panels edge and push it in about a 1/8" to 1/4". Repeat. Many times. This process had much better results than trying to push at the curve with 2x4s, which cracked a panel.
If none of this makes sense, perhaps I can figure out a way to visually describe it.
|
|
|
|
|
11-19-2013, 09:11 AM
|
#10
|
|
Bus Nut
Join Date: Jun 2013
Location: West Lafayette, IN
Posts: 832
Year: 1999
Coachwork: Thomas
Engine: 3126
Rated Cap: 72
|
Re: Armageddon: the smell of airborne rust
Quote:
|
Originally Posted by jazty
Yep, 1/4". I think I cut the kerfs about 1/3 of the way through the plywood. Pulling them tightly into the curve is quite a challenge. Working with another person is the preferred way to do it. I was alone with this job, though, so I had to be resourceful. I ended up putting the panel up, resting the bottom edge on the wall panel, pushing in to the curve the best I could, then putting a couple screws into the strapping along the top edge. The shape of the screw heads held the panel in place. Then I "walked" the panel in closer by putting a screw at a 45° angle just under the top edge of the panel and tightening and repeating all along the edge. As I tightened the screw, the screws head would catch the panels edge and push it in about a 1/8" to 1/4". Repeat. Many times. This process had much better results than trying to push at the curve with 2x4s, which cracked a panel.
If none of this makes sense, perhaps I can figure out a way to visually describe it.
|
You discribed it fine, thanks.
|
|
|
|
|
11-21-2013, 11:44 AM
|
#11
|
|
Bus Geek
Join Date: Mar 2011
Location: Houston, Texas
Posts: 8,462
Year: 1946
Coachwork: Chevrolet/Wayne
Chassis: 1- 1/2 ton
Engine: Cummins 4BT
Rated Cap: 15
|
Re: Armageddon: the smell of airborne rust
Homemade "Bender Board"! Cool.
|
|
|
|
|
11-23-2013, 05:17 PM
|
#12
|
|
Bus Geek
Join Date: Aug 2011
Location: Stony Plain Alberta Canada
Posts: 2,937
Year: 1992
Coachwork: Bluebird
Chassis: TC2000 FE
Engine: 190hp 5.9 Cummins
Rated Cap: 72
|
Re: Armageddon: the smell of airborne rust
Good job, I like what I see.
You have many of the same idea's as me. I also use pex as wire conduits. Works well, and is cost effective.
I see you are using good name brand modern tools. That sure helps.
I will also be strapping my walls the same way, as it is one of the best ways to get a proper thermal break. Only difference is I will be using 3|4 plywood to overcome the splitting problem we have with 1x4's.
Looking forward to more pics.
Nat
__________________
"Don't argue with stupid people. They will just drag you down to their level, and beat you up with experience."
Patently waiting for the apocalypses to level the playing field in this physiological game of life commonly known as Civilization
|
|
|
|
|
02-25-2014, 06:23 PM
|
#13
|
|
Bus Crazy
Join Date: Nov 2011
Location: Sault Ste. Marie, Ontario
Posts: 1,793
Year: 1997
Coachwork: Thomas
Chassis: B3800 Short bus
Engine: T444E
Rated Cap: 36
|
Re: Armageddon: the smell of airborne rust
Quote:
|
Originally Posted by nat_ster
I will also be strapping my walls the same way, as it is one of the best ways to get a proper thermal break. Only difference is I will be using 3|4 plywood to overcome the splitting problem we have with 1x4's.
|
Holy hell... yes.. do that. I thought of it after purchasing several bundles of 1x4 and putting a handful up. Splitting was inevitable so I made a point of using plenty of PL premium at the joints.
|
|
|
|
|
02-25-2014, 06:36 PM
|
#14
|
|
Bus Crazy
Join Date: Nov 2011
Location: Sault Ste. Marie, Ontario
Posts: 1,793
Year: 1997
Coachwork: Thomas
Chassis: B3800 Short bus
Engine: T444E
Rated Cap: 36
|
Re: Armageddon: the smell of airborne rust
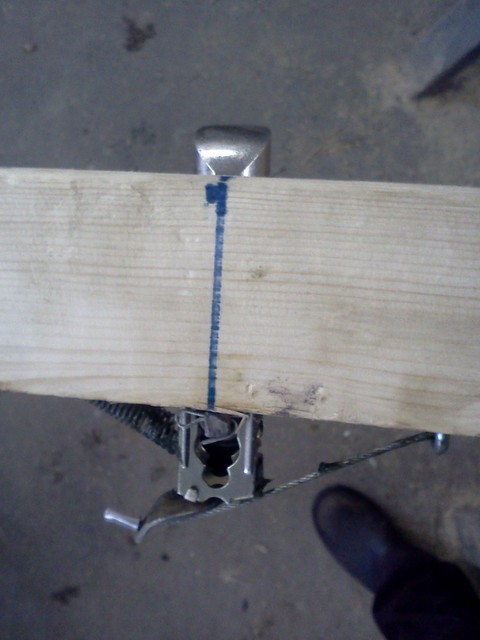
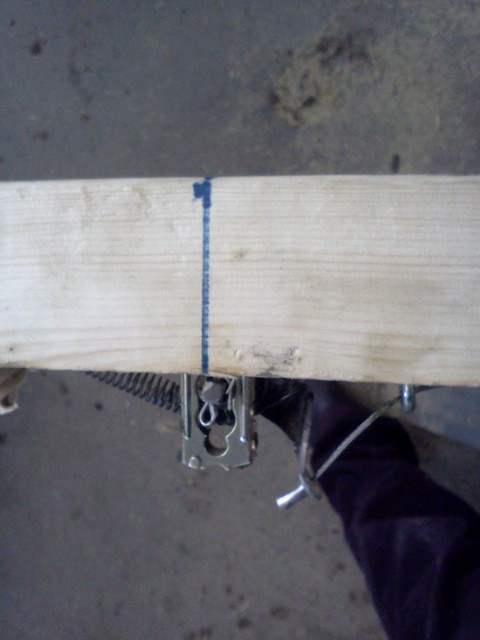
Installing the Murphy bed:

I haven't finished the legs yet.
(See that sweet foam window frame in the back?)

Leaky gate valve: perfect knob to release the Murphy bed from it's lifted position.
Can't see it, but I used normal door hardware for the catch and latch.

Front corner pivot point.


I still need to build the front legs and install mounts for the straps which will hold the mattress in place when the bed is up. I'll probably go with cam straps like these:

|
|
|
|
|
02-26-2014, 04:39 AM
|
#15
|
|
Bus Geek
Join Date: Aug 2011
Location: Stony Plain Alberta Canada
Posts: 2,937
Year: 1992
Coachwork: Bluebird
Chassis: TC2000 FE
Engine: 190hp 5.9 Cummins
Rated Cap: 72
|
Re: Armageddon: the smell of airborne rust

Nat
__________________
"Don't argue with stupid people. They will just drag you down to their level, and beat you up with experience."
Patently waiting for the apocalypses to level the playing field in this physiological game of life commonly known as Civilization
|
|
|
|
|
02-26-2014, 12:05 PM
|
#16
|
|
Moderator
Join Date: Feb 2007
Location: NUNYA
Posts: 4,236
Year: 1995
Coachwork: Thomas
Chassis: 3800
Engine: DT408, AT545
Rated Cap: 23 500 gvw
|
Re: Armageddon: the smell of airborne rust
Nicely done.
|
|
|
|
|
03-02-2014, 07:08 PM
|
#17
|
|
Bus Crazy
Join Date: Nov 2011
Location: Sault Ste. Marie, Ontario
Posts: 1,793
Year: 1997
Coachwork: Thomas
Chassis: B3800 Short bus
Engine: T444E
Rated Cap: 36
|
Re: Armageddon: the smell of airborne rust
|
|
|
|
|
03-13-2014, 11:55 AM
|
#18
|
|
Bus Crazy
Join Date: Nov 2011
Location: Sault Ste. Marie, Ontario
Posts: 1,793
Year: 1997
Coachwork: Thomas
Chassis: B3800 Short bus
Engine: T444E
Rated Cap: 36
|
Re: Armageddon: the smell of airborne rust
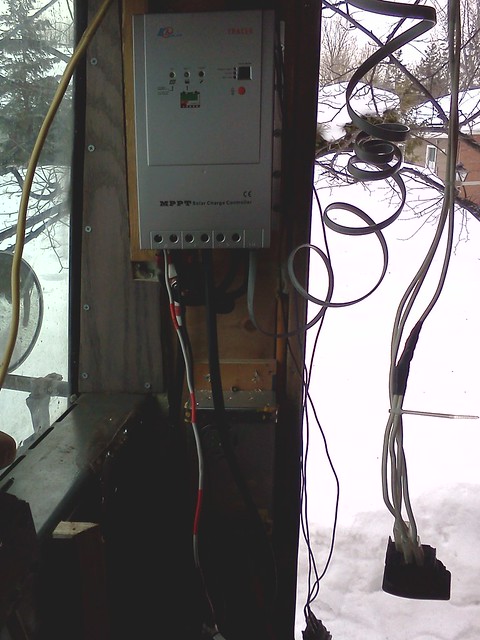
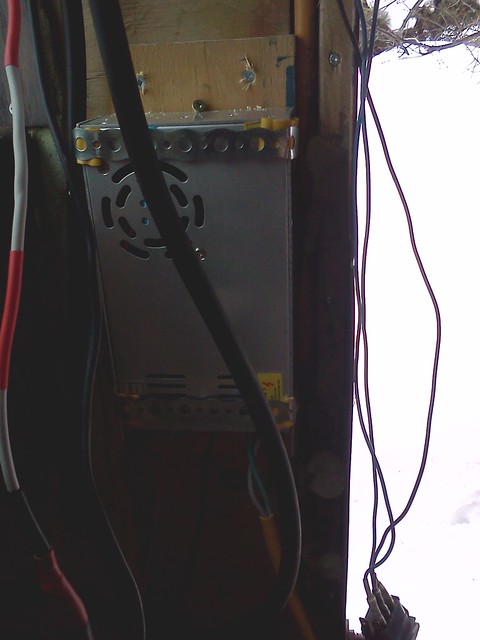
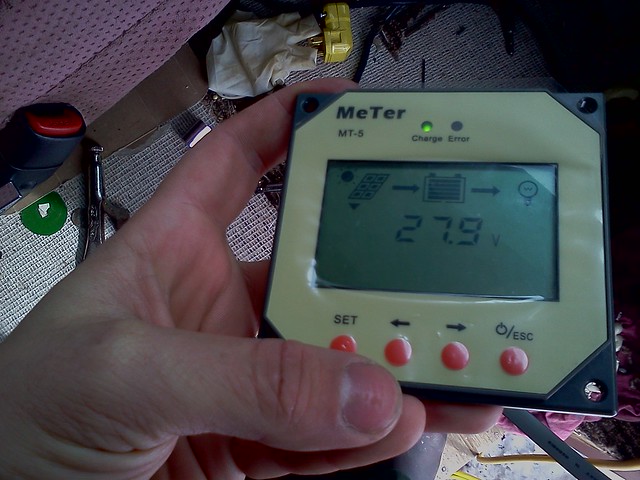
Roughly installed a 120ac to 24v/15a power supply which is connected to the solar charge controller and tested it out. It seems to be working well. This'll be good to keep the batteries charged when plugged in to shore power. 24v/15a works out to 15v/24a max for charging the batteries. That should be plenty for my needs.
Here you can see the Tracer 4210rn MPPT charge controller above the 24v/15a power supply:
Closer view of the power supply ($26 on amazon: http://www.amazon.com/gp/product/B00...?ie=UTF8&psc=1):
Closer view of the charge controller :

Here are the readouts from the charge controller. The battery had loads of juice in it already, so it's only putting in a fraction of the available amperage.

The power supply actually had a knob for adjusting the voltage +/- 4v so I turned it right up. Why not
|
|
|
|
|
03-13-2014, 01:07 PM
|
#19
|
|
Bus Geek
Join Date: Aug 2011
Location: Stony Plain Alberta Canada
Posts: 2,937
Year: 1992
Coachwork: Bluebird
Chassis: TC2000 FE
Engine: 190hp 5.9 Cummins
Rated Cap: 72
|
Re: Armageddon: the smell of airborne rust
Cool little set up.
Thx for sharing.
Nat
__________________
"Don't argue with stupid people. They will just drag you down to their level, and beat you up with experience."
Patently waiting for the apocalypses to level the playing field in this physiological game of life commonly known as Civilization
|
|
|
|
|
03-16-2014, 11:06 AM
|
#20
|
|
Bus Crazy
Join Date: Jan 2008
Location: Adirondack Mountains NY
Posts: 1,101
|
Re: Armageddon: the smell of airborne rust
Quote:
|
Originally Posted by jazty
The power supply actually had a knob for adjusting the voltage +/- 4v so I turned it right up. Why not |
27.9 volts will be fine with hydrate (wet cell) batteries if you check periodically to keep the distilled water and acid level up. If you are using any kind of sealed batteries, check with the manufacturer's specification for charging instructions. That much voltage will cook most gel-cells once they are fully charged. If they out-gas through the safety vents, there is no topping them back up to replace the lost storage capacity. Somewhere around 27.0 volts ± 0.3 volts might be better in a 24-volt system.
But I suspect you knew that. I just don't want to see anyone else destroy an expensive battery bank by over-charging.
Nice build, by the way. I just caught up with it again to see all the progress.
__________________
Someone said "Making good decisions comes from experience, experience comes from bad decisions." I say there are three kinds of people: those who learn from their mistakes, those who learn from the mistakes of others, and those who never learn.
|
|
|
|
|
|
 Posting Rules
|
You may not post new threads
You may not post replies
You may not post attachments
You may not edit your posts
HTML code is Off
|
|
|
|
 » Recent Threads
 |
|
|
|
|
|
|
|
|
|
|
|
|
|
|
|
|
|
|
|
|
|
|
|
|
|
|
|
|
|
|
|
|
|
|
|
|
|


 Linear Mode

