Journey with Confidence RV GPS App RV Trip Planner RV LIFE Campground Reviews RV Maintenance Take a Speed Test Free 7 Day Trial ×


Reply
 
Thread Tools Display Modes
 
Old 04-18-2016, 07:02 PM   #41
Bus Geek
 
joeblack5's Avatar
 
Join Date: Dec 2015
Location: pa
Posts: 2,500
Year: 98
Coachwork: 1. Corbeil & 2. Thomas
Chassis: 1 ford 1998 e350 4x4 7.3 2 mercedes 2004
Engine: 7.3 powerstroke & MBE906
Another beautiful day. Started working late. Sanded the drips in the first green spray experience back out. A little wind came along so decided to wait with the paint.
Our daughter made the first drawings on the Chalk board side. ( img 20160418 in album). Will see how that paint is going to hold up. Drilled and removed the rivets around 3 windows on the driver side. Prepped the sheet but want to first try fitting it and drill some holes before spraying last coats of paint. Hung the 2 window panel and installed nylon washer between the panel and the frame. ( img 20160418 in album) I will use gorilla construction glue to fill up the gap to get more strength out of the construction and also to reduce the chance of galvanic corrosion. I used 8-32 SS button head screws with washer on the out- and inside. Will loctite in the end. I choose the gorilla glue because it mentioned that it can be used on foam board. Any other suggestions?
later J

joeblack5 is offline   Reply With Quote
Old 04-20-2016, 05:22 PM   #42
Bus Geek
 
joeblack5's Avatar
 
Join Date: Dec 2015
Location: pa
Posts: 2,500
Year: 98
Coachwork: 1. Corbeil & 2. Thomas
Chassis: 1 ford 1998 e350 4x4 7.3 2 mercedes 2004
Engine: 7.3 powerstroke & MBE906
E350 Corbeil Kids drawing

Today I ripped one more seat out to do some framing for the bed. All worked out good. Starting to put more screws with nylon spacers. Sun was shining pretty good and the coating that was on the inside of the panel got soft. That threw my gluing and screwing the panels under the bus . We need this bus to pick family up coming weekend. So I did not want to take it of and properly remove the tar like stuff from the inside. What do you folks think about the gluing versus screwing idea?
The three window panel has to go thru a final revision and paint job. ( tomorrow and I will take the tar of so hat at least that one can be glued.
Finished the other painting and let the kids go for it. ( picture in album) .
Removed the electric box above the driver to make more space for a bed / hammock for our oldest. Start to look good, now we can plan better for the fridge and kitchen area.
Later J
joeblack5 is offline   Reply With Quote
Old 04-23-2016, 06:46 PM   #43
Bus Geek
 
joeblack5's Avatar
 
Join Date: Dec 2015
Location: pa
Posts: 2,500
Year: 98
Coachwork: 1. Corbeil & 2. Thomas
Chassis: 1 ford 1998 e350 4x4 7.3 2 mercedes 2004
Engine: 7.3 powerstroke & MBE906
E350 Corbeil first trip

A super hectic Thursday and Friday. The three window panel got glued to the roof framing with slow setting marine epoxy and then screwed with stainless hardware. I had to loosen the interior panels to get access for the nuts and locking washers. The trial bed got in. I made the first section hinged as to get easier access from the inside. At last i adjusted the front wheel tow. i had noticed a wear pattern in the rubber and when I measured with a tape measure the wheels had a tow out of 1/2" . On my trip picking it up it felt a little unstable but had not any experience or time to check. Then there was the wiper motor that the PO had told me that it was broken. Cleaned and checked the motor and made some bypass wiring. The intermittent wiper module was missing.
We left Friday night to Newark , slept in a rest area and made it back the next day. ( 2 pictures in album)

Later J
joeblack5 is offline   Reply With Quote
Old 06-12-2016, 03:31 PM   #44
Bus Geek
 
joeblack5's Avatar
 
Join Date: Dec 2015
Location: pa
Posts: 2,500
Year: 98
Coachwork: 1. Corbeil & 2. Thomas
Chassis: 1 ford 1998 e350 4x4 7.3 2 mercedes 2004
Engine: 7.3 powerstroke & MBE906
Elf Bus E350 Corbeil passenger swivel seat & cabinet

Finally, work got the best of me, fortunately some time to make progress. Today I installed the first wall that will become the cabinet for the freezer / microwave / fridge combo. Got a 12 volt Dometic as fridge, and a 12 freezer box. A little pain to get the roof curve right but the second one will be a lot easier. Waiting for 3/8 plywood for the second wall. Experimented with a passenger swivel seat up front. Two photo's in album.
Later J
joeblack5 is offline   Reply With Quote
Old 06-13-2016, 08:28 PM   #45
Bus Geek
 
joeblack5's Avatar
 
Join Date: Dec 2015
Location: pa
Posts: 2,500
Year: 98
Coachwork: 1. Corbeil & 2. Thomas
Chassis: 1 ford 1998 e350 4x4 7.3 2 mercedes 2004
Engine: 7.3 powerstroke & MBE906
E350 Corbeil driver side floor rust

When i bought this his rust was the only serious problem. There were some roof leaks that must have kept the floor wet. One problem was that the vent drain holes were caulked shut and then painted over. After i opened the drain holes the were no leaks anymore.
Today I cut out the main part of the driver side floor pan. The floor reinforcement all looks good. I hope with another day of grinding and cleaning i will be ready for new sheet metal.
picture of hole in album.
Found some nice 1/4" furniture grade plywood to make the ceiling cabinet. A good day.
Later J
joeblack5 is offline   Reply With Quote
Old 06-19-2016, 12:14 PM   #46
Bus Geek
 
joeblack5's Avatar
 
Join Date: Dec 2015
Location: pa
Posts: 2,500
Year: 98
Coachwork: 1. Corbeil & 2. Thomas
Chassis: 1 ford 1998 e350 4x4 7.3 2 mercedes 2004
Engine: 7.3 powerstroke & MBE906
Elf Bus E350 Corbeil kitchen mockup

A little progress since the last time.
Took a side skirt of to make under storage space.
Found a SS kitchen sink in the dumpster with regards from Pa...ira bread. Just what I needed. Our daughter and me removed the last two seats. Me under the bus with a wrench she inside with the Dewalt impact gun. This fathers day we hung the the SS sink and a cardboard layout of the ceiling storage to see if it was not crowding the space. We were pleased so now it has to be finalized.

image in album
later J
joeblack5 is offline   Reply With Quote
Old 06-21-2016, 06:44 PM   #47
Bus Geek
 
joeblack5's Avatar
 
Join Date: Dec 2015
Location: pa
Posts: 2,500
Year: 98
Coachwork: 1. Corbeil & 2. Thomas
Chassis: 1 ford 1998 e350 4x4 7.3 2 mercedes 2004
Engine: 7.3 powerstroke & MBE906
Elf Bus E350 Corbeil under body storage

Already hinted on the under body storage in my last post. Here a first picture (in album). This storage is not particular water proof. We intended it for kids toys and outdoor gear.
I had some 1/8" SS sheet left over and bend an U lip on one side that would slide over the lower leg of the chassis frame. The bus frame is at the same time the rear wall. I will glue a couple of rubber strips on the frame so that no metal on metal rubbing can occur. Cut the skirt very careful to only cut thru one layer and as straight as possible. The aluminum bus body floor pan is bend down and the outer skin is glued and riveted together with the lower steel skirt. the steel skirt is electrical isolated to minimize corrosion between the aluminum and steel.
Removed the rivets. Pried the lower steel left over loose from the aluminum and stuck a SS piano hinge in between. I had to shorten the lower skirt bu 5/16" to make up for the hinge. The front of the storage space is closed of by the door steps.
Later J
joeblack5 is offline   Reply With Quote
Old 06-22-2016, 06:48 PM   #48
Bus Geek
 
joeblack5's Avatar
 
Join Date: Dec 2015
Location: pa
Posts: 2,500
Year: 98
Coachwork: 1. Corbeil & 2. Thomas
Chassis: 1 ford 1998 e350 4x4 7.3 2 mercedes 2004
Engine: 7.3 powerstroke & MBE906
Elf Bus E350 Corbeil underbody storage 2

Another follow up on the underbody storage. Sheet installed ( image in album) Cut and bend two more sheets for behind the wheel left and right. It will become an integrated part with the lower lip on the bumper.
Glued two pieces of rubber on the chassis to avoid chafing and erosion of the chassis when grit and sand gets in between. Bend a crease in the SS sheet to have water flow away from the chassis as to avoid long term corrosion issues. Drilled and tapped the SS piano hinge. Tomorrow I will tighten this side up. This will create a lot of storage with low center of gravity. Reduce the exposure of chassis and floor of water and salt and potential streamline the airflow below the bus?
Later J
joeblack5 is offline   Reply With Quote
Old 06-25-2016, 08:14 PM   #49
Bus Geek
 
joeblack5's Avatar
 
Join Date: Dec 2015
Location: pa
Posts: 2,500
Year: 98
Coachwork: 1. Corbeil & 2. Thomas
Chassis: 1 ford 1998 e350 4x4 7.3 2 mercedes 2004
Engine: 7.3 powerstroke & MBE906
Elf Bus E350 Corbeil battery box relocation / solar

In my efforts to get better storage space and more efficient wiring I relocated the second battery from the passenger side to the drivers side.
I want to use a battery switch directly at the wiring column behind the driver and also the inverter is directly behind the drivers seat. Fortunately there was a little space in front of the skirt mounted condenser.
So I decided to make a little door and make a battery tray that supports the battery to be slid. The second battery is only required for real cold weather starting and the 900 watt of planned solar on the roof will make it unlikely that we will run a battery flat but a 300 amp battery selector switch between the seems to be an elegant solution. The 3500 watt inverter can be run of battery 1 or 2 or both or none. The solar is tied into battery 2. Battery 1 is always connected to the starter motor.
I intend to make the use a piece of piano hing on each side of the battery door and use make the hinge pin wire removable as to easy open the door or even take the door of.
image attached in album.

Later J
joeblack5 is offline   Reply With Quote
Old 06-25-2016, 08:22 PM   #50
Bus Geek
 
joeblack5's Avatar
 
Join Date: Dec 2015
Location: pa
Posts: 2,500
Year: 98
Coachwork: 1. Corbeil & 2. Thomas
Chassis: 1 ford 1998 e350 4x4 7.3 2 mercedes 2004
Engine: 7.3 powerstroke & MBE906
Elf Bus E350 Corbeil battery box relocation / solar

One detail I forgot. The parking brake cable is in the way. I made the battery box longer so that the battery can sit 2 inches away from the frame rail. The hole in the side of the box is where the parking cable goes thru. The battery is rotated 90 degrees so that it better fits the space and also easier to reach one terminal to disconnect.

later J
joeblack5 is offline   Reply With Quote
Old 07-01-2016, 09:01 PM   #51
Bus Geek
 
joeblack5's Avatar
 
Join Date: Dec 2015
Location: pa
Posts: 2,500
Year: 98
Coachwork: 1. Corbeil & 2. Thomas
Chassis: 1 ford 1998 e350 4x4 7.3 2 mercedes 2004
Engine: 7.3 powerstroke & MBE906
Elf bus e350 corbeil bunk above driver

Today I tore the old bed from our 9 yr old out of the ambulance and moved it to the elf bus. Did not like the outcome and decided to start from scratch. Investigated the structural part at the top right corner of the windshield and entrance. Not impressed. How often do the windshields crack when you hit a pot hole at the passenger side?
Thought that a 3/4" tube diagonal from the driver side door pillar to that corner would be helpful. I bolted a triangular piece of 1/2" plywood all the way across. Then I made from plywood a cover and mounted that on a piano hinge. When it is down it becomes a bunkbed and when it is up it hides all the bedding.
Also pulled the above window storage shelve out of the ambulance and mounted that in the bus.
A nice surprise was a little storage area that appeared when I pulled trim of the funny window in front of the entrance door. Good for something.
I will get and post some pictures tomorrow when it is light.
Later j
joeblack5 is offline   Reply With Quote
Old 07-03-2016, 08:50 PM   #52
Bus Geek
 
joeblack5's Avatar
 
Join Date: Dec 2015
Location: pa
Posts: 2,500
Year: 98
Coachwork: 1. Corbeil & 2. Thomas
Chassis: 1 ford 1998 e350 4x4 7.3 2 mercedes 2004
Engine: 7.3 powerstroke & MBE906
Elf Bus E350 Corbeil

Had a stomach flue yesterday and so no progress.
Today we rough finished the bunk bed above the driver and our oldest daughter tested it. I think she liked it.
Reinforced the poor entrance door construction. Tomorrow the dinette bed conversion for our other daughter.
Pictures of poor entrance door construction, reinforcement bracket, bunk bed closed and bunk bed with our Daughter in album

Later J
joeblack5 is offline   Reply With Quote
Old 07-04-2016, 07:40 AM   #53
Bus Geek
 
joeblack5's Avatar
 
Join Date: Dec 2015
Location: pa
Posts: 2,500
Year: 98
Coachwork: 1. Corbeil & 2. Thomas
Chassis: 1 ford 1998 e350 4x4 7.3 2 mercedes 2004
Engine: 7.3 powerstroke & MBE906
test

joeblack5 is offline   Reply With Quote
Old 07-04-2016, 08:01 AM   #54
Bus Geek
 
joeblack5's Avatar
 
Join Date: Dec 2015
Location: pa
Posts: 2,500
Year: 98
Coachwork: 1. Corbeil & 2. Thomas
Chassis: 1 ford 1998 e350 4x4 7.3 2 mercedes 2004
Engine: 7.3 powerstroke & MBE906
test images

http://www.skoolie.net/forums/member...ture13469.html

copy link location

http://www.skoolie.net/forums/member...ture13469t.jpg

copy image location


copy image


http://www.skoolie.net/forums/member...ture13469.html
insert e-mail link


Insert image
joeblack5 is offline   Reply With Quote
Old 07-04-2016, 08:22 AM   #55
Bus Geek
 
joeblack5's Avatar
 
Join Date: Dec 2015
Location: pa
Posts: 2,500
Year: 98
Coachwork: 1. Corbeil & 2. Thomas
Chassis: 1 ford 1998 e350 4x4 7.3 2 mercedes 2004
Engine: 7.3 powerstroke & MBE906
Elf bus E350 corbeil image test


http://www.skoolie.net/forums/member...ture13467.html


http://www.skoolie.net/forums/members/8382-albums906-picture13468.html

Later J
joeblack5 is offline   Reply With Quote
Old 07-12-2016, 08:56 PM   #56
Bus Geek
 
joeblack5's Avatar
 
Join Date: Dec 2015
Location: pa
Posts: 2,500
Year: 98
Coachwork: 1. Corbeil & 2. Thomas
Chassis: 1 ford 1998 e350 4x4 7.3 2 mercedes 2004
Engine: 7.3 powerstroke & MBE906
ElfBus E350 Corbeil floor repair

A couple of posts ago I started the drivers side floor repair. I need to get this bus on the road again and that means inspection and that mean it has to be fixed.
To cover the important pieces I had to make a new floor pan out of 4 pieces and TIG welded those together.
Cleaned the hole better up and did some more rust converter treatment.

http://www.skoolie.net/forums/member...ture13577.html

http://www.skoolie.net/forums/member...ture13578.html

http://www.skoolie.net/forums/member...ture13579.html


Tomorrow I will pull the rear drums and inspect the brakes. Thursday is inspection day.

Later J
joeblack5 is offline   Reply With Quote
Old 07-16-2016, 09:19 PM   #57
Bus Geek
 
joeblack5's Avatar
 
Join Date: Dec 2015
Location: pa
Posts: 2,500
Year: 98
Coachwork: 1. Corbeil & 2. Thomas
Chassis: 1 ford 1998 e350 4x4 7.3 2 mercedes 2004
Engine: 7.3 powerstroke & MBE906
Elf Bus e350 Corbeil state inspection

Got the hole under the driver seat fixed and wanted to take the wheels of to do a pre inspection. Unable to get the nuts off. Soaked wd40 over night. next day at the inspection station they had to use an extended breaker bar.
It came off but I was nervous that one of the studs would break as well. All was good. They wanted me to take the lights of the front of the bus and so we did and went for a re-inspection. Passed. ( photo wife takes of lights)
http://www.skoolie.net/forums/member...ture13585.html

Later J
joeblack5 is offline   Reply With Quote
Old 07-16-2016, 09:40 PM   #58
Bus Geek
 
joeblack5's Avatar
 
Join Date: Dec 2015
Location: pa
Posts: 2,500
Year: 98
Coachwork: 1. Corbeil & 2. Thomas
Chassis: 1 ford 1998 e350 4x4 7.3 2 mercedes 2004
Engine: 7.3 powerstroke & MBE906
Elf bus e350 Corbeil battery box and airco wiring

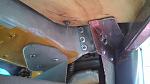
For the inspection i had to adjust the parking brake and to not have to take the cable loose again I installed the battery box. In the picture you can see the parking brake cable goes thru the rear in the battery box.
I also wanted to get the airco working and started rewiring. Decided to use the original relay board and mount it to the skirt condensor. Doing so shortens the wiring. I also wanted to restore the original Ford switches and wiring as good possible.
The original Ford high and low pressure switches were removed. After I bypassed both original high and low pressure connectors the original Airco clutch connector worked again.
Took some time to understand the wires that went to the evaporator.
two wires for a low pressure switch. One neutral, Three wires for low medium high speed and one not connected.
Extended the low power wiring to the skirt fan motor relay. From that relay i took the fan power via the high pressure switch at the skirt condenser and the low pressure switch at the rear evaporator ( both closed under normal operation condition) to the airco compressor clutch.
I measured the current thru the skirt fan motors --- 15 Amp total at 13 volts.
Mounted the rear evaporator fan switch at the kids dinette.
It cooled pretty darn good. At idle the battery voltage remained at 14.3 Volt with front airco fan at max and rear airco fan at medium.
http://www.skoolie.net/forums/member...ture13586.html

The current thru the rear evaporator fan at medium speed was 9 Amp.

Later J
joeblack5 is offline   Reply With Quote
Old 07-18-2016, 07:38 AM   #59
Bus Geek
 
joeblack5's Avatar
 
Join Date: Dec 2015
Location: pa
Posts: 2,500
Year: 98
Coachwork: 1. Corbeil & 2. Thomas
Chassis: 1 ford 1998 e350 4x4 7.3 2 mercedes 2004
Engine: 7.3 powerstroke & MBE906
Elf Bus E350 Corbeil test trip NewArk

Yesterday we had to drop family of at NewArk Airport. It was warm and a good day to test the airco. 500 Miles .Trip went well. Airco held up wih the heat. The bus is not insulated yet so i was pleased.
At 65Mph one of the rear wheel seem to start bouncing. Need to have that re-balanced. It was much more noticeable on the way back with less people and luggage.
Did not do a mileage trip.

Later J
joeblack5 is offline   Reply With Quote
Old 07-18-2016, 02:42 PM   #60
Bus Geek
 
ol trunt's Avatar
 
Join Date: Apr 2012
Location: So Cal
Posts: 3,231
Year: 1935
Coachwork: Superior
Chassis: Chevy
Engine: 317 ci/tid / Isuzu
J, I've had worn out shocks cause a wheel to start bouncing even with a freshly balanced wheel. The fact that the bounce is worse under lighter load would also make me want to pull the shock at that wheel to see if it is working. Jack
ol trunt is offline   Reply With Quote
Reply

Thread Tools
Display Modes

Posting Rules
You may not post new threads
You may not post replies
You may not post attachments
You may not edit your posts

BB code is On
Smilies are On
[IMG] code is On
HTML code is Off
Trackbacks are Off
Pingbacks are Off
Refbacks are Off


» Featured Campgrounds

Reviews provided by

Powered by vBadvanced CMPS v3.2.3

All times are GMT -5. The time now is 06:54 AM.


Powered by vBulletin® Version 3.8.8 Beta 4
Copyright ©2000 - 2024, vBulletin Solutions, Inc.